

The main challenge when shooting architectural photography is choosing the right perspective. If you do not use a tilt-shift lens, you’ll have to rely on Photoshop to adjust and change the perspective. The Perspective Warp tool in Photoshop is excellent for correcting perspective. In this article, I’ll show you how to use this tool to Adjust Perspective in Photoshop, but first, let me define perspective and aspects of a wide-angle lens.
What is perspective?
Perspective in photography is defined as the sense of depth or spatial relationship between objects in a photo, along with their dimensions with respect to what the viewer of the image sees. By changing perspective, subjects can appear much smaller or larger than normal, lines can converge differently, and much more.
Sometimes, an object may look different in an image from how it appears in real life. This mismatch is due to perspective distortion. Images of the same object captured from different camera lenses, different distances, and angles of view exhibit different perspective distortion.
Wide-angle lens characteristics
A wide-angle lens is a lens with a focal length of less than 35 mm, therefore it has a very wide angle of view. When we use a wide-angle lens, the following perspective effects are shown:
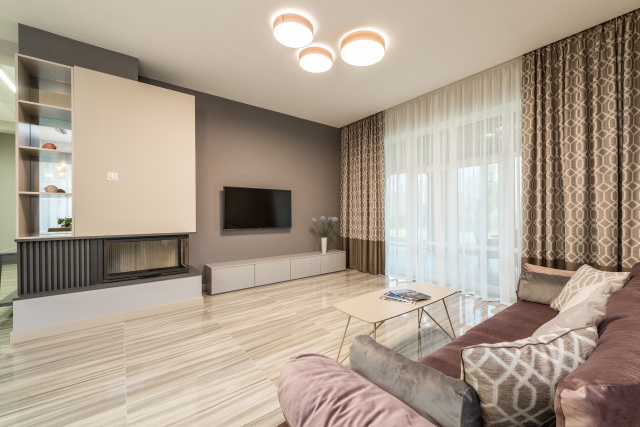
Photo by Max Vakhtbovych from Pexels
- Nearby objects may look much bigger and nearer than they really are (the arm of the sofa looks bigger), and faraway objects look even smaller and farther away (the TV set looks smaller and far away).
- It amplifies distances between objects, i.e., things look further away from each other. The shorter the focal length, the bigger the perspective exaggeration effect. That is why wide-angle lenses are not used for shooting portraits because they alter the shape and the features of the subject.
- The lines that are the results of the intersecting of plans (ceiling and walls) are in real parallel. However, in the shot, the lines come towards each other and converge. The point where the lines finally meet and “vanish” is called the “vanishing point”. However this “convergence effect” is not unique to wide-angle lenses. You might also see it in shots taken with other types of lenses. However, the shorter the focal length, the stronger the effect, and the closer the vanishing point will appear.
How to adjust perspective in Photoshop
Photoshop lets you easily adjust and change your perspective in images. This feature is particularly useful for images having straight lines and flat surfaces, for example, architectural images and images of buildings. You can also use this feature to composite objects having different perspectives in a single image.
Example 1
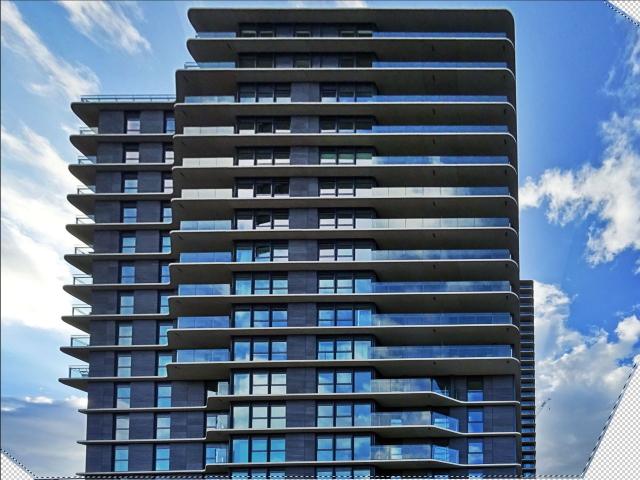
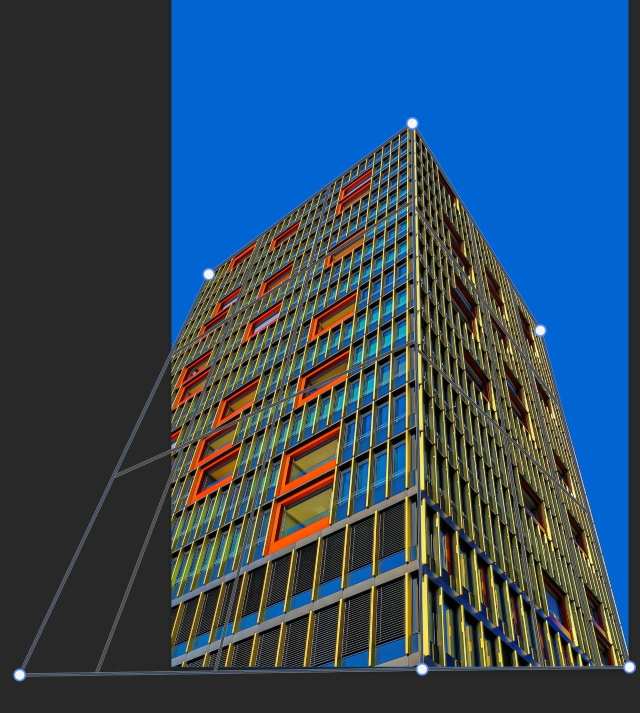
Photoshop offers a tool called Perspective Wrap; we will use it, and the below photo to correct the perspective of the building in the following example.
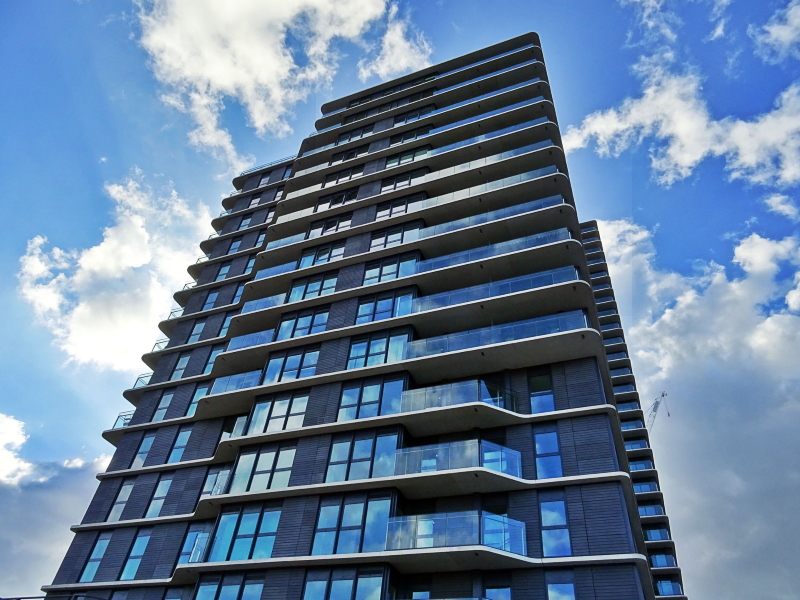
Photo by SevenStorm JUHASZIMRUS from Pexels
Step 1
Open the photo in Photoshop
Duplicate the background layer (Ctrl + J)
Convert the layer to a smart object (right-click on the layer and choose: Convert to Smart Object)
Step 2
From the Edit menu, choose the Perspective Wrap tool
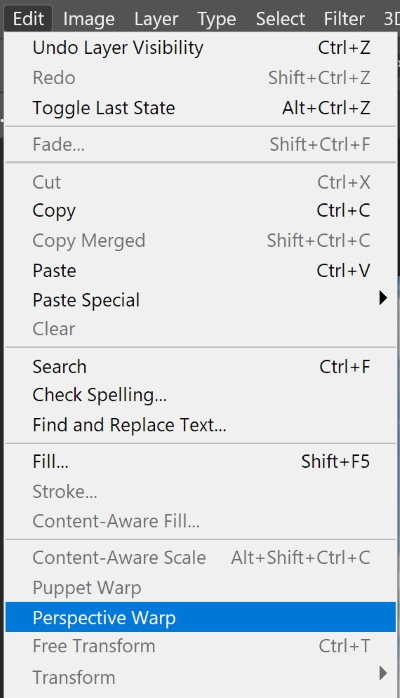
The following menu is shown
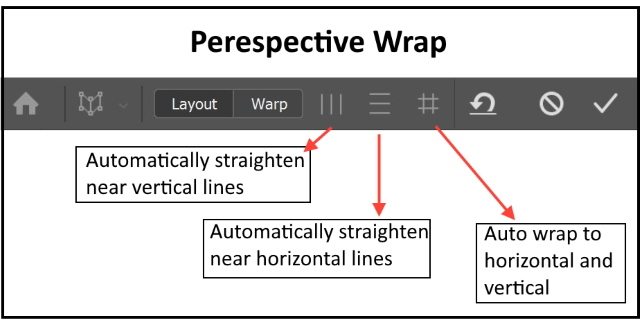
Before you adjust the perspective, you must define the planes of the architecture in the image.
Click on Layout.
Now, Draw quads along the planes of the architecture in the image. While drawing the quads, try to keep their edges parallel to the straight lines in the architecture. This photo only has one plane.
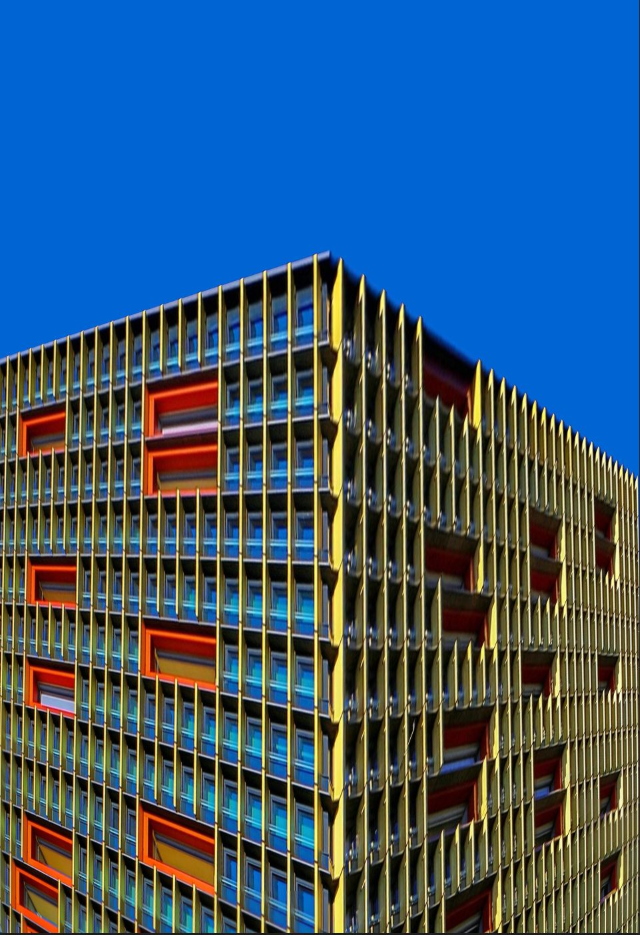
Step 3
Switch to the Warp mode from the Layout mode.
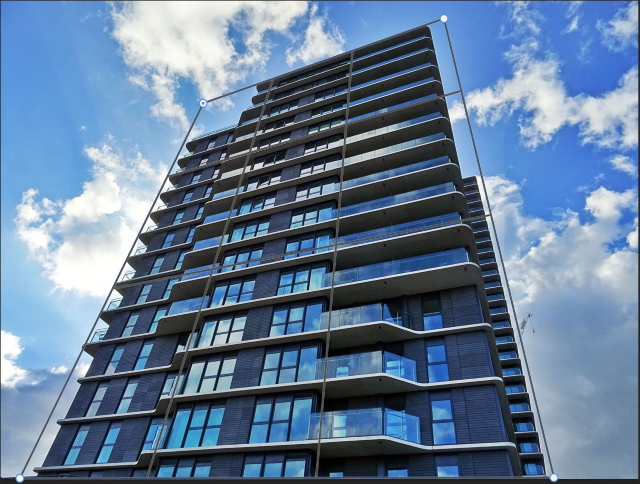
Move around the corners of the quads (pins) as appropriate. Shift-click an individual edge of a quad to straighten it and keep it straight during further perspective. You may also use the three icons in the top menu to adjust the vertical or horizontal lines automatically. The result is shown below:
Step 4
As you can see from the above image, some empty areas exist. To fill these areas, we will use the content-aware filling tool.
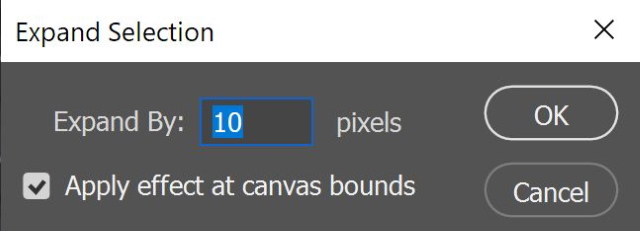
The content-aware tool will not work on a smart layer, so we need to duplicate the layer first (Ctrl+ J), then convert the layer to a normal one by right-clicking the layer and selecting convert to layers.

Choose the magic wand tools from the toolbar. Click in the empty spaces to select it. Then expand the selection by 10 pixels (Select > Modify > Expand)
The selection will expand as shown below
Now, choose Edit > Content-Aware Fill, and press O.K
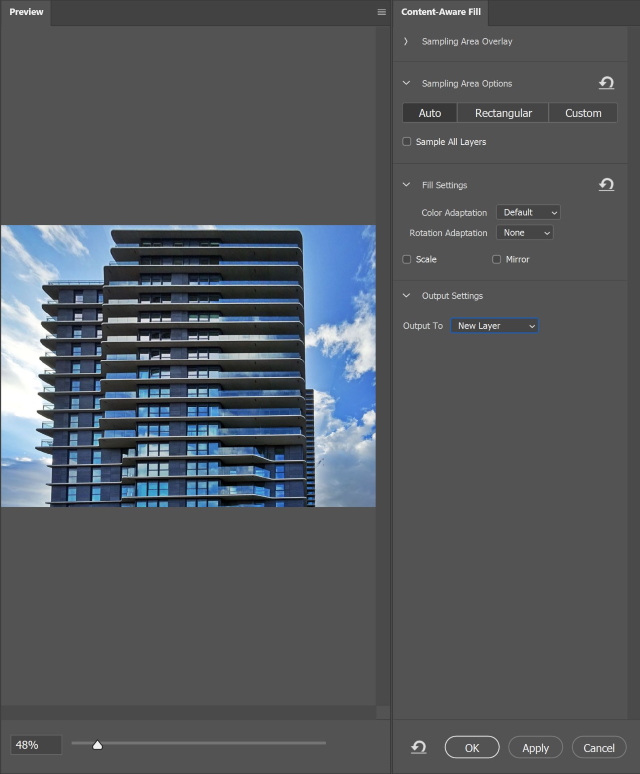
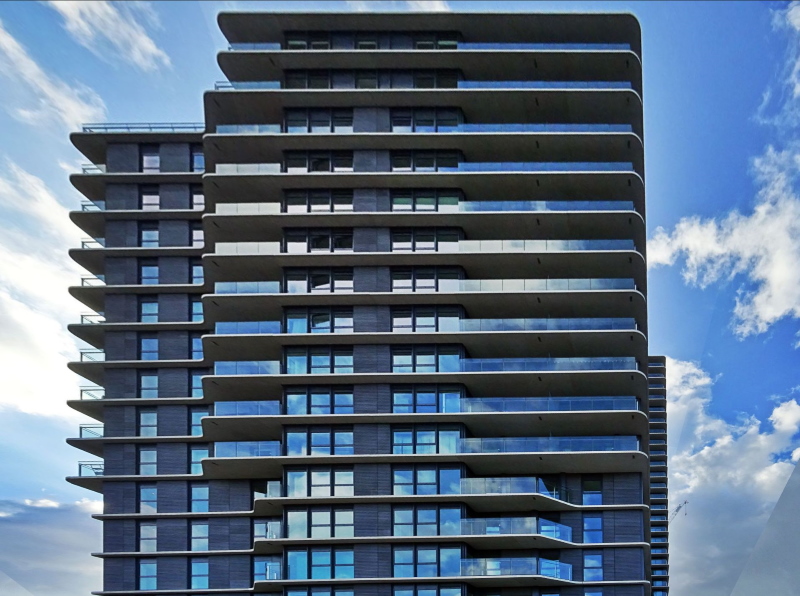
The content-aware tool will fill the empty spaces from the surrounding areas and output the result in a separate layer as shown below
Example 2
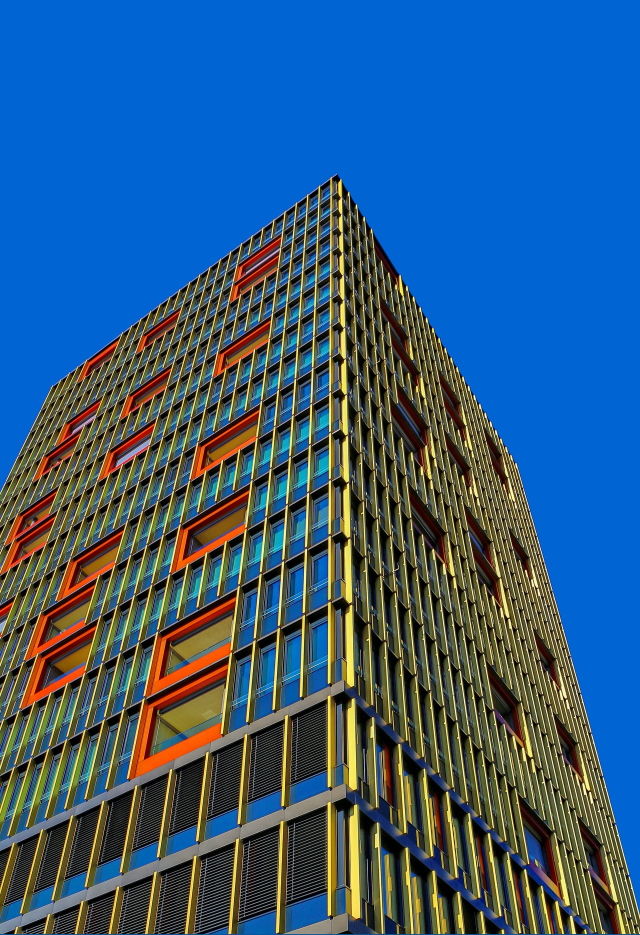
Photo by Ricardo Gomez Angel on Unsplash
In the previous example, the building has only one plane. In this example, the building has two planes. We will follow the same steps except to define the two planes of the building as shown below.
The result after changing the perspective is shown below
Example 3
In both previous examples, we were trying to adjust the perspective from a wide-angle view to a telephoto view and change the angle of view from the bottom and up view to near eye-level view.
In this example we will do the opposite, we will change the perspective of a normal shot to a wide-angle view with an exaggerated perspective.
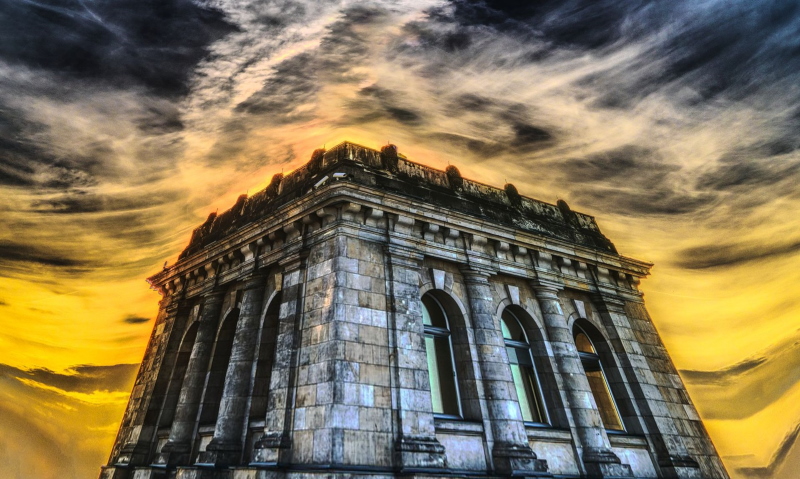
This is the original photo:

Image by FelixMittermeier from Pixabay
This is the edited photo with an exaggerated perspective
Related posts
How to Use Tilt-Shift Lens? – Your Ultimate Guide
How to Place Anything Into Perspective In Photoshop
How to Fix Distortion In Photoshop
Thanks for reading, I hope you enjoyed the article, in case you have any questions just drop them below & I will be happy to answer you.
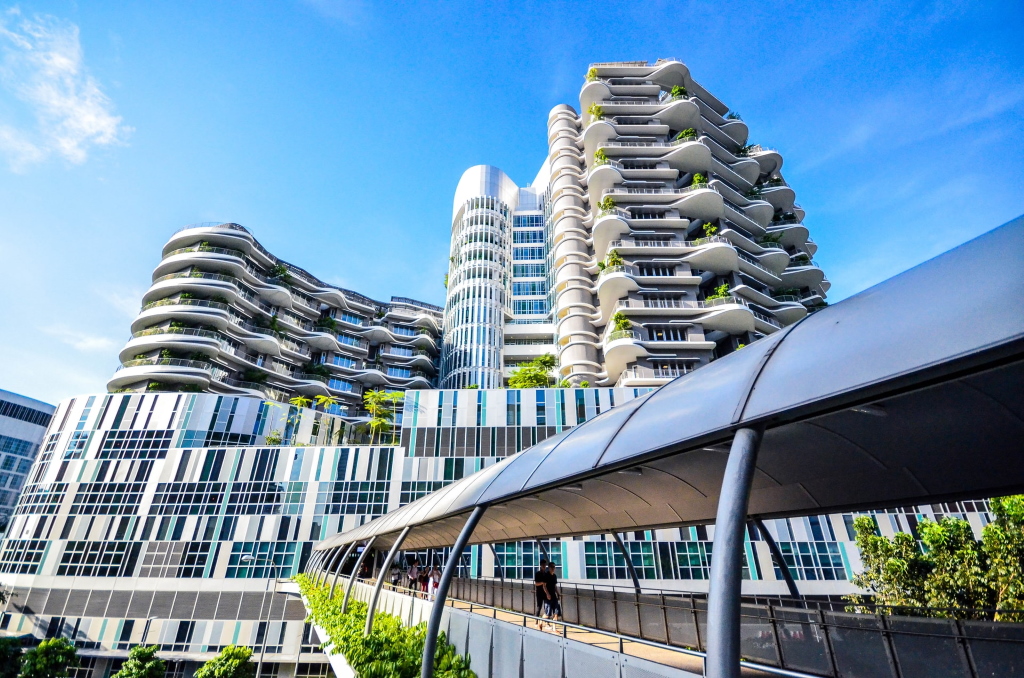
The featured Photo by Esaias Tan on Unsplash
If you enjoy the site, don’t forget to subscribe, we will only inform you when a new article is posted.


Thanks for sharing another brilliant article that you have published with us all here.I love the picture of this hotel. I love these style of buildings, all be them modernisisedf versions of the original designs. As a stone mason myself, I absolutely loove looking at old achitecture and can see the work that been put into them
Glad you like the article, thanks
This is more than just going out to get a camera for some family photos, I am happy to be a simple person when it comes to camera shopping. How do you know what lense to use for each item? Having the variety of angles explained was kind of helpful too.
Ms. Kim
Thanks