

In this tutorial, we are going to learn how to create basic 3D text in Photoshop , then adding some light and creating shadows, and change the textures and the materials of the text surfaces. In the end, we will learn how to use Image Based Lighting to create a reflective light falling on the surfaces of the text. Let us begin!
How to create a basic 3D text
In this example, we will use the extrusion method to create the 3D text. Extrusions are the primary method of creating 3D objects in Photoshop. We take a 2D shape and push it back in the Z-axis to create a 3D object
Step 1
Create a New Document
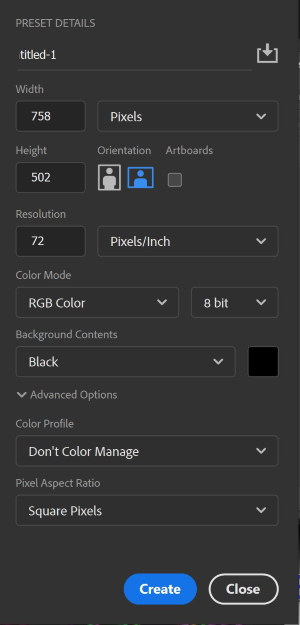
Enter the width and the height of your document, set your resolution and the color of the background
Step 2
Select the Type Tool from the tool panel, or press T

Step 3

Select the font and the text color from the option bar. You may also select the size of your text but it is not necessary at this point since you can easily change it later, as we will see.
Step 4
Type your text, and then press the checkmark to accept

Step 5
Resize your text by using the transformation tool, Press (Ctrl + T). Press and hold the Shift key to maintain the aspect ratio and use the Handles to change the font size and location.
![]()

Step 6
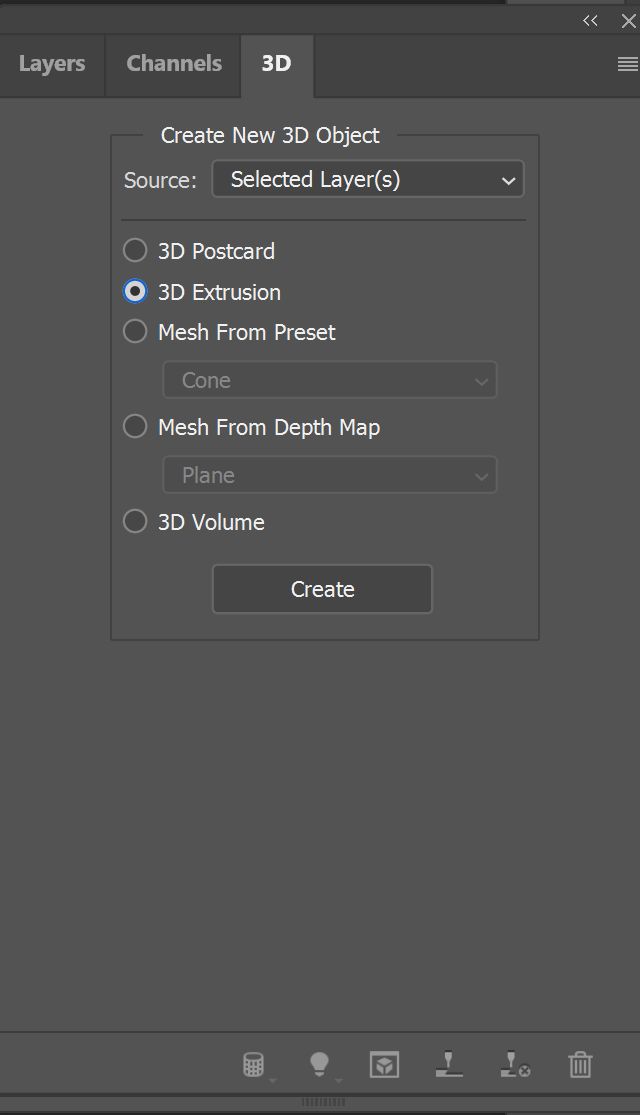
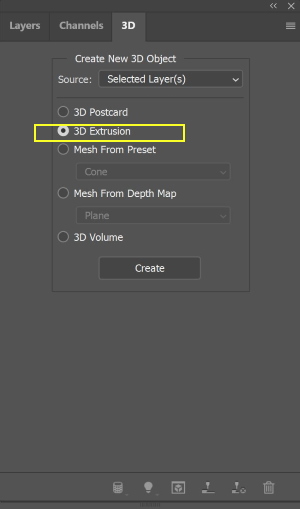
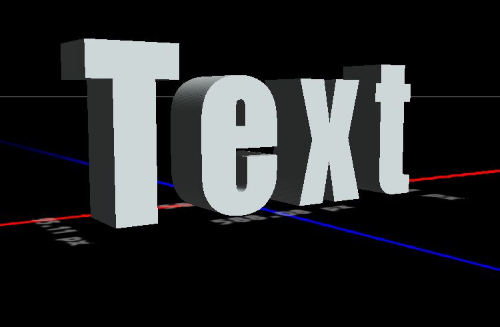
Change the text layer to 3D. Make sure that the 3d is checked in the windows main menu, choose 3d Extrusion, press create.
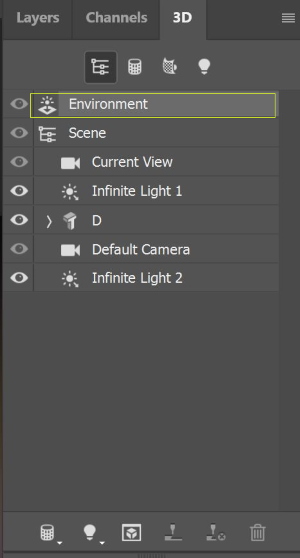
Step 7
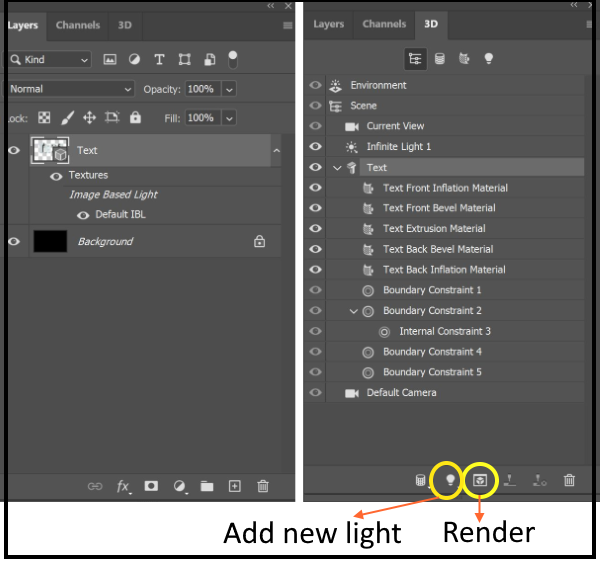
The layer and the 3D panels are shown below
Step 8
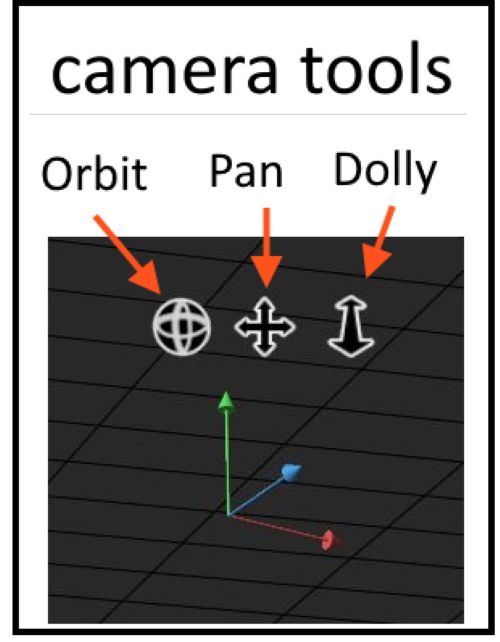
You can change the way you look at your text using the camera at the left bottom of the screen.
Step 9
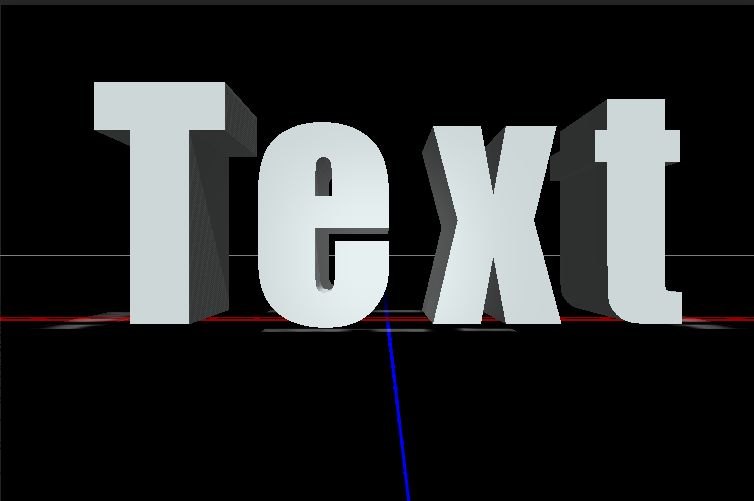
The final step is to use the render button to finalize the image
The rendering process may take a considerable time depending on the complexity of your photo and the speed of your computer processor.

How to add and change the text’s material, and surface deformation
The material creates the visual appearance of the 3D object’s surface. Texture, reflectivity, bump maps, etc. Photoshop comes with 36 material presets. Deformation defines the shape of the surfaces of an object; you can make it spherical, beveled, or inflated.
In the following example, I will illustrate How to add and change the text’s material, and surface deformation.
Step 1
Repeat the steps of the last example to step 8. I will use the letter “D” instead of “text” to show you the effect clearly.

From the 3D layer, click on the 3D text layer to change the texture. You can also click on any one of the underneath layers to only change it.

The mesh properties panel shows up in the photo below.
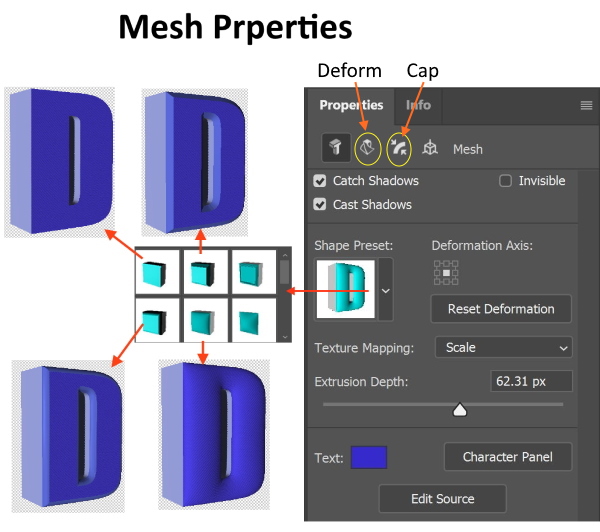
Step 2
From the mesh property panel, choose one of the shape presets, and you can adjust the extrusion depth.
Step 3
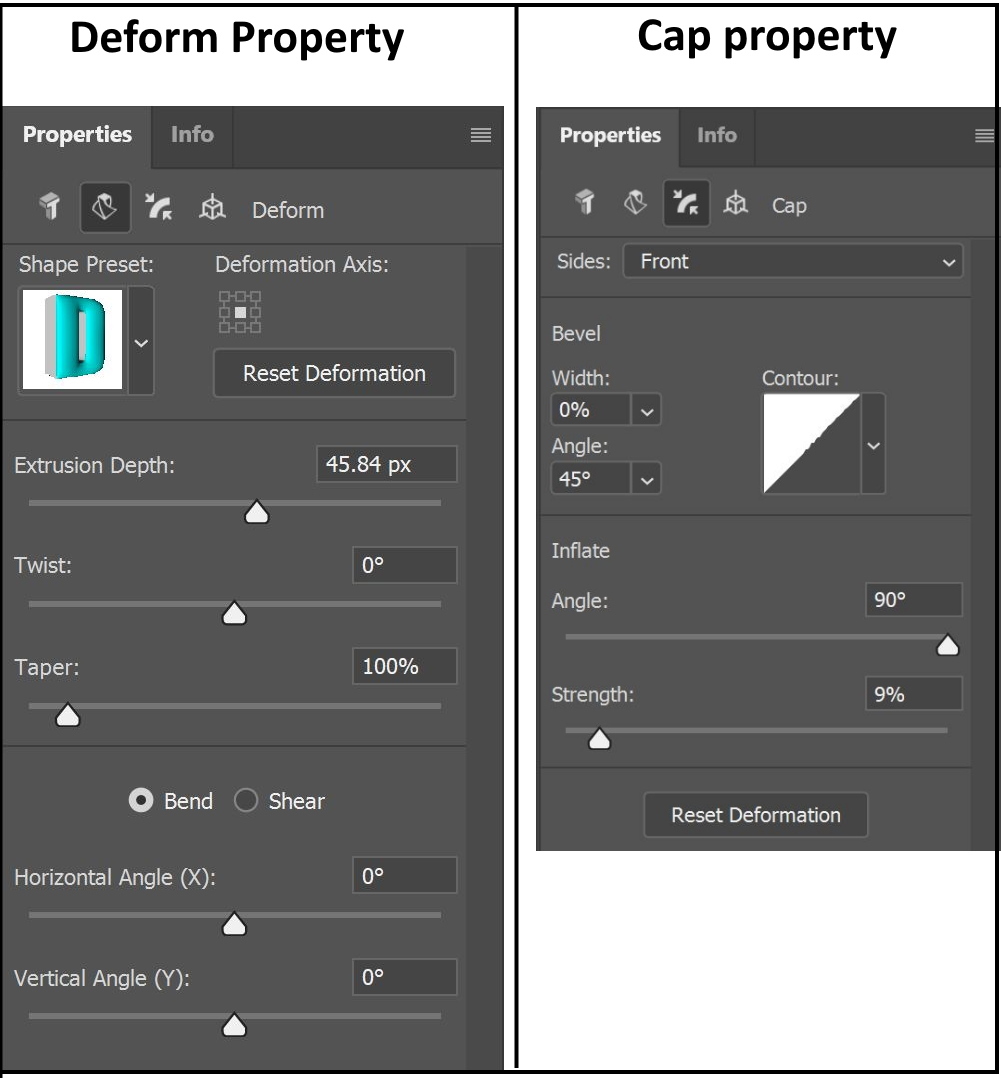
From the Deform and Cap properties panels, you can also add different effects.
Step 4
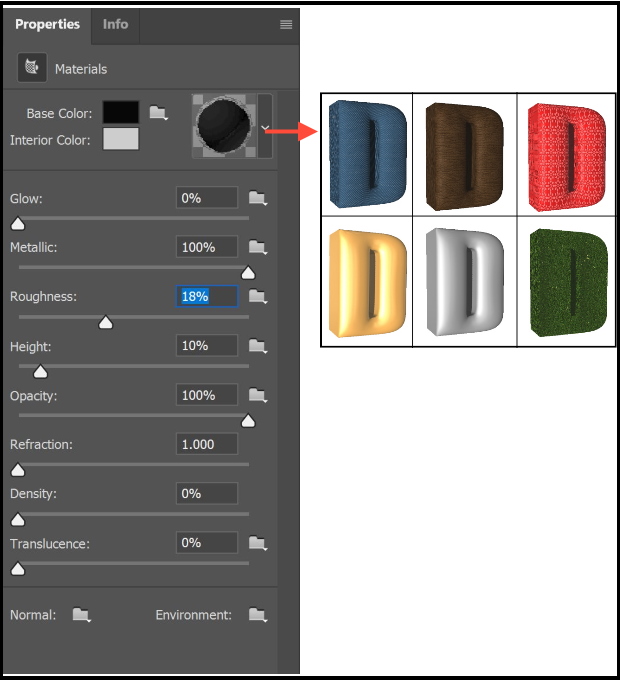
To change the material of any surface of the 3D model, click on its layer and the properties panel will appear, choose from the available materials.
Step 5
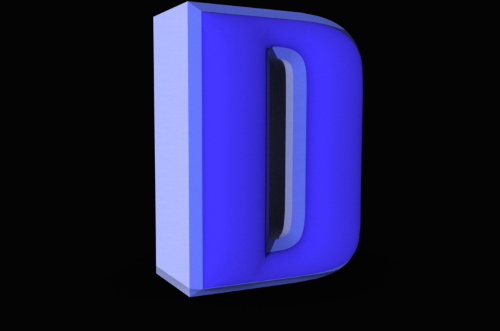
Click the Render to finalize the image.
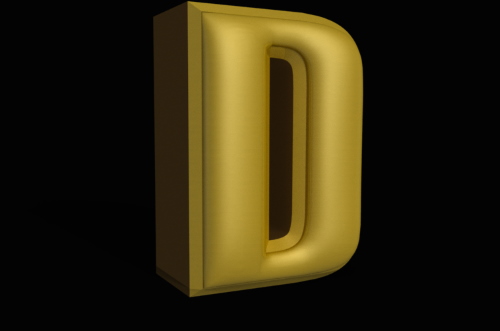
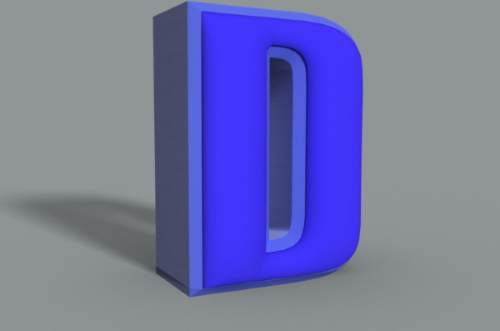
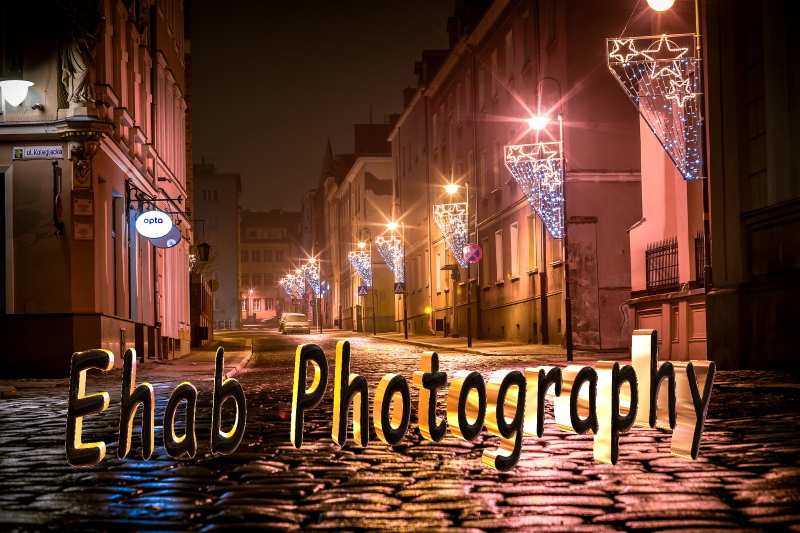
How to add light to the scene
You can add a light source to make a shadow and change the lighting of the scene. I have changed the black background of the previous example to show the dropped shadow.
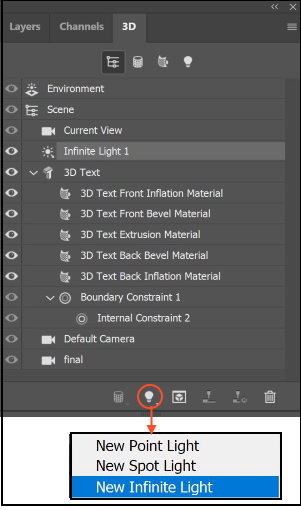
Step 1
Click on the symbol of the light bulb at the bottom of the 3D menu, and choose the light type.
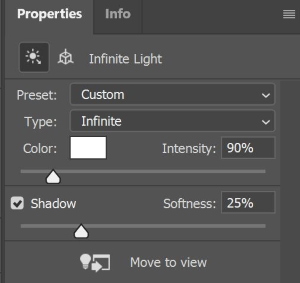
Step 2
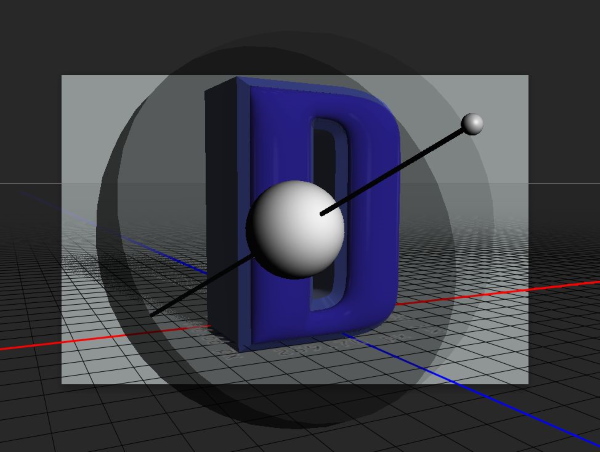
Move the handle to change the direction of the light. From the property’s panel choose the color of the light and the intensity of the shadow
Step 3
Render the image. The final image is shown below
Another example is shown below
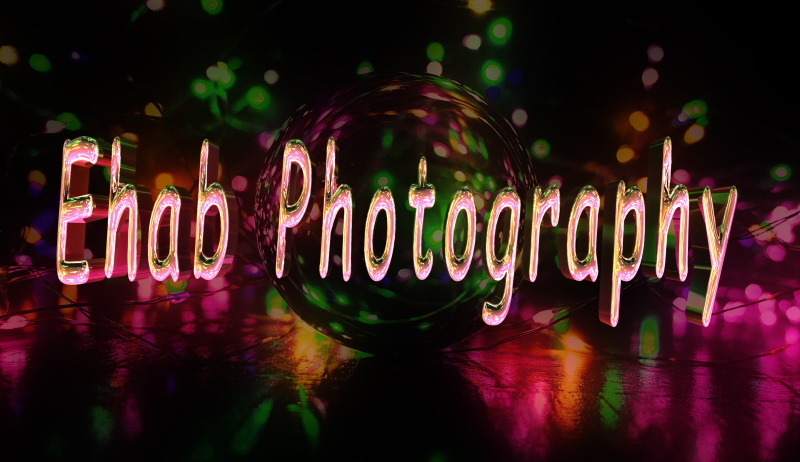
How to make a reflection
In the following example, I will explain a technique used to make the surfaces of the text reflective. The reflective light is coming from another image, which is used as an Image Base Lighting. The 3D surfaces of the text must be changed to have high metallic (reflective) values.
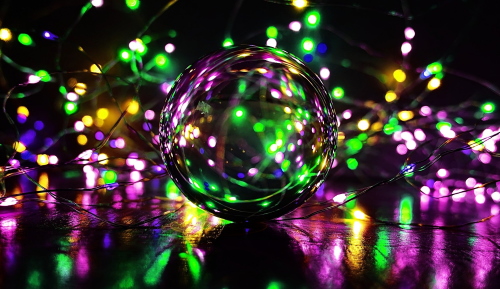
Image by Alexas_Fotos from Pixabay
Step 1
Open the image in Photoshop, and duplicate the layer
Step 2
Blur the image, using Filter > Blur > Gaussian Blur
Step 3
Use the above examples to create a 3D text
Step 4
From the mesh properties of the text, choose the “Inflate” from the shape preset (It is the 5th shape preset)
Step 5
From the material properties of the all shape layers, move the Metallic slider to its maximum, and the Roughness slider to its minimum
Step 6
Choose Environment from the 3D layer
Step 7
From the properties panel of the environment. Make sure that IBL (Image Based Lighting) is checked, and click New Texture
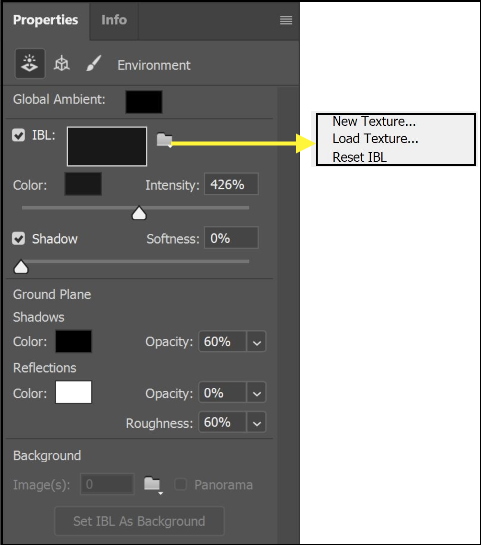
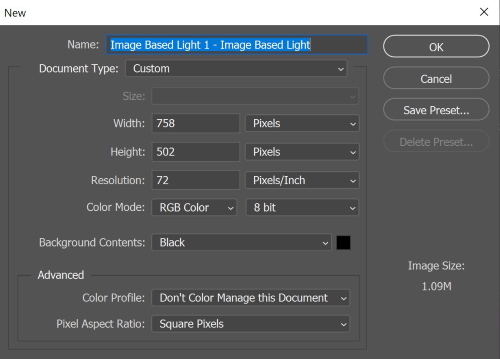
A new menu will show up, click O.K
Step 8
Choose Edit Texture, a new tap is opened.
Step 9
Copy the background layer (Ctrl + C) and Paste (Ctrl + V) it in the new tap
Use Image > Reveal All to show the whole image. Then save the image (Ctrl + S)
The 3D panel is shown below

Step 10
The 3D image will look like the photo below
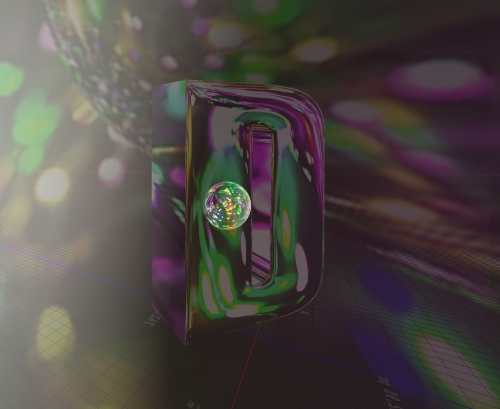
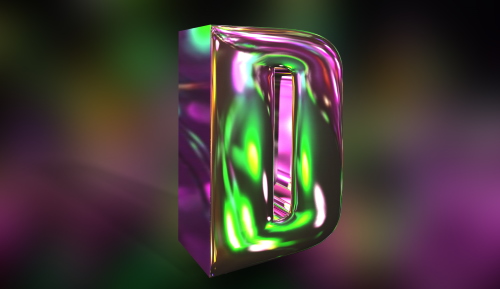
Move the inside circle to change the reflection on the surfaces of the 3D text. When satisfied, click render
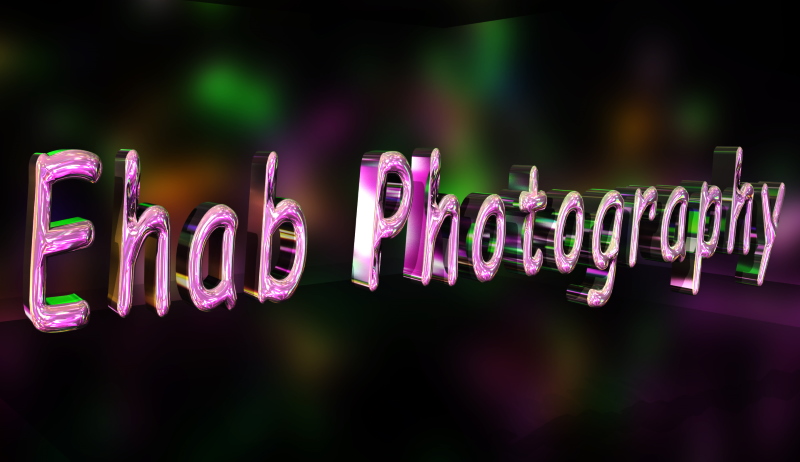
The final image is shown below
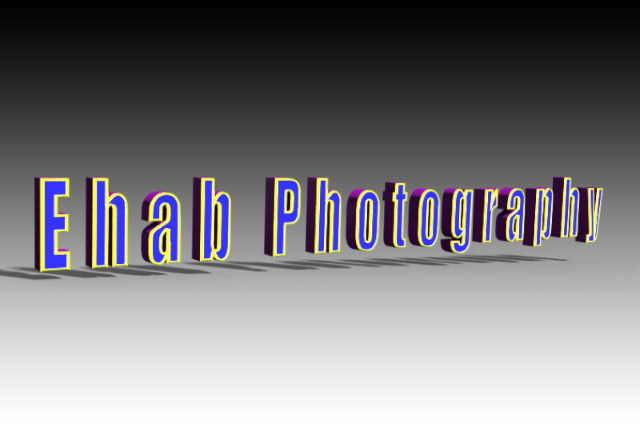
More examples
Related posts
Create 3D Image – Photoshop Beginner’s Guide
Thanks for reading, I hope you enjoyed the article if you have any questions just post below & I will be happy to answer you.
If you enjoy the site, do not forget to subscribe, we will only inform you when a new article is posted.


This is a great way to actually be a path of this training, i want to sincerely thank you for posting this here about ehab photography and how to design a 3D picture. this has been very helpful and i would like to know which application or software do you use often for 3D or 2D photoshop?
Thank you for your comment, I usually use Photoshop
That is cool a fully detailed tutorial, you have put a lot of work into that post well done. You got to love technology programs like photoshop just keep on getting better as technology advances making effects like this easier and more realistic.
Keep these sort of tutorials coming I might get good at this stuff.
Thanks, I’m glad you found the article useful for you. Hope you all the success!