

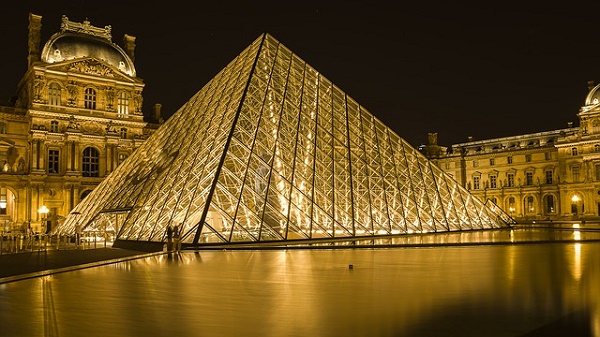
Every photographer is looking to take an amazing and stand out photos. It is rather hard to do so if you are photographing only during the day. Night photography is a new world that has opened up since the introducing of the digital cameras. Now you don’t need to travel a lot to search for exotic places to take photos, you can still get stunning photographs of some subjects, places, building, city streets etc., they look ordinary and may be boring at daylight, but they turn into fantastic scenes at night. Street lights, neon lights, traffic, even the moon and the stars give you things to work with that just aren’t available during the day.
Another interesting aspect of shooting photos at night is that the light condition is almost constant; it doesn’t change like daylight. So you can take your time to find the best shooting angle and position and set up your camera exactly the way you want.
The main challenge when photographing at night is getting the proper exposure. During the day, you can just walk around without worrying too much about camera shake. In addition, because there is plenty of light during the day, you normally use a low ISO setting. At night, however, hand holding is generally not an option and digital noise can be a major problem because you are shooting at a high ISO.
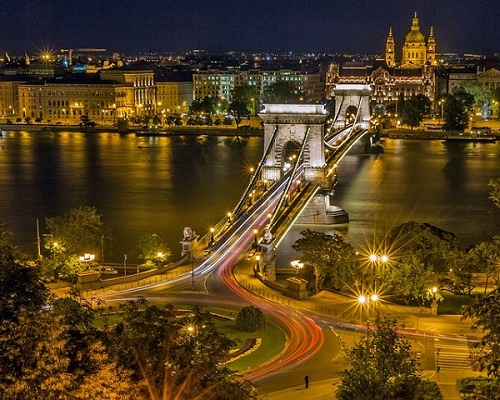
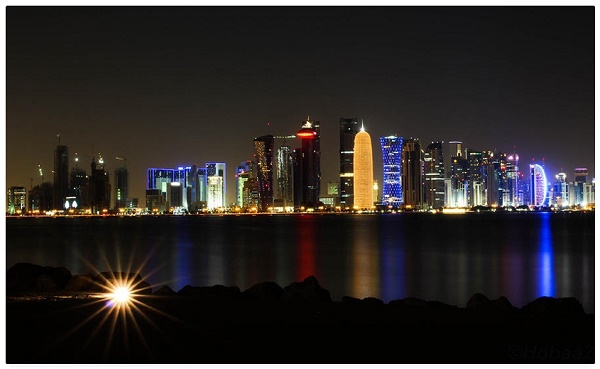
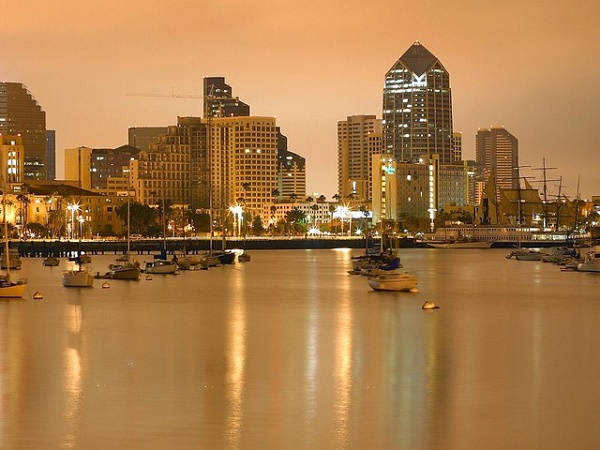
Before we proceed to state some tips and techniques about night photography, just relax and enjoy some beautiful night photos.


The Night Photography Tips
1- Make sure you have the right tools
Doing Night photography needs special requirements and tools for exposure and stability. Here is a list of the required tools; you will find most of them helpful, and some essential for getting great pictures at night.
The right camera
You should make sure that your camera gives you the right amount of control and have the following capabilities:
- Can shoot in raw format, so that you can get the best image quality possible and keep digital noise to a minimum
- It has manual controls, including manual exposure settings and manual focus, as sometimes it will be too dark for your camera’s auto-focus to work
- It Has Bulb mode for taking super-long exposures.
Also, your camera has to have a good performance at the low light condition. Check out the testing done by DxO mark to see your camera performance.
You may also check my post “What Is The Best Camera For Night Photography? – Recommendation & Tips”
Tripod and Remote Shutter Release
It is probably obvious that you will need a tripod for your night photography to keep the camera steady during the long exposures necessary due to the low light conditions. I recommend checking my post “Best Digital Camera Tripod”.
Also, you need a remote shutter release so you are able to trigger the shutter without touching the camera, thereby avoiding shaking the camera during the exposure. You may check my post “Canon Wireless Remote Shutter Release”.
Lens Hood
In night photography environment there are harsh lights coming from different directions. Light hitting the front lens element from the side can lead to unwanted lens flare. A lens hood is designed to avoid this problem.
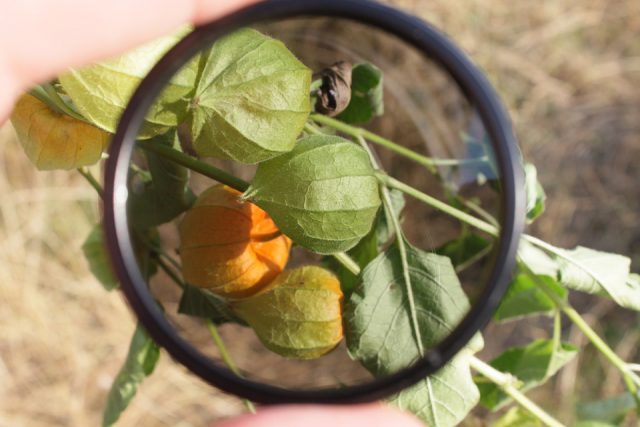
Neutral Density Filters
It may sound odd but sometimes you want an even longer exposure than available light (or darkness) allows, such as when you are trying to catch streaking tail lights, blur moving water, or to remove people walking through your picture. For this reason, a collection of neutral density filters is a handy thing to have for night photography. You may review my post about Neutral Density filters.
A torchlight
Having a small torch light can help you to see your camera’s controls, in setting up your tripod, dealing with straps and other attachments, etc.
2- Find the Good Exposure
Your camera’s light meter will guide you to choose the right aperture and shutter speed settings to get a good exposure, or it will choose them automatically if you are using the automatic mode. The problem is that your camera can be fooled by tricky lighting situations and that’s why your image may not come out exactly the way you want it.
The following are four techniques you can use to make sure you get a good exposure:
-
Exposure Compensation
First, you have to evaluate the exposure, it isn’t enough to use the camera display (LCD) after capture, which is called, by the way, chimping (the habit of checking every photo on the camera display). You should check your photo using the histogram because what you are seeing on the back of your camera is a compressed version of the image and it also depends on the brightness setting of your camera screen.
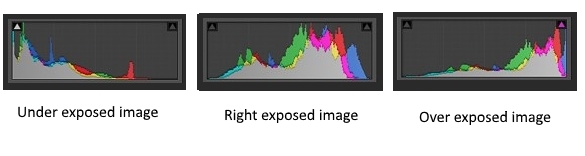 Using the histogram is easy. The blacks are on the left, the whites are on the right, and all the mid-tones are in between. All you really need to know is that a spike on either edge of the graph is not accepted. If there is a spike on the very right edge, it means part of your image is completely white and contains no data and you can’t correct it by post-processing. It’s better to keep the graph off the right edge. But if there is a spike on the left edge, it means part of your image is completely black. It may be accepted after all you are shooting at night and there are lots of blacks in the scene.
Once you evaluate your image using the histogram, you can use your exposure compensation to make the image darker or lighter without having to worry about changing the aperture, shutter speed, or ISO.
-
Automatic Exposure Bracketing (AEB)
Most modern cameras have a setting for automatic exposure bracketing which makes it easy to take automatically three shots at different exposures, normal, underexposed, and overexposed. After taking the 3 shots, you may choose the better one, or you can use the three photos in editing software to blend them and get an amazing HDR photo. Full detailed information about bracketing and HDR techniques is available in my post “Bracketing – The Best Way To HDR Photography”.
-
Exposure Lock
You can use “exposure lock” in combination with the “spot metering” exposure mode so that the camera will only take into account the light level at the exact spot in the frame that I choose. You should decide what part of the image is most important for the exposure, then point the camera at the part and use the exposure lock button to freeze the exposure then you recompose the image, focus, and take the shot.
3- Meter for the highlights
You have to select the proper metering mode of your camera when you are shooting night photography. Each metering mode presents its own challenges. If you use evaluative metering, the camera is likely to be confused. If you use spot or partial metering, the meter will jump around depending on whether you are aiming at a bright light or a dark background.
One answer to this problem is to use spot metering and to expose for the highlights. Set your meter between +1 and +2 as you meter on the highlights. This will keep your highlights looking bright, but at the same time, will keep the highlights within the dynamic range of the camera.
4- Take a test shot at a high ISO
You should use test shots when shooting at night to check things out. Because most of the night photography is taken with a relatively long time and of course you don’t want to wait that long to see if the test shot is going to work out or not. The best way to accelerate a test shot is to evaluate tone at a much higher ISO than you would ordinarily use.
For example, the proper exposure settings for a given shot are:
Exposure time = 32 min
F- Stop= f/8
ISO=100
Rather than taking that shot and waiting around 32 minutes to see the exposure result, for each successive increase of your ISO dial and full stop in opening the aperture notch of your lens, your subsequent exposure time will be cut in half. The exposure level will be the same, but it will take a lot less time to expose the test picture as shown below if we increase the ISO and the F-stop six times:
Exposure time = 4 sec
F- Stop= f/2
ISO=6400
Related Posts
What Is The Best Camera For Night Photography? – Recommendation & Tips
How to Reduce the Photo Noise – The Free Noise Reduction Software
Finally, when you follow these steps, you are most likely will get some great shots. The amazing effects of the lights in night photography can help you a lot in taking amazing photos. Take your time and apply these tips and practice a lot and very soon you increase your experience and become a better photographer.
Thank you very much for reading this article. I hope you found what you are looking for; if you need any information related to photography, please don’t hesitate to leave your comment in the box below. If you like the site remember to subscribe, we will inform you when there is a new post.
Also, if you like reading about other types of photography, you can check my post ”The Different Types of Photography “, you will find 25 more types of photography.
If you enjoy the site, don’t forget to subscribe, we will only inform you when a new article is posted.


Absolutely love this post. As a long time amateur photographer, I have always been challenged by night photography in that you are striving to create a finished product that pretty much reflects how your eye sees it. I used to take shots of lit up church steeples and all your advice is sound. I will definitely revisit and use your instructions.
Many thanks for your nice comment, you are always welcomed.