


Introduction
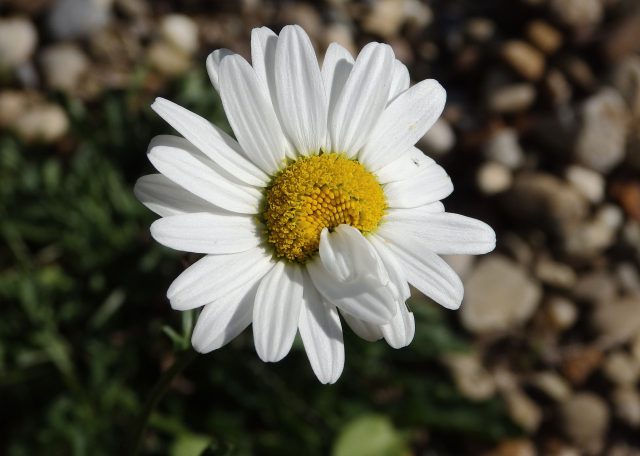
The sharpness of photos is considered a prime factor for evaluating the quality of photos, so understanding sharpness and knowing how to improve it is very important toward shooting good photos. One of the things that make photography frustrating is softness and blur in pictures. Sharp photos are much more appealing than soft images. It is very disappointing when you take a picture at a special moment and images come out soft or blurry or out of focus.
Definitions
Sharpness:
It is a term used to describe the clarity of details of a photo and how your subject textures look like. There are two fundamental elements that can contribute to sharpness, the resolution, and the acutance.
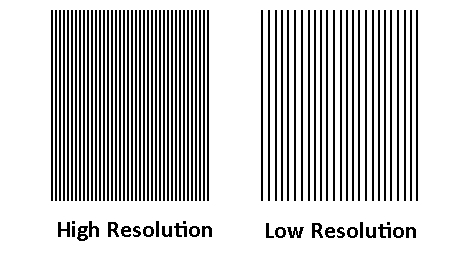
Resolution
It defines the ability of your camera to differentiate between closely spaced elements of details, such as the two sets of the line shown below.
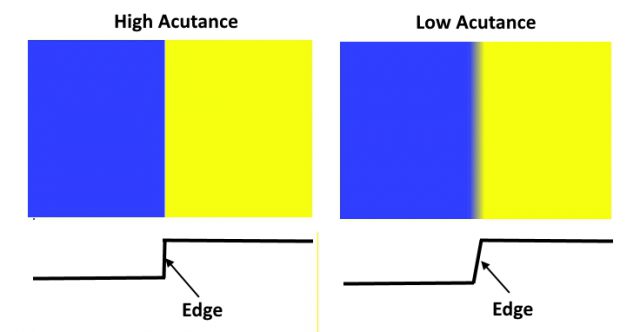
Acutance
It defines how quickly image information transition at an edge of two different colors, high acutance means sharp transition and detail with clearly defined borders.
For digital photography, the resolution is limited by the digital sensor of the camera. Whereas acutance is governed by the quality of the lens, the camera setting, control of the camera, and the type of post-processing of the image.
The main causes for lack of sharpness
Before starting to discuss how to improve the sharpness, I think it would be better to list the main factors that cause the photos to be unintentionally blurry or soft.
-
Wrong or poor focus
The most obvious way to get images that are ‘un-sharp’ is through having them out of focus. This might be a result of focusing on the wrong part of the image, being too close to your subject for the camera to focus, selecting an aperture that generates a very narrow depth of field or taking an image too quickly without checking it is in focus.
-
Subject Movement
Some types of ‘blur’ in shots are the result of your subject moving, this is generally related to shutter speed being too slow.
-
Camera movement (Shake)
You may get a blurred photo if you as the photographer generate movement while taking the image, this movement happens when pressing the button to release the shutter, and/or the stillness of your camera. It may also happen when using long shutter speed.
-
Using a high ISO setting
In low light condition, you may want to increase the ISO setting. Your ISO could be set to a very high number, resulting in lots of noise and loss of detail
-
Using a low-quality lens
You might have a bad lens or a lens that is not capable of producing sharp photos.
How to take sharp photos
In this post, I will go through the techniques that should be used to make sure that your images always come out tack sharp.
-
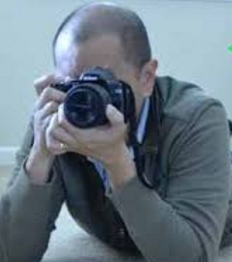
Hold the camera properly
The best way to eliminate camera shake is to use a Tripod (see below), but there are many situations when using one is impractical and you’ll need to shoot while holding your camera. Try using the following technique to help you hold your camera firmly. Use your right hand to grip the camera, use your left hand to support the weight of camera lens, make the camera as close as possible to your body, and finally, support your arms by leaning to a solid wall or object or by setting or kneeling down.
-
Use a tripod and a remote shutter
Although it is not always an easy way to use a tripod to shoot a photo, it is the best way to stabilize your camera. My recommended Tripod and using a remote shutter release is the complete solution to overcome the problem of camera shaking.
-
Use IS (image stabilization) lens
Some modern lenses are equipped with Image stabilization (IS), you can turn it on, and it will help a lot in reducing camera shake and allow you to shoot at slower shutter speeds and narrower apertures.
-
Use a fast shutter speed
To eliminate motion blur and get a sharp photo, you may try using a fast shutter speed setting. The general rule is to set your shutter speed to the reciprocal of your focal length. For example, if you are using a focal length of 50 mm, then set your shutter speed to 1/50 of a second or faster. The last rule applies only for full frame camera, if you are using a crop sensor camera you should increase the shutter speed to 1/80 of a second.
-
Choose the right aperture
Use aperture priority mode. In aperture-priority mode, you tell the camera what the lens aperture should be (the “f” number, for example, f/3.5), while the camera automatically meters and guesses what the shutter speed should be to properly expose the image. So, set your camera to aperture-priority mode and lower the aperture to the lowest possible number.
-
Lower your ISO
The higher the ISO value, the more noise there will be, so Set your camera ISO to as low as it will go, usually between 100-200, where you get the sharpest photos. For really clear, crisp photos, you want as little noise as possible.
-
Get the right focus
The most obvious technique to work on when aiming for sharp photos is focusing. Most of us use ‘Auto Focusing’ with our cameras but don’t assume that the camera will always get it right. Always visually check what part of the image is in focus before hitting the shutter and if it’s not right trying again or switch to manual focus mode. This is particularly important if you’re shooting with a large aperture (small depth of field) were even being slightly out can result in your subject being noticeably out of focus.
-
Use a good lens
Your photos are only as good as the lens they pass through. When you buy your first camera, I recommend upgrading to an inexpensive prime (can’t zoom) lens as soon as you can. You’ll find an immediate improvement in image quality as prime lenses are designed with only one job in mind. I recommend one of these prime lenses from Canon, Canon EF 50mm f/1.2L USM, Canon 85mm f/1.2L II USM, and Canon 100mm F/2 USM
-
Clean your lens
It is obvious that cleaning your lens is important for getting clear photos; I suggest that you view this post “How to clean your camera lens? – Protect your asset” for some valuable information.
-
Use the lens sweet spot
Most lenses are at their sharpest when stopped down 2 or 3 stops from the maximum aperture. However, even if for depth of field reasons it’s not possible to stop down that far, closing the aperture 1/3 to 2/3 of a stop will still increase sharpness. By the same token, when a lot of depth of field is required, shooting one or two stops open from minimum aperture will provide the best sharpness.
The sharpest point in your lens will likely be between f/8-f/11. Using a wide aperture gives you a shallow depth of field, resulting in a lot of blurs. When you get to about f/8, you’ll find that the images are much crisper as the majority of what you’re shooting will be clearly focused.
-
Use a polarizing filter
Polarizers are famous for darkening blue skies on sunny days, but they are just as useful in other situations. In misty or hazy situations, polarizers can help cut through that haze. Haze has the effect of softening an image, so using a polarizer to eliminate the haze enhances sharpness. So don’t hesitate to put the polarizer on your lens, even when darkening a blue sky isn’t the reason. For more information about filters check it HERE
-
Shoot in Raw
You can adjust and change a lot of settings after you’ve taken the photo by using photo editing software. One of these settings is sharpness. Shooting in RAW allows you to keep all the data and information on the photo, so it is much easier to change any of them. For more information about the RAW file format, I recommend reading my post What Is The Difference Between RAW And JPEG?
Thanks for reading, hope you enjoyed the post about understanding sharpness if you have any questions just post below & I will be happy to answer you.
If you enjoy the site, don’t forget to subscribe, we will only inform you when a new article is posted.


Personally, I’ve found some of my favourite photos to be ones that can effectively play with the focus between the foreground and background to create truly stunning visuals. I don’t know if it’s the right word but I think it’s the ‘depth’ that I find most appealing.
Is a lack of sharpness something that can always be fixed after taking the picture?
Hello Ryan, thanks for your comment, sharpness is one of the little things that hardly can’t be adjusted after taking the photo, that’s why it’s very important to focus in a perfect way if you find any distortion take another photo.