

Because there are many peoples who admire the look of oil painting, I wrote this article to explain how to turn a photo into oil painting in Photoshop. Photoshop has many resources to help us produce this effect. The CC version of Photoshop has a unique oil painting filter with a much smaller, less intimidating dialog box that makes using it much easier than ever.
Combining the use of the oil filter and other filters such as texture and high pass filter can help in producing a realistic look of an oil painting look.
Through the following paragraphs, I will explain the use of the above-mentioned three filters, then I will make an example to illustrate how we can get the oil painting effect easily.
Filters in Photoshop
You can use filters to clean up or retouch your photos, apply special art effects that give your image the appearance of a sketch or impressionistic painting, or create unique transformations using distortions and lighting effects. The filters provided by Adobe appear in the Filter menu. Some filters provided by third-party developers are available as plug-ins. Once installed, these plug-in filters appear at the bottom of the Filter menu.
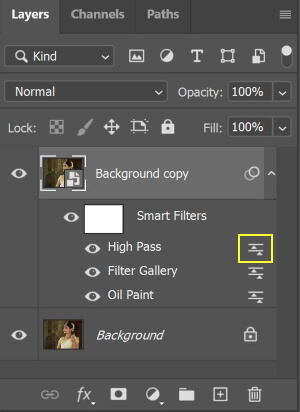
Smart Filters, applied to Smart Objects, let you use filters non-destructively. Smart Filters are stored as layer effects in the Layers panel and can be readjusted at any time, working from the original image data contained in the Smart Object.
In this tutorial, I will use three different types of filters, the Oil filter, the texturize filter, and the High pass filter. Here is a quick explanation of the three used filters.
-
Oil Paint filter
The Oil Paint filter lets you transform a photo into an image with the visual appearance of a classic oil painting. With a few simple sliders, you can adjust the amount of stylization, brush scale, cleanliness, and other parameters.
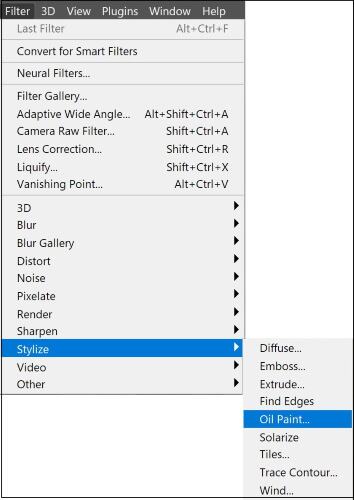
To use the filter Select Filter > Stylize > Oil Paint. You can adjust the following settings for the filter:
Preview
The preview option to the right of the window controls whether or not we see a live preview of the oil painting effect within the image itself (as opposed to just inside the preview window in the dialog box).
Brush sliders
-
Stylization
Adjusts the style of the strokes, ranging from a daubed look at 0 to smooth strokes at 10.
-
Cleanliness
Adjusts the length of the strokes, ranging from shortest & choppiest at 0 to longest & fluid at 10
-
Scale
Adjusts the relief or apparent thickness of the paint, moving from a thin coat at 0 to a thick coat, giving luscious Vincent van Gogh-style paint globs, at 10
-
Bristle Detail
Adjusts how much of the paintbrush-hair indentation is apparent, moving from soft at 0 to leaving strong grooves at 10
Lighting sliders
-
Angle
Adjusts the incidence angle of the light (not the brushstroke). This setting is important if you are incorporating the oil painting into another scene.
-
Shine
Adjusts the brightness of the light source and the amount of bounce off the paint’s surface.
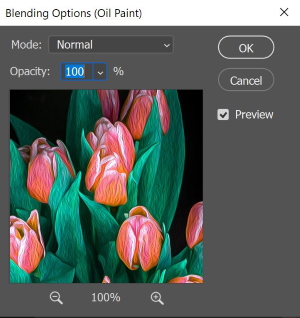
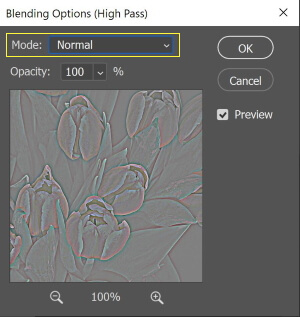
You can control the filter blending mode, and opacity by clicking the icon on the right side of the filter. The following window will show up
-
Texturizer filter
The Texturizer filter allows you to simulate different texture types or select a file to use as a texture. Texture options make images appear as if they were painted onto textures, such as canvas and brick, or viewed through glass blocks.
To access the filter
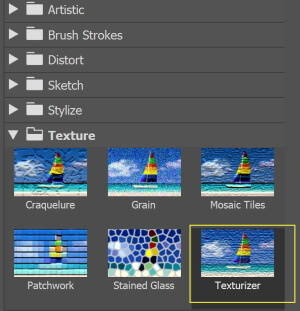
To use the filter Select Filter > Filter Gallery > Texture > Texturize.
You can adjust the following settings for the filter:
- Texture: choose canvas, to simulate the appearance of depth or substance of canvas that is used in oil painting.
- Scaling: adjust the grain size of the canvas
- Relief: Adjust the visibility of the canvas grains
- Light: Define the light direction
-
High pass filter
You can access the High pass filter by Filter > Other > High Pass
Photoshop’s High Pass filter is very good at sharpening images, and it works by increasing contrast along the edges in your image. Photoshop considers an edge to be any area where there is a big, sudden change in brightness between neighboring pixels.
Increasing contrast along the edges makes the light side of the edge lighter and the dark side darker. Your brain then interprets the increased contrast as “sharper”. The more we boost edge contrast, the sharper the image appears.
Before we can increase contrast along the edges, we first need to find those edges. In addition, High Pass is an edge-detection filter. It looks for edges in the image and highlights them. Areas that are not an edge are ignored.

Once the edges are highlighted, we can then combine the High Pass results with one of Photoshop’s contrast-boosting blend modes (Overlay, Soft Light, Hard Light, and Linear Light) to easily increase edge contrast without affecting other parts of the image.
Turn a Photo into Oil Painting in Photoshop
Example 1
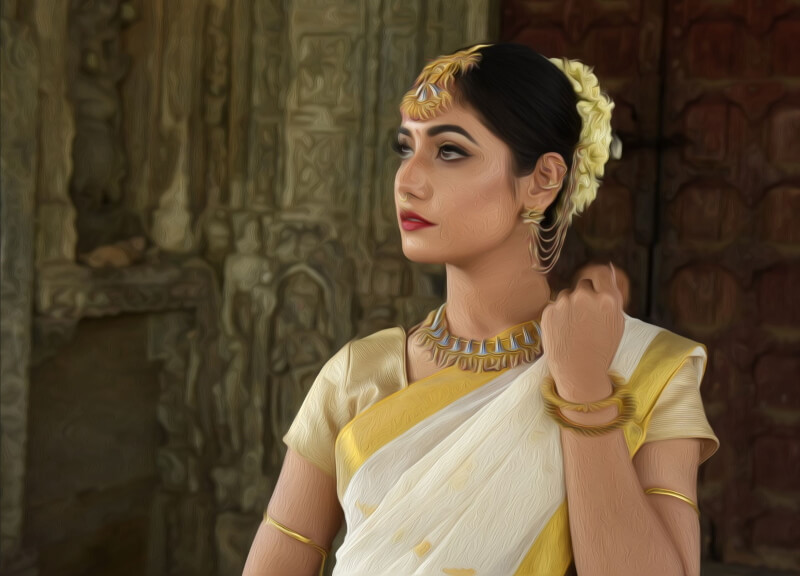
I will use the below photo:

Photo by Manjeet Singh Yadav from Pexels
Step 1
Open the file in Photoshop
Step 2
Duplicate the background layer (Ctrl + J)
Step 3
Convert the layer into a smart object. Right-click the layer, and then choose to Convert to Smart Object
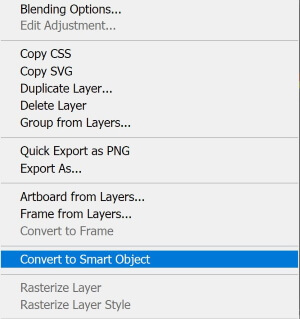
I use this conversion to allow for the use of Smart Filters. Which keeps the filter settings non-destructive and fully editable; so I can easily go back and try different settings.
Step 4
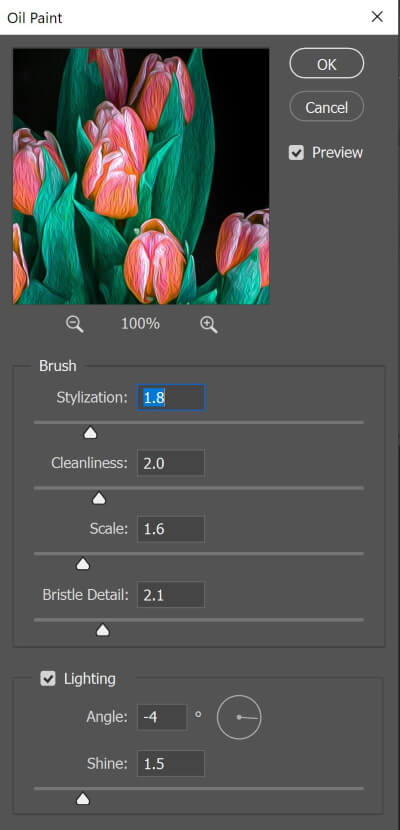
With the layer active, open the Oil filter
Filter > Stylize > Oil Paint.
In addition, the following window will show up
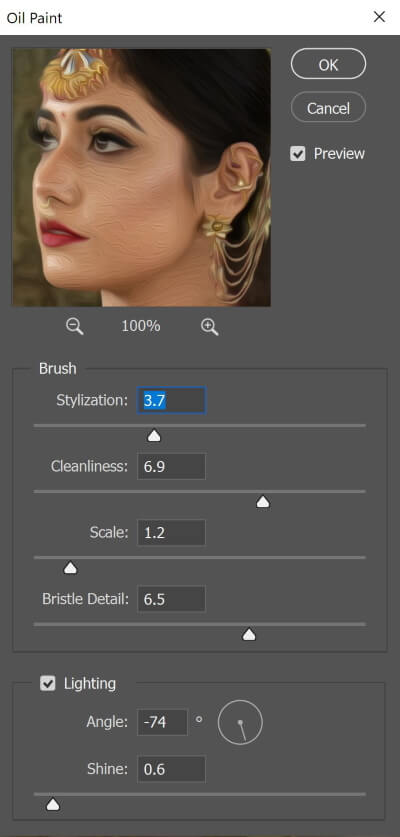
Make sure you check the review box, and the lighting effect to see the changes.
Adjust the stylization slider to control how rough or smooth the brush effect:
- If you drag the Stylization slider all the way to the left, to its lowest value (0.1): It will look like your image was painted by daubing the brush onto the canvas, giving it a rough and detailed appearance
- If you drag the slider all the way to the right to the maximum value of 10: it will create the smoothest strokes possible.
A value around five seems O.K.
Step 5
Adjust the Cleanliness slider. It controls the length of the brush strokes, ranging from short and choppy at the lowest setting to long and fluid at the highest.
- If you drag the Cleanliness slider all the way to the left, to its lowest value (0): It gives the shortest possible brush strokes.
- If you drag the Cleanliness slider all the way to the right to its maximum value of 10: it gives long, fluid strokes, resulting in a much cleaner, less detailed effect.
A value around six seems O.K.
Step 6
Adjust the Scale slider; it controls the size or thickness of the brush itself. Use low Scale values for thin, fine brushes or higher values for bigger, thicker brushes.
- If you drag the Scale slider all the way to the left, the strokes look like they were painted with a very thin, fine brush.
- If you drag the slider all the way to the right, the brush strokes are much thicker as if a bigger brush was used.
A value of three seems O.K.
Step 7
Adjust the Bristle Detail. It controls the strength of the grooves created in the paint by the hairs in the brush. At lower values, the grooves appear light and soft, becoming stronger and more pronounced as you increase the value.
A value of five seems O.K.
Step 8
Now, for the lighting part:
The Angle controls the direction of the light source shining on the painting, which affects the direction of the shadows and highlights created by the paint. To change it, simply click and drag inside the circle to rotate the dial. The best angle should match the actual direction of the original photo.
The Shine slider controls the intensity of the light source, which affects the intensity of the shadows and highlights of the paint. I’ll set my Shine value to around 0.7 which adds a nice amount of detail without making things look too harsh.
Step 9
Click o.k. to apply the filter, here is the look of the image after applying the Oil painting filter.
Step 10
Now, I will apply the second filter, the Texturize Filter.
Select Filter > Filter Gallery > Texture > Texturize.
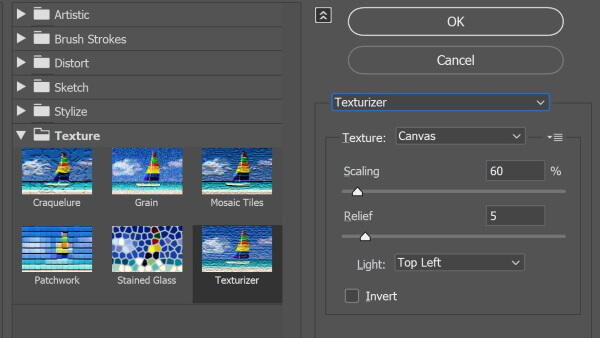
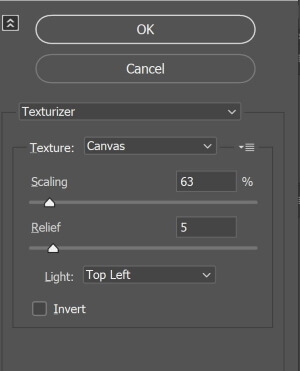
From the Texture menu, choose Canvas
Use the Scaling slider to adjust the grain size of the canvas
Use the Relief slider to adjust the visibility of the canvas grains
Choose the light direction
Press O.K. to apply the filter.
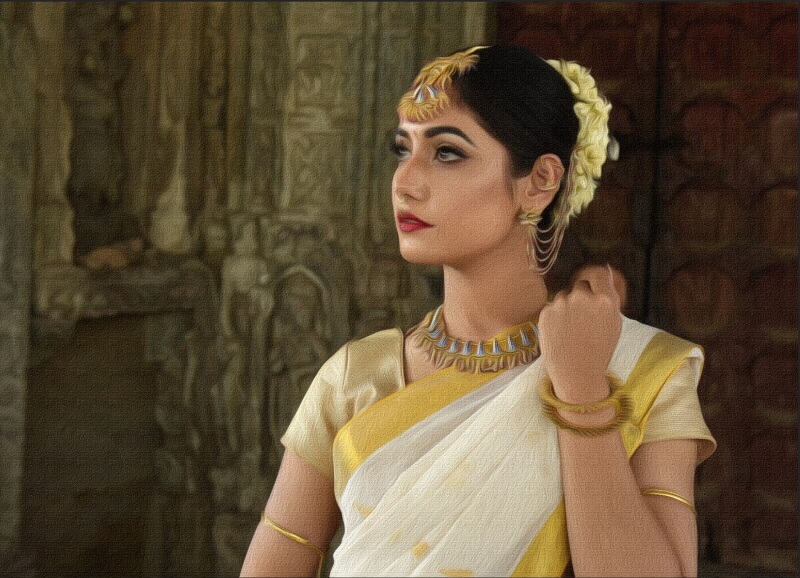
The result is shown below after applying the texturize filter.
Step 11
To add some sharpness to the photo, I will use the High Pass Filter
Select Filter > Other > High Pass
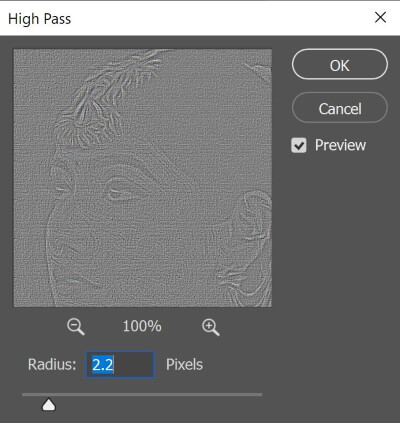
Adjust the Radius slider to define the edges that will be sharpened. I choose a value of four and press O.K. to apply the filter.
Then change the blending mode to Overlay. Press the right icon on the filter in the layer panel
Choose Overlay
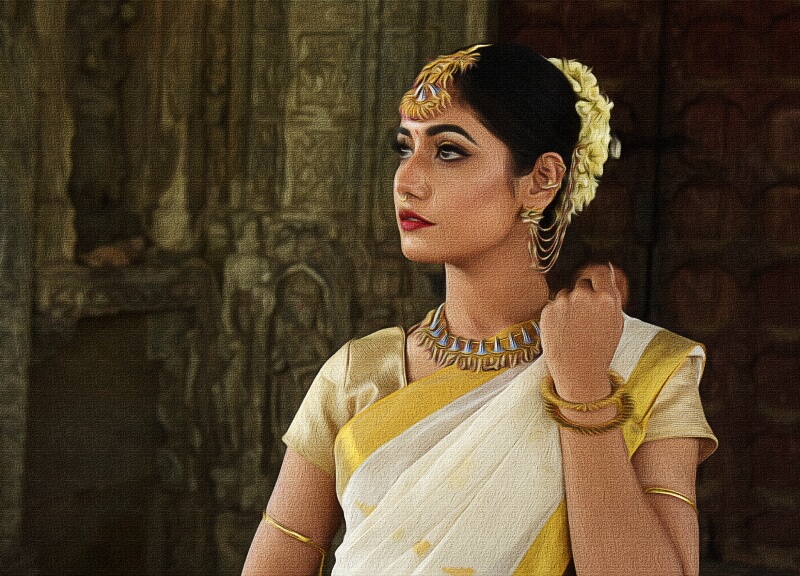
The final look is shown below
Example 2
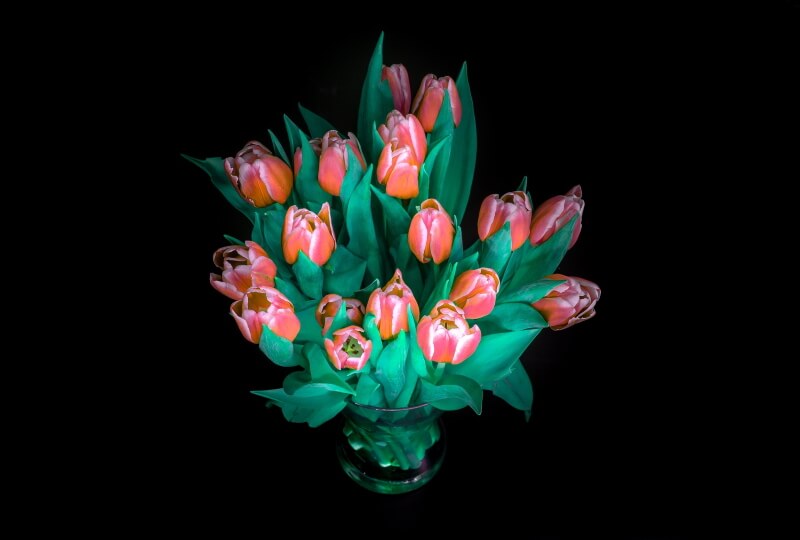
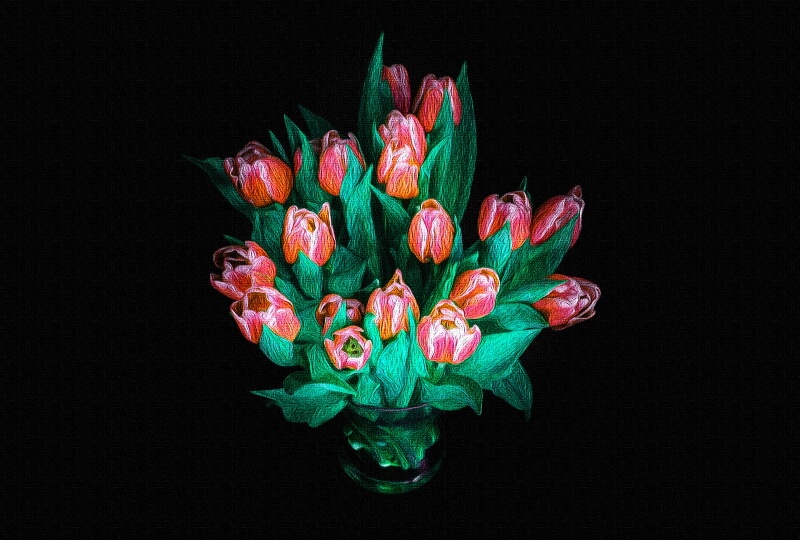
Image by Rudy and Peter Skitterians from Pixabay
Example 3
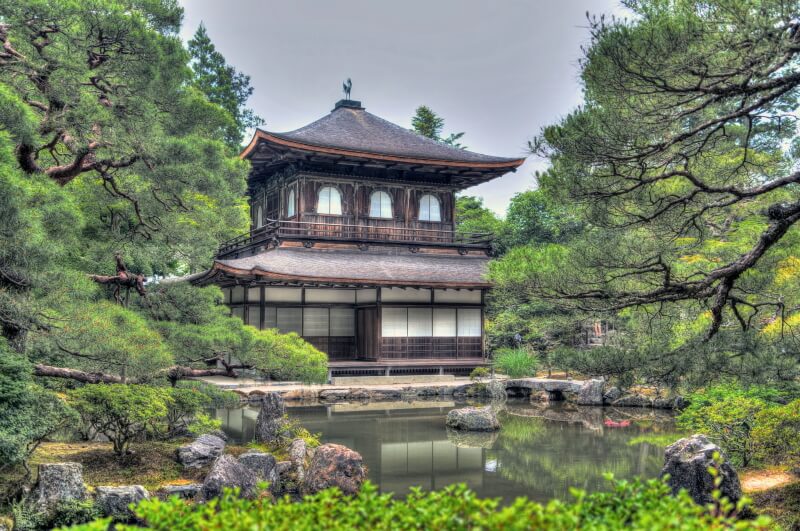
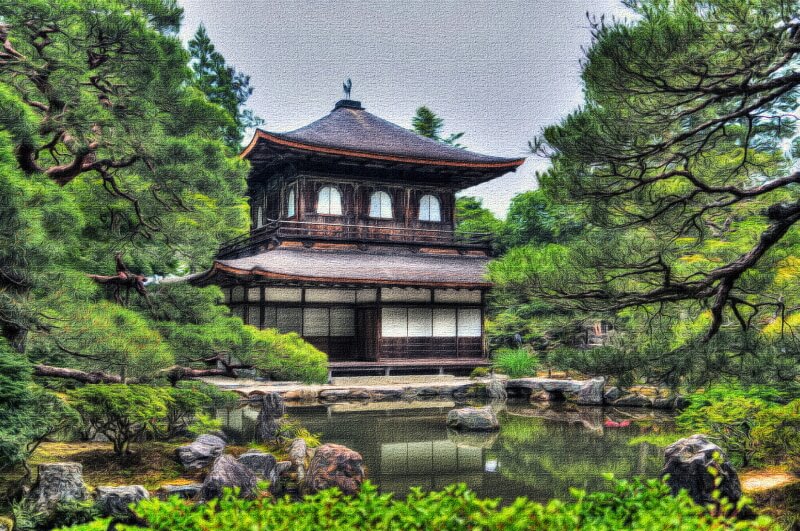
Image by Michelle Raponi from Pixabay
Example 4

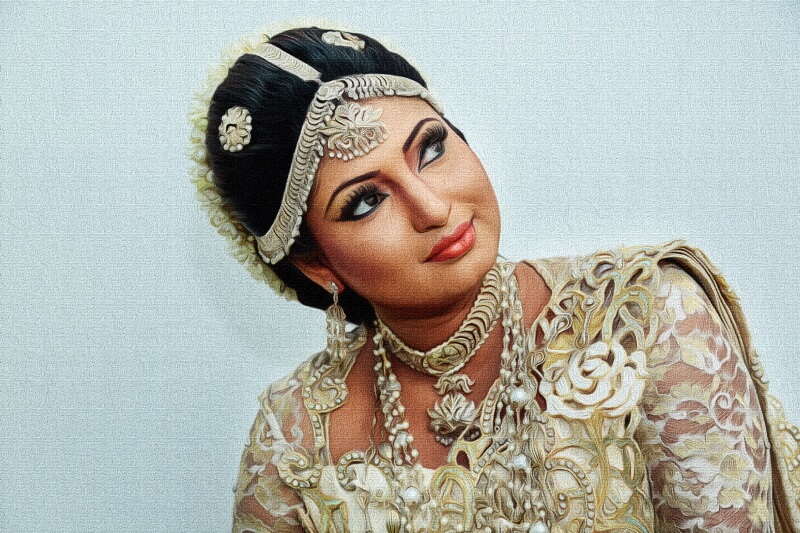
Photo by Shiru gamage from Pexels
Example 5
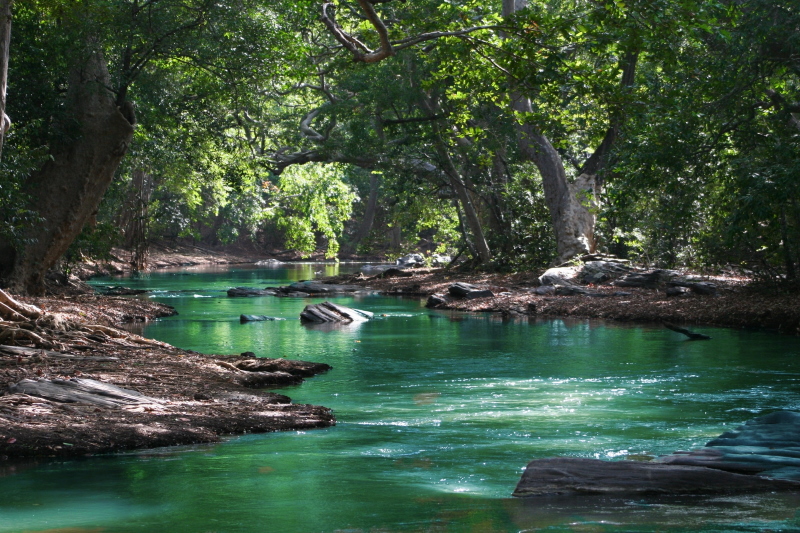
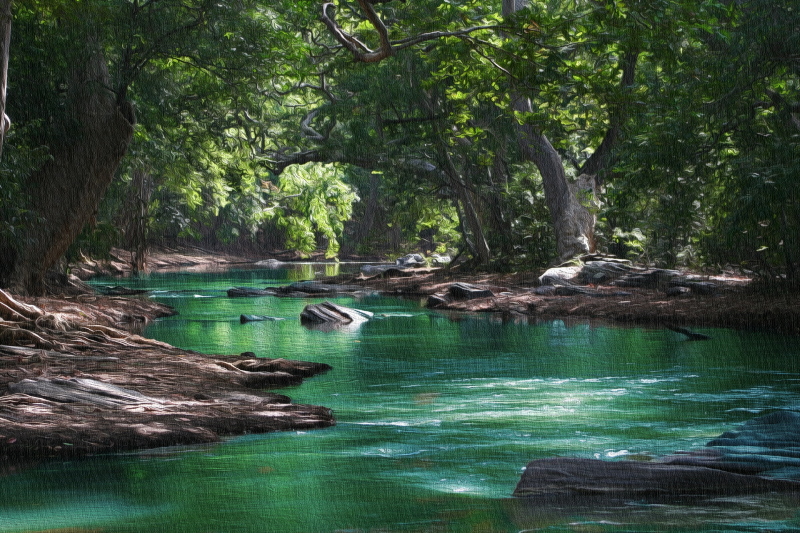
Photo by Ian Turnell from Pexels
Related posts
Hand Painted Portraits Photos – Celebrate The Moments
Thanks for reading, I hope you enjoyed the article, in case you have any questions just drop them below & I will be happy to answer you.
If you enjoy the site, don’t forget to subscribe, we will only inform you when a new article is posted.


It is wonderful how without knowing to grab a brush properly, we can still create a wonderful oil paintings. I have tried different filter combinations but my results are way more different than yours. Mine look synthetic and not as paintings but computer generated. Your set of filters make it look genuine.
It is very nice to have you back on the site, you are very welcome. Thanks for your feedback.
I have very little experiences with photoshop I never can learn it, but with you’re article I could download this program and produce a photo into an oil painting, is there a way to transfer this onto canvas.
It would be cool if you could put this on a wall or canvas with an overhead projector and pretty much trace the pic onto said wall or canvas
Thank You,
Bill Wright
Thanks for the comment, It is really funny!