

It’s a common trend in retouching portrait photos to change and adjust facial features like eye, nose, and mouth. However, before we learn how to use the available tools in Photoshop to do these changes, I would like to emphasize that changing facial features is a very sensitive issue, and should always be discussed with your clients and your subjects before making them.
In addition, when you do make changes to facial features and expressions, especially with automated tools like the ones we’re trying here, make sure to keep them subtle! Drastic changes often end up looking very unnatural and can ruin an otherwise beautiful portrait.
Your target should be to make small improvements to an image as a whole, not completely changing a subject’s appearance.
In the following sections, I will explain How to Adjust Facial Features in Photoshop CC, The below video illustrate in detail this method.
How to Adjust Facial Features in Photoshop
There are many ways to change facial features and expressions in Photoshop; in this tutorial, I will use four of them. Let us start!
-
Adjust Facial Features (Liquify Filter)
The Liquify filter lets you push, pull, rotate, reflect, pucker, and bloat any area of an image. The distortions you create can be subtle or drastic, which makes the Liquify command a powerful tool for retouching images as well as creating artistic effects. The Liquify filter can be applied to 8‑bits per-channel or 16‑bits per-channel images. The Liquify filter supports Smart Objects, including Smart Object video layers, and is applied as a smart filter.
It also features advanced face-aware functionality that automatically identifies eyes, noses, mouths, and other facial features, making it easy for you to adjust them. Face-Aware Liquify is great for retouching portrait photos, creating caricatures, and doing much more.
Example:
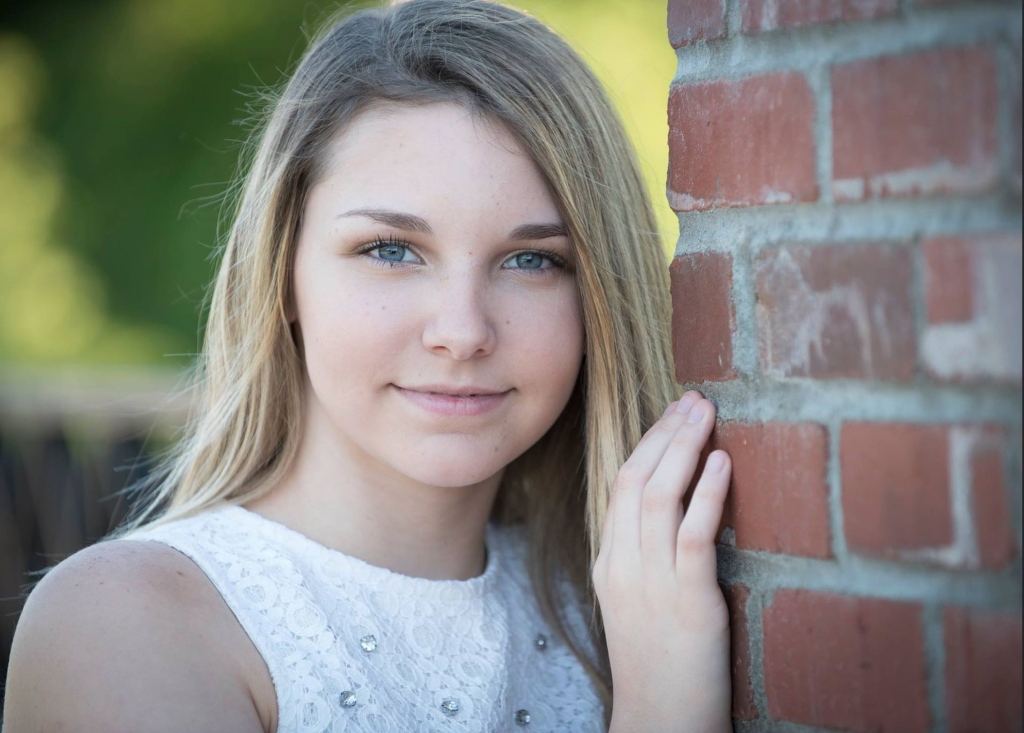
I will use the following photo

Photo by emre keshavarz from Pexels
Step 1
Open the photo file in Photoshop
Duplicate the layer (Ctrl + J)
Convert the layer to a smart object (right-click on the layer and choose: Convert to Smart Object). Smart objects enable you to perform nondestructive editing to the layer, and you can edit filters applied to Smart Objects at any time.
Step 2
Click Filter > Liquify Filter, make sure you choose the face tool from the left side menu
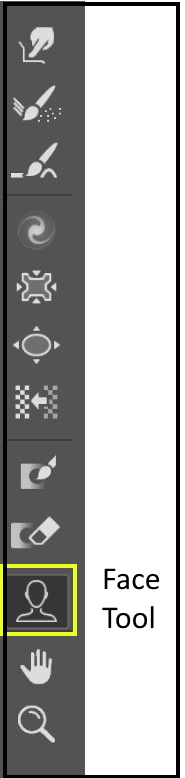
The following menu shows up
Step 3
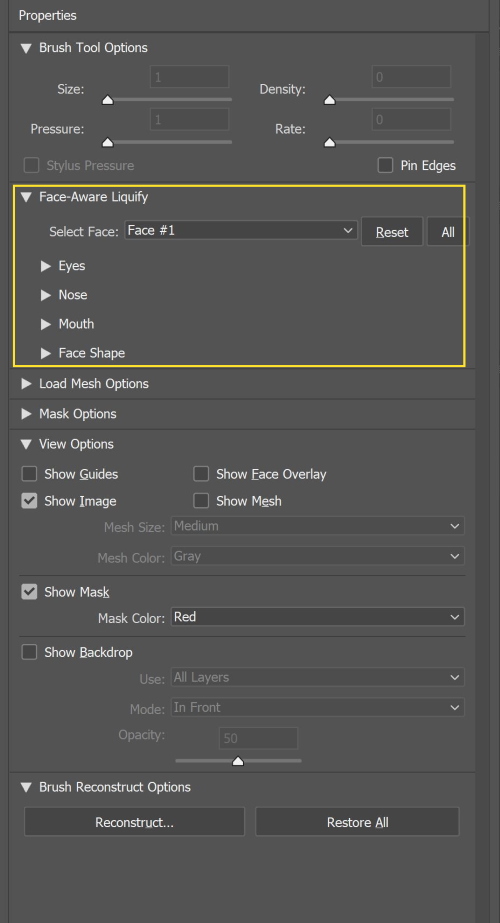
The drop-down menu in the right-side toolbar is labeled Face-Aware Liquify. This menu contains the tools we’ll need to make subtle adjustments to facial features.
This menu allows you to change and adjust the following facial features:
- Eyes:
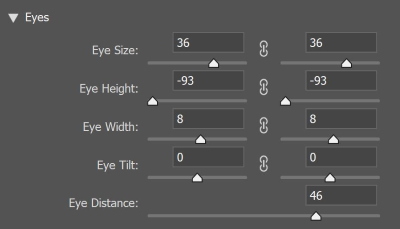
You may enlarge or reduce the eyes sizes automatically by just moving a slider. You may also adjust the eye height and width as shown below

- Nose
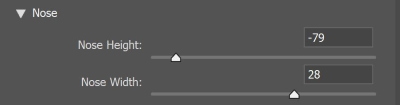
You can adjust the nose height and width.

- Mouth
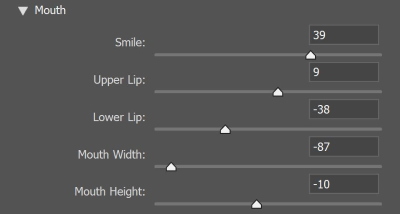
You may change the upper and lower lips heights; also, you can change the overall length and height of the mouth.

- Face
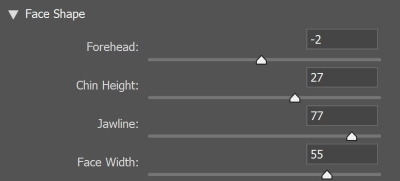
You can easily change the forehead, and chin heights. In addition, you can change the face and the jawline width.

Useful Editing tip: how to duplicate the Smart Filter
If you want to copy a Smart Filter, you will need to use your mouse and keyboard together.
Hold down your Option key on a Mac, or Alt key on a PC. Whilst holding the key down, click and drag the Smart Filter you want to copy. When you release the mouse, it creates a copy of the Smart Filter.
Be aware that you can only drag and copy the Smart Filter onto another Smart Object layer. You can’t copy it to a regular layer.

-
Adjust Facial Features (Puppet Wrap)
Puppet Warp is a handy command that allows you to easily bend and shape parts of your image as if it were a puppet. You can use this distortion tool on almost any photo.
Puppet Warp provides a visual mesh that lets you drastically distort specific image areas while leaving other areas intact. Applications range from subtle image retouching (such as shaping face) to total transformations (such as repositioning arms or legs).
You can access the Puppet filter by clicking: Edit > Puppet Wrap
![]()
Adjust the setting, and then you start dropping pins around the areas you want to change, then slightly move each pin to get the movement you want.
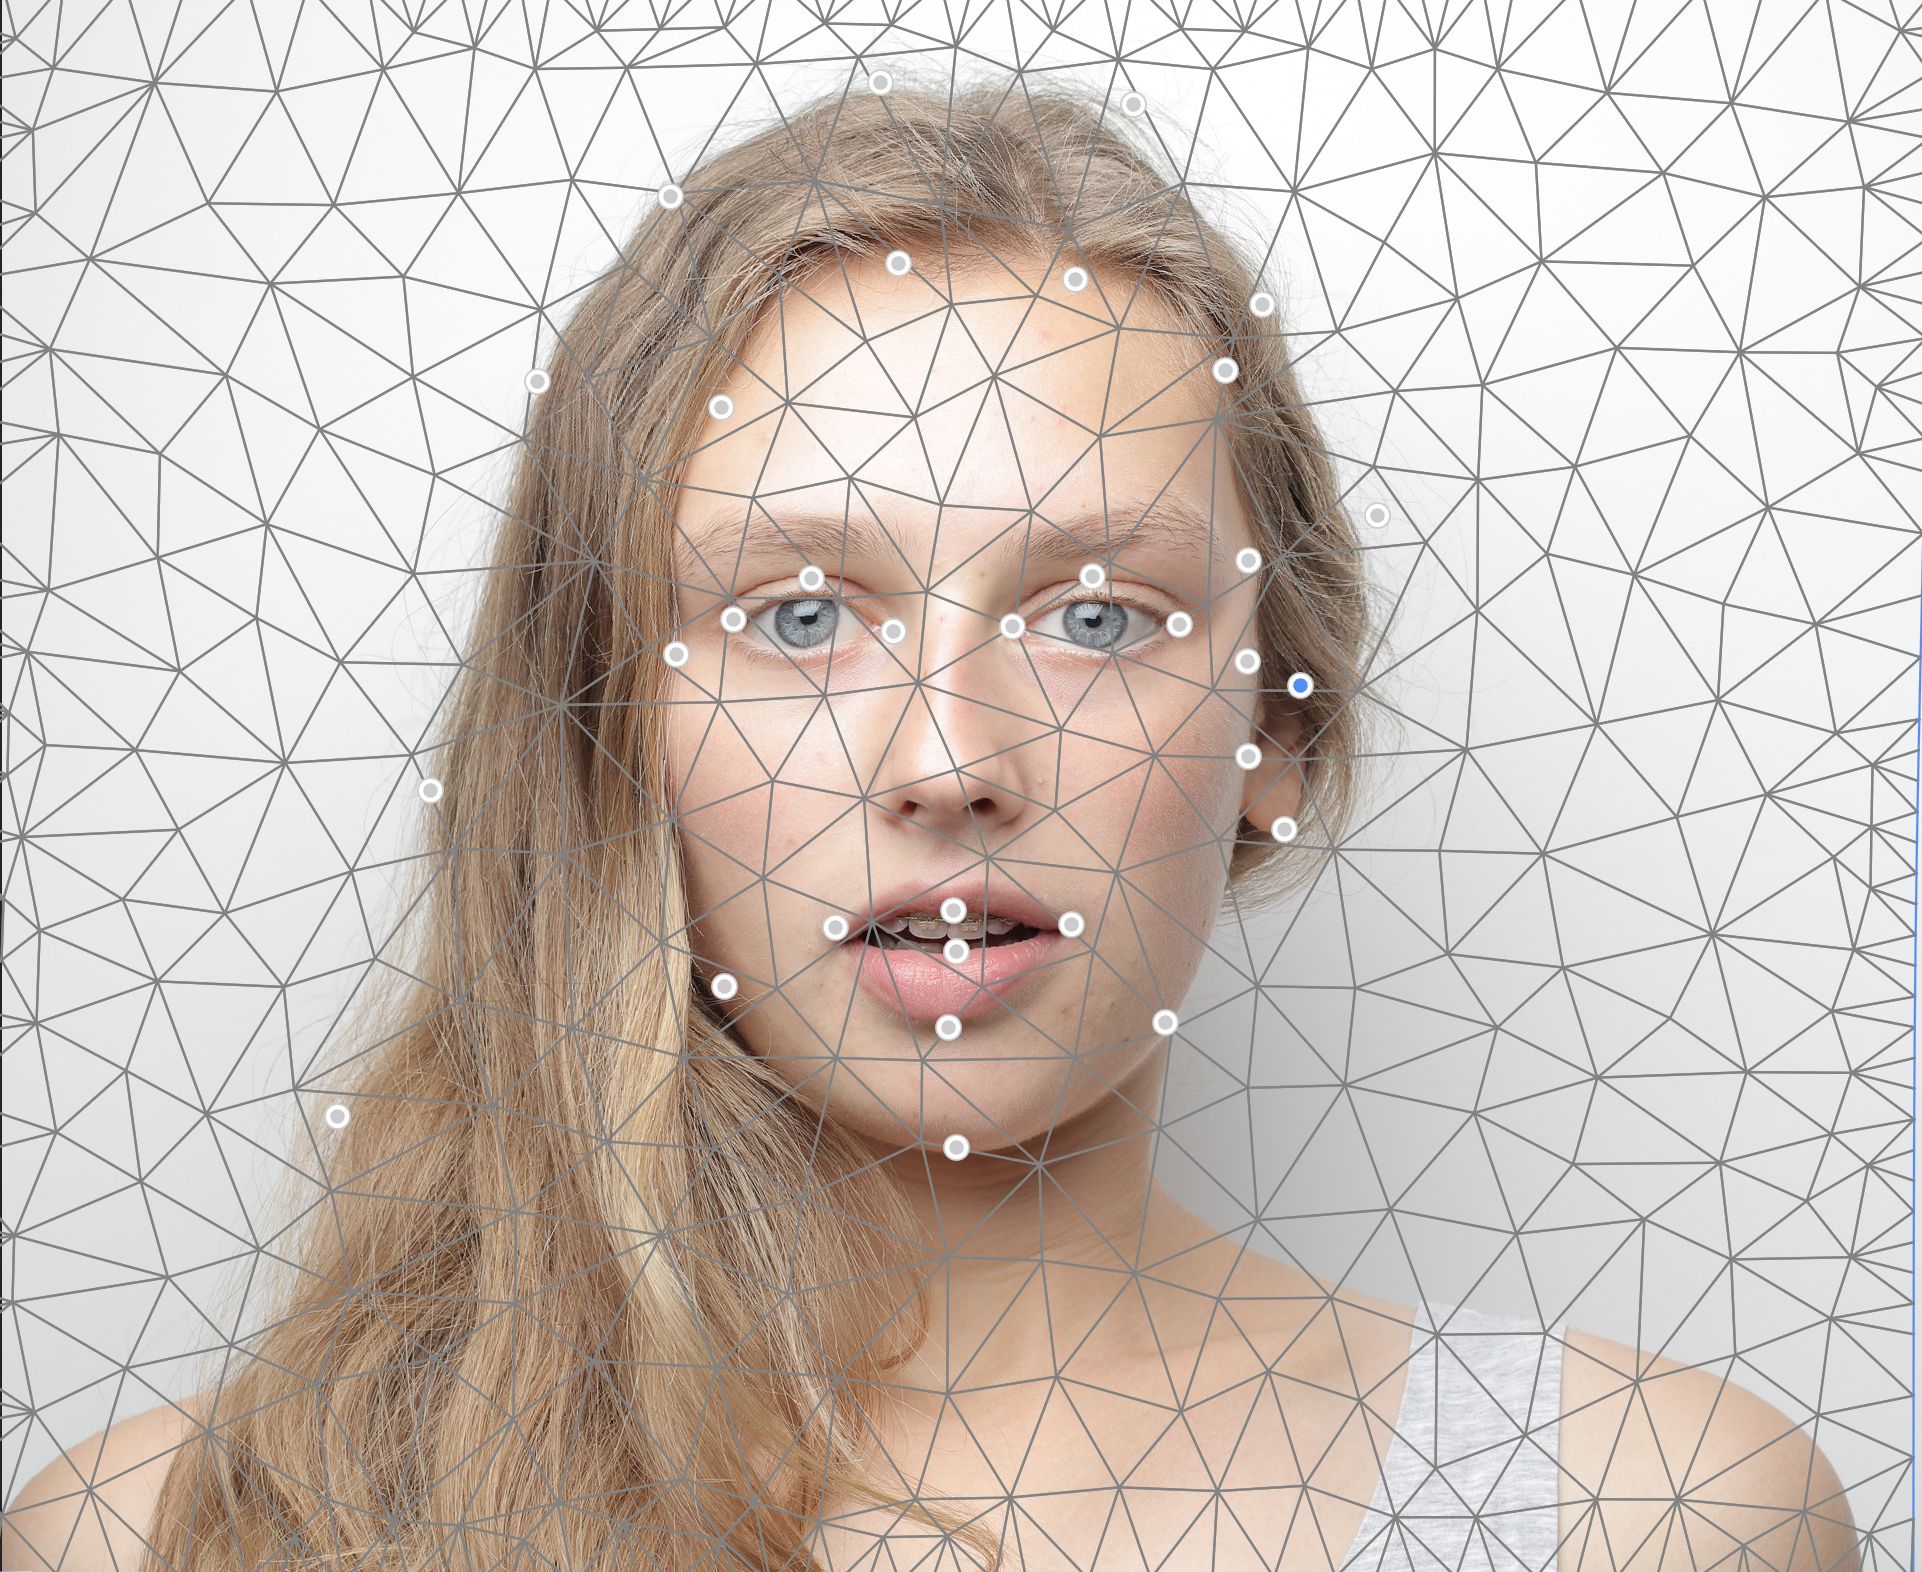
The result is shown below
Photo by Andrea Piacquadio from Pexels
-
Add Facial Expression (Neural Filter)
Neural Filter is a new workspace in Photoshop with a library of filters that dramatically reduces difficult workflows to just a few clicks using machine learning-powered by Adobe Sensei.
Neural Filter is a tool that empowers you to try non-destructive, generative filters and explore creative ideas in seconds. Neural Filters helps you improve your images by generating new contextual pixels that are not actually present in your original image.
When you use Liquify filter to add a smile to your portrait photo, you move existing pixels from the image to adjust the smile. However, Neural Filters generates new pixels to adjust the smile.
You can access the Neural Filters panel by clicking Filter > Neural Filters. Then click on the smart portrait filter.
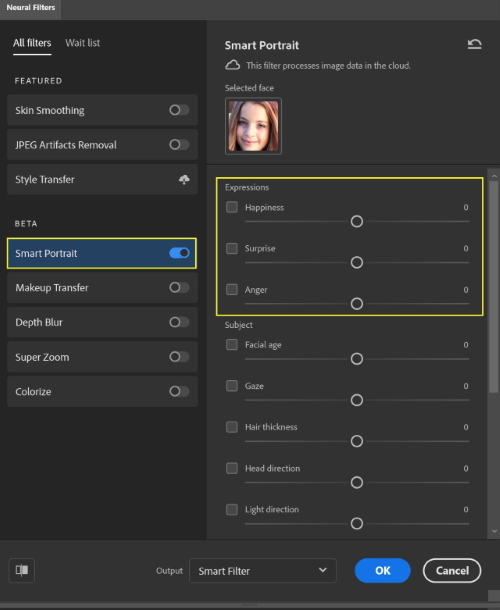
The following are the facial expression you can add to your portrait photo, only by moving a slider. I will use Image by Aleš Kartal from Pixabay
- Happiness

- Surprise
- Anger
Your resulting edits are saved as output in one of the following ways:
- Current Layer: Destructive operation that generates pixels to modify the current layer.
- Duplicate Layer: Duplicates the current layer and applies the new filters to the new layer.
- Duplicate Layer masked: Creates a new layer and applies the filters as a mask in the new layer.
- New Layer: Generates a new layer with only the newly generated pixels.
- Smart Filter: New pixels are generated and applied as a smart filter.
-
Change facial Makeup (Neural filter)
Photoshop releases a new beta filter that allows you to transfer the makeup of a certain portrait photo into another photo.
The Beta filters are available for testing. The machine learning models or workflows are still being improved. Feel free to use and test these filters knowing that the output may be unexpected.
You can access the Neural Filters panel by clicking Filter > Neural Filters. Then click on the Makeup Transfer filter.
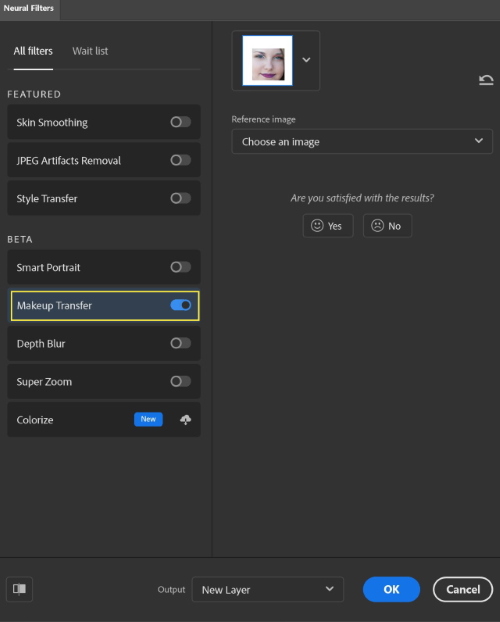
You only need to load the photo that you want to copy the makeup from it
The following are examples of different makeup transfers.


Photo Credits
The above-used photos are credited to:
Photo by Omar Lopez on Unsplash
Photo by Edward Howell on Unsplash
Photo by Sarah khan on Unsplash
Image by Amy Malcolm from Pixabay
Image by inna mikitas from Pixabay
Related post
Photoshop New Neural AI Filters
Thanks for reading, I hope you enjoyed the article, in case you have any questions just drop them below & I will be happy to answer you.
If you enjoy the site, don’t forget to subscribe, we will only inform you when a new article is posted.


I am amazed at the quality of the tools that are available for photoshop now. You can alter almost any photo to a desired result.
I understand that learning the new tools is very easy. It just takes time with trial and error. I find that this may be useful for me in the future and look for future updates.
Jerry
Thanks
Great article on how to adjust facial features. I’m aware you notified us about affilliate promotions within your article so appreciate your heads up.
when using photoshop, I tend to get lost trying to learn how to edit my facial features as I really need.
your article gave me a good explanation of how it works . Will look deeper into the links u shared. Thanks
Glad you like the article, thanks