


In this article, we’ll be unraveling the mystique surrounding a term you’ve probably heard before: Vignetting. If you’re just starting your photography adventure or looking to enhance your existing skills, understanding vignetting is a must.
Definition of Vignetting
In photography, vignetting is the gradual darkening or brightening of the edges or corners of an image. It is usually caused by the way light travels through the lens of the camera. This process can manifest as subtlety, artistic effects or unintentional errors in your photos.
Think of it as nature’s way of framing your subject. It draws your viewer’s attention to the center of the image, making it a valuable tool in a photographer’s arsenal. Understanding how vignetting works can help you control it, use it creatively, and avoid unwanted surprises in your photos.
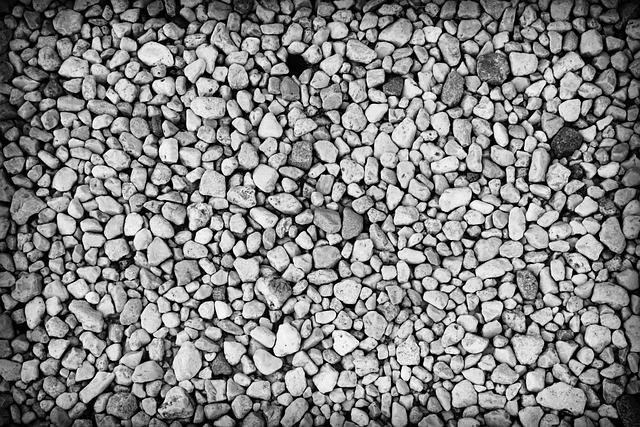
Image by Samuele Schirò from Pixabay
Importance of Understanding Vignetting
So, why is it essential to grasp the concept of vignetting? Well, for several reasons:
- Creative Control: Vignetting isn’t always a flaw to be corrected; it can be a deliberate creative choice. Knowing how to control it lets you add a touch of drama or emphasize the subject in your photographs.
- Quality Improvement: If you’re not a fan of unintended vignette effects, understanding the causes and solutions can significantly enhance the overall quality of your images.
- Lens Selection: When choosing lenses, especially for specific photography styles like portraits or landscapes, understanding how different lenses may produce varying vignette effects can be crucial.
- Post-Processing: If you’re into post-processing your photos, knowing how to correct or enhance vignetting during editing can make a world of difference.
- Artistic Expression: Vignetting can be an expressive tool, giving your photos a unique and artistic flair. By understanding it, you can use it intentionally to convey your message or mood.
In this blog post, we’ll explore what vignetting is, how it’s caused, and how to control it. We’ll also discuss some creative ways to use vignetting in your photography.
Photo by Jakob Braun on Unsplash
What Causes Vignetting?
Let’s unravel the mystery of what causes vignetting in photography. Vignetting, the gradual darkening or lightening of an image toward the edges, can be both a creative tool and an optical challenge. Understanding its origins will help you control and master this intriguing effect.
A- Natural Causes of Vignetting
-
Lens Design and Limitations
Vignetting often starts with the very design of your camera lens. While modern lenses are crafted to minimize vignette effects, they may still exhibit some under specific conditions. For instance, wide-angle lenses tend to be more prone to vignetting than standard or telephoto lenses. Understanding your lens’s inherent characteristics can help you anticipate and manage vignetting.
-
Aperture Settings
The size of your lens aperture, expressed as an f-stop, plays a significant role in vignetting. When you shoot with a wide-open aperture (e.g., f/1.4 or f/2.8), the outer portions of the lens may not receive as much light, causing a natural vignette effect. Stopping down the aperture (e.g., f/8 or higher) can mitigate this effect, but it’s essential to balance your desired depth of field with the risk of vignetting.
B- Artificial Causes of Vignetting
-
Use of Filters
Photographic filters, though immensely valuable for enhancing your shots, can sometimes introduce vignetting. When you stack multiple filters or use thick, wide-angle lenses, they can obstruct the light entering your camera, resulting in vignette-like shadows. To avoid this, use high-quality, slim-profile filters designed for your specific lens.
-
Improper Lens Hoods
Lens hoods are essential accessories that help block unwanted stray light from entering your lens, reducing the risk of lens flare and vignetting. However, using an improperly sized or incorrectly mounted lens hood can lead to vignette issues. Always ensure that your lens hood matches your lens and is correctly attached to provide optimal protection without interfering with your shot.
Understanding the causes of vignetting, whether they are natural or artificial, is the first step in mastering this effect. In the next section, we’ll delve deeper into the different types of vignetting you may encounter in your photography adventures, helping you recognize and harness the power of vignetting to enhance your images.
Effects of Vignetting
Let’s explore the various effects of vignetting in photography. Understanding how vignetting can impact your images will give you the creative edge to use it to your advantage.
1- Aesthetic Benefits of Vignetting
Vignetting isn’t always a flaw to be fixed; in fact, it can be a powerful aesthetic tool that enhances your photos in numerous ways:
-
Emphasis on the Subject
One of the most significant aesthetic benefits of vignetting is its ability to draw the viewer’s attention to the central subject. By darkening the edges or corners of an image, vignetting naturally guides the eye towards the main focal point. This can create a sense of intimacy and engagement with the subject.
-
Enhanced Mood and Atmosphere
Vignetting can be used to evoke specific moods or atmospheres in your photos. A subtle vignette can add a touch of nostalgia or romanticism, while a more pronounced one can create a sense of drama and intrigue. It allows you to control the emotional impact of your photographs.
-
Artistic Framing
Think of vignetting as a subtle, natural frame for your images. It can provide a sense of depth and dimension, making your photos feel more three-dimensional. This framing effect can make your subject pop and give your photos a unique, artistic touch.
2- Creative Uses in Photography
Vignetting is not just about correcting or minimizing; it can also be harnessed creatively to elevate your photography:
-
Portrait Photography
In portrait photography, vignetting can be your ally. By gently darkening the edges of the frame, you can highlight the subject’s face, making it the focal point of the image. This technique can create stunning, attention-grabbing portraits.
-
Vintage and Retro Vibes
Vignetting can lend your photos a vintage or retro look reminiscent of old film cameras. If you’re aiming for a nostalgic or timeless aesthetic, a subtle vignette can be the perfect tool to achieve it.
-
Storytelling and Mood Enhancement
Whether you’re telling a story or aiming to enhance the mood of your photograph, vignetting can be a storytelling device. It can help you guide your viewer’s emotions and convey a specific narrative.
Potential Drawbacks of Vignetting
While vignetting can be a valuable asset in photography, it’s essential to be aware of its potential drawbacks:
-
Unintended Vignetting
Sometimes, vignetting can occur unintentionally, leading to dark corners or edges that detract from your image’s overall quality. This can happen due to lens limitations or improper use of filters or lens hoods.
-
Overuse and Distraction
Overusing vignetting in your photos can lead to distraction and a lack of visual balance. It’s crucial to exercise restraint and use vignetting to enhance your image, not overpower it.
-
Incompatibility with Certain Styles
Not all photography styles benefit from vignetting. For instance, landscape photography often aims for even illumination across the frame, so vignetting might not align with that goal.
In conclusion, understanding the effects of vignetting in photography opens up a world of creative possibilities. By harnessing its aesthetic benefits and using it thoughtfully, you can take your photography to new heights. However, it’s essential to be mindful of its potential drawbacks and use it judiciously to serve your artistic vision.
How to Recognize Vignetting
Now that you’ve learned about the effects of vignetting in photography, it’s time to explore how to recognize it in your own photos. Understanding how to spot vignetting is a crucial skill that enables you to harness its creative potential or correct it when needed.
1- Visual Examples
One of the most straightforward ways to recognize vignetting is through visual observation. Here’s how:
-
Inspect the Edges and Corners
Start by examining the outer edges and corners of your photo. Look for any darkening or lightening compared to the center of the frame. Vignetting typically manifests as a gradual change in brightness from the center outward.
-
Pay Attention to Subject Illumination
Check how well your main subject is illuminated. In many cases, vignetting can naturally draw attention to your subject by creating a spotlight effect. If your subject appears brighter than the surrounding areas, vignetting might be at play.
-
Use a Plain Background
To make vignetting more apparent, photograph a subject against a plain, evenly lit background. This helps the vignette effect stand out, making it easier to spot.
2- Histogram Analysis
Another method to identify vignetting is through histogram analysis. Here’s how you can do it:
-
Capture a Neutral Image
Take a photo of a neutral subject with uniform lighting, ideally a plain white or gray surface. Ensure your exposure settings are consistent and well-balanced.
-
Examine the Histogram
After capturing the image, review the histogram in your camera’s display or post-processing software. A histogram is a graphical representation of the image’s tonal distribution, showing how pixels are distributed across different brightness levels.
-
Look for Irregularities
In the histogram, vignetting often appears as a gentle curve or dip at the edges. If you see a significant drop-off in brightness at the corners or edges of the histogram, it indicates potential vignetting.
3- Post-Processing Tools
If you’ve captured an image and suspect vignetting, or if you want to enhance or correct it, post-processing tools come to the rescue:
In Photoshop, you can use the “Lens Correction” filter to address vignetting issues. This filter provides options to correct both natural and artificial vignettes. It’s especially useful when dealing with more complex cases. Another method is using the “Camera Raw Filter”, in the Optic section, You can adjust the magnitude and the location of the Vignetting from the menu below
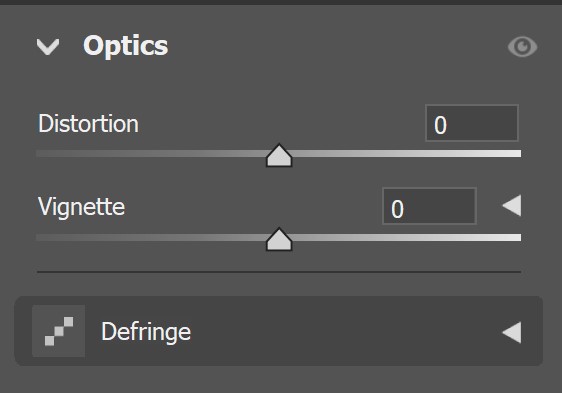
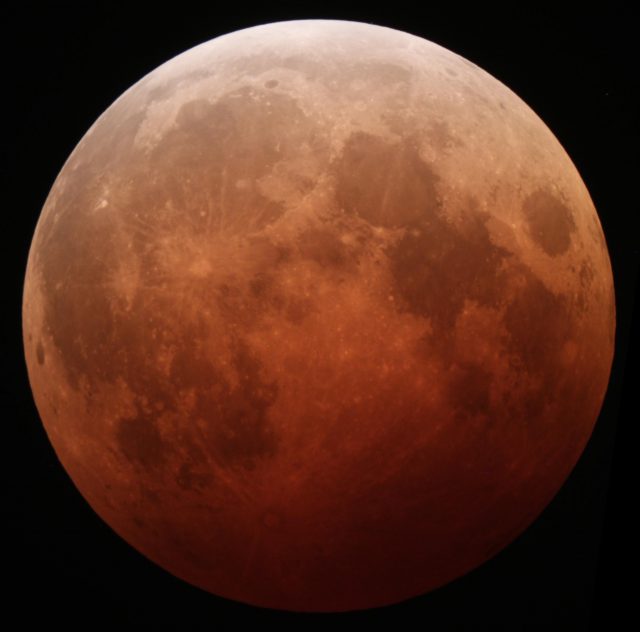
Example

Image by Alexandre Gonçalves da Rocha from Pixabay
After adding a dark vignetting

After adding white vignetting

Vignetting vs. Lens Distortion
Let’s clear up a common area of confusion in photography: the differences and similarities between vignetting and lens distortion. While these two terms might seem related, they have distinct characteristics and applications. Understanding these distinctions can help you better navigate the world of photography.
The table below shows a comparison between vignetting and lens distortion
| Aspect | Vignetting | Lens Distortion |
|---|---|---|
| Nature of the Effect | Gradual darkening or lightening towards edges | Warping or distortion of lines and shapes |
| Causes and Correction | - Lens characteristics - Aperture settings - Use of filters or lens hoods | - Lens optical design - Challenging to fully correct in post-processing |
| Visual Impact | Affects image brightness and illumination | Affects image geometry, warping lines and shapes |
| Corner Effects | Can result in darkened corners, but gradually | Can also cause darkened or altered corners, but due to warping |
| Use of Post-Processing | Correctable and manipulable in post-processing | Correctable and manipulable in post-processing |
| Artistic Expression | Can be used creatively for mood or aesthetics | Occasionally embraced for artistic purposes |
Techniques to Control or Enhance Vignetting
In the world of photography, mastering the art of vignetting can significantly elevate your creative capabilities. Whether you want to control or enhance vignetting, there are various techniques at your disposal. Let’s explore these methods and learn how to make vignetting work for you.
1- Controlling Vignetting
-
Adjusting Aperture
One of the primary factors influencing vignetting is your lens’s aperture settings. Widening your aperture, such as using f/1.4 or f/2.8, can increase the likelihood of vignetting. To control it, consider stopping down the aperture (e.g., f/8 or higher). This reduces the amount of light reaching the corners, minimizing the vignette effect. Keep in mind that this may also impact your depth of field, so find a balance that suits your creative vision.
-
Using Lens Hoods
Lens hoods are valuable accessories for reducing vignetting. They block unwanted stray light from entering your lens, ensuring that the image frame receives even illumination. Using the appropriate lens hood for your lens can help prevent vignetting, especially in bright or backlit conditions. Make sure to attach it correctly to maximize its effectiveness.
-
Post-Processing Corrections
In post-processing software like Adobe Lightroom or Photoshop, you have powerful tools to correct vignetting. These tools allow you to balance the brightness across the frame. By using the “Vignette” adjustment, you can add or reduce vignetting as needed. This flexibility lets you fine-tune your images to achieve the desired look while maintaining control over the final result.
2- Enhancing Vignetting
Vignetting can be a valuable creative tool to enhance your photos. Here are some ways to use it deliberately:
- Highlighting the Subject: To draw attention to your subject, intentionally add a subtle vignette effect. This brightens the center of the frame while gently darkening the edges, making your subject stand out.
- Creating a Mood: Vignetting can help establish the mood of your photograph. For instance, a slight vignette can evoke a sense of nostalgia or intimacy, while a more pronounced one can add drama or mystery.
- Adding Depth: By darkening the edges, you can create a sense of depth and dimension in your photos. This can make your subject appear more three-dimensional and captivating.
3- Adding Vignette Effect
In some cases, you might want to introduce a vignette effect to your photos for creative purposes. There are several ways to achieve this:
A- Using special lenses:
Capture your image with a lens known for its natural vignette characteristics. Wide-angle lenses, for example, often produce a gentle vignette effect. This can save you time in post-processing. Also Zoom lenses are more prone to vignetting than prime lenses, especially at the wide end of the zoom range.
There are special lenses that are designed to intentionally produce vignetting. These lenses are often used by photographers to create a specific mood or atmosphere in their images. Here are some examples of special lenses for vignetting:
- Petzval lenses: Petzval lenses are known for their distinctive swirly bokeh and strong vignetting. They were originally designed in the 1840s, but have recently become popular again among portrait and landscape photographers.
- Helios 44-2 58mm f/2: This Soviet-era lens is another classic option for vignetting. It is known for its soft, dreamy look and strong vignetting.
- Samyang 135mm f/2 ED UMC: This lens is known for its sharp images and smooth bokeh. It also produces a subtle vignette at wide apertures, which can be used to create a more cinematic look in your images.
B- Using Vignette Filters:
Vignette filters are screw-on filters that can be attached to any lens to create a darkening effect at the edges of the image. They are available in a variety of strengths, so you can choose the amount of vignetting that you want to achieve.
- B+W 7708 77mm XS-Pro Vignetting Filter: This filter is designed to create a subtle vignette in landscape photography. It is available in a variety of strengths, from 1 to 5.
- Hoya VND2-77 77mm Variable Neutral Density Filter: This filter can be used to create a variety of effects, including vignetting. It has a variable density, so you can adjust the amount of vignetting to your liking.
- Cokin P164 Graduated Neutral Density Filter: This filter is a good choice for creating a subtle vignette in landscape photography. It has a graduated density, which means that it is darker on one half and lighter on the other. This allows you to darken the corners of the image without affecting the exposure of the center.
C- Manual Post-Processing:
For complete control, you can manually add a vignette effect during post-processing. This involves using editing software to darken the edges or corners to your desired level, z mentioned earlier in the post.
Remember, the key to effective vignette enhancement is moderation and intent. While it can enhance your photos, it’s important not to overdo it, as excessive vignetting can distract from your subject or message.
Conclusion
In conclusion, vignetting is a fascinating aspect of photography that can either enhance your images or require correction, depending on your creative goals. Throughout this journey, we’ve learned about its definition, causes, and ways to control or enhance it.
Understanding vignetting empowers you to make intentional choices in your photography. Whether you want to emphasize a subject, create a mood, or correct unwanted darkening at the edges, you now have the knowledge and tools at your disposal.
Remember, vignetting isn’t just a technical detail; it’s a creative element that can add depth and emotion to your photos. It’s a subtle but powerful tool to help tell your visual stories.
As you go out to capture moments through your lens, keep an eye on lighting conditions and consider how vignetting can play a role in your compositions. Experiment, explore, and embrace the artistic potential of vignetting. It’s one more way to bring your photographic vision to life.
Thanks for reading, I hope you enjoyed the article, if you have any questions just drop them below & I will be happy to answer you.
The featured photo by Depositphotos
If you enjoy the site, don’t forget to subscribe, we will only inform you when a new article is posted.


Hey, Vignetting is a fascinating element of composition that can either add a creative touch or subtly enhance the focus of an image.
I particularly appreciate how you’ve broken down the different types and causes of vignetting.
Have you ever intentionally used vignetting to achieve a specific artistic effect in your own photography?
It’s a technique that can really bring out the character in photos!
I’m really happy that you found the breakdown of vignetting elements intriguing! I purposely incorporated vignetting into my photography to create certain artistic effects. It’s a fantastic tool for directing the viewer’s focus towards the center of the image, giving it a sense of depth, or even adding a nostalgic, vintage vibe. Vignetting truly has the ability to enhance the overall character and mood of photos. If you have any specific questions about using vignetting or if you’d like more tips, feel free to ask! I’m here to assist you in exploring this creative technique.
Hey Amin!
Thx for the article, it was rly informative. i’m a newbie in photography, and i’ve heard about vignetting before, but i didn’t fully grasp what it meant until now. it’s cool to know that it can be both a creative choice and something to be corrected. i’ll keep this in mind when i’m out taking photos. rly appreciated the explanation about the causes and the ways to control or enhance vignetting. gonna try some of those techniques for sure!
cheers!
You’re very welcome! I’m delighted to hear that the article clarified the concept of vignetting for you. It’s indeed a versatile tool in photography. Have fun experimenting with the techniques, and best of luck on your photography adventures!