

In this tutorial, I show you how to make eyes pop in Photoshop using simple steps. I will be working with separate layers, so I would not make any permanent changes to the image, and you can skip any step if not needed. I’ll be using Photoshop CC but the steps are fully compatible with Photoshop CS6. To follow along, you can use any image where you want to enhance the look of a person’s eyes.
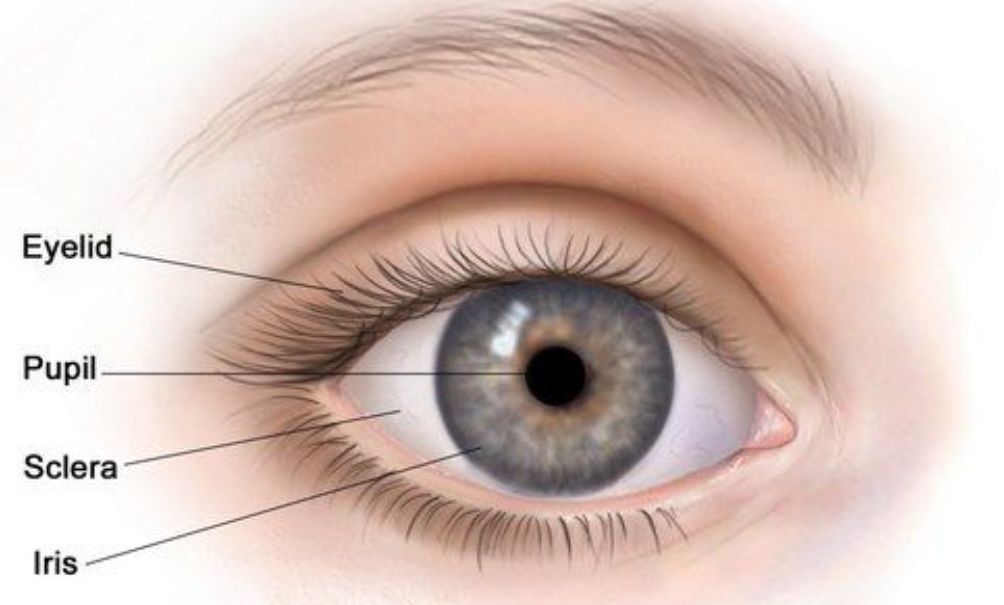
Parts of the human eye
The following is a simplified diagram that shows parts names of the human eye
Useful shortcuts
- Zoom in and out (Alt + mouse wheel)
- Pan (Space bar + mouse)
- Create a clipping mask (Ctrl + Alt + G)
- Inverse the color of a mask layer (Ctrl + I)
- Fill a layer with the background color (Shift + Backspace)
- Bring back last selection (Ctrl + Shift + D)
- Change the brush size ([ or ])

Steps to Make Eyes Pop in Photoshop
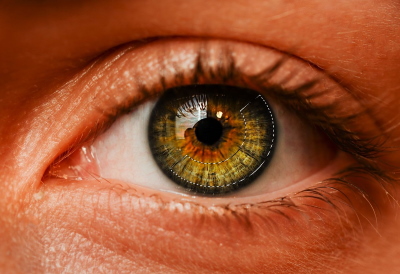
I will use the following photo in this example
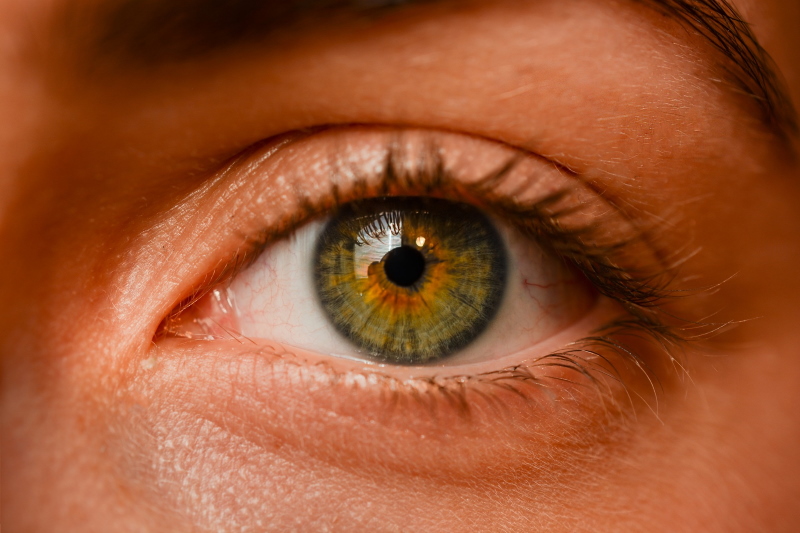
Image by Sofie Zbořilová from Pixabay
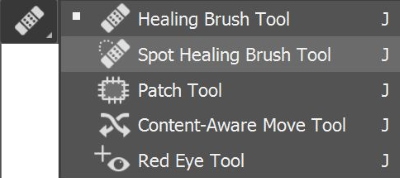
Step 1: Clean the sclera (white part of the eye)
When retouching a portrait photo, you may find some tiny veins in the white part of the eye, use the Spot Healing Tool to remove them as follow:
From the option bar, make sure that the Type is Content-aware, and sample all layer is checked. Because the vein’s color is darker than the color of the sclera, you should select the “Lighten” mode.
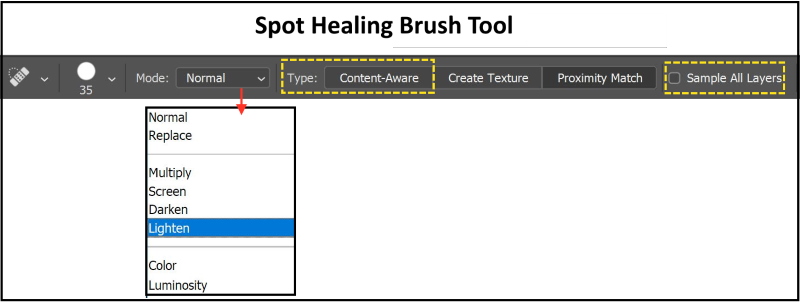
Choose a soft brush, and adjust its size, paint short stocks over the veins until it vanishes.

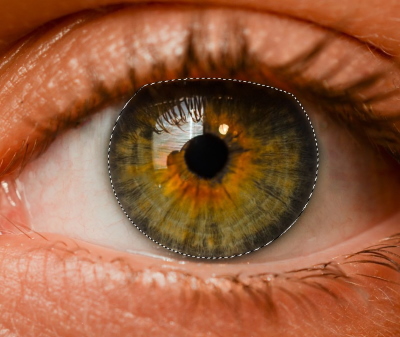
Step 2: Select and Mask the Iris
Make a duplicate layer of the original layer and call it iris. Use the Elliptical Marquee tool to select the iris. To move the selection: while holding the left mouse key press and hold the Space key. To trim the upper part make a larger selection and press (Alt + Shift) keys
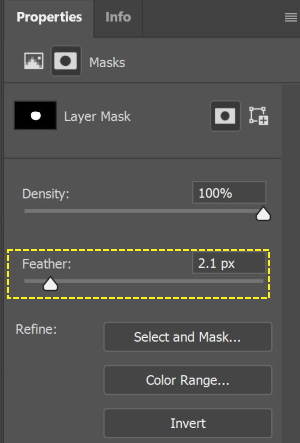
Turn the selection into a mask by clicking the new mask icon in the layer panel.
Soften the iris edges by moving the feather slider in the properties panel of the mask.
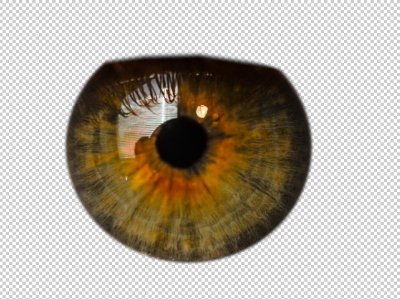
Now, the iris of the eye is separated from the photo as shown below
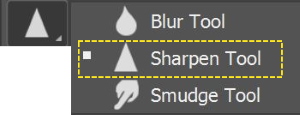
Step 3: Sharpen the Iris
Create a new layer, and name it “sharpness”
Use the Sharpen tool
Make sure you checked the Sample All layers and the Protec Details boxes from the properties panel.

Adjust the brush size using (“[“ and”]”), then paint on the iris.
To limit the sharpness only to the iris, convert the layer to a clipping mask (Ctrl + Alt + G)
You can adjust the strengths of the sharpness using the opacity slider of the layer.

Step 4: Darken the boundary of the iris and the pupil
Create a new layer, and name it “shadow”
Fill the layer with 50% gray. Use the shortcut (Shift + backspace)
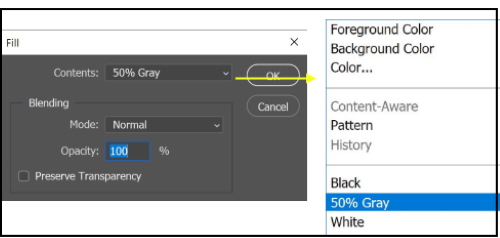
Change the blending mode to Overlay
Select the Burn Tool to darken the pupil and the iris boundaries
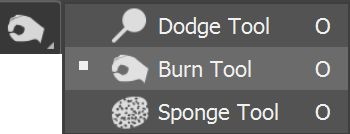
Make sure that the “Midtones” is selected from the Range dropdown menu of the properties panel.

Paint over the pupil and the boundaries of the iris to add shadows. You can also adjust the opacity of the layer to adjust the strengths.
To only limit the darkening effect of the iris, convert the layer to a clipping mask (Ctrl + Alt + G)

Step 5: Add texture to the iris
Create a new layer, and name it “texture”
Fill the layer with 50% gray. Use the shortcut (Shift + backspace)
Change the blending mode to Overlay
Select the Burn Tool. Make sure that the “Midtones” is selected from the Range drop-down menu of the properties panel, as the previous step
Make the brush size very small, and then start painting radial lines on the iris.
Select the Dodge Tool. Make sure that the “Midtones” is selected from the Range drop-down menu of the properties panel, as in the previous step.
Make the brush size very small, and then start painting radial lines on the iris.
Using both the Burn and Dodge tools creates and enhances the texture of the iris. You can use the blur tool to edit the shapes of the texture lines.

Step 6: Add reflection light (from the catch light)
When the eyes have a catch light, normally this light is reflected back on the other side of the iris. However, sometimes the camera cannot catch it. Therefore, we are going to create it.
Make a new layer and name it “Reflection”
Use the Elliptical Marquee tool and Polygon lasso tool to make a selection like the photo below
Fill it with white color
Change the blending mode of the layer to overlay, and convert the layer to a clipping mask (Ctrl + Alt + G)
You may need to apply some blur to enhance the reflected light. In addition, you can change the layer opacity.

Step 7: Add a final touch
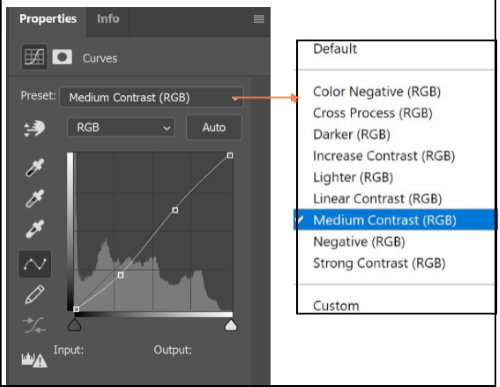
You can add contrast to the final image.
Add a new adjusting layer, choose curves, name the layer contrast, and convert the layer to a clipping mask (Ctrl + Alt + G).
From the properties menu, choose medium contrast
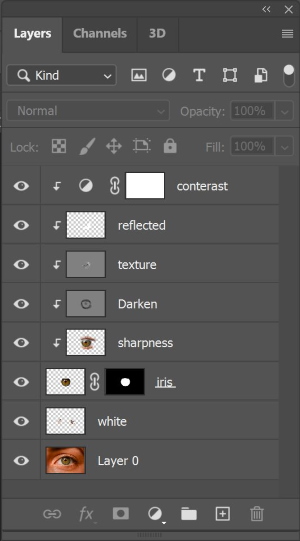
The full layers panel is shown below
The final before and after images are shown below

Other examples
Image by Jerzy Górecki from Pixabay
Image by Dimitar Veselinov from Pixabay
Related posts
How To Photograph Human Eye – Tips & Tricks
What Are The Selection Tools In Photoshop?
What Is A Mask In Photoshop? – A Complete Beginner’s Guide
Thanks for reading, I hope you enjoyed the article if you have any questions just post them below & I will be happy to answer you.
The featured image by Dimitar Veselinov from Pixabay
If you enjoy the site, don’t forget to subscribe, we will only inform you when a new article is posted.


Amin, the advice you have provided here is extremely good. Many congratulations on putting into practice what you say with some fantastic pictures, the movement with the eyes is outstanding and highly attractive. I have saved the url as I will be back again, when I am looking to improve my pictures. Do you have any similar advice using Canva?
Hi Trevor
Thank you for your comment, glad you found the article useful. As for Canva, unfortunately, I haven’t made an article about it
WOW! Thanks for this article! I’m not really a pro at editing but I love how simple and easy this is to follow, I definitely would want to give this a go in my spare time. Pretty useful tip!
It looks awesome too and realistic, I wasn’t sure how they did it, I used to think its natural but I won’t be fooled now!
Thanks for your nice feedback!