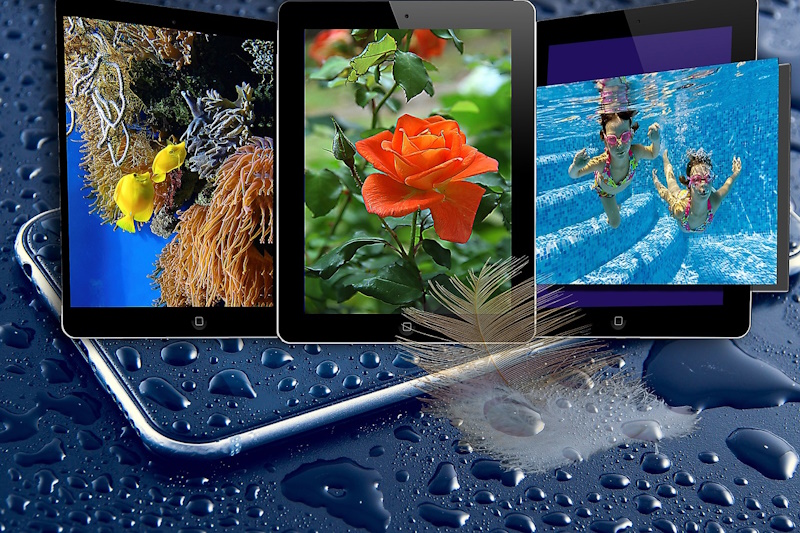


Mobile photography has revolutionized the way we capture and share moments. With the advancements in smartphone camera technology, anyone can become a skilled photographer. It allows us to document our lives, express our creativity, and connect with others through visual storytelling. Mobile photography is accessible, convenient, and offers endless possibilities for capturing stunning images.
Overview of the Tutorial
Welcome to this mobile photography tutorial! In this comprehensive guide, we will explore various tips, techniques, and tools to help you master the art of mobile photography.
Whether you’re a beginner or an experienced photographer, this tutorial will provide you with valuable insights and practical advice to enhance your smartphone photography skills. From understanding camera settings to composition, lighting, and editing, we will cover all the essential aspects of capturing impressive photos with your mobile device.
Now that we understand the importance of mobile photography and have an overview of what this tutorial will cover, let’s dive into the exciting world of capturing stunning smartphone shots.

Photo by Depositphotos
What are the differences between digital cameras and smartphone cameras?
Here are some of the main differences between digital cameras and smartphone cameras:
- Sensor size: Digital cameras typically have larger sensor sizes than smartphone cameras. This means that digital cameras can capture more light, which can lead to better image quality in low-light conditions.
- Pixel size: The pixel size of digital cameras is typically larger than that of smartphone cameras. This means that each pixel on a digital camera’s sensor can capture more light, which can also lead to better image quality in low-light conditions.
- Lens selection: Digital cameras typically offer a wider range of lens selection than smartphone cameras. This means that digital cameras can be used for a wider variety of photography tasks, such as portrait photography, landscape photography, and wildlife photography. Although a smartphone has a fixed lens, there are many options to add a clip lens to your phone
- Manual controls: Digital cameras typically offer more manual controls than smartphone cameras. This means that digital cameras can be used by more experienced photographers to achieve more creative results.
- Battery life: Digital cameras typically have longer battery life than smartphone cameras. This is because digital cameras do not have to power a large display or other features that smartphone cameras have.
However, smartphone cameras also have some advantages over digital cameras, such as:
- Convenience: Smartphone cameras are always with you, so you can take photos whenever you want.
- Ease of use: Smartphone cameras are typically easier to use than digital cameras. This is because smartphone cameras have a simpler user interface and they do not require any manual settings.
- Sharing: Smartphone cameras make it easy to share photos and videos online. This is because smartphone cameras can connect to Wi-Fi and cellular networks.
Understanding Your Smartphone Camera
Mobile photography allows us to capture precious moments with just a tap of our fingertips. Whether you’re a beginner or an experienced photographer, understanding your smartphone camera’s settings and features is essential to optimize image resolution and quality.
The number of cameras in a smartphone can vary depending on the model and manufacturer. Some smartphones have only one rear camera, while others have as many as four or five. There is also typically one front-facing camera for taking selfies.
The location of the cameras on a smartphone also varies. The rear cameras are typically located on the back of the phone, in a vertical or horizontal row. The front-facing camera is typically located in the top bezel of the phone, above the screen.
Here are some of the most common types of cameras found on smartphones:
-
Wide-angle camera:
This is the most common type of camera on smartphones. It has a wide field of view, which is ideal for taking landscape photos or group shots.
-
Telephoto camera:
The telephoto camera allows you to zoom in on distant objects. It is often used for taking portraits or capturing wildlife.
-
Ultra-wide-angle camera:
The Ultra-wide-angle camera has an even wider field of view than the wide-angle camera. It is ideal for taking photos of large groups of people or capturing panoramic views.
-
Macro camera:
This type of camera allows you to take close-up photos of small objects. It is often used for taking photos of flowers, insects, or other tiny objects.
In addition, some models have a depth sensor, this type of sensor is not used to take photos directly. Instead, it is used to help the phone create better portrait photos by blurring the background.
The following table shows examples of some smartphones models and their camera lenses:
| Smartphone | Rear Camera | Front Camera |
|---|---|---|
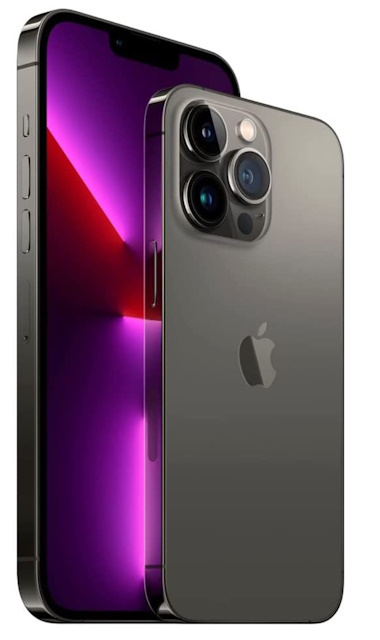
| Apple iPhone 13 Pro | 12MP Wide (f/1.5), 12MP Ultra Wide (f/1.8), 12MP Telephoto (f/2.8) | 12MP (f/2.2) |
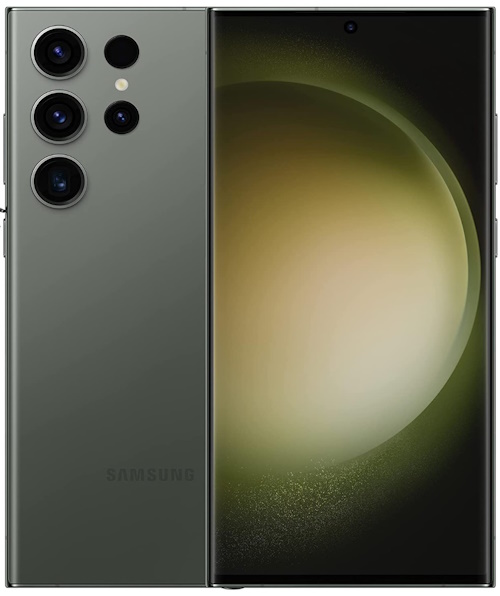
| Samsung Galaxy S22 Ultra | 108MP Wide (f/1.8), 12MP Ultra Wide (f/2.2), 10MP Telephoto (f/2.4), 10MP Telephoto (f/4.9) | 40MP (f/2.2) |
| Google Pixel 6 Pro | 50MP Wide (f/1.8), 12MP Ultra Wide (f/2.2), 48MP Telephoto (f/3.5) | 11.2MP (f/2.2) |
| OnePlus 10 Pro | 48MP Wide (f/1.8), 50MP Ultra Wide (f/2.2), 8MP Telephoto (f/3.4) | 32MP (f/2.4) |
| Xiaomi 12 Pro | 50MP Wide (f/1.9), 50MP Ultra Wide (f/2.2), 50MP Telephoto (f/1.9) | 32MP (f/2.4) |
What is a smartphone camera?
A smartphone camera is a digital camera that is built into a smartphone. Smartphone cameras have become increasingly sophisticated in recent years, and many now offer features that rival those of dedicated point-and-shoot cameras.
Smartphone cameras typically have a few main components:
- The lens: The lens is responsible for focusing the light that enters the camera. Smartphone cameras typically have a single lens, but some models have multiple lenses that allow for different focal lengths or image effects.
- The sensor: The sensor is the part of the camera that captures the image. Smartphone sensors are typically small, but they have become increasingly sensitive to light in recent years.
- The image processor: The image processor is responsible for processing the image data and converting it into a digital file. Smartphone image processors are very powerful, and they can often produce high-quality images.
The main specifications and features of smartphone cameras:
- Megapixels: This is the most common way to measure the resolution of a smartphone camera. However, it is important to note that megapixels are not the only factor that determines image quality. Other factors include sensor size, pixel size, and image processing.
- Sensor size: The sensor size is the area of the camera’s image sensor that is sensitive to light. A larger sensor size means that more light can be captured, which can lead to better image quality in low-light conditions.
- Pixel size: The pixel size is the physical size of each pixel on the camera’s image sensor. A larger pixel size means that each pixel can capture more light, which can also lead to better image quality in low-light conditions.
- Aperture: The aperture is the opening in the camera’s lens that allows light to pass through. A wider aperture (lower f-stop number) means that more light can pass through the lens, which can lead to better image quality in low-light conditions.
- Image stabilization: Image stabilization helps to reduce blur caused by camera shake. There are two main types of image stabilization: optical image stabilization (OIS) and electronic image stabilization (EIS). OIS uses physical components in the camera to move the sensor to compensate for the camera shake, while EIS uses software to digitally stabilize images.
Other features: Other features that can be found in smartphone cameras include:
- Zoom: Smartphone cameras typically offer both optical zoom and digital zoom. Optical zoom uses the camera’s lens to magnify the image, while digital zoom simply crops the image and enlarges it.
- HDR: HDR stands for high dynamic range. HDR photos capture a wider range of brightness levels than standard photos, which can result in more realistic images.
- Night mode: Night mode is a feature that helps to improve image quality in low-light conditions. Night mode typically uses a longer exposure time to capture more light, which can result in brighter and less noisy images.
These are just some of the main specifications and features of smartphone cameras. Many other factors can affect image quality, such as the quality of the lens, the software used to process the images, and the photographer’s skill.

Photo by Depositphotos
Tips for Capturing Sharp and Clear Photos
Mobile photography has revolutionized the way we capture and share moments. With just a smartphone in hand, we can now take stunning photos anytime, anywhere. Whether you’re a beginner or a seasoned photographer, these simple tips will help you capture sharp and clear photos that will impress your friends and family. So, let’s dive into this mobile photography tutorial and unlock the secrets to amazing photos!
1. Clean your lens:
Before you start snapping away, take a moment to clean your phone’s camera lens. Our phones are constantly exposed to dust, fingerprints, and smudges, which can affect the clarity of our photos. A quick wipe with a microfiber cloth or a gentle lens cleaning solution will ensure that your lens is free from any obstructions.
2. Hold your phone steady:
Keeping your phone steady is essential for sharp photos. Use both hands to hold your phone and keep your elbows close to your body for stability. If possible, lean against a solid surface or use a tripod to eliminate any camera shake. This will ensure that your photos come out crisp and blur-free.

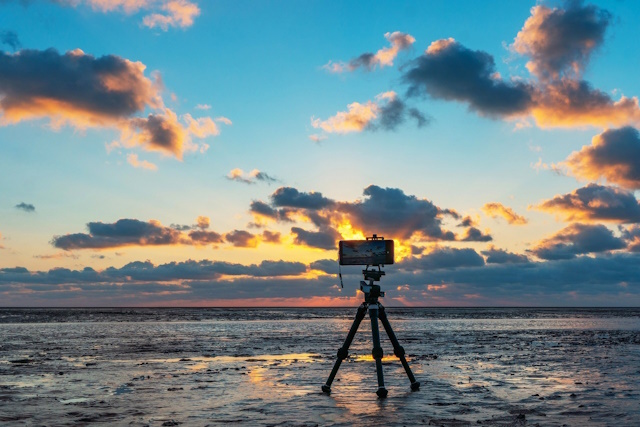
Photo by Depositphotos
3. Find good lighting:
Lighting plays a crucial role in photography, and when it comes to mobile photography, understanding how to use light effectively can greatly enhance the quality of your images. In this mobile photography tutorial, we will explore different aspects of lighting and how to make the most of it to capture stunning photos with your mobile device.
-
Natural Light vs. Artificial Light
When it comes to lighting, you have two main sources to work with: natural light and artificial light. Natural light, such as sunlight, provides a soft and flattering illumination that can bring out the best in your subjects. It is ideal for capturing portraits, landscapes, and other outdoor scenes. On the other hand, artificial light, like the one from lamps or flash, can be used to create dramatic effects or to illuminate subjects in low-light situations.
Natural light is often preferred as it is readily available and can produce beautiful results. When shooting outdoors, try to take advantage of diffused light on cloudy days or during the golden hour and blue hour, which we will discuss in the next section.
-
Golden Hour and Blue Hour
The golden hour refers to the period shortly after sunrise or before sunset when the sun is low in the sky, casting a warm and soft light. This time of day offers a magical quality to your photos, with a golden glow that can enhance colors and create a pleasing atmosphere. It is an ideal time for capturing landscapes, portraits, and any subject that benefits from a warm, gentle light.
Similarly, the blue hour occurs just before sunrise or after sunset when the sky takes on a deep blue hue. This time can create a serene and ethereal atmosphere in your photos. Experiment with long exposures during the blue hour to capture the beauty of cityscapes, seascapes, or any scene that benefits from a cool, tranquil ambiance.
-
Using Shadows and Highlights
In photography, shadows and highlights can add depth, contrast, and visual interest to your images. When shooting in natural light, pay attention to how shadows fall on your subject and use them creatively to add drama or emphasize certain elements. Shadows can create interesting patterns or lead the viewer’s eye through the image.
Also, highlights, which are the brightest areas in your photo, can draw attention to specific details or create a sense of luminosity. Be mindful of the direction and intensity of light to control the placement of highlights and shadows in your composition.
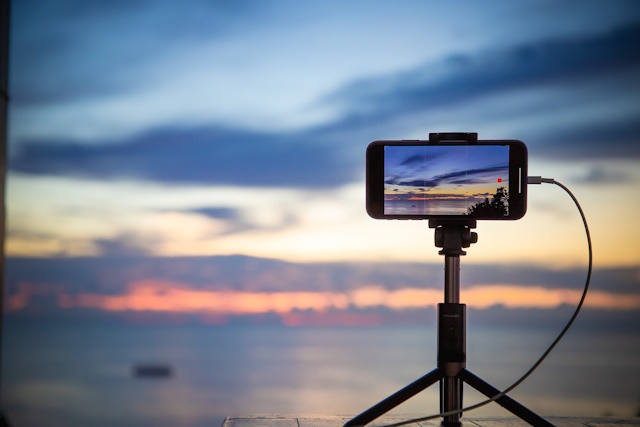
Image by Peggy und Marco Lachmann-Anke from Pixabay
4. Mind the composition:
Good composition can greatly enhance the visual impact of your photos. Here is some composition rules to consider:
-
Rule of thirds:
Divide your frame into a 3×3 grid and place your subject along the gridlines or at the intersections. This creates a more balanced and visually appealing composition.
-
Leading lines:
Utilize lines in your scene, such as roads, fences, or rivers, to lead the viewer’s eye toward the main subject. This adds depth and guides the viewer through the image.
-
Framing:
Use elements in the foreground to frame your subject. This could be natural elements like trees or man-made objects like archways. The framing adds depth and draws attention to the subject.
-
Symmetry and patterns:
Look for symmetrical scenes or patterns in your composition. Symmetry can create a sense of balance and harmony, while patterns add visual interest.
-
Negative space:
Incorporate negative space, which is the empty area around your subject, to create a sense of simplicity and emphasize the main subject.
-
Depth of field:
Experiment with a shallow depth of field (wide aperture) to isolate your subject from the background, or use a deep depth of field (small aperture) to keep everything in focus. This technique can help direct the viewer’s attention.
-
Fill the frame:
Get closer to your subject and fill the frame to create a more intimate and impactful composition. This eliminates distractions and allows the viewer to focus on the details.
-
Experiment with angles:
Try shooting from different angles and perspectives to add variety and uniqueness to your photos. Get low to the ground, shoot from above, or try unconventional angles to create interesting compositions.
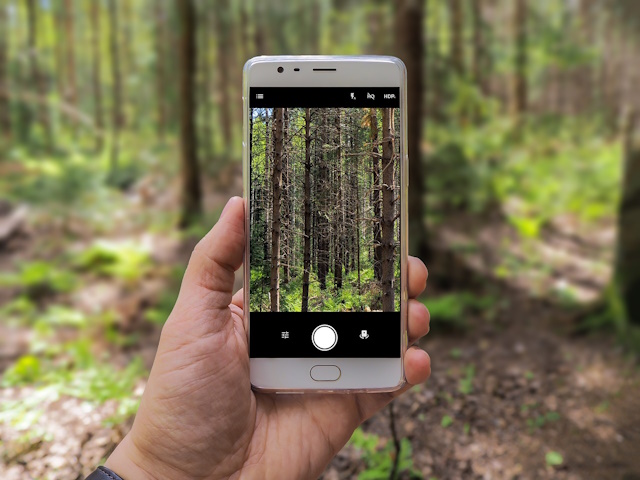
Image by Esa Riutta from Pixabay
5. Consider using Creative Techniques
Mobile photography has come a long way, and with the advancements in smartphone camera technology, capturing stunning and unique shots has become easier than ever. In this mobile photography tutorial, we will explore three creative techniques that can take your smartphone photography to the next level. So grab your smartphone and let’s get started!
-
Long exposure photography:
Long exposure photography allows you to capture motion in a still image, creating a sense of movement and dynamism. With the right app or camera mode, you can achieve stunning effects like light trails, silky smooth waterfalls, and mesmerizing star trails. To try this technique, find a scene with interesting movements, such as flowing water or moving traffic. Set your smartphone on a stable surface or use a tripod to avoid a camera shake. Then, enable the long exposure mode on your camera app and adjust the exposure time to capture the desired effect. Experiment with different shutter speeds to achieve the desired result and let your creativity flow!
-
Creating bokeh and depth of field:
Bokeh refers to the aesthetic quality of the out-of-focus areas in a photograph. It adds a beautiful and dreamy background blur, making the subject stand out. While smartphones may not have the same depth of field control as DSLR cameras, you can still achieve a pleasing bokeh effect.
To create Bokeh, position your subject close to the camera and make sure there is some distance between the subject and the background. Tap on the subject to focus, and the camera will automatically blur the background. Some smartphones even have a dedicated portrait mode that simulates a shallow depth of field effect. Experiment with different subjects and backgrounds to create stunning Bokeh shots.
-
HDR and panorama modes:
HDR (High Dynamic Range) and panorama modes are built-in features in most smartphone cameras that can help you capture breathtaking landscapes and scenes with a wide dynamic range. HDR mode combines multiple exposures to create a well-balanced image with enhanced details in both the shadows and highlights.
Panorama mode, on the other hand, allows you to capture a wide-angle view by stitching together multiple images. To use these modes effectively, find a scene with a wide range of light and dark areas for HDR mode, or a sweeping landscape for panorama mode. Follow the on-screen instructions, and let your smartphone do the magic of blending multiple shots into one stunning image.

Image by Gerd Altmann from Pixabay
6. Tap to focus:
Most smartphones allow you to manually adjust the focus by tapping on the screen. Take advantage of this feature to ensure that your subject is in sharp focus. Simply tap on the area you want to highlight, and your phone will adjust the focus accordingly. This is especially useful when capturing close-up shots or portraits.
7. Avoid digital zoom:
While it may be tempting to zoom in on your subject, it’s best to avoid using digital zoom on your smartphone. Digital zoom simply enlarges the image, resulting in a loss of quality and detail. Instead, try to get closer to your subject physically or consider cropping the photo later during editing.
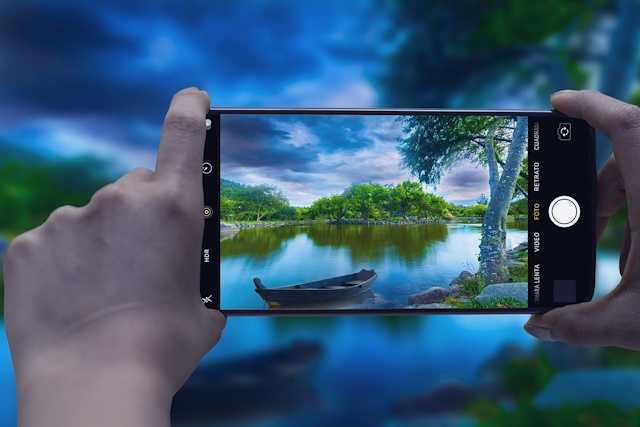
Image by fernando zhiminaicela from Pixabay
8. Edit with care:
In the world of mobile photography, capturing a great shot is just the beginning. Editing apps can take your photos to the next level, allowing you to fine-tune and enhance your images with a few simple taps. In this mobile photography tutorial, we will explore popular editing apps and the key adjustments and effects you can apply to enhance your photos.
-
Popular Mobile Editing Apps
There are numerous editing apps available for mobile devices, each offering a range of features and tools to enhance your photos. Some popular options include Adobe Lightroom, Snapseed, VSCO, and Instagram’s built-in editing tools. These apps provide a user-friendly interface and a wide array of editing options to suit your creative needs.
For more information, you can check my post “What Is The Best Photo Editing App For Android?”
-
Adjusting Brightness, Contrast, and Saturation
One of the fundamental adjustments you can make to improve your photos is adjusting the brightness, contrast, and saturation levels. These adjustments can help bring out the details, enhance colors, and create a more visually appealing image.
Increase the brightness to make your photo appear lighter and more vibrant. Adjust the contrast to add depth and make the colors pop. And tweak the saturation to intensify or desaturate the colors, depending on the desired effect.
-
Applying Filters and Effects
Filters and effects are a fun way to add a unique touch to your photos. Many editing apps offer a wide range of filters that can instantly transform the mood and style of your image. From vintage and black-and-white filters to vibrant and cinematic looks, there’s something for every taste.
In addition to filters, you can also experiment with various effects like vignettes, blurs, and textures. These effects can add a creative flair and make your photos stand out from the crowd. However, it’s important to use them sparingly and ensure they enhance rather than overpower your image.
Remember, the key to successful editing is to enhance your photos while maintaining a natural and realistic look. Avoid going overboard with adjustments and effects, as it can result in an artificial and unappealing outcome. Strive for a balanced and tasteful edit that enhances the original image without losing its essence.
So, whether you want to make minor adjustments to brightness and contrast or unleash your creativity with filters and effects, mobile editing apps provide a powerful toolset to enhance your photos. Take the time to explore different apps, experiment with various adjustments, and find your editing style.
Related posts
Smartphone Camera VS DSLR Camera
Smartphone Cameras Vs. Digital Cameras
What Is The Best Photo Editing App For Android?
How To Shoot Video With Your Smartphone
Best Smartphone Gimbal Stabilizer- Top Five!
The Influence Of Mobile Photo Editing Apps In 2023
Thanks for reading, I hope you enjoyed the article, in case you have any questions just drop them below & I will be happy to answer you.
The featured
Image by Bronisław Dróżka from Pixabay
If you enjoy the site, don’t forget to subscribe, we will only inform you when a new article is posted.


The Mobile Photography Tutorial: Tips for Taking Great Smartphone Shots by Ehab Photography provides important insights for enhancing your smartphone photos. With practical tips on composition, lighting and editing, this guide will help beginners and hobbyists alike create stunning images. Thank you for a very important and interesting article. Keep up the good work!
Thank you for your positive feedback on the Mobile Photography Tutorial by Ehab Photography! It’s great to hear that you found the insights on composition, lighting, and editing helpful for enhancing your smartphone photos. Whether you’re a beginner or a hobbyist, this guide aims to assist you in creating stunning images. I appreciate your kind words, and I’ll be sure to keep up the good work. If you have any more questions or need further assistance, feel free to let me know.
Great article! You’ve covered the main differences between digital cameras and smartphone cameras very comprehensively. The discussion on sensor size, lens selection, manual controls, and battery life highlights the advantages of digital cameras. On the other hand, the convenience, ease of use, and sharing capabilities of smartphone cameras are important factors to consider. The section on understanding smartphone cameras and their components provides a useful overview. Additionally, your tips for capturing sharp and clear photos, including cleaning the lens, finding good lighting, minding composition, and considering creative techniques, are practical and insightful. The suggestions for editing photos with popular mobile editing apps add a valuable touch. Overall, this article is a great resource for anyone looking to understand and make the most of their camera, whether it’s a digital camera or a smartphone camera. Well done!
Thank you for the positive feedback on the article! I’m glad you found the comprehensive comparison between digital cameras and smartphone cameras helpful. The tips for capturing sharp photos and suggestions for editing with mobile apps aim to enhance your photography experience. If you have any more questions or need further assistance, feel free to reach out. Keep capturing amazing moments! Well done to you too!