

Introduction
Setting up home photography studio is a great way to learn and practice taking photos under artificial light, which is considered a hard topic to learn. And if you are planning to be a professional photographer, it is essential to learn flash photography and be good at it. In this post, I will state the various aspects of setting up a home photography studio.
Basic Equipment Requirements
The basic equipment required is a camera, lighting system, accessories, and space for a studio.
-
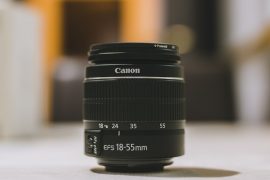
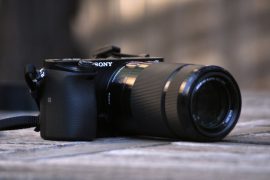
Camera and lenses
The camera must be able to synchronize the shutter with the external off-camera lighting source (strobes) used for lighting the subject. Almost any modern DSLR will sync with an external off-camera flash. DSLR’s are by far the most popular type of camera for studio photography.
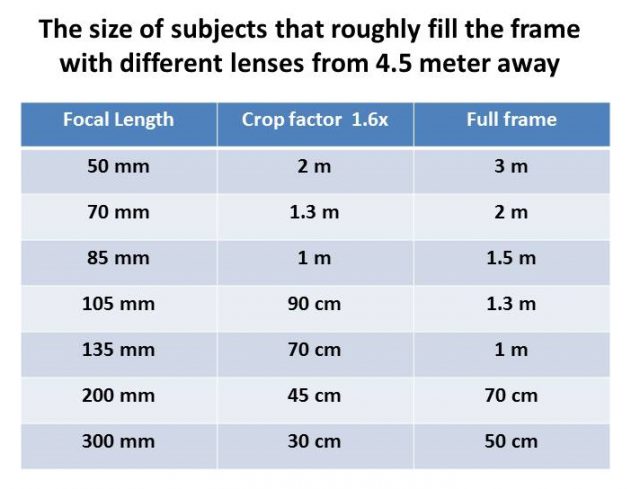
In general, you should avoid using lenses with focal lengths less than 50mm (or its equivalent) for portraiture. Shooting from a distance 4.5 meter away from your subject will give the subject a nice perspective and will keep the subject/photographer distance sufficient to keep the subject comfortable. You can shoot from closer or further than 4.5 m, but it is a good idea to think of 4.5m as your base distance.
Here is a table of subject sizes that roughly fill the frame for various focal lengths at a subject/photographer distance of 4.5 m.
An important consideration in picking out a lens for portraiture is aperture. The maximum aperture size of your lens affects both the shallowness of the depth-of-field you can achieve with a given lens and the focusing ability of the lens. Lenses are generally at their best sharpness between 2 stops less than their widest aperture until diffraction starts to dominate.
A pair of high-quality zoom lenses can cover the entire range from 24-28mm to 200mm, reducing your need for switching between multiple prime lenses. Zoom lenses also reduce the need for the photographer to move closer and further from the subject as much as with prime lenses. For lenses review, you can check my page HERE.
-
Lighting system
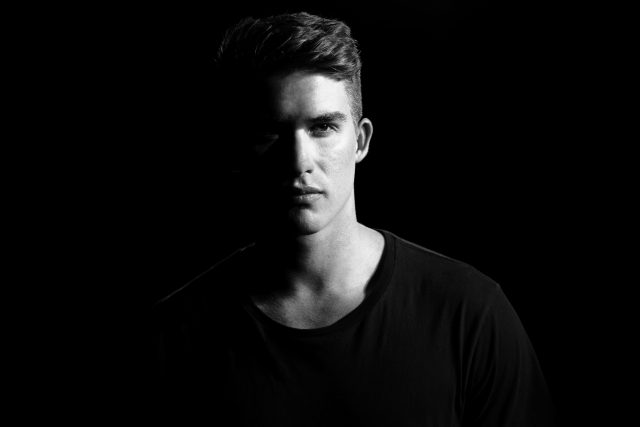
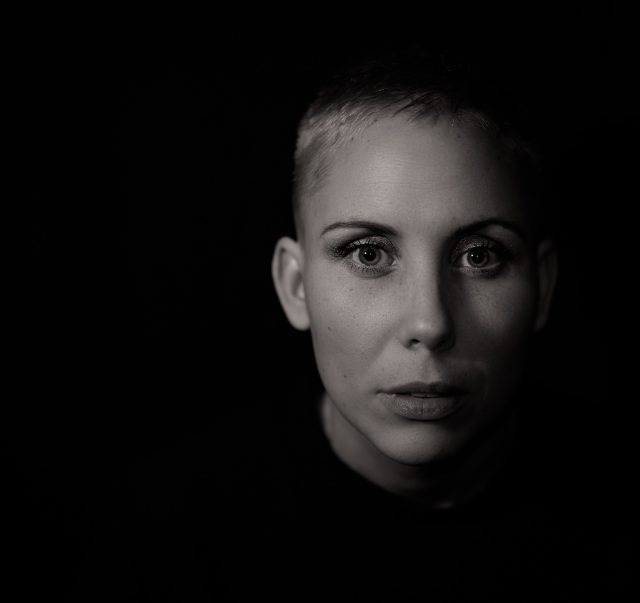
In photography, there are two types of light; hard or harsh light, and soft or diffused light. Hard light casts sharp shadows with well-defined edges. Soft light casts softer shadows with edges less defined. Because the light is bounced and diffused in different directions and is spilling into the shadows, so the size of the light becomes much larger. The effective size of the light depends on two factors:
- The actual physical size of the light.
- The position of the light sources relative to the subject.
The closer the light is to the subject, the larger the effective size and the softer it is. The further the light is from the subject, the smaller the effective size and the harder it is. So you can easily change the quality of light by changing the effective size.
The lighting system equipment is divided into three different types: Holders and supporting tools, light modifiers, and light sources.
Holders and supporting tools expand to encompass all the stuff we use to support and hold our gear. Like tripod for your camera, or stands and clamps to support lighting equipment.
Light modifiers are anything we attach to (or hold in front of) our flash or light source, to control the light pattern it normally emits. These would include umbrellas, softboxes, and reflectors.
Light sources are any number of things that emit light onto our scene. It could be tungsten or fluorescent bulbs, or flash units and strobes.
The figure below shows a standard light system
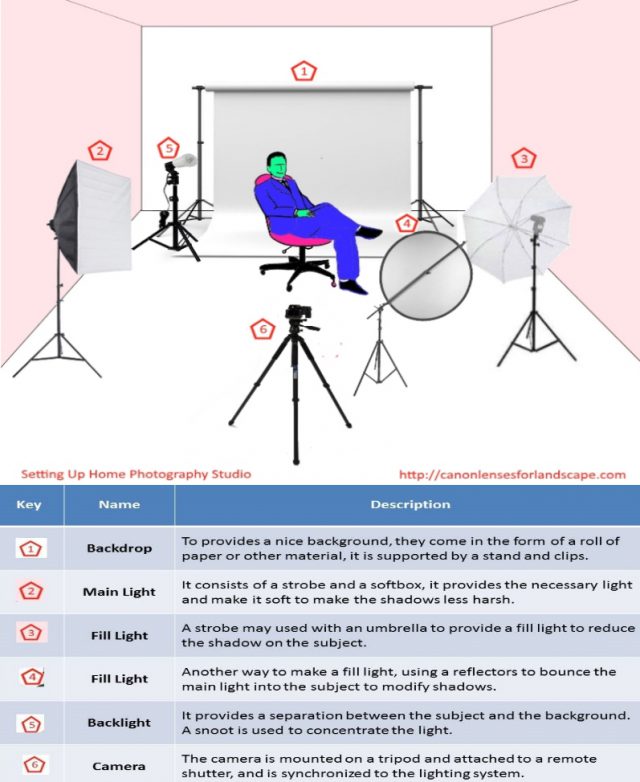
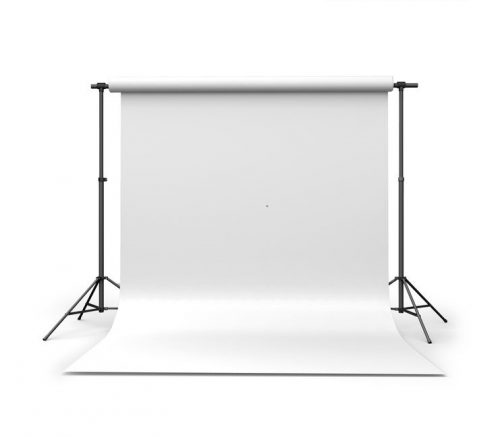
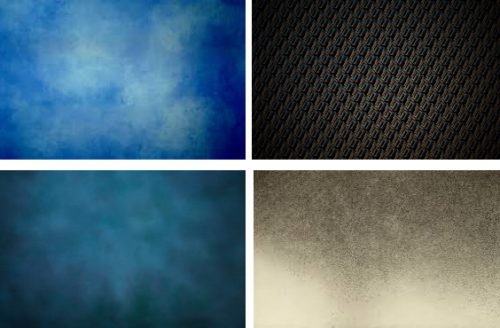
- Backdrop
The backdrop is a painted material (papers, cloth or fabrics) hung across the back of a stage. It serves as a background for the photo. It comes in a form of a roll with different widths and needs special support to hold it. The photos below show the backdrop stand and some sample colors.

For more information about backdrops. please check the following posts:
- Portrait Studio Backdrops – Types And Recommendations
- Best Photography Backdrop Stands
- The Best Food Photography Backdrops
1- Main light – Key light
-
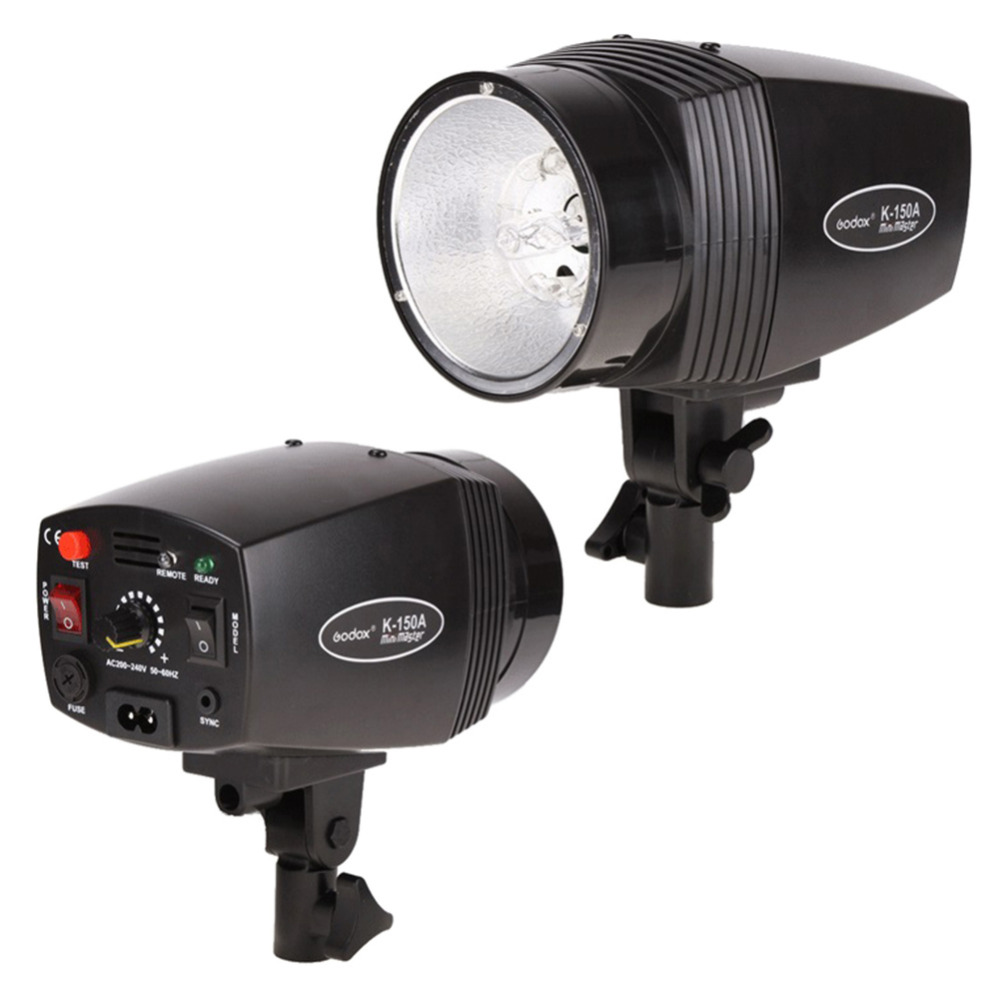
Strobes
Strobes are much more powerful than continuous lights and are the lights of choice for studio portraiture photography. The important factor in choosing a strobe is its power, generally, home portrait studio strobes should be in the range of 300 to 600 Watts for the greatest versatility.
300-watt strobes will allow you to shoot at ISO 100 to ISO 400, apertures that give you a good useful depth of fields such as f/8, f/11, or even f/16, and will allow you to use small to medium-large diffusers up to about 1.6 square meters in size. If you want to use an even larger diffuser such as a 1.2 m X 1.8 m softbox then you will need a more powerful 600-watt strobe.
You should choose a strobe with a power-adjustable down to at least 1/16th of full power and 1/32nd is even better. This will allow you to use smaller diffusers such as 60 cm X 60 cm softboxes.
A built-in optical slave sensor and a connection for a sync cable are basic requirements for any studio strobe.
-
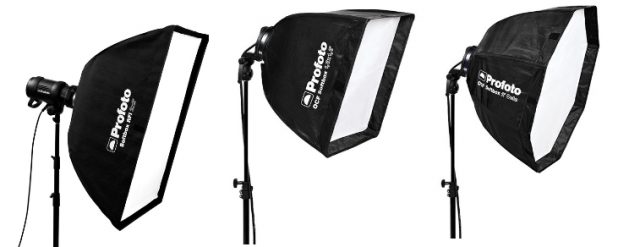
Softbox
A softbox emulates the soft, directional lighting usually produced by natural window light. It softens and diffuses the lighting from the attached light source by transmitting the light through a diffusion panel. Softboxes come in various shapes (rectangular, square, or octagonal) and sizes, including large ones that, when placed close to a subject, produce very soft, yet directional light.
With softbox lighting, because you’re shooting through rather than relying on reflected light, your flash requires less power output to obtain the same lens aperture.
You can also make use of various accessories (such as grids or louvers) that you can attach to your softbox to help make the resulting light narrower or evener.

2- Fill light
-
An umbrella
The umbrella is probably the most popular light modifier as it is highly portable, incredibly cheap, and best of all, easy to use.
Umbrellas provide photographers with a broad and soft light source that closely emulates outdoor lighting. Umbrellas produce an unrestricted type of lighting that will pretty much go everywhere.
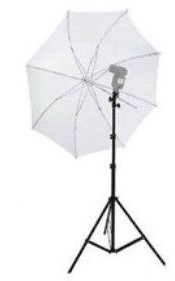
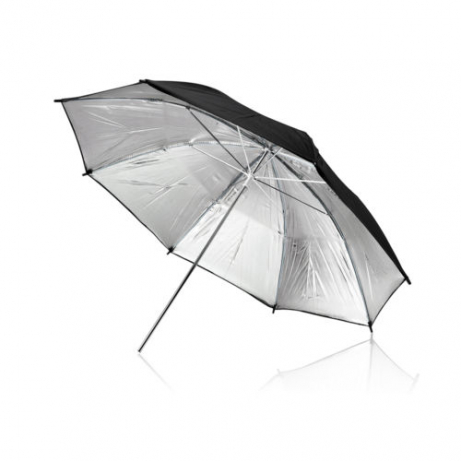
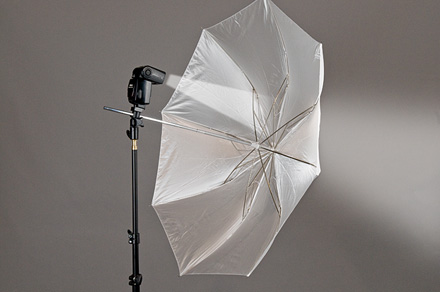
There are two types of umbrellas:
- Reflective umbrellas are opaque on the outside and made of metallic, reflective material on the inside. To diffuse light with this type of umbrella, you simply need to set it up so that the inner reflective part faces the subject, then you shoot the flash into the reflective material so that the “hard” light bounces and reflects a softer, broader, and more even light onto the subject.
- Shoot-through umbrellas are made with a plain, white, and semi-translucent material. To diffuse light with these umbrellas, you need to point the outside part of the umbrella at your subject and shoot the flash into the opening so that the light passes through the translucent material, making it much softer. Unlike the reflective umbrella, the light produced with the shoot-through is slightly easier to control. When used in the traditional position, umbrellas produce indirect, bounced light that may require more flash output from the light source you’re using.
-
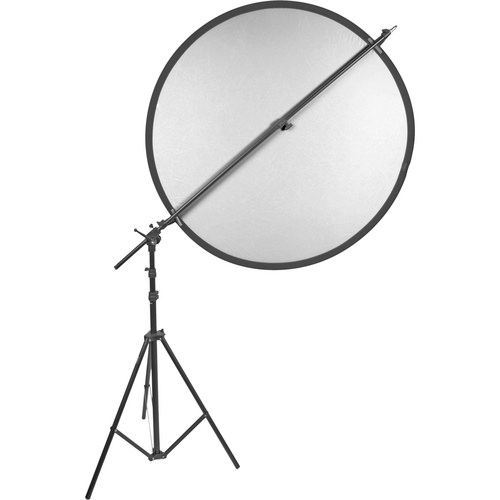
Reflector
A simple reflector can be really useful in a studio lighting setup, especially if you’re only using one light. You use it the same way you would with natural light – to bounce light back onto your subject and fill in any hard shadow areas Collapsible white/silver reflectors are the most useful but there are times when black, gold, or gold/silver zebra reflectors are good to have. My post about reflectors explains many aspects of reflectors types and use.
3-Separation lighting
-
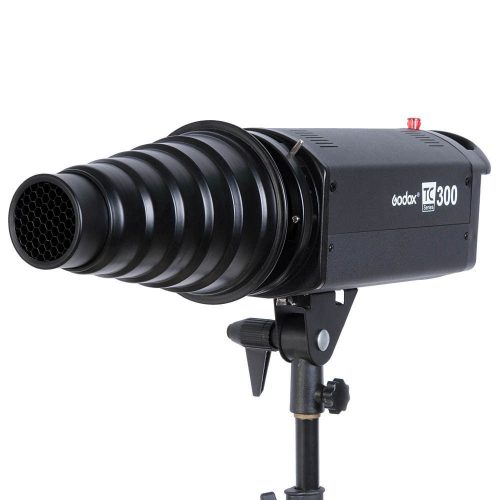
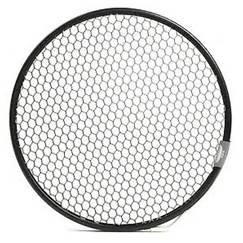
Snoot/honeycomb
Both of these tools help to concentrate or ‘focus’ the light. They’re ideally suited for use as backlights or for isolating a particular part of an image from the background.
A snoot is a tube that fits over a strobe or studio light to direct the light in a focused area and prevents light spill from getting into your shadows.
The honeycomb grid is a tight structure of a similar shape to the honeycomb made by honeybees. It’s affixed to the front of a studio strobe. Or it can be fixed to an off-camera flash. The light shines through the grid and creates a tight beam of light. The aim is to create a focused beam with little diffusion. It is effective in creating such a beam, but it is not as intense or focused as a snoot.
Space and wall color requirements
If you use a 3-meter wide background and use two studio strobes located outside this background, you would want a space about 4 to 5 meters wide. You can manage with less space if you are creative. As for the studio length, the figure below shows that the minimum length would be 7 -8 meters long.
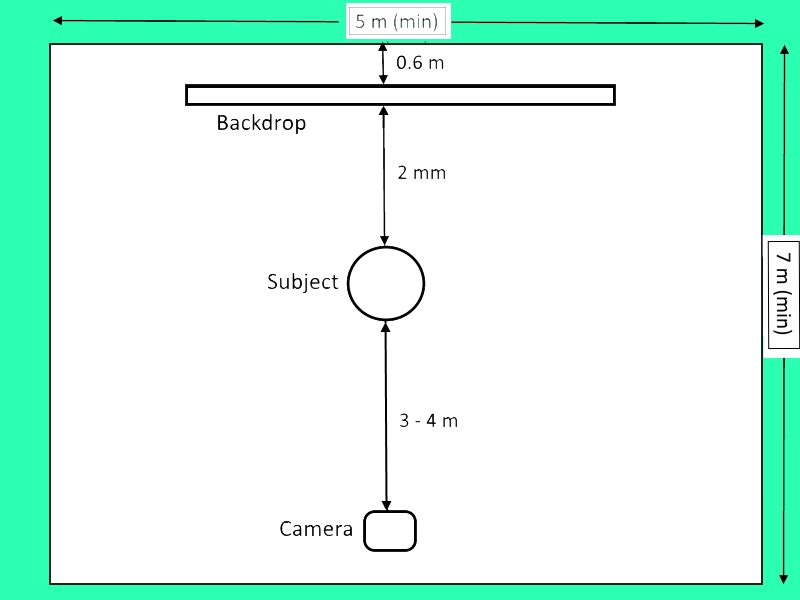
You can also manage with less space if you use shorter focal lengths, but remember the closer you are to your subject the greater the extension distortion will be.
For the wall color, light gray or white walls and ceiling are the most common in dedicated small home studios. The floor can be covered in various ways if necessary. Light control can come through the use of black drapes that can be pulled across the walls or windows.
Related Posts
Continuous Lighting Vs Flash Lighting
Photography Lighting Techniques – Softbox Vs Umbrella
photography-lighting-techniques-all-about-light-reflectors

Finally, I hope you found the article interesting if you have any comments please do not hesitate to write them in the box below, I will be glad to answer any questions. Thanks for dropping by.
If you enjoy the site, don’t forget to subscribe, we will only inform you when a new article is posted.

This was an excellent and comprehensive article with tons of useful information. I’ll be sharing this with others I know who are looking into setting up a home photography studio. Thanks so much for all of the great info!
Glad that you liked the post, happy shooting 🙂
That was one of the most detailed article I’ve read about Setting Up Home Photography Studio and I’ve a strong feeling this would definitely work.
Shared this with some of my Photographer friends and they are loving it. We all were planning to start a home studio and looks like we have hit the bulls eye!
Great job mate!
Setting up a home studio is a great way to learn and practice studio and indoor photography. There are more related post about this subject, I mean the post about reflectors and the other one about softbox and umbrella. Thanks for your comment, wish you all the luck for your coming project!
Wow.. what a nice, thorough write-up. It’s actually amazing how important lighting is and how much affects anyone photography. It really has to be perfect to get the right shot. I’ve thought about starting a studio, and this blog will definitely me get started with the right items. Thanks for the tips!
Thank you for your nice comment, I’m very glad cause you found the post interesting and useful.
You are always welcomed, wishing you all the success for your upcoming studio!