

Panoramic photography is a technique of photography, using specialized equipment and software, to capture images with horizontally elongated fields of view. It is sometimes known as wide format photography. The term has also been applied to a photograph that is cropped to a relatively wide aspect ratio, like the familiar letterbox format in the wide-screen video.
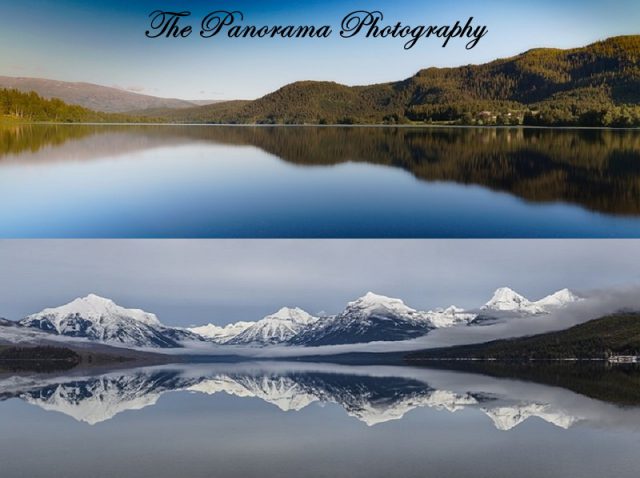
The term “panorama” literally means “all sight” in Greek, an image showing a field of view greater than, that of the human eye (about 160° horizontal by 75°vertical) may be termed panoramic. This generally means it has an aspect ratio of 2:1 or larger, the image being at least twice as wide as it is high. The resulting images take the form of a wide strip. Some panoramic images have aspect ratios of 4:1 and sometimes 10:1, covering fields of view of up to 360 degrees. Both the aspect ratio and coverage of field are important factors in defining a true panoramic image. The following slideshow presents some wonderful panorama photos.


There is a function on most modern digital cameras that enables you to take multiple photos in sequence as you shoot. These images can later be stitched together to create one larger panoramic image. Some cameras may have the stitch built-in, while others may require you to do the stitching through software editing later. Using a proper photography technique and panoramic equipment, it is now possible to create near-perfect panoramas at extremely high resolutions. Some photographers even stitch hundreds of high-resolution images to create gargantuan “gigapixel” panoramas. Today, digital panoramic photography is quite popular and common not only among landscape photographers but also among architectural and cityscape photographers.
Types of Panoramas
180-degree panoramas
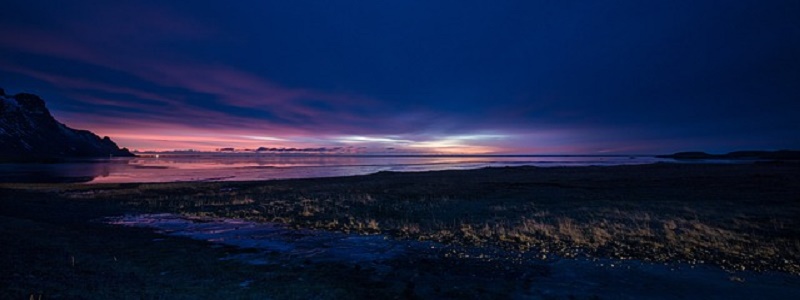
It is Panoramas photos that cover an angle of view of 180 degrees from left to right. These types of panoramas look very wide, covering a large area.
360-degree panoramas
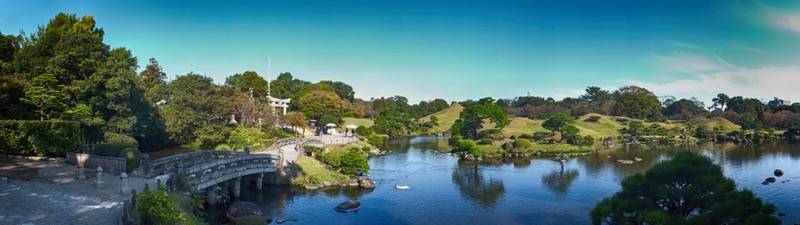
It is Panorama photos that cover an angle of view of up to 360 degrees. These panoramas look extremely wide and they cover the whole scene in a single, super wide image.
Spherical panoramas
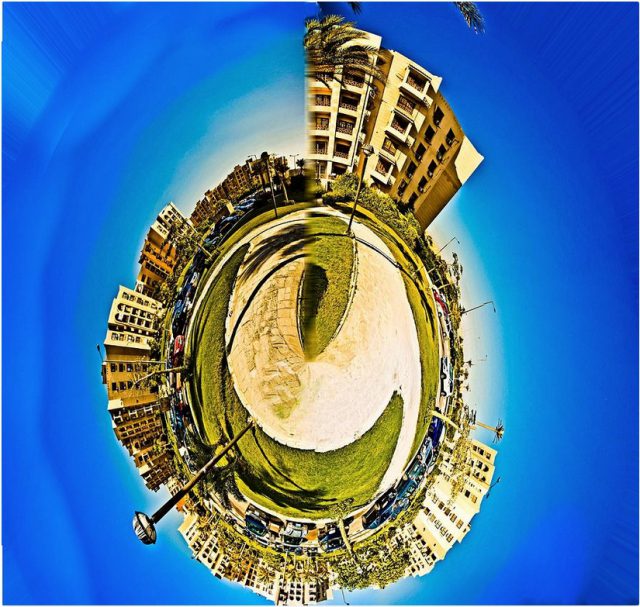
It is also known as “planets”. These are 360-degree panoramas that are converted to a square spherical image using a special post-processing technique.
The Panorama Photography Tutorials
-
Find the right view
Find a nice spot overlooking the entire view of the scene where you wish to take your panoramic picture. Make sure that this spot has a clear unobstructed view of the scene with a few subject movements. This means that there should not be too many subjects moving around in the scene as this can cause alignment issues when you are stitching your pictures. If you are photographing a distant landscape, the effect of Parallax (the shifting of an object as the camera changes position) is minimized by the great distance to the subject; however, if there are foreground objects close to the camera, parallax created as the camera pans, it can cause difficulties for the stitching software and leaves your image with unwanted issues.
-
Choosing the Camera and accessories
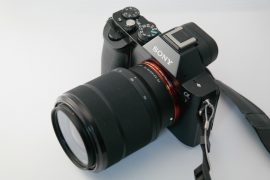
Any SDLR camera with manual control of the exposure can be suitable for panorama photography. I find zoom lenses to be the most useful for panoramic photography. You can certainly photograph panoramas with fixed/prime lenses, but being able to zoom in and out will give you more options and versatility. I recommend using Canon EF 24-70mm f/2.8L II USM or Canon EF-S 18-200mm f/3.5-5.6 IS. If you are more comfortable using a prime lens, you may use Canon EF 50mm f/1.2L USM.
You need a Tripod with a built-in bubble level (to horizontally level the camera), a ball head so you can smoothly and accurately turn your camera to capture the sections of the scene, and an L bracket to let you mount the camera on the tripod in the vertical (portrait) orientation as shown in the following figure.
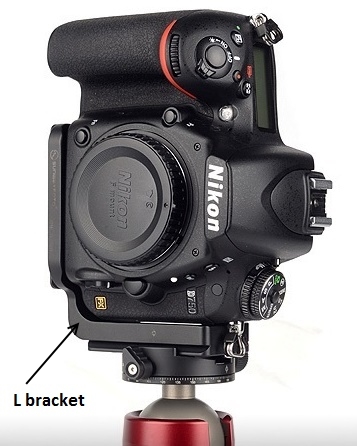
This allows you to crop the top and bottom, in post-processing, as needed to keep the main subject inside the panorama. Also, you should get less distortion.
To complete the setup a remote shutter release is required to avoid camera shake.
-
How many photos to take?
To answer this question, you first have to decide the field of view of the scene you are going to shoot. For the sake of the example, let us say you are going to shoot a 180-degree panorama. You have chosen your lens, so find its angles of view (horizontal and vertical) from the manual. The table below shows the horizontal and vertical angles of view for different focal lenses and camera sensor sizes.
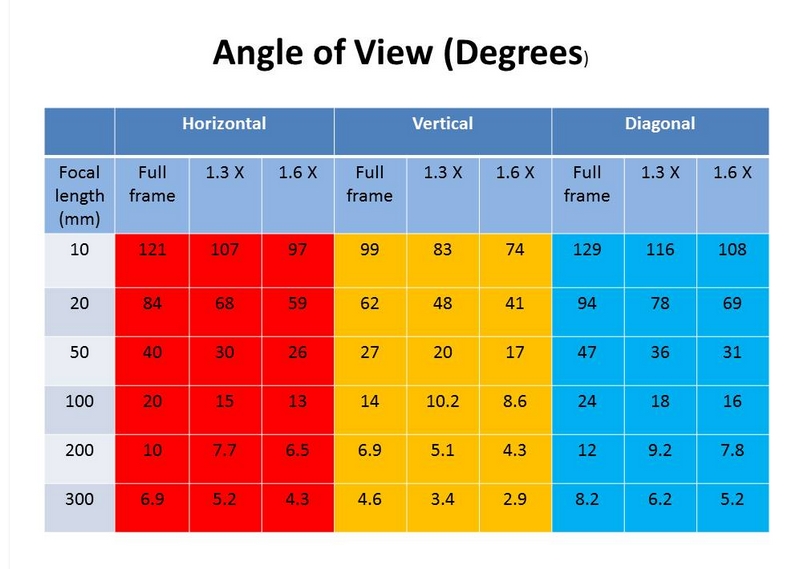 Let us assume you chose a 50 mm lens, from the above table (when using it with a full-frame camera), so the horizontal angle =40 degrees and the vertical angle = 27 degrees.
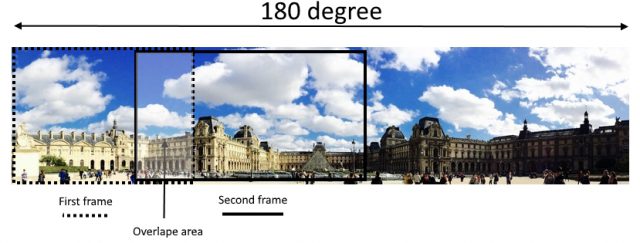
To make the stitching process works good, you have to overlap your photo frames. A 30% is a good overlapping percentage and it helps to reduce “flaring” that happens when the software is forced to use the entire image frame, including the corners which may show distortion. The figure below shows the overlapping process.
The formula for calculating the number of frames is as follow:
N= F / (H*(100%- O) (landscape orientation)
N= F / (V*(100%- O) (Portrait orientation)
Where
N= Number of frames
H= Horizontal Angle
V= Vertical angle
O= Overlap percentage
F= Field of view of the panorama
As for our example, we have f=180, v=40 (shooting horizontal), O=30 %, the calculated number of frames is
N= 180/(40 * (100-30))= 6.4, i.e. seven frames.
-
Panning Direction
The panning direction should be from left to right, as the camera’s automatic modes use this and the post-processing engines also work from left to right.
-
Exposure setting
Often, one part of the landscape is brighter than others. But remember that you are not going to change the exposure or the focus during the shooting of the panorama, because the stitching software may miss the aligning of your photos. So setting the camera to manual mode is essential. To set my exposure, I set the camera to a middle aperture for maximum sharpness and, on the Aperture Priority mode; I scan through the landscape and look at my camera’s light meter and exposure information. I remember the required shutter speed in the bright areas and in the dark areas and then I pick a shutter speed value in between the two. If there is no difference or only a difference of one-stop, I will choose the darker exposure, as I know I can pull more details out of the shadow areas of the panorama.
Some professional photographers meter off several areas across the scene and set the camera somewhere in the middle of the average. Since you should be shooting in RAW, using an average exposure should leave you with enough leeway to correct any slight over or underexposed areas. Some panoramic experts will adjust aperture instead of shutter speed to fine-tune their exposures. Remember to check your histograms and look for clipping in all channels.
-
Post-processing software
After taking the required photos, it is time to load them into your editing favorite software like Lightroom and Photoshop. Also, there is some free stitching software like Image Composite Editor, Hugin, and Autostitch.
These are just a few of the basic guidelines to help you not make all the mistakes I have made in learning how to shoot panoramas over the years. You don’t need fancy, expensive cameras to create nice panoramic images, just a little know-how and a lot of practice.
Thanks for reading the article, hope you found it useful. If you have any questions, just drop them in the below box. I will be glad to answer.
If you like the site, don’t forget to subscribe, we will inform you when a new article is published.


Those pictures that are presented in your article are amazing. The spherical panorama is very cool and I am looking forward to putting some of your suggestions into action. I love photography and am always trying to get some awesome pictures, and this article was super helpful. Thank you so much! Heather
Hi, Heather
It is very good to see you again, and thanks for your nice comment.