

A tilt-shift or perspective-control lens is a specialized lens that has the ability to moderately rotate the image focal plane with a pitch or yaw, as well as skew the image perspective. This is possible by additional design features that allow the lens to physically tilt, shift, and rotate. Tilt-Shift Lens has three types of Movements. The first one is the shift movement, where the lens moves parallel to its original axis as the following figure:

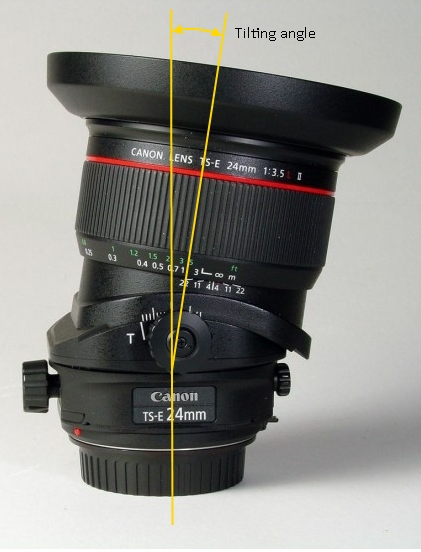
The second movement is the tilt, where the lens moves around a pivot to make an angle with its original axis
The third movement is the rotation of the lens, this allows you to shift and tilt the lens not only vertically or horizontally, but at any plan.
The tilt and shift lens has two main advantages over other lenses:
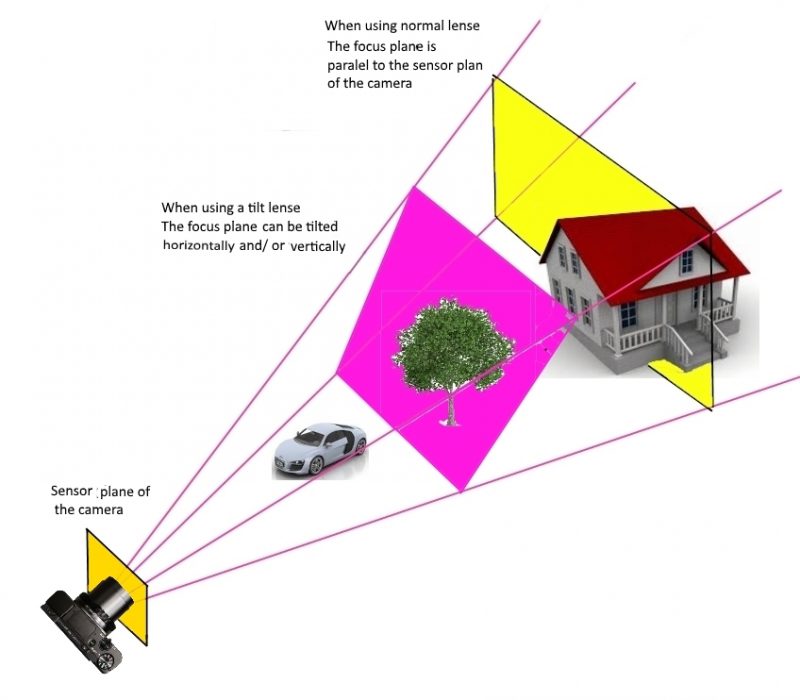
The tilt-shift lens can do amazing things to control the perspective. Tilt determines the plane of focus by allowing you to point the lens at an angle other than perpendicular to the image plane, (As a normal lens it only focuses on a singular and perpendicular plan) With tilt, the focal plane becomes pliable, it becomes possible to capture an image entirely in focus (background and foreground), as well as narrow the focal plane and make it surrounded by soft blur. Another thing tilt can do is make the miniature-faking possible, creating the illusion of super-shallow depth of field.

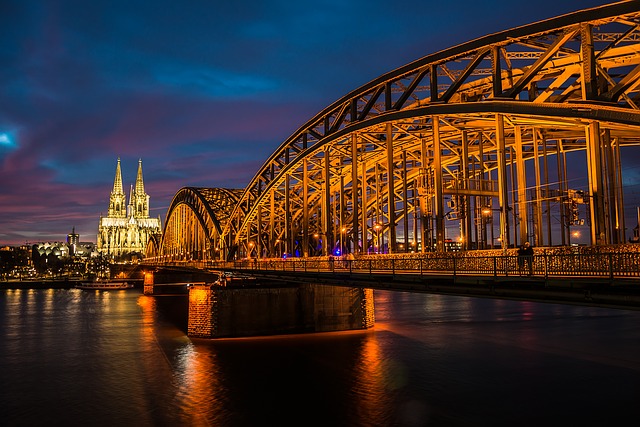
The Shift movement allows you to adjust a subject’s place in a composition without needing to move the camera itself. It also keeps everything squared, eliminating the convergence of vertical lines, a phenomenon known as “keystoning” that occurs when photographing tall buildings. That is why tilt and shift lens is an essential gear of an architectural photographer.

The relation between the lens image plane and the camera sensor plane
If you were trying to take a picture of a building (especially when you are close to it) you would, of course, angle the camera upwards. It is the angling of the camera up or down that makes the building appear to lean back or taper. Using the shift function of a tilt-shift lens enables control over vertical framing while maintaining a parallel relationship between the camera sensor and building vertical lines.
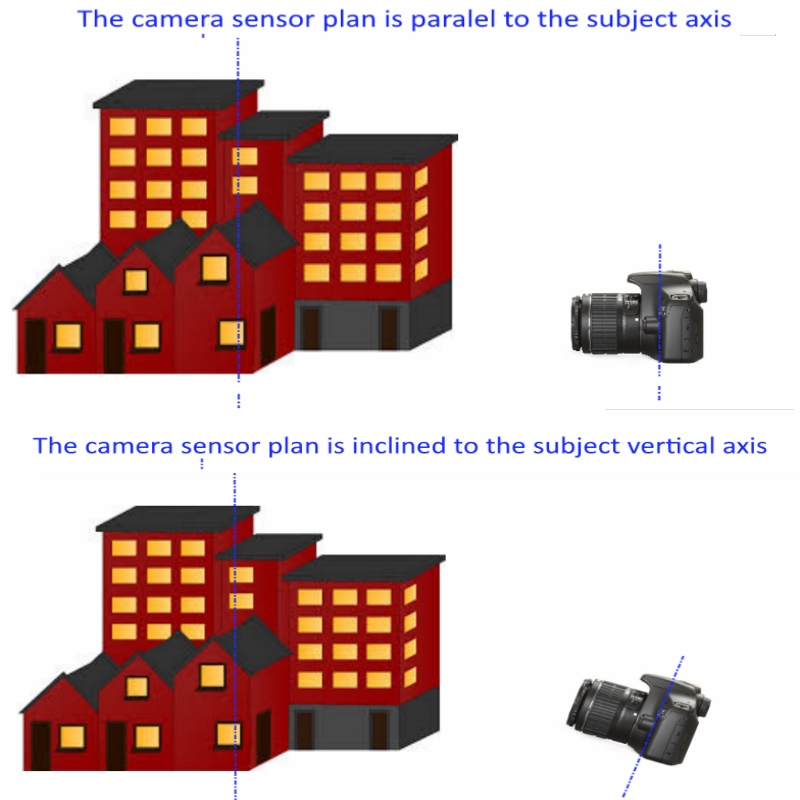
Using the tilt function of a tilt-shift lens enables you to control the focusing plan and it does not have to be parallel to the sensor plane.
The relation between the lens image circle and the camera sensor
To explain how a tilt-shift lens works. For a normal lens, the image circle is only slightly larger than the sensor,
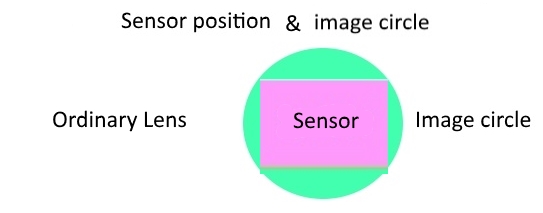
while in the case of the tilt-shift the circle is much larger, so it allows for more movements of the lens and still can get different scenes. When the lens is tilted or/and shifted, the image of the scene in front of it is projected onto the camera sensor. The resulting image is an image that is slightly different in each of the positions of the lens. So you can understand that the lens can only cover a limited area of the scene in any direction and this area depends on the maximum possible displacement of the lens related to the sensor’s position.

The use of a tilt-shift lens
-
Correcting converging vertical lines
The first use of a tilt-shift lens for architecture is to control perspective, namely to control the keystone effect. The first thing you need to keep in mind when shooting architecture with a tilt-shift lens, in order to have the verticals parallel, is to always place the camera in a parallel position with the plane of the building, thus perfectly vertical. Unless you do this, the tilt-shift will not be able to remove the keystone effect.
Then, after you compose your shot so the verticals are parallel and you have the needed scene in the frame, you can start to slowly shift the lens upwards till you include the entire building in the frame and also avoid the convergence of the verticals.
It needs a bit of practice to know how to compose so you get the final image exactly where you want it after shifting the lens

-
Miniature Effect
What the Miniature effect does is introduce some selective blur to the foreground and background of an image. This effect is usually achieved by pointing the camera down and then tilting the lens up. It’s often most successful when shooting from a high viewpoint, as this means that you can angle the camera more than when shooting at the same level as the subject.

Tilting the lens upwards means that the plane of focus moves in the opposite direction to the way that the subject is positioned, producing an extremely shallow area of sharp focus.
This tilt-shift photography effect is most pronounced when using wide apertures and you will also need to refocus on the area that you want to be sharp because tilting the lens completely alters the focus settings on the lens. The following are some sample photos:
-
Sideways tilt
Similar to the toy town effect, this relies on the extremely shallow depth of field, but instead of tilting the lens up you rotate it and tilt it to one side.
This is perfect for shooting scenes where there are objects that are the same distance from the camera on either side of the frame. By tilting the lens sideways you can then throw the subject on one side of the frame out of focus while keeping the subject on the opposite side sharp. An example would be shooting a train, and all you want in focus is the tractor.

-
Selective Focus
Tilting the lens allows you to define a focusing plane, which is not parallel to the sensor plane. This capability can give you a great tool to take astonishing photos.


-
Changing the depth of field
This effect is one of the more subtle uses of the tilt movement. It can allow you to keep a subject sharp, which would otherwise be impossible even using extremely small apertures.
Once you have framed your shot, tilt the lens slowly towards the subject that you want to keep in focus. This moves the plane of focus so that instead of being parallel to the sensor, it corresponds to the surface of the subject that you want to keep in focus.
- Panoramic shots
Nowadays, most cameras offer built-in panoramic mode. This is done by turning your camera or phone around a vertical axis to capture multiple images that will be stitched to become a panoramic photo with internal software. This makes taking panoramic photos easy, but the digitally composited image will be vastly distorted and is not pleasing to the eyes.
Another way to create a panoramic photo is by using the Shift function of a tilt-shift lens. With a few post-editing steps, we can create an optically composited panoramic photo with minimal distortion.
How to focus when using a Tilt-Shift lens
You will only be able to focus on manual mode since the mechanics of the tilt shift makes impossible the use of an auto-focus system in this lens. By using the tilt function it allows a front-to-back depth of field (DOF) meaning we can keep everything in focus, no matter the aperture, even at f/3.5 or f/2.8. What you need to do to get a front-to-back depth of field is to use a “trial and error” method:
- Mount the camera on a tripod.
- Set your aperture at f/8 for the best quality of the image (you can also set a different aperture if needed).
- Open the Live View of the camera.
- Choose two important subjects (points) that you want to be in focus, one in the foreground and the other one in the background.
- Focus on the closest point you want sharp in the scene (the foreground subject you chose).
- Tilt the lens downwards slightly to the furthest point in the scene is in focus (in the general tilt of no more than 1-2 degrees will be enough.
- Go back and forth 2-3 times with fine-tuning, while zooming up to 10x in Live View to check out the focus, till both subjects (in the foreground and in the background) are in focus, and the entire scene will then be in focus.
How to set the exposure with a Tilt-Shift lens
When tilting or shifting the lens, the exposure the camera meters changes due to the light that leaks into the camera when the lens parts move relative to each other, since the parts of a tilt-shift lens are not sealed between them and the fact that they are moving relative to one another creates small openings that allow the light to enter the lens and confuse the light meter that indicates us the right exposure.
So, what is the answer? It is not very difficult; just meter your scene before tilting or shifting the lens.
You can watch the following two-minute videos of sample photos from the well-known Canon Tilt-Shift lenses
Canon TS-E 17 mm F/4 L
Canon TS-E 24 mm F/3.5 L II
Related Post:
The Architectural Photography- The full Guide
Thanks for reading the article, hope you enjoy it and find it useful to you. If you have any questions, drop them down in the box below and I’ll answer them as soon as possible.
If you like the site, don’t forget to subscribe, we will notify you if a new article is posted. Also, if you are interested in reading about other kinds of photography techniques you can click this link “The Photography Techniques”, You will find 15 more photography techniques.


Hello!
What a great article! My mom is in photography and is learning new things with her camera and lenses. I’ll have to show her this site to get some insight on how to better her pictures!
I loved the imagery. As someone who doesn’t understand photography and the specific uses of a camera and lens, it was easy for me to follow along with your explanation because you showed pictures displaying the exact explanation.
Photography is such an important thing to learn. Life passes us so quickly that we have to snap every shot of life that we can before it’s over!
Thanks for the great article!
Cheers,
Brooke
Hi, Brooke
Much appreciated for your nice comment, our policy in the site is to provide our audiences with fresh and updated learning resources.