


Whether you are an amateur or more experienced with photography, there are a few rules or guidelines that will surely advantage you and provide overall better photography results. Here are some basic issues that you may need to manage and a few tips on how you can utilize them further bolstering your good fortune.
Top 10 photography rules:
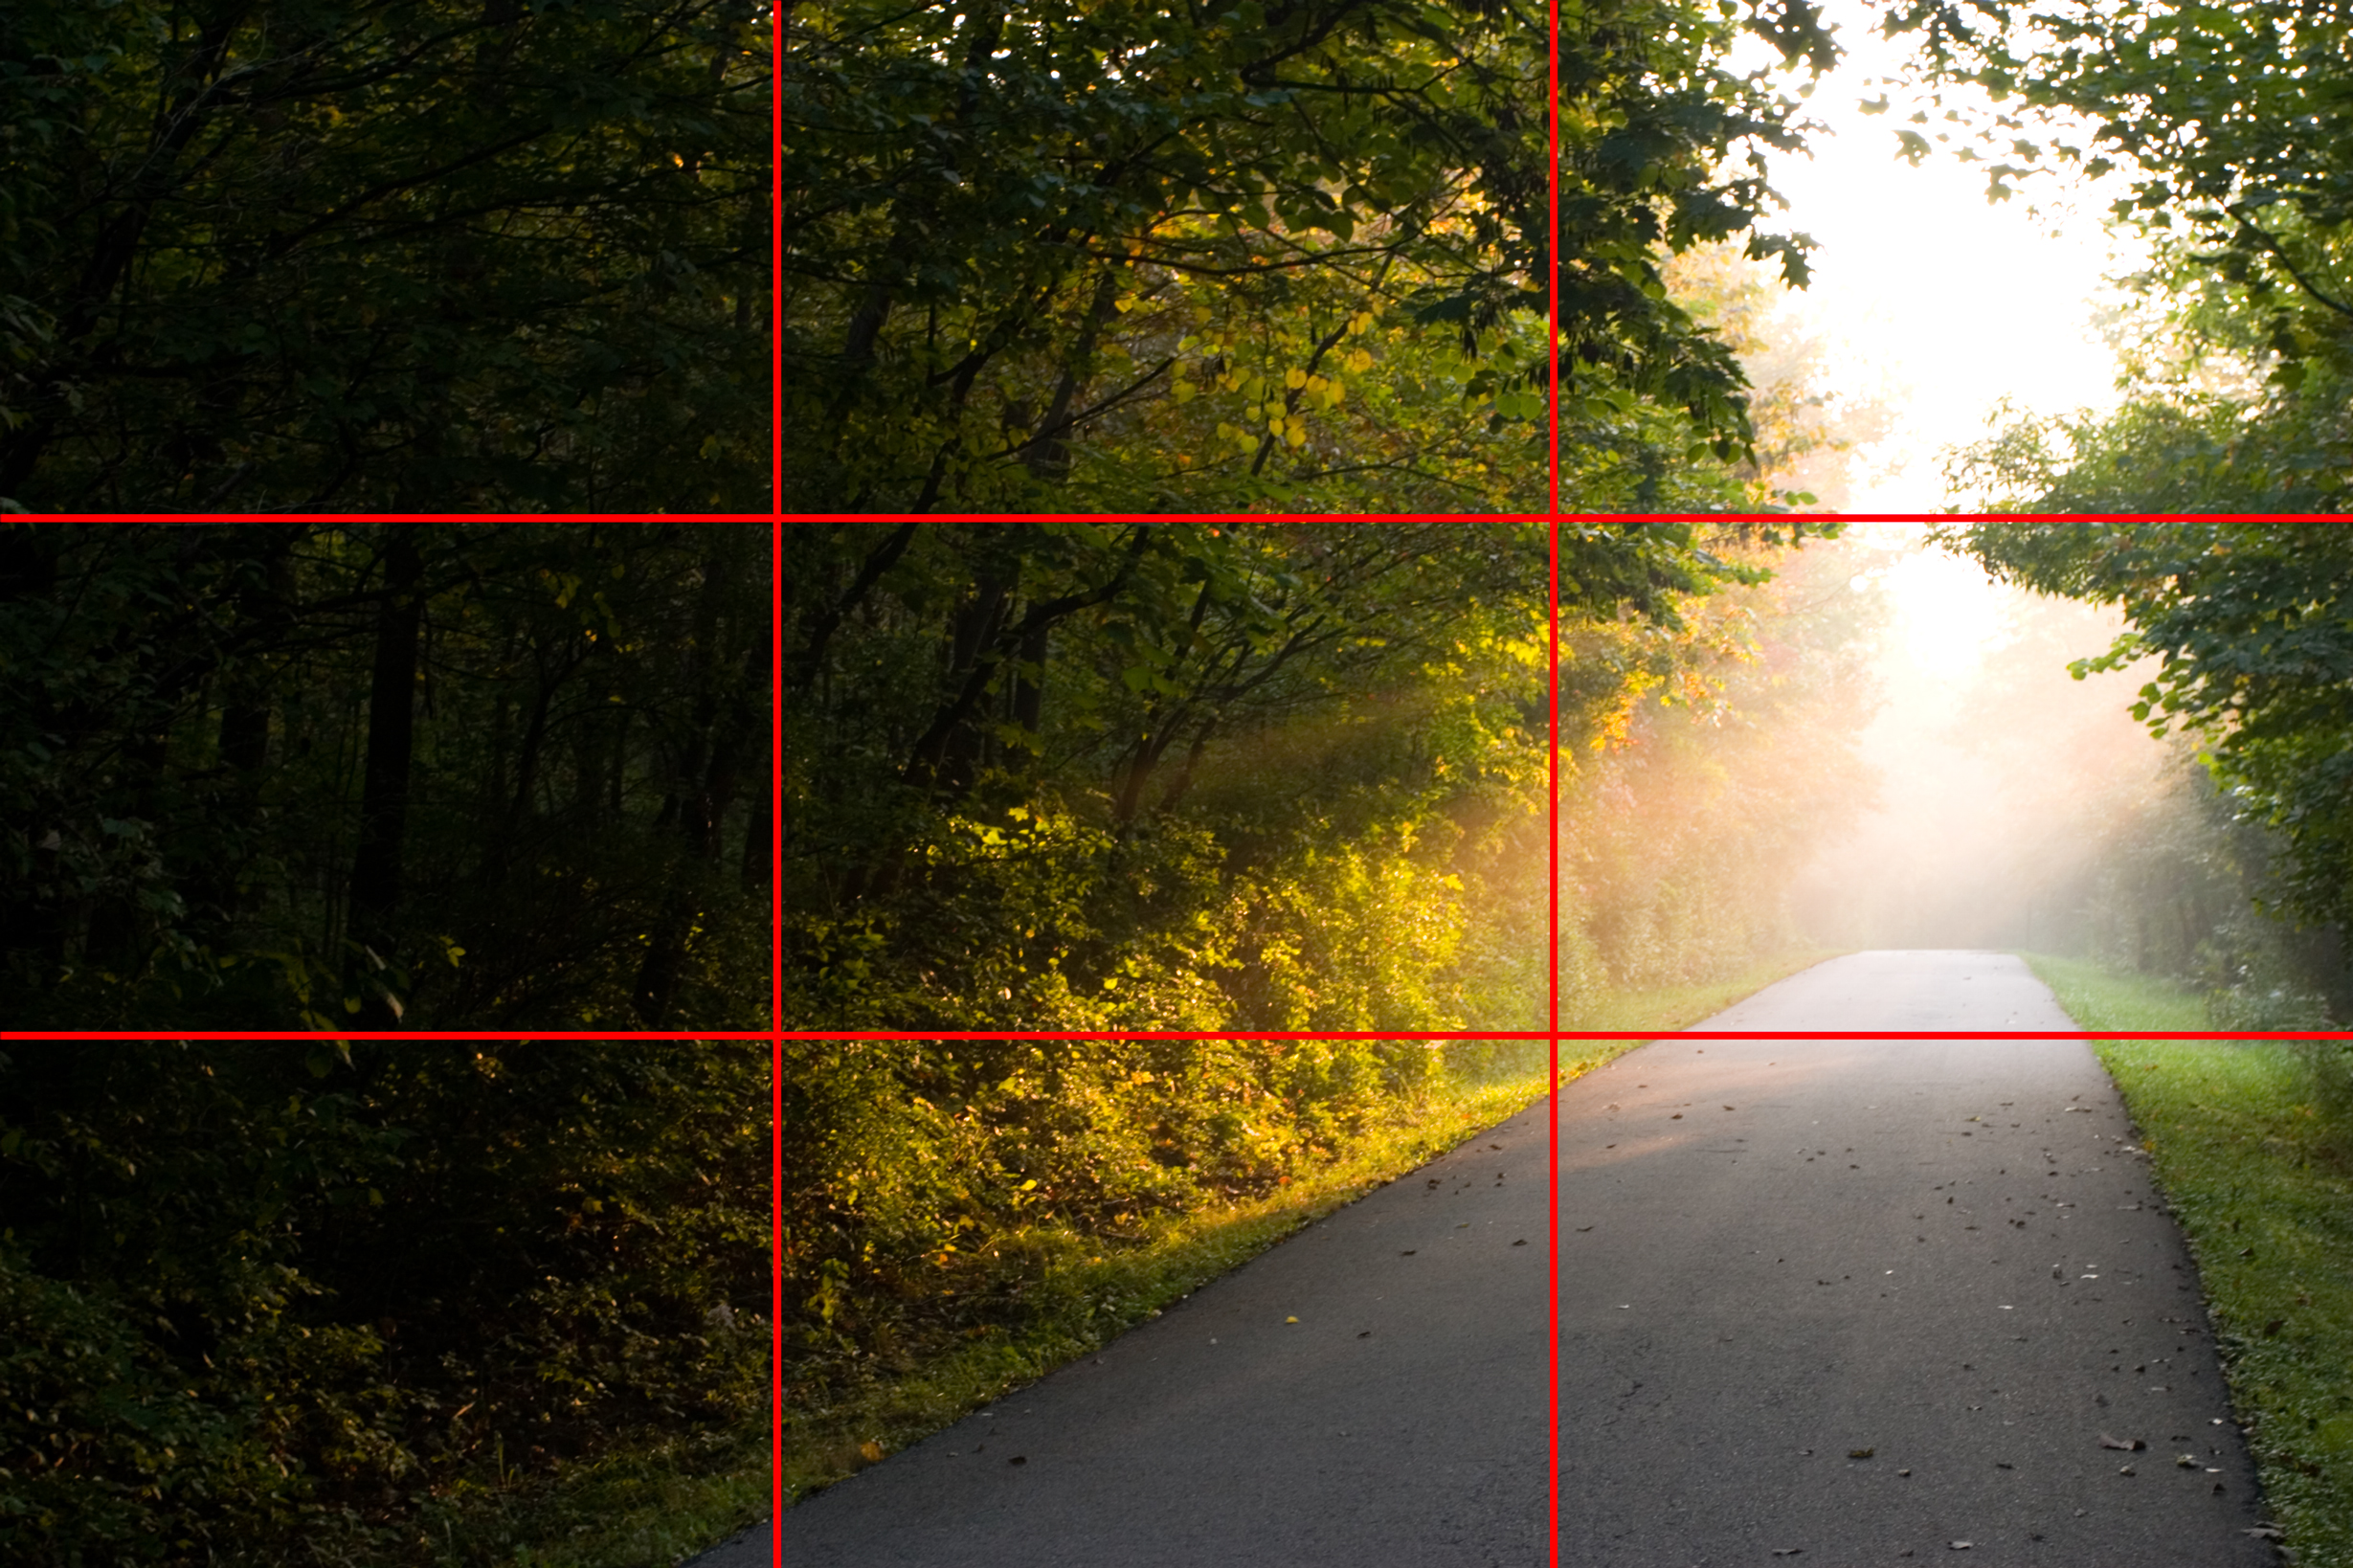
1. The rule of the thirds
First, you have to see your image as if it were divided into 9 segments, all equal and with 2 horizontal and 2 vertical lines.
The idea of this rule is that people ought to position all the important elements from your image along the lines, or the second option is to place the key elements at the point where the lines intersect.
Those who follow this rule will add extra interest and also balance to the photography. Furthermore, people should know that there are cameras that offer the option of a superimposed grid over the screen. Thus, the rule of thirds will be easier to understand and also to use.
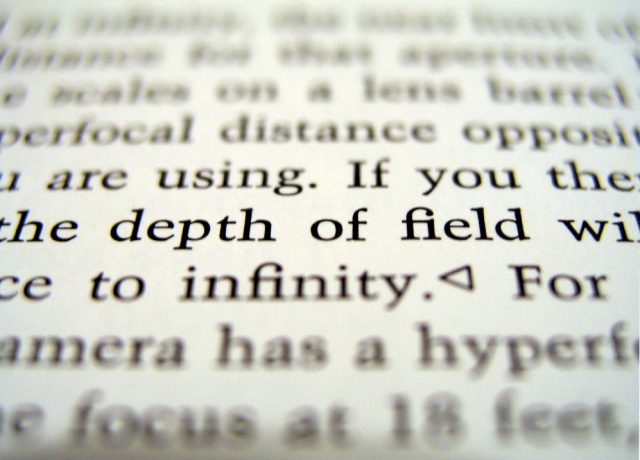
2. The rule of Depth
If we want a photograph that will ultimately convey the depth present in the real scene, then we should give more importance to the composition. Remember that, after all, a photo is two-dimensional.
Thus, try to include some elements in the background, middle ground and also foreground in order to obtain more depth.
Another useful rule, or more like a technique, is overlapping. This means that you will try to partially obscure a certain object with another one. This composition technique will create depth because the eye can understand these layers and the brain will separate them out.
3. Avoid Camera Shake
Blur owed to camera shake is something that can torment any picture taker and here are a few approaches to stay away from it.
Initially, you have to figure out how to hold your camera appropriately; utilize both hands, one around the body and one around the lens. Hold the camera near your body for extra backing. Additionally, ensure you are utilizing a shutter speed that matches the lens central length.
So, in case you’re utilizing a 100mm lens, the shutter speed ought to be bigger than 1/100th of a second. Another idea is to try and utilize a tripod or monopod each time you have the possibility. If you do not have a tripod, try using a table or even a wall to balance out the camera.
4. The “Sunny 16” Rule
This rule can help us to predict how to meter a camera on a warm, sunny day when we want to take photos outdoors.
If the weather is sunny, then you should use an f/16 aperture setting the shutter speed should be 1/100th, in case you are utilizing ISO 100. These settings will most likely provide a clear photo, that is neither over nor underexposed.
It is a useful rule to follow in case your camera does not have an LCD screen, and thus, you do not have the option of checking the photograph or in case you do not own a light meter.

Photo credits go to Esmer Olvera
5. Use a Polarizing Filter
In the event that you can just purchase one filter for the lens, you should choose it a polarizer. This filter decreases reflections from glass, metal, and of course, water, and it enhances the shades of the sky and it will also be useful to secure your lens. There’s no motivation behind why you could not use it for the majority of your photography.
The suggested sort of polarizer is round on the grounds that these permit your camera to utilize TTL metering.

6. Patterns and symmetry
Photographers with a larger life perspective know that we are all surrounded by patterns. These create a beautiful symmetry all around us, in objects and nature, too. They can result in eye-catching compositions.
One amazing way to use symmetry is to break it and subsequently to obtain a focal point and tension.

Photo credits go to Jeffrey Zeldman
7. The rule of viewpoint
Before capturing your subject, set aside time to consider where you will shoot it from.
Our perspective massively affects the structure of our photograph, and, therefore, it can extraordinarily influence the message that the photo passes it on.
As opposed to simply shooting from eye level, consider capturing from high above, down at ground level, from the back, from the side, from close up, from far away, etc.

8. Framing for your photography
Nature and man-made surrounding objects are the ideal frames for a lovely photograph. Try to give more credit to these natural frames, created from archways, holes, or trees.
You can isolate the main subject from the exterior imagery by placing these frames around the edges of your photography. Consequently, your result will be a better-focused image and more attraction towards the main element in your photo.
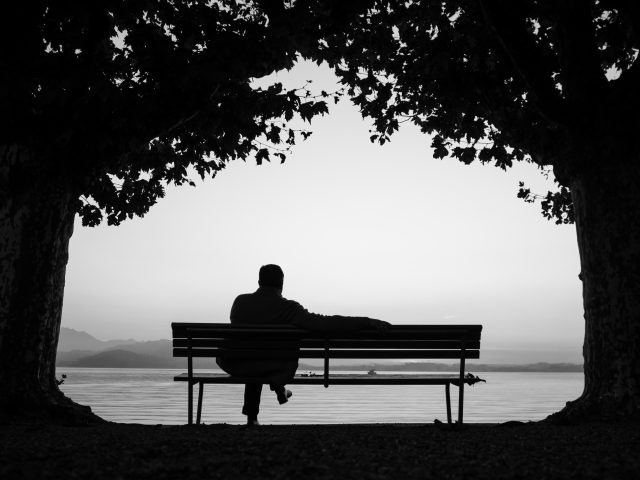
Photo credits go to Thomas Leuthard
Additional reading: Rule of symmetry In photography
9. Choose the right ISO
The ISO setting decides your camera’s sensitivity to light, furthermore how fine the grain of the picture.
The ISO we pick relies on upon the circumstance – when it’s dim we have set the ISO up to a higher number, say between 400 – 3200, as this will make the camera more delicate to light and afterward we can abstain from blurring.
On sunny days, we can pick “ISO 100” or the “Auto –setting” as we have all the more light to help us.
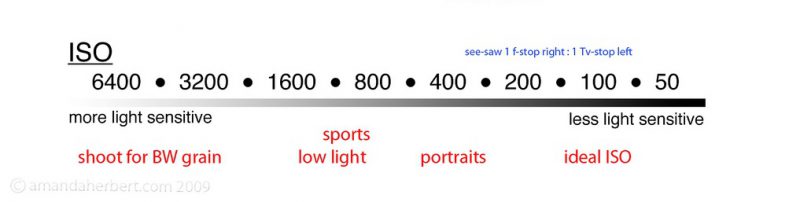
Photo credits go to M@ndy
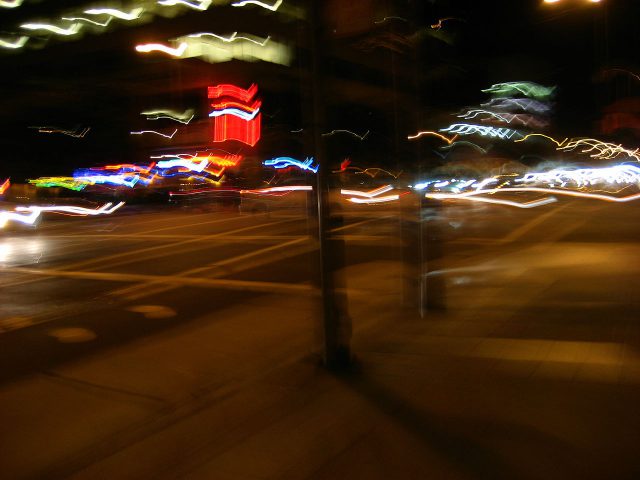
10. Experiment with shutter speed
Trying is always to your advantage. Just like we use our creativity, we can also try different shutter speeds in order to create outstanding effects.
For example, for night photography, try taking the image at 4 seconds shutter speed. This way you will obtain some interesting trail lights along your main element of the picture.
For a 1/250th shutter speed, you will obtain a freeze in the action, instead of a bright trail.
This technique will be successful on the condition you use a tripod and the rule is applied for moving objects.
Photo credits go to M@ndy
One Final Thought about the Top 10 photography rules
they don’t work in your scene, ignore them; if you find a great composition that contradicts them, then go ahead and shoot it anyway. But they can often prove to be spot on and are worth at least considering whenever you are out and about with your camera.
In the event that they do not work in your scene, overlook them.
On the other hand, these simple rules are worth being taken into consideration. They may prove suitable for most occasions and they will provide marvelous results and beautiful memories for you and those around you.
Walkthrough this video:
Thanks for reading, hope you enjoyed the post & if you have any questions just drop me a comment below and I will be happy to answer you.
If you enjoy the site, don’t forget to subscribe, we will only inform you when a new article is posted.
The form you have selected does not exist.


Such nice tips about Photography. I love to capture photos but I have very little knowledge about it. Your website looks like the perfect place to learn the art of photography. Will surely come back for more.
Thanks Demi for passing by my website, I’m glad that you liked it, you are most welcome.