


The puppet Warp tool in Photoshop is one of the essential tools to use if you need to manipulate and change the shape of an object heavily. It allows you to make significant adjustments to one area while leaving another relatively intact. While the Liquify tool is fantastic, you’ll struggle to make significant changes; such as moving an arm, bending an object, stretching, and so on.
In this tutorial, I will explain How to Use Puppet Warp in Photoshop, how it works, and provide some examples to show you how to use this powerful tool.
What is the Puppet Wrap command?
Puppet Warp provides a visual mesh that lets you drastically distort specific image areas while leaving other areas intact. You can add, move, and rotate pins to seamlessly transform parts of your subject into different positions while keeping the other elements in their original position.
Manipulating images is not necessarily an essential skill to learn, but its applications are far-reaching, from product photography, weddings, portraits, and swimsuits – the options are endless really. It’s also quite fun, and generally simple once you know what you’re doing.
You can use puppet wrap to make a subtle retouch (such as shaping hair) or do total transformations (such as repositioning arms or legs). It can be used in a smart object layer to nondestructively distort images. This means you can quickly go back and tweak the adjustments by double-clicking on the Puppet Warp label to bring the pins back and readjust them as you need.
You can also click on the Reset icon to reset the pins and start over.
How does Puppet Wrap work?
In the Layers panel, select the layer you want to transform.
Choose Edit > Puppet Warp.
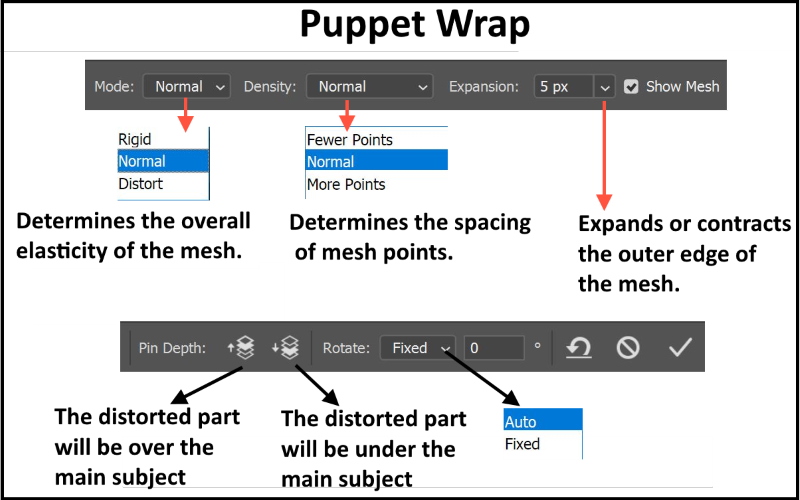
In the options bar, adjust the mesh settings
In the image window, click to add pins to areas you want to transform and areas you want to anchor in place.
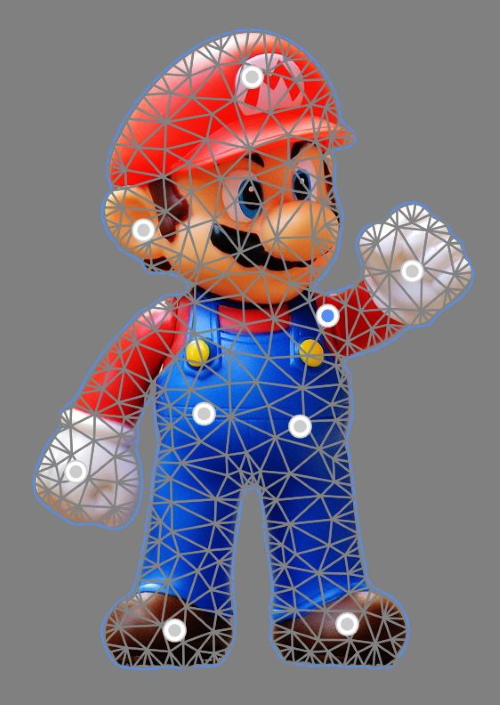
Click and drag a pin (in this example the left hand of the subject) to transform the arm of the subject. The adjoining pins hold the nearby areas intact.

To define where to position the right hand (in front or behind the body of the subject) click, change the pin depth in the puppet wrap’s options menu.

To twist the subject (in this example the head), select a pin (in the middle of the head) and then position the cursor near to, but not over the pins. When a dotted circle appears, drag to visually rotate the head.
To delete a pin, click on a pin you want to remove to activate it, and press Delete (Windows) or Backspace (macOS).
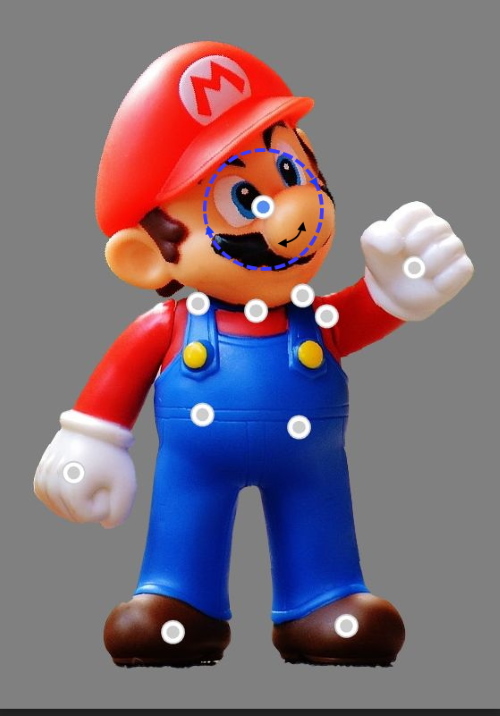
The result is shown below

Useful shortcuts for Puppet Wrap
The below table summarizes the puppet wrap keyboard shortcuts.
Shortcut Windows
Cancel completely Esc
Undo last pin adjustment Ctrl + Z
Select all pins Ctrl + A
Deselect all pins Ctrl + D
Select multiple pins Shift-click
Move multiple selected pins Shift-drag
Delete a pin Delete
How to Use Puppet Warp in Photoshop
Example 1
Ideally, to manipulate a subject and move its arm, head, or leg, you should have a transparent background. However, in the following example, we have a background, and we want to manipulate only the subject without affecting the background. We have to separate the subject from the background using any selection tool and place the subject in a separate layer. Then in the background layer, we delete the subject and fill the deleted area with the Content-aware filter. After that, we can apply the Puppet Warp tool.
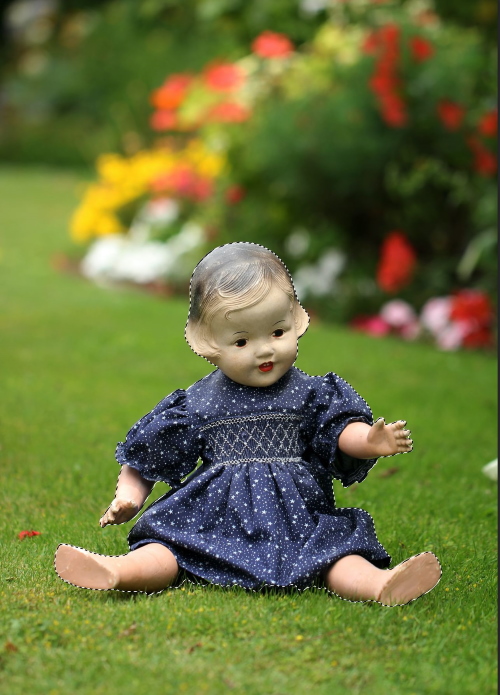
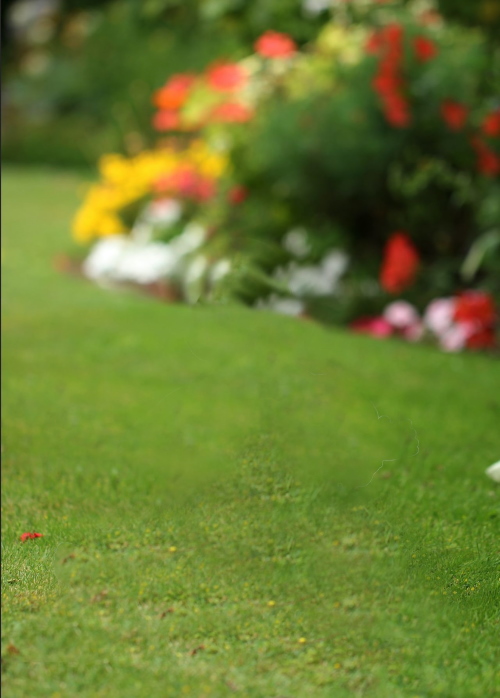
I will use the below photo
Photo by Sandy Millar on Unsplash
Step 1
Open the photo in Photoshop
Duplicate the layer (Ctrl + J), name it “subject and background”
Step 2
Select the subject (use your favorite selection tool), I use Select and Mask
In addition, choose the output to a new layer, and name the layer “subject”
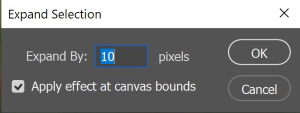
Expand the selection (Select > Modify > Expand)
Expand by around 10 pixels.

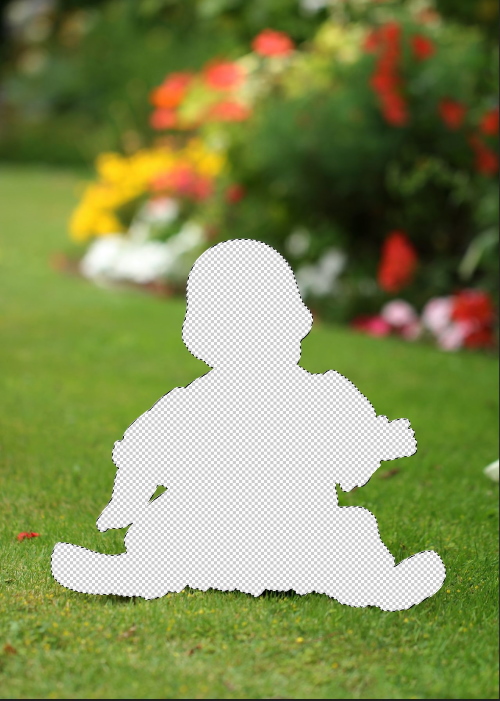
Step 3
With the selection active, click on the “subject and background layer”, press delete to remove the subject
Click Edit > Fill (or use the shortcut Shift + F5).
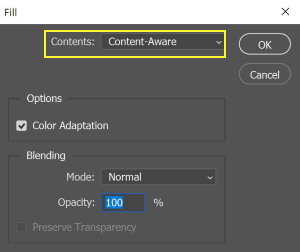
From the Content, choose Content-Aware, and press O.K
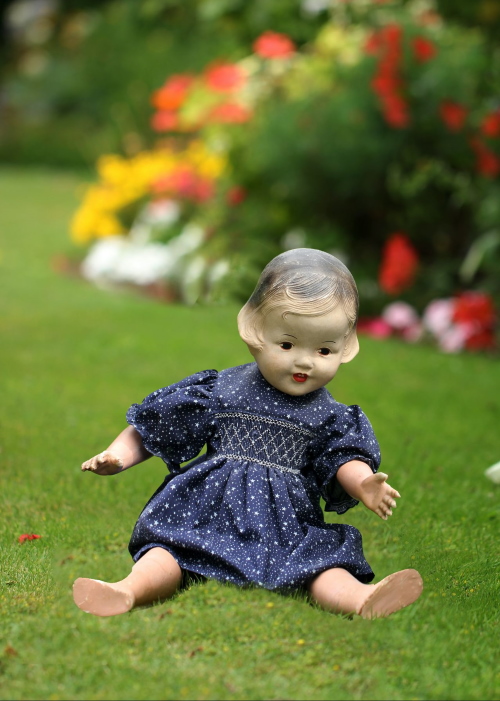
The result is shown below
Step 4
Click on the “subject layer” and, convert it to a Smart object
Click Edit > Puppet Warp
Add pins and move or rotate them to make the required changes.

Finally, to refine the editing of the photo, you may need to use the Content-Aware tool and mask in some areas.
The result is shown below
In the following three examples, I follow the same steps mentioned in example 2
Example 2
Photo by Elyas Pasban on Unsplash
Example 3
Photo by Aenic Visuals from Pexels
Example 4
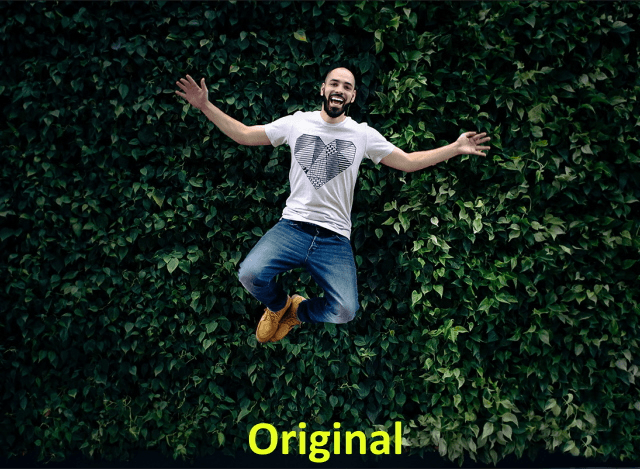
Photo by Jonathan Sebastiao on Unsplash
Related posts
How To Adjust Facial Features In Photoshop
What Are The Selection Tools In Photoshop?
What Is A Mask In Photoshop? – A Complete Beginner’s Guide
For more Photoshop techniques and tutorials, you can check my editing category
Thanks for reading, I hope you enjoyed the article, in case you have any questions just drop them below & I will be happy to answer you.
The feature Photo by Yogendra Singh from Pexels
If you enjoy the site, don’t forget to subscribe, we will only inform you when a new article is posted.


Hi Amin, I want to use the Photoshop program in the future. I need to have more qualitative and beautiful pictures for my Blogs, especially my food Blog photos. I’m so glad to find your site and learn more about Photography. Your article about Puppet Warp in Photoshop is helpful and clear to understand by everyone. Each person like me who doesn’t know anything about photoshop can profit and understand how to use and benefit from this photoshop feature.
Thank you for sharing this. I hope to read other informative and learning photography articles from you.
Best
Alketa
Hi Alketa, I’m very glad you find the article useful to you, and thanks for your feedback.
Wow, what great information. I have photo shop but never used the puppet wrap tool. To be honest I didn’t know how. Your in depth explanation has me wanting to get back into it and try it out. I am avid photographer and have a Sony RX100. I use it for both travel photos and vlogging. Can you tell me where do I find the content aware filter. It has been a while since I have used my photo shop and I am a bit rusty. Thanks for motivating me to get back into my photography. Stephen.
To fill a selected area with the content-aware, Click Edit > Fill (or use the shortcut Shift + F5), then From the Content, choose Content-Aware, and press O.K
Thanks for the comment