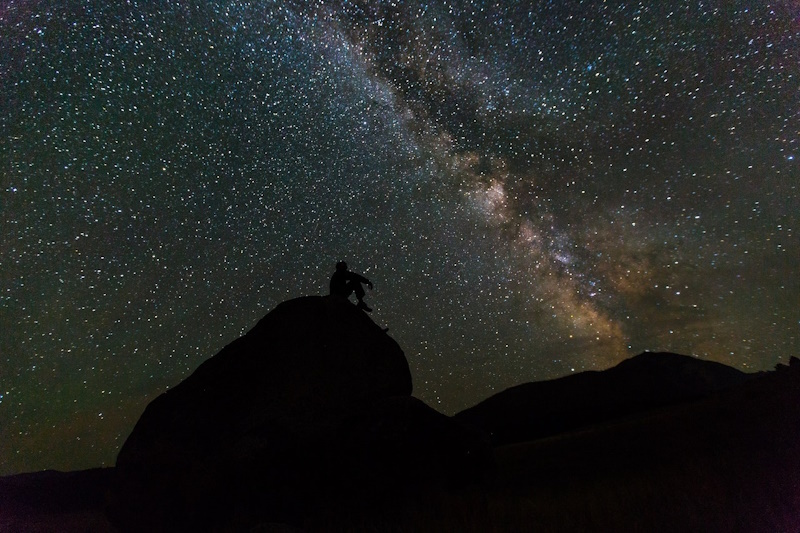


Hey there, have you ever looked up at the night sky and felt a sense of wonder? Well, get ready to take that wonder to a whole new level with astrophotography for beginners. Imagine capturing the twinkling stars, mesmerizing galaxies, and even shooting stars through your camera lens. It’s like turning the sky into your very own masterpiece!
Astrophotography isn’t just about snapping pictures; it’s about preserving moments of cosmic beauty. It’s like freezing time and space in a single frame. You’ll be amazed at how much detail the universe holds when you start exploring it through your camera. Trust me, there’s a whole universe waiting to be discovered through your lens.
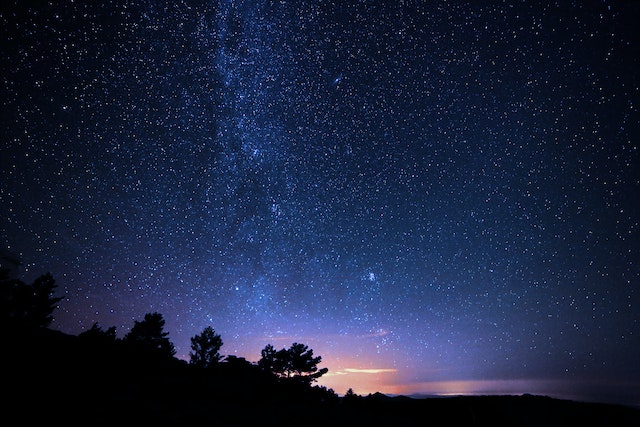
Photo by Miriam Espacio
What is Astrophotography?
Astrophotography is the captivating art of capturing the beauty of the night sky through the lens of a camera. It involves skillfully combining photography techniques with astronomical knowledge to immortalize celestial wonders such as stars, planets, galaxies, and nebulae. By extending exposure times and utilizing specialized equipment, astrophotographers unveil the hidden splendor of the cosmos that our eyes alone often fail to perceive.
Astrophotography opens the door to a breathtaking world. Imagine capturing the moon’s craters, dancing Northern Lights, and the sprawling Milky Way—all through your camera lens. Let’s dive into the enchanting realm of astrophotography!
This intricate dance between science and creativity allows enthusiasts to create breathtaking images that showcase the vastness and mystery of the universe, inviting us to contemplate our place within it.
Below are some of the activities that astrophotography includes:
-
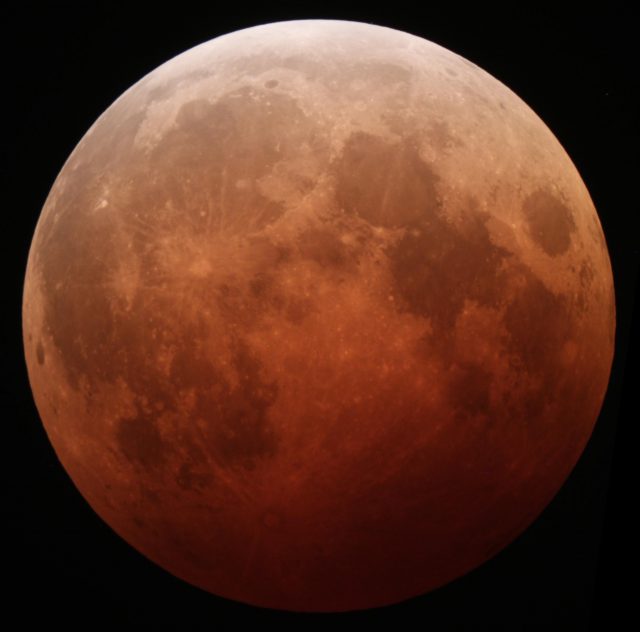
Capturing the Moon’s Mystique
The moon, our celestial neighbor, is a captivating subject. With a telephoto lens, you can reveal its intricate craters and rugged terrains. Experiment with different phases, from the crescent to the full moon, each unveiling a unique charm.
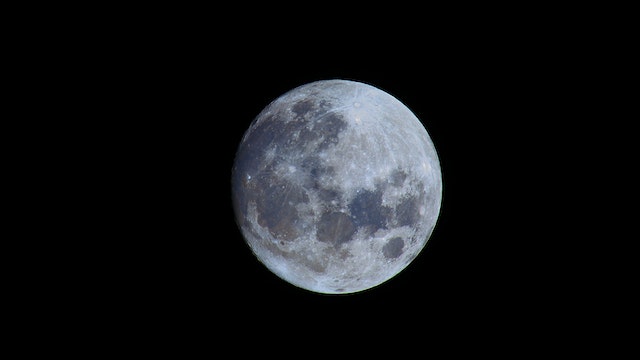
Photo by Jose Gabriel Ortega Castro
-
Capture the sky stars
Capturing the mesmerizing allure of twinkling stars against the backdrop of the night sky is the essence of astrophotography. Through careful manipulation of exposure settings and the use of dedicated equipment, photographers can freeze these celestial gems in time, revealing their intricate patterns and celestial narratives. Whether it’s a single brilliant star or a sweeping panorama of the Milky Way,
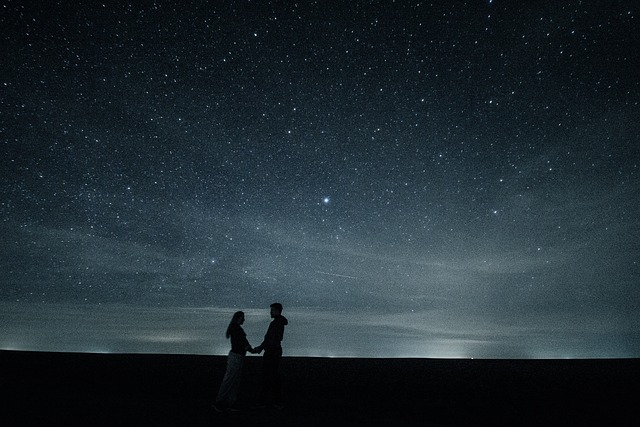
Image by Mihai Paraschiv from Pixabay
-
Chasing the Northern Lights
The Northern Lights, or Aurora Borealis, paint the sky with vibrant hues. Head to darker landscapes, set up your camera and capture the dazzling dance of colors. Long exposures reveal the mesmerizing green, pink, and purple curtains lighting up the night.
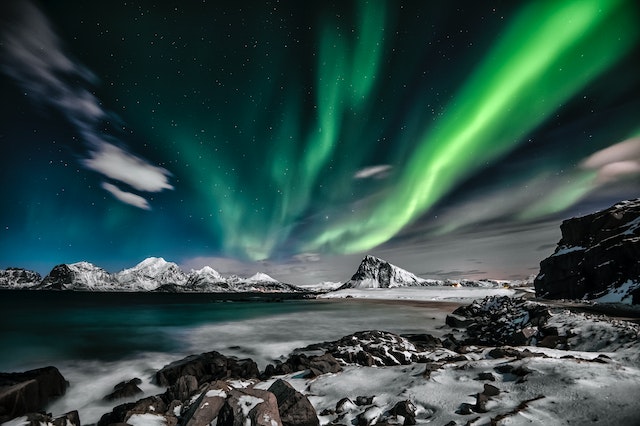
Photo by stein egil liland
-
Journeying into the Milky Way
The Milky Way, our galaxy’s star-studded highway, offers an awe-inspiring spectacle. Find a spot away from city lights, use a wide-angle lens, and shoot with long exposures. Watch as the Milky Way arches across the sky, revealing its galactic secrets.
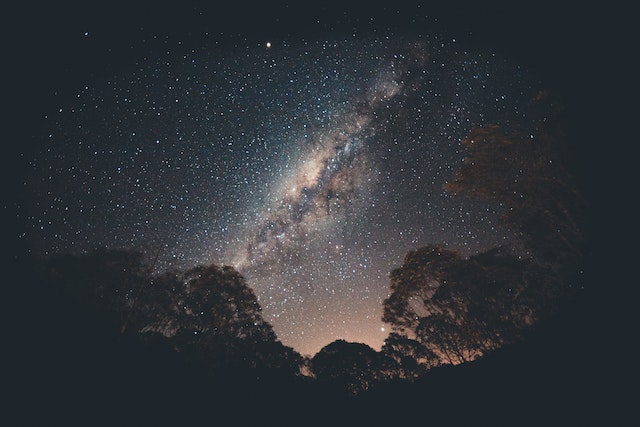
Photo by Lucas Pezeta
-
Unveiling Nebulas and Deep-Sky Wonders
Astrophotography isn’t just about familiar subjects; it’s about unveiling celestial mysteries. Nebulas, galaxies, and star clusters come to life through long exposures. Capture Orion’s Nebula or the Andromeda Galaxy, millions of light-years away.
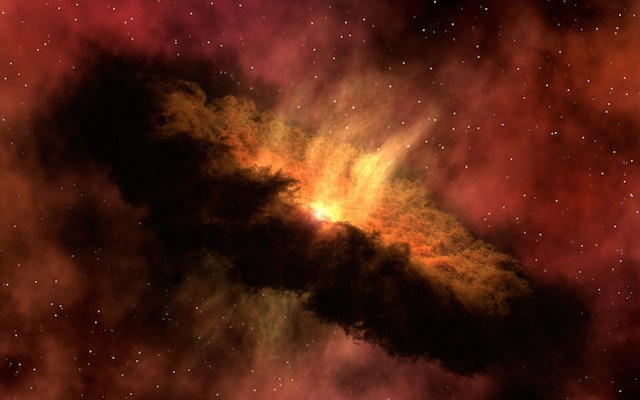
Photo by Pixabay
-
Capturing Meteor Showers
Imagine the sky turning into a cosmic canvas, as bright shooting stars leave brief, glowing trails across the dark backdrop. This incredible sight is called a meteor shower – a stunning space event that amazes people all over the world.
Meteor showers happen when Earth crosses paths with tiny leftovers from comets traveling around the Sun. These little pieces, sometimes as small as a grain of sand, zoom into our atmosphere and create dazzling streaks of light. You might have heard them called meteors or “falling stars.” It’s like nature’s own fireworks show, right above us!
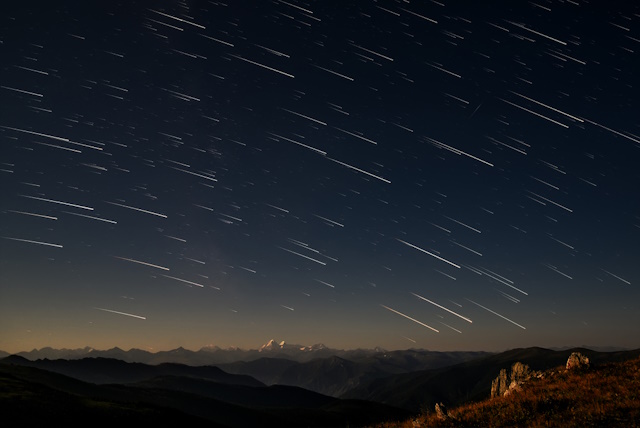
Photo by Depositphotos
Why Astrophotography is Accessible for Beginners
Now, you might be thinking, “Isn’t astrophotography for super-experienced photographers?” Not at all! Astrophotography is totally accessible, even if you’re just getting started with photography. Think of it as a journey. You start with the basics, learn the ropes, and before you know it, you’re capturing stunning celestial scenes.
Here’s the cool part: modern cameras are like magic wands for astrophotography beginners. They have settings that make capturing stars and galaxies a whole lot easier. Plus, there’s a bunch of friendly software that can help you enhance your shots afterward. You don’t need a spaceship or a fancy observatory – just a camera, a tripod, and a sense of curiosity.
And guess what? You don’t need to live in the middle of nowhere to do this. Even if you’re in a city, you can still photograph the moon, planets, and some brighter stars. Just a little planning and creativity, and you’ll be amazed at what you can achieve.
So, whether you’re a photography enthusiast or just someone who loves gazing up at the night sky, astrophotography for beginners is your ticket to a cosmic adventure. It’s like joining a secret club where the entry requirement is simply a passion for exploring the universe.
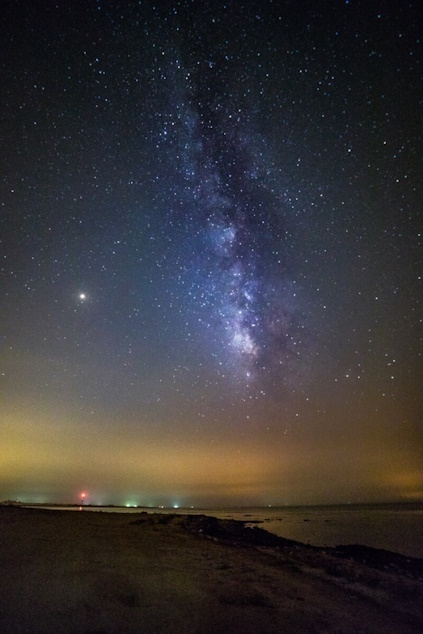
Photo by Ehab Amin
Getting Started with Astrophotography
Essential Equipment for Beginners
Let’s gear up with the essentials that every budding astrophotography needs. From capturing star trails to unveiling the Milky Way, let’s get started!
-
Camera and Lens Selection
Your camera is your trusty spaceship in this cosmic adventure. For astrophotography, a DSLR or mirrorless camera works wonders. Look for one with manual mode capabilities. A camera that performs well in low light is your best buddy.
When it comes to lenses, go for a wide-angle lens with a low f-stop number (like f/2.8 or lower). This lets more light in and allows you to capture those twinkling stars and galaxies. Remember, the universe is vast, so your lens helps you capture more of it.
To help you select the right lens for Astrophotography check “Best Wide Angle Lens For Astrophotography”
-
Tripod
When taking photos at night, the camera’s shutter is open for a longer time (because of the low light). Any movement, even if it’s as minor as pressing the shutter button, can cause blur. A tripod eliminates this risk by holding the camera steady, resulting in sharp and detailed images.
Another reason you need a tripod, Astrophotography often involves using long exposure times to capture faint light from stars and other celestial objects. Even the slightest camera shake can result in blurry images. A tripod provides the stability needed to keep your camera perfectly still during these extended exposures, ensuring crisp and clear shots.
Finally, a tripod allows you to carefully compose your shots. You can frame the scene precisely and make minor adjustments without worrying about changing the camera’s position unintentionally.
Further reading “Best Tripods In 2023 – Top 5 For Sharper Photos!”
-
Mount
While a tripod stabilizes your camera, a mount takes it a step further. A star tracker mount compensates for the Earth’s rotation, allowing you to take much longer exposures without the stars appearing as streaks in your images. This is particularly beneficial for capturing deep-sky objects like galaxies and nebulae.
As the Earth rotates, stars appear to move across the sky. A star tracker mount counteracts this motion, keeping your camera aligned with the stars. This results in pinpoint stars and opens up the possibility of capturing intricate details that would be lost with shorter exposures.
Finally, a mount expands your creative possibilities. With longer exposures, you can capture faint details, reveal vibrant colors in nebulae, and showcase the Milky Way in all its glory. It’s like upgrading your camera to capture the cosmos’ full potential.
By combining a tripod with a star tracker mount, you create a setup that delivers the best of both worlds. The tripod ensures your camera is stable and secure, while the mount compensates for the Earth’s rotation, enabling you to capture breathtaking images of the night sky without the limitations of short exposures. the following is a recommended mount:
iOptron SkyGuider Pro Camera Mount
The iOptron SkyGuider Pro Camera Mount is a high-precision, compact, and affordable tracking mount for astrophotography. It is capable of tracking celestial bodies with great accuracy, making it ideal for capturing long-exposure images of stars, galaxies, and other deep-sky objects.
The SkyGuider Pro features several innovative design elements that make it a great choice for astrophotographers. These include:
- A compact and lightweight design that makes it easy to transport and set up.
- A silent tracking system that eliminates vibrations and allows for smooth, long-exposure images.
- A built-in rechargeable battery that provides up to 12 hours of tracking power.
- A precision polar scope with adjustable illumination for accurate polar alignment.
- A variety of mounting options, including a built-in alt-azimuth base and a declination bracket for heavier payloads.
-
Remote Shutter Release
Ever heard of the term “camera shake”? It’s when even the slightest touch of your camera causes blurry images. To combat this, a remote shutter release is your secret weapon. It lets you trigger the shutter without touching the camera, ensuring those shots are razor-sharp.
For more information, check “What Is a Camera Remote? – Types and Recommendations”
Planning for Astrophotography
1. Choosing the Right Time and Location
In astrophotography, the concept of time takes on a whole new dimension. Timing isn’t just important – it’s the conductor of your cosmic orchestra. While the stars are constant companions above, some nights hold a touch of magic that sets them aglow.
- New Moon Phases
When there is a fresh new moon phase, the moon momentarily steps aside, transforming the sky into a rich, velvety tapestry. As the moon takes a temporary leave of absence, the sky becomes a dark, velvety backdrop. This absence of moonlight allows the stars to truly shine, revealing their intricate details and captivating brilliance. These nights are your celestial playground, offering the perfect stage for your astrophotography
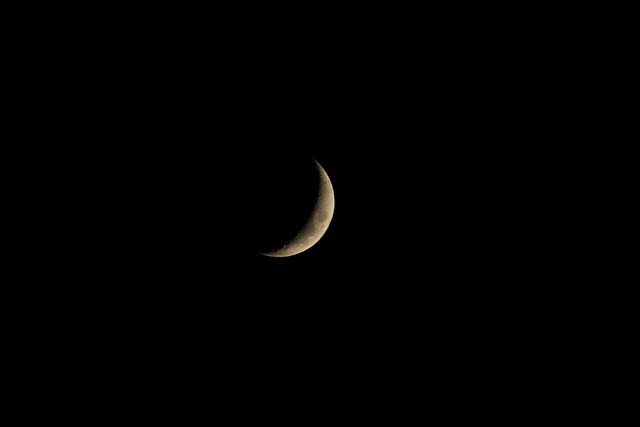
Image by Khusen Rustamov from Pixabay
- City Lights vs. Cosmic Delights
Imagine you’re preparing for a special performance – your astrophotography session. The stage you choose can either elevate your experience to celestial heights or dim the sparkle of the stars. In the heart of the city, city lights cast their glow, creating a captivating urban landscape. However, these lights can be a double-edged sword, washing out the delicate luminescence of the stars.
For a pure and unfiltered connection to the cosmos, it’s time to venture beyond the city limits. Think of open fields where the horizon stretches infinitely, majestic mountains reaching for the heavens, or serene national parks where nature’s symphony takes center stage. The stars shine with unwavering brilliance in these havens of minimal light pollution.
- Weather Condition
Weather condition plays a pivotal role in shaping your cosmic encounters. Clear skies are your golden ticket to unveiling the treasures of the universe. When the clouds part and the canvas of the night sky is untouched by their presence, you’re granted front-row seats to an awe-inspiring spectacle.
Although clouds may add drama to other photography genres, when it comes to stargazing, they’re not the best companions. Their whimsical dance can obscure your view and dampen the magic of the night. Monitoring weather forecasts becomes a part of your astrophotography routine – a way to anticipate when the stars will take the stage and shower their brilliance upon you.
2. Tracking Celestial Events
Being a fan of learning more about the night sky and all of its wonders—from stars to rare game-changing lunar events—there are several apps for that. These apps can not only help you identify constellations, stars, and planets in real-time, but they can also alert you of upcoming astronomy events, whether it’s a lunar eclipse or a meteor shower. The following are some of these apps:
- NASA App, Available for free on both iOS and Android devices.
- Sky Guide is available on iOS devices; the basic version is free and offers in-app purchases.
- SkySafari is available on iOS devices for $2.99 and on Android devices for free with in-app purchases.
Astrophotography Techniques
-
Capturing Star Trails
Ever seen those stunning photos where the stars create mesmerizing trails across the sky? That’s star trail photography, a magical technique. It involves taking long exposures, like leaving your camera’s shutter open for several minutes. As Earth spins, the stars appear to move, creating those beautiful streaks.
Stacking involves taking multiple photos of the same scene and merging them later. This reduces noise and enhances the trail’s brightness, resulting in a jaw-dropping celestial masterpiece.
To capture breathtaking star trails, you need a canvas free from the city’s light pollution. Think about it – the darker the sky, the brighter the stars. Head to spots far from city lights, like open fields or remote areas, for optimal results. Planning ahead and scouting locations during the day can make your night sky adventure even more rewarding.
Set your camera to manual mode, and start with a wide aperture (lower f-number) to let more light in. Experiment with different exposure times, but don’t go too long; star trails might turn into star blurs.
Remember to turn off long exposure noise reduction – this saves time between shots. If you’re stacking, shoot in RAW format for more flexibility during editing. And speaking of editing, software like Photoshop or dedicated stacking programs will help merge your shots into an awe-inspiring trail masterpiece.
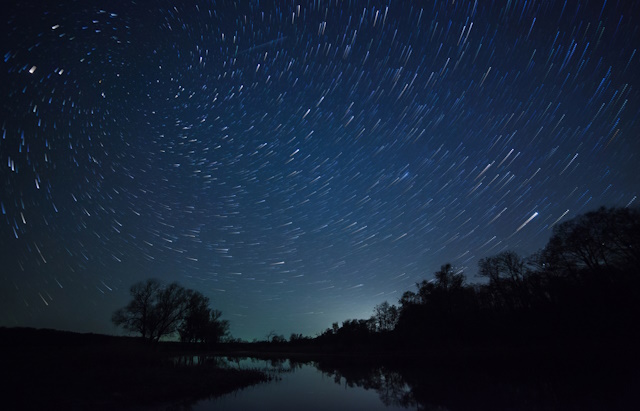
Photo by Depositphotos
-
Photographing the Milky Way
Imagine photographing a river of stars flowing across the night sky. That’s the Milky Way, our home galaxy, in all its glory. To capture this cosmic wonder, you need to know when and where to look.
Start by heading out to a location with minimal light pollution. Wait for a moonless night – this is your canvas for capturing the Milky Way’s brilliance. Now, find the galactic center – the heart of the Milky Way – usually visible as a bright band stretching across the sky. Use apps like Stellarium or PhotoPills to guide you to this celestial treasure.
Now, it’s time to dial in the perfect camera settings. First, switch to manual mode, and choose a wide-angle lens to capture the vast expanse of the galaxy. Set a wide aperture (a low f-number) to let in as much light as possible. This is crucial for capturing the Milky Way’s delicate details. Start with an ISO between 1600 and 3200 – this makes your camera more sensitive to light.
As for the shutter speed, experiment with exposures between 10 to 25 seconds. Longer exposures might cause stars to blur. Keep an eye on the histogram – a graph that shows light distribution – to avoid overexposing or underexposing your shot.
Remember, a sturdy tripod is your best friend. It keeps your camera steady during those long exposures, preventing shaky shots. And if your camera has a mirror lock-up feature, use it to reduce vibrations.
Milky Way photography is a blend of skill and patience. As you press that shutter button and capture the cosmic dance of stars, remember that practice makes perfect. Don’t be discouraged if your first shots don’t match your expectations – the Milky Way rewards those who persist.
Further reading: “Milky Way Photography Tips”
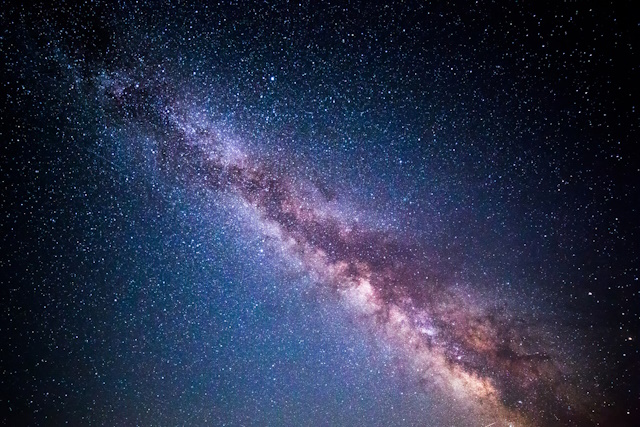
Photo by Depositphotos
-
Shooting Stunning Meteor Showers
You have to know exactly when and where the sky will light up with falling stars. Meteor showers have their own celestial schedule, and you’re invited to the show! Look up meteor shower dates online or use apps like SkySafari or Star Walk to stay in the cosmic loop.
Mark your calendar for nights when the moon isn’t hogging the spotlight – new moon phases are your VIP tickets to meteor magic. Research the best times for viewing based on your location and weather conditions. Remember, clear skies are your photography partners.
Find a cozy spot away from pesky city lights. You want those meteors to shine bright and steal the show. Set up your camera on a sturdy tripod – shaky shots are the enemy.
Switch to manual mode and open your lens wide with a low f-number, letting in all that cosmic goodness. Bump up your ISO to make your camera super sensitive to light – ISO 1600 or 3200 is your meteor-hunting sweet spot.
Now, for the shutter speed, experiment with exposures around 10 to 30 seconds. This captures those meteor streaks without turning stars into blurry blips. Remember to keep that remote shutter release handy for shake-free shooting.
Patience is your cosmic virtue. As meteors dart across the sky, keep clicking that shutter button. You might capture a single meteor or a meteor shower masterpiece – each shot is a celestial surprise.
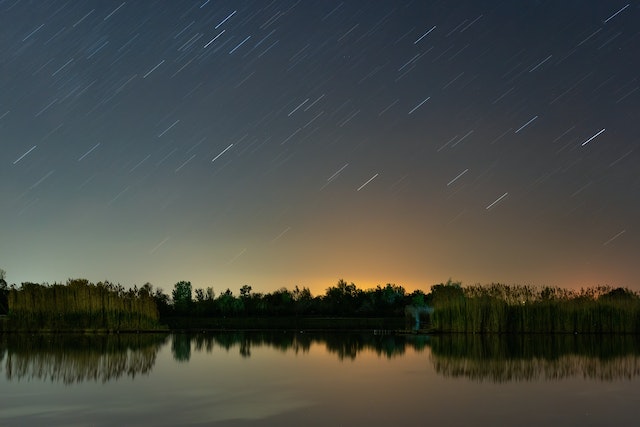
Photo by Péter Kövesi
-
Northern Lights Photography
Let’s capture the breathtaking dance of the aurora borealis! Northern lights, or auroras, follow their own schedule. Look up online or use apps like Aurora Forecast to find out when the Aurora party is happening near you. Keep an eye on the moon’s schedule too – a dim moon lets the northern lights shine even brighter. And don’t forget your cosmic weather report – clear, crisp nights are your golden tickets to Aurora photography magic.
First, find a spot away from city lights, and remember your sturdy tripod for rock-solid shots.
As usual in Astrophotography, use your camera manual mode, and set your aperture wide. Pump up your ISO to make your camera a light-gobbling champ – ISO 800 to 1600 is the sweet spot.
Now, the exposure time. Test the waters with shots around 10 to 25 seconds. This captures the auroras’ dance without turning stars into streaks.
Patience is your cosmic superpower. Auroras can be shy or bold, so keep your camera ready for action. Each shot could unveil a different side of the aurora dance
Further reading “Northern Lights Photography: Shooting Guide And Settings”
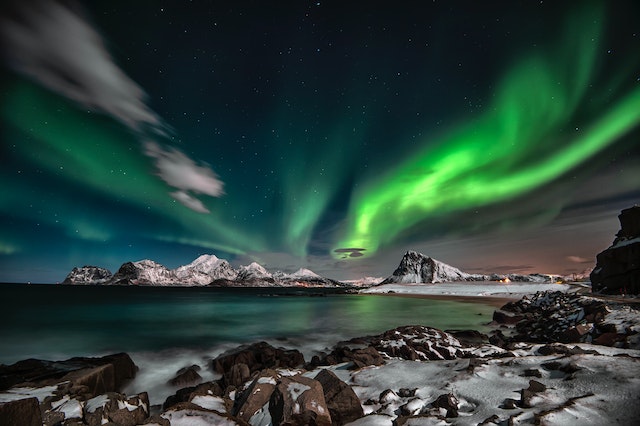
Photo by stein egil liland
-
Time-Lapse Sky Photography
Time-lapse sky photography is your ticket to turning still stars into a cosmic ballet. Time-lapse photography is like pressing fast forward on the universe’s remote control. It condenses hours of celestial action into seconds, revealing the sky’s dynamic beauty.
Grab your camera, tripod, and remote shutter release – your essential trio. Find a dark spot away from city lights, giving the stars their stage.
Start by framing your shot – the Big Dipper, the Milky Way, or a constellation of your choice. Set your camera to manual mode and open up that aperture. Tune your exposure settings, and you’re ready to roll!
Time lapses require time and dedication. Leave your camera clicking away as you embrace the cosmic show. Later, stitch your images together for a cinematic voyage through the night sky.
Further reading “Capturing The Magic: Mastering Time-Lapse Sky Photography”
Video by llz502374737 from Pixabay
Common Challenges in Astrophotography
Are you ready to tackle some cosmic challenges that might come your way? We’ve got your back with this guide to troubleshooting common issues in astrophotography for beginners. Let’s turn those challenges into shooting stars of success!
-
Dealing with Focusing Issues
Focusing in the dark can feel like searching for constellations without a star map. Fear not – we’ve got two focus techniques to light up your images.
For astrophotography, manual focus is your trusty sidekick. Why? Stars can be tricky for autofocus to lock onto, leading to blurred shots. To score crisp starry shots, start with your lens wide open. Use your camera’s live view mode to zoom in on a bright star. Gently adjust your focus ring until that star turns into a tiny, sharp point. Voilà, sharp star focus achieved!
-
Handling Light Pollution:
City lights acting like party crashers in your astrophotography scene? Don’t worry – we’ve got two light-busting moves up our sleeves.
-
Light Pollution Filters:
Meet your light pollution filter, your guardian against pesky city lights. This magical filter cuts out unwanted artificial light, allowing those cosmic gems to shine through. Below is a wonderful pollution filter:
Hoya Starscape Light-Pollution Camera Filter
HOYA Starscape light-pollution filters feature special optical glass which selectively filter out the yellow and greenish light pollution coming from distant street lights, which often ruins nighttime and astro shots.
The result is more natural-looking images and improved overall contrast. HOYA Starscape filters significantly reduce the amount of time required to correct color cast in RAW post-processing – images rendered without these filters can become degraded at the pixel level.
These filters have low-profile filter frames and are ideal for use with wide and super-wide-angle lenses. They are available in a full range of screw-in diameters from 49mm to 82mm.
-
Post-Processing Solutions
So, you’ve captured the stars, but a touch of light pollution still sneaked in? Fear not – post-processing to the rescue! Software like Adobe Lightroom lets you tweak your images, reducing light pollution and enhancing those starry wonders.
Conclusion
And there you have it, young astrophotographer – your journey into the mesmerizing world of astrophotography for beginners! From capturing meteor showers to chasing the Northern Lights, you’ve uncovered the secrets of freezing celestial wonders in your camera’s lens.
Remember, every photograph you take is a unique piece of the universe’s art. Embrace challenges as opportunities to learn and grow, whether you’re focusing stars or battling light pollution. With each click of the shutter, you’re capturing moments that connect you to the cosmos.
So, keep exploring the night sky, experimenting with settings, and sharing your cosmic creations. Your camera is your spaceship, your tripod a trusty companion on this celestial adventure. As you frame stars, planets, and galaxies, you’re not just taking pictures – you’re capturing the magic of the universe.
The cosmos awaits your lens, your creativity, and your passion. Whether you’re a casual observer or a dedicated stargazer, astrophotography lets you freeze time and share the wonders of the universe with the world.
Related posts
How To Shoot Moon Photography- Everything You Need To Know
Northern Lights Photography: Shooting Guide And Settings
Capturing The Magic: Mastering Time-Lapse Sky Photography
Best Wide Angle Lens For Astrophotography
Thanks for reading, I hope you enjoyed the article, in case you have any questions just drop them below & I will be happy to answer you.
The featured Photo by Pixabay
If you enjoy the site, don’t forget to subscribe, we will only inform you when a new article is posted.


Hi Amin,
The work on your website is amazing! It is so professional in every aspect! I found it to be exactly what I expected from the name in the URL. You’ve touched on a great subject and have so many excellent articles from which to choose.
The layout is so fresh, concise, and uncomplicated. The font has the perfect artistic touch without being defined to any predictable genre.
It was easy to read and comprehend. The reading level left me feeling comfortable and receptive to the idea of the subject matter. The subject is over my head, but someone with expertise in the area would indeed benefit from all the great information. I used to have a Canon AE-1 long ago!
The content you offer is upscale. It is rich in information, well laid out, and in keeping with the overall subject.
The media is so colorful and enticing! It surely makes one want to delve into the world of photography!
Overall, the site is well on its way to success as you have amassed quite a collection of articles for your readers. The information you offer has a nice range from beginner to professional.
Thank you for the opportunity to review. I wish you all the best!
Tami
Thank you so much for your thoughtful and encouraging feedback! We’re thrilled to hear that you find our website professional, engaging, and informative. Your kind words about the layout, readability, and content quality mean a lot to us. We’re delighted that our efforts to cover a wide range of topics and cater to different expertise levels are being appreciated. Your support is greatly appreciated, and we’re excited to continue growing and providing valuable content for our readers. Thank you for taking the time to review our site, and we’re grateful for your best wishes!
Dear Amin Hashem,
I had the opportunity to visit your website, and I must say it’s a well-designed and informative platform. The layout is clean, and the navigation is user-friendly, making it easy for visitors to find the content they’re looking for.
The article on astrophotography for beginners is a standout piece. It provides a comprehensive and easy-to-follow guide for those interested in capturing the beauty of the night sky. The inclusion of affiliate links and banners is a smart way to generate income while recommending quality products to your audience.
The website’s overall tone is inviting and engaging, making it an enjoyable experience for visitors. The quizzes and editing store add an interactive element to the website, providing additional value and opportunities for engagement.
Best regards,
Alquante Foster
Thank you so much for your kind words! We’re thrilled that you enjoyed your visit to our website and found our content helpful and engaging. Your feedback truly motivates us to continue providing quality information and a user-friendly experience.