


Adding text to your photos is becoming a very easy job, thanks to Photoshop. The text tool has a wide range of formatting and styling options that make it useful for more than just adding captions to your images.
You can also use the text tool to create things like creating a poster, website banners, advertisements, postcards, invitations, and book or magazine covers.
In the following tutorial, I will explain to you how to use the text tool, and how to format and style your text.
Text tool in Photoshop
You can select the text tool from the toolbar, or use the shortcut (T)

Once you select the text tool, click on the image you opened where you want to add your text and type it in. You will notice that a text layer is created, representing the text you just added.
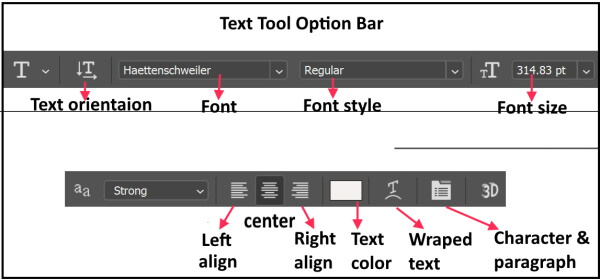
There are several ways to format your text: change the font, size, color, and other styles. The formatting options are available in the toolbar on the top of the workspace.
You can find additional formatting options by selecting Window > Character and Window > Paragraph. The Character options will give you additional formatting options such as text scale, language, superscript, subscript, and more. While the Paragraph options typically cater to paragraph content, some of the additional options such as alignment/justification, indentation, and spacing before and after the paragraph, may be useful for shorter text too.
Character panel
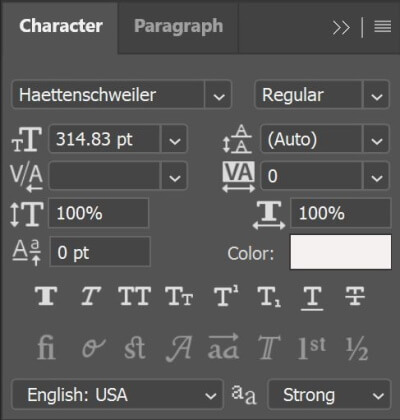
When you select a text layer from the Layers panel you can select text on that layer and use the Character panel to apply changes to it. Some of the options that are available in the Photoshop Character panel are:
- Font
- Font style
- Font size
- Font leading
- Kerning
- Tracking
- Vertical scaling
- Horizontal scaling
- Baseline shift
- Font color
Paragraph panel

Along the top of the Paragraph panel, there is a row of icons for aligning and justifying your text. The first three icons on the left of the row are the alignment options.
The next four icons in the row along the top of the Paragraph panel are the justification options. From left to right, we have Justify Last Left, Justify Last Centered, Justify Last Right, and finally, Justify All.
Below the alignment and justification icons are three indent options – Indent Left Margin (top left), Indent Right Margin (top right), and Indent First Line (bottom left).
Photoshop also gives us options for adding space either before or after a paragraph. Add Space Before Paragraph (left) and Add Space after Paragraph (right) option
Text Stylize window
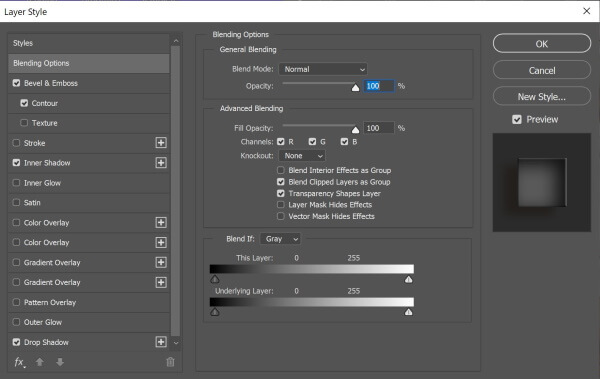
You can access the text style options by right-clicking the text layer for the text you want to stylize and selecting Blending Options. In addition to changing how the text blends into your image, you can also choose from several style options such as embossing, shadows, and many others.
Adding a Text to an Image
You can add text to an image in Photoshop in many different ways:
- Add Horizontal and vertical text
- Add a text Paragraph
- Position the text behind a subject
- Wrap text around a Path or Shape
-
Add Horizontal and vertical text
Example 1

Photo by Arina Krasnikova from Pexels
- Open the image that you want to add some text to it.
- Select the Horizontal Type tool from the toolbar, or press (T) on the keyboard to select it. The cursor changes to the Type cursor.
- Set up the formatting for your text. (You can change it later)
- Click anywhere on your image where you want to place your text
- Photoshop automatically adds some dummy text “Lorem Ipsum”.

- Type or paste your text directly on top of the dummy text.
- Press and hold Ctrl, A transformation box will appear. Drag any corner to resize the text. and click inside and drag to move it
- Finish adding the text, by clicking the Commit button in the options bar.

- To edit the text, select the Horizontal Type tool again, and click directly on the text on your image to select the text. Do whatever you like: change the font, change color, etc.
Tip: You can double-click anywhere in a word to select that whole word, or you can triple-click in a word to select the whole sentence.
- You can also use the Character panel for more text formatting.

- Now it is time to add some style and effect to the text
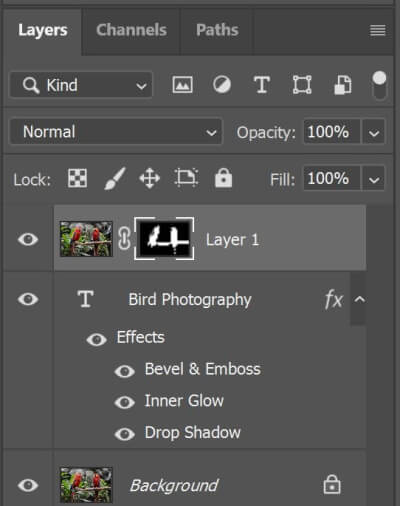
- Double-click on the text layer to open the Style window
- In this example, I use the Bevel and Emboss, Inner Shadow, and Drop shadow to style the text
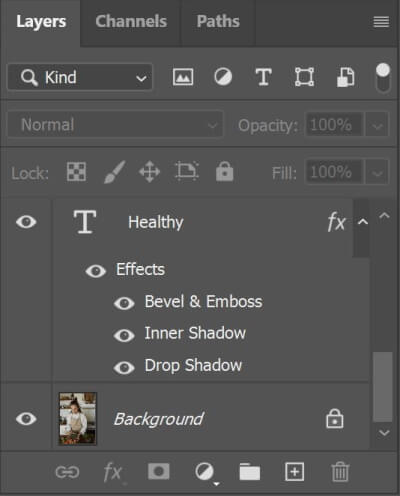
The Layer panel is shown below
- By following the same exact steps except using the vertical text tool, I will add a vertical text.
Tip: You can also rotate your text at any angle; click the text layer, choose the text tool and press Ctrl the transform appears. Now, move the mouse pointer outside the text box so that the mouse pointer looks like a curved two-sided arrow. You can then rotate the text by clicking and dragging with the mouse.
The result is shown below

-
Add a text Paragraph
Example 2
Adding a paragraph of text is similar to adding a title or a short sentence.
- Select the horizontal text tool
- With the text cursor, draw a rectangle or a square to put your text in it.
- Click inside the box and start typing or pasting the required text.
- You may use the paragraph window and character window to format and choose how you want to justify your text.
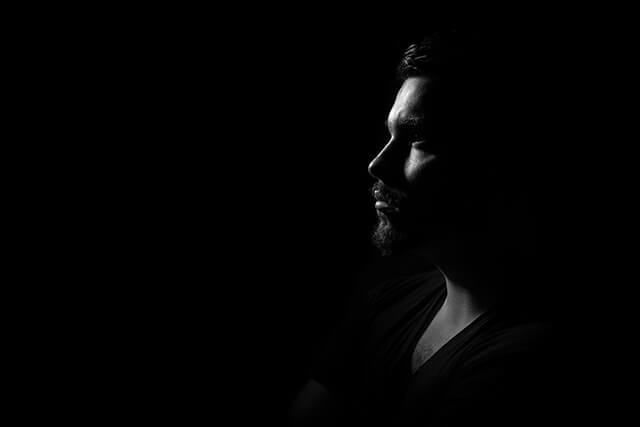

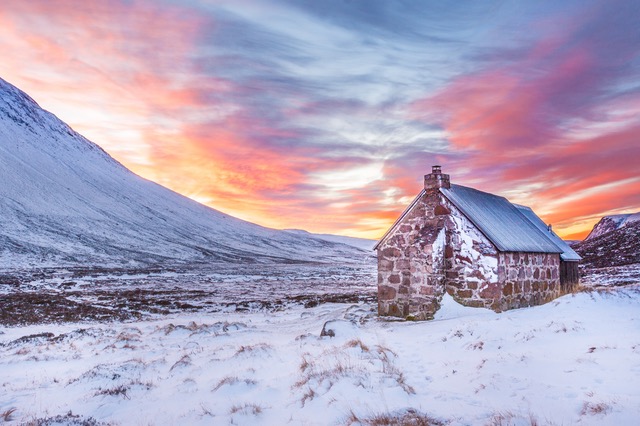
Photo by Pixabay
Example 3
One of the most common text effects you may have seen is wrapped text. This effect alters the positioning of your text to outline a specific shape or image. In this example, I will show you how to wrap a paragraph of text around a person’s profile.
We will use the Pen tool
- Create an outline of the person.
- Complete the drawing to make a closed box
Tip: To draw horizontal or vertical lines hold the Shift key while using the pen tool.

- Hover over the inside of your path (notice how your text icon changes to a cursor with a circle)
- Click inside of the path and start typing or pasting a paragraph.
The result is shown below

-
Position the text behind a subject
Example 4
One of the techniques used in designing book covers and posters is placing a text between the main subject and the background.
- Open the photo
- Follow the steps for example 1 to write and format the text
- Duplicate the background layer
- Click on any of the selection tools
- Click on Select and Mask
- Select your subject
- Choose the output to the layer mask, press o.k

- The layer panel will look like below
The result is shown below

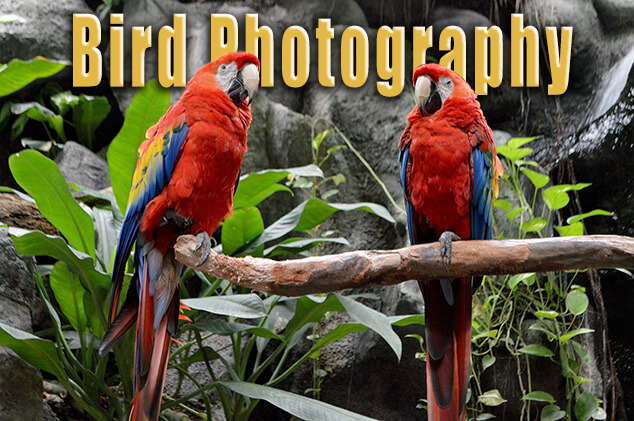
Photo by Pixabay
Example 5
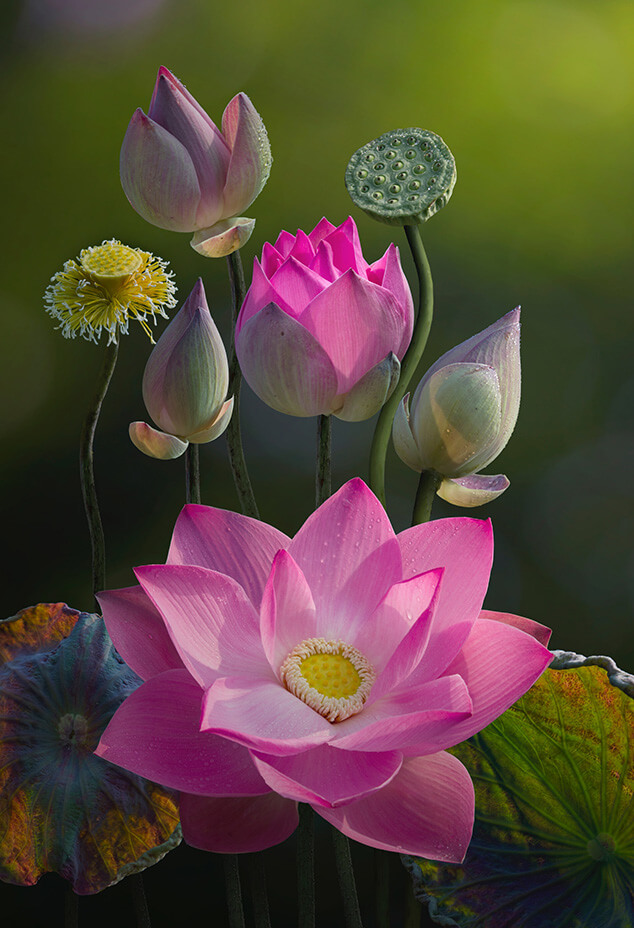

Photo by Trung Nguyen
- Wrap text around a Path or Shape
To wrap a text around a circle or a shape, I have already a published post “Wrap Text around Circle in Photoshop” It explains the whole procedure in detail.
Conclusion
Learning how to use the text in Photoshop is of great help and the results are incredibly satisfying. In this tutorial, I explained four ways to use the text tool to offer a wide range of choices to fit any situation.
Are you looking for Photo editing resources or editing Services?
Some photographers are struggling to learn and master editing software like Lightroom or Photoshop, they find the editing process is taking too much of their time. Therefore, assigning the editing tasks to an editing service may be the answer.
On the other hand, some others are looking for editing resources like actions, overlays, and textures to help them. For those I highly recommend paying a visit to my store, it has amazing professional photo editing tools.
In addition, you can check my editing tutorials, there are many tips and tutorials there.
Related posts
Thanks for reading, I hope you enjoyed the article, in case you have any questions just drop them below & I will be happy to answer you.
If you enjoy the site, don’t forget to subscribe, we will only inform you when a new article is posted.


Spot on with this write-up, I really believe this web site needs a great deal more attention. I’ll probably be returning to see more, thanks for the advice.
Photoshop is the Grandaddy of photo editing platforms. I have never used it because it has been a mystery to me. I liked the logical way your tutorial explained how to add text in so many creative ways.
Instead of adding plain old text, you showed how one can add stylized text in artistic ways. At least in the adding text category, Photoshop is not a mystery to me anymore, thanks to you.
Cheers.
Edwin
Glad you like thee article, thanks
Hey Amin this is a wonderfully useful post!
I’ve just started to dip my toes in the editing and photography world, it’s amazing what you can create with just a few tweaks. Anyways this post provided me with a lot of cool ideas and ways to now be able to edit my images for the blog and especially Pinterest.
Definitely going to be saving this website for future editing! Thanks again!
I really appreciate your comment, thank you, and happy editing!