


Taking good photos in bright sunlight is always a challenging job for photographers. Bright sunlight produces harsh lighting, which in turn can lead to strong shadows, unwanted contrast, blown-out highlights, lens flare, and overly saturated colors.
Ideally, professional photographers try to take their outdoor photos when the lighting condition is perfect, for example during the golden hours, when the sun is low in the sky, near the horizon. This produces a nice soft light. The light coming from the sun is diffused by particles in the air, making the light a lot less harsh than during the day. This softer light is especially suited for natural light portraits, as well as landscape photography.
However, there are times, when it is just inevitable and you need to shoot under bright, glaring daylight. Perhaps you want to take some photos at the beach or you are taking photos during your travel, so, it is important to know how to handle the situation.
In this tutorial I will provide you with some tips on taking great photographs in direct sunlight:
How Harsh Light can affect photography?
Harsh light is characterized by its high brightness and ability to cause dark shadows on your subject. The obvious source of Harsh lighting is the direct sunlight or lighting from a lamp that has no covering.
Because harsh light creates hard shadows it’s great for creating depth and making your subjects more defined. That is why this lighting is suitable for architecture shots for example. In addition, Harsh light can also help create mood in a shot, using shadows to create intense contrast between different parts of your image.
However, when a harsh light is not required it can create unsightly shadows, especially in portraits and close-up macro images, and causing images to be unflattering. It would also make it difficult to get the right exposure for a scene where light levels vary a lot throughout the image. In addition, it can blow out the highlights, introducing lens flare, and overly saturated colors.
Tips for Taking Photos in Harsh Sunlight
There are many tips that can help you a lot in taking stunning photos in harsh sunlight; it only needs some extra attention to your compositions and camera settings, and little creation. So, let us start.
-
Look for a shade, or create your own shade
Sometimes it is the easiest and most obvious solution, Just look for a shade and move into it. Obviously, this isn’t always feasible, but with circumstance, moving your subjects, and heading into the shade is quick and easy. It’s a good solution when shooting portraits.
An alternative solution when you cannot find a good shade is to try to create your own shade by blocking the sun and creating your own shade!
There are a few different options, some more convenient than others. Block the light with your body, or ask an assistant to stand between the subject and the light. In addition, you may use an umbrella or a hat.
Also, you may try to use a pop-up diffuser above the subject, it will soften the light rather than block it, and will give you the most flattering results.
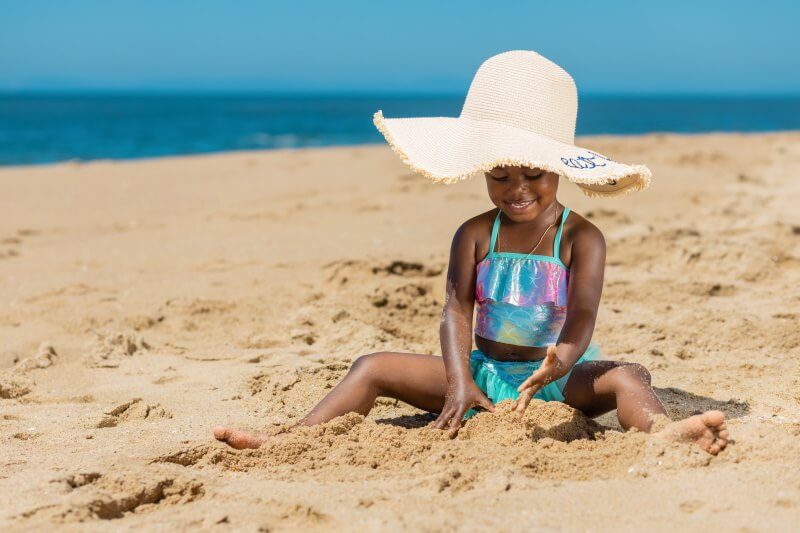
Photo by Kindel Media from Pexels
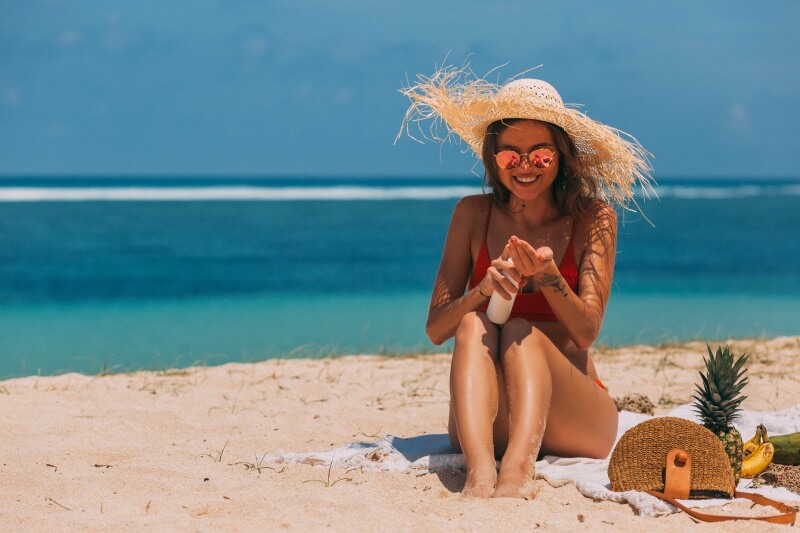
Photo by Mikhail Nilov from Pexels
-
Consider using a flash or reflector
One of the toughest issues with shooting in direct sunlight is the harsh shadows. For instance, portrait subjects will get unwanted shadows under the chin and nose, flowers will get heavy shadows underneath the petals, and pets will get dark shadows under their head and body. Generally, these harsh shadows look unflattering and have to be avoided.
The easy solution is to use a flashlight to fill the shadows. Just point the flash toward the dark shadows and fire away! For the flash setting, use low power, just to fill the shadows and try different flash angles.
You have another easy option to fill in the harsh shadow, use a reflector. Point the reflector at the area you want to brighten up, and then adjust it by changing its angle until you get some nice fill. You have to know that a reflector isn’t as powerful as a fill flash, so you’ll need to carefully angle it for maximum effect.

Photo by David Dibert
You also might try putting the sun behind your subject, and then using either a fill flash or a reflector to brighten up your subject’s front.

Photo by Matthias Cooper from Pexels
-
Use a lens hood
When a bright light enters the camera lens and hits the camera’s sensor, and scatters. It can appear like a haze over a photograph, washing out and changing the photo’s contrast, giving it a washed-out look. On the other hand, it can appear in a starburst(s). The placement and shape of the lens flare starburst are determined by the shape and size of your camera’s aperture.
It is worth mentioning that lens flare is different from Bokeh, as Bokeh is rendered by the camera, while lens flare is caused by the placement of a bright light source.
Fortunately, many lenses come with hoods, which block flare-causing light and keep your photos flare-free. If you don’t have a lens hood, I advise you to get one for your lens, it is cheap.
-
Use Camera filters
Using camera filters can be handy for direct sunlight photography. Especially when you want to shoot with a wide aperture for the shallow depth of field effect, or you want a slow shutter speed to convey motion blur.
For instance, a polarizing filter will help cut down on reflections, and it will help you achieve vibrant colors.
Moreover, a neutral density filter will reduce the light hitting your camera sensor, allowing for slower shutter speeds and smaller apertures at midday.
-
Carefully set your camera white balance
The white balance setting can change the look of your photo dramatically; it can enhance the look of highlights and shadows. For example, while a warm white balance will make bright sunlight appear softer, a cooler white balance can give a neat effect to more monochrome images.
Canon cameras, for example, have several white balance settings, and your choice of these depends on the type of light you are shooting in. You can dial in a white balance preset, such as Daylight, Shade, Cloudy or Auto White Balance.
Although you can adjust the white balance later in post-processing (if you’re shooting in RAW), it is better to get things right in-camera, so it is important to carefully set your white balance from the start.
-
Meter your shots correctly
Getting the right exposure of your shots in direct sunlight can be very difficult. You can meter off the subject to ensure that it is adequately exposed. Take some sample shots and check these to make some adjustments.
A good idea when it comes to metering during a midday photo shoot is to use spot metering then choose the main subject. Alternatively, you could try to find a middle point, somewhere that is not too bright and not too dark, and use that to meter off. This will ensure that every element of your photograph is bright enough to see.
-
Use harsh sunlight to your advantage
Although harsh light photography has its difficulties, it also has plenty of positives, including hard contrast, hard shadows, and a good chance to take some artistic and moody photos. You may develop an amazing style of your own if you can adapt to this type of lighting and make it play in your favor. So, take a chance and shoot into the sun. Move your composition around the light. Pay attention to your background and use that contrast. The creative potential in harsh light is endless.
a- Shoot silhouettes
In photography, a silhouette is defined as an outline that appears dark against a light background. More specifically, it is where your subject is seen as a black shape without detail against a brighter background. This effect can be achieved with any kind of bright light source such as the sun or clear sky
If the sun is causing you problems, just use it to your advantage; make your subject stand in front of the bright light, then capture stunning silhouettes photos.
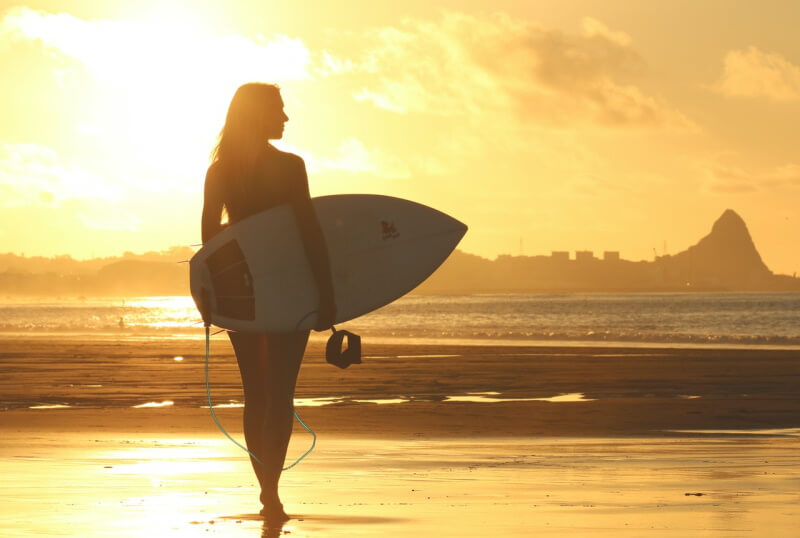
Photo by Bradley Hook from Pexels
b- Add style to your photos with lens flare.
Because Lens flare can happen when a bright sunlight source hits your camera’s lens. This light can show up in the form of circles, rings, starbursts, or an all-over haze in your photo. lens flare has become a deliberate stylistic choice you can use to produce stunning results.
Lens flare can add a warm softness to backlit portraits, define landscape shots, and help you naturally achieve a cinematic or sun-drenched look. In addition, since every lens flare will turn out different, a one-of-a-kind touch can take your image to next level.

Photo by Max Vakhtbovych from Pexels
c- Creatively use the hard shadows
The existence of hard sunlight produces unlimited shapes and forms of shadows, so it is convenient to try some shadow photographs. A shadow is a contour of an object that forms due to the blockage of a light source, its shape changes depending on the position of an object and light source. The form, scale, and intensity of a shadow rely on the angle, distance, and size of the light source and the object.
Shadow photography is defined as the manipulation of the light source, exposure of the shadow to add or remove darkness from the image, and the increased dramatic depth of a photo.
There is no limit on the ideas you can implement in sunlight and shadow photography. I recommend you to try it, you would be surprised by the outcome.

Photo by Agung Pandit Wiguna from Pexels

Photo by Pixabay
Conclusion
Photography in harsh sunlight is not easy and needs more effort. You have to be versatile and creative. You have to think carefully about your composition, a good result is all about the clever positioning of your subject with respect to its surroundings.
I hope that the above-mentioned tips will help you next time you are taking pictures in harsh sunlight.
Related posts
What Are The Different Types Of Light In Photography?
Best Time to Take Landscape Photos- Golden and Blue Hour
Off Camera Flash For Beginners
Thanks for reading, I hope you enjoyed the article, in case you have any questions just drop them below & I will be happy to answer you.
The featured Photo by Andrea Piacquadio from Pexels
If you enjoy the site, don’t forget to subscribe, we will only inform you when a new article is posted.


Thank you for the lessons! It has always been a challenge for me to take photos outside, I have even taken some in the past three days and they look ughhh! They are blurred, full of shadows, and unclear.
Thank you for the hacks, I had never thought about using an umbrella or hat to create my own shade. These are things I have hanging around but I had never thought to use them. I guess it takes professionalism to know how to improvise in given cases
Impressive information, thank you again!
Thanks for your nice comment, I am very glad you find the article helpful to you
Hi Amin.
Great post. When i was into photography before digital cameras i was always caught out by dark shadows from bight sunlight shots. Of course back then you did not realise the results until your film was processed. I eventually figured out that by fitting a small flash to my Olympus OM10 i could get around the problem!
Nowadays the digital format makes it so much easier, i still sometimes get caught out by bright lighting BUT now i see the problem straight away.
I love the idea of making silhouettes, i am going to give this a try!
Regards Mike
Meeting fellow photographer who practices film photography gives me a great nostalgia for those amazing old days. Thank you very much for your comment, wishing you all the best!