

Welcome to the fascinating world of moon photography! If you’ve ever gazed up at the night sky and wondered how to capture the moon’s beauty with your camera, you’re in the right place. In this guide, we’ll walk you through the process of shooting stunning moon photography.
Photographing the moon can be a rewarding and awe-inspiring experience. With the right equipment, a little planning, and some helpful techniques, you’ll be able to capture breathtaking lunar images that will leave viewers in awe.
Importance of Moon Photography
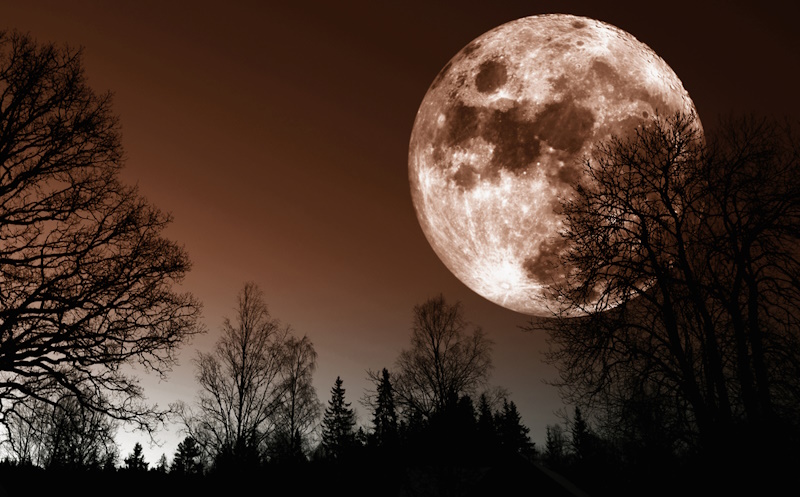
Moon photography is a captivating and rewarding endeavor that allows us to capture the beauty and wonder of our celestial neighbor. Here’s why it’s worth exploring:
- Appreciating the moon’s allure: Shooting the moon lets us appreciate its ethereal beauty and intricate details up close.
- Connecting with nature: Moon photography allows us to connect with the natural world and the vastness of the universe.
- Artistic expression: It provides a canvas for creative expression, allowing us to experiment with composition and techniques.
- Technical growth: Shooting the moon challenges us to refine our skills in exposure, focus, and composition.
- Sharing the experience: By sharing our moon photographs, we can inspire others and evoke a sense of wonder.
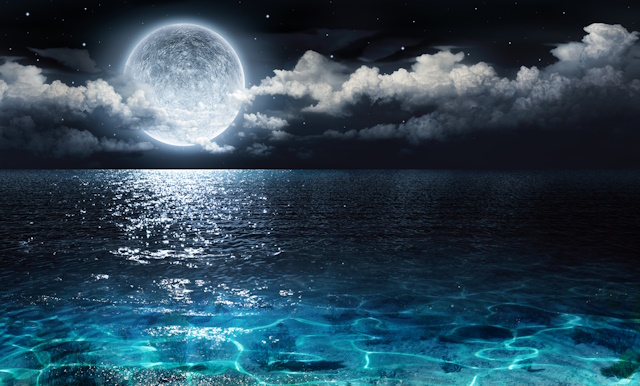
Photo by Depositphotos
What are the Moon Phases?
To shoot moon photography successfully, it’s essential to understand the different phases of the moon and their impact on your shots. Each moon phase offers a unique opportunity for photography, with varying levels of illumination and visibility.
The moon phases are the different shapes that the moon appears to have in the sky as it orbits around the Earth. The moon’s phases are caused by the changing position of the moon relative to the sun and the Earth.
The moon has eight phases:
- New moon: The moon is between the Earth and the sun, so we can’t see any of its surface.
- Waxing crescent: The moon is slowly getting bigger and we can see a thin crescent of its surface.
- First quarter: The moon is half-illuminated and we can see half of its surface.
- Waxing gibbous: The moon is getting bigger and more of its surface is illuminated.
- Full moon: The moon is on the opposite side of the Earth from the sun, so we can see all of its surface.
- Waning gibbous: The moon is getting smaller and less of its surface is illuminated.
- Third quarter: The moon is half-illuminated again, but this time the side that is facing us is not illuminated.
- Waning crescent: The moon is getting smaller and thinner until it disappears again.
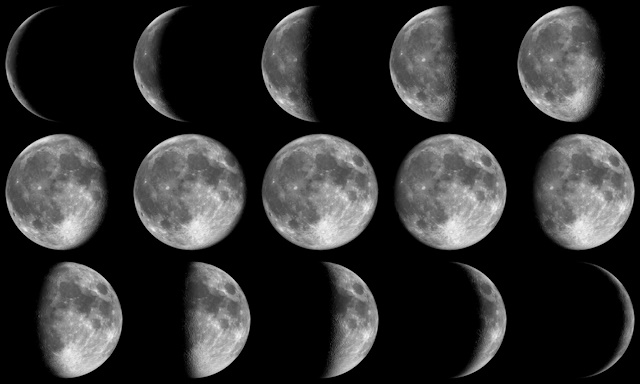
Photo by Depositphotos
Features of Moon Phases
Understanding the moon phase is crucial when it comes to shooting moon photography. Here’s why it matters:
- Illumination and visibility: Different moon phases offer varying levels of illumination and visibility, affecting the overall look of your photographs.
- Detail and texture: The angle of the moon’s illumination during different phases can highlight its craters, mountains, and other fascinating features.
- Creative compositions: Each moon phase presents unique opportunities for creative compositions, whether it’s capturing a crescent moon against a colorful sky or a full moon rising over a landscape.
Knowing the moon phase helps you plan your photography sessions in advance, ensuring you’re prepared to capture the desired effect.
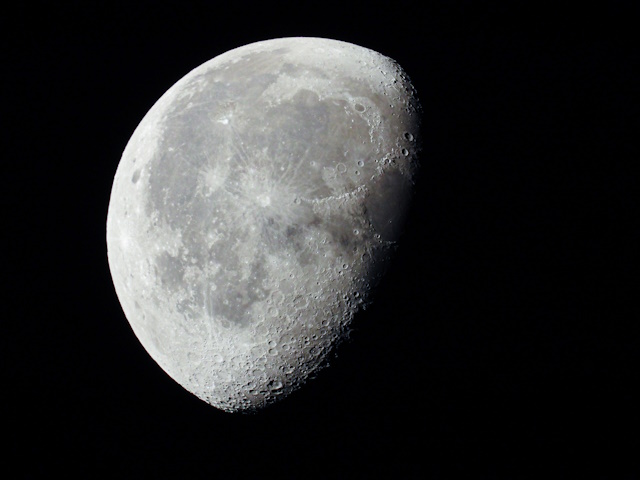
Photo by Depositphotos
How to Shoot Moon Photography
1. Planning the Shoot
When it comes to shooting moon photography, timing is everything. Researching the moonrise and moonset times in your location is crucial for capturing the moon in all its glory.
- Use websites or apps that provide accurate moonrise and moonset times for your specific location.
- Selecting the right location is an important key. Here’s how to choose a spot with a clear view of the moon:
- Look for areas away from city lights to minimize light pollution and enhance the visibility of the moon.
- Find locations with unobstructed views, such as fields, beaches, or hilltops, to capture the moon without any obstacles.
- Incorporate interesting landmarks or silhouettes into your composition to add depth and context to your moon photographs.
- 3. Check the weather forecast and Look for nights with clear skies to ensure optimal visibility of the moon. Cloudy or hazy conditions can obstruct the view and affect the quality of your photographs
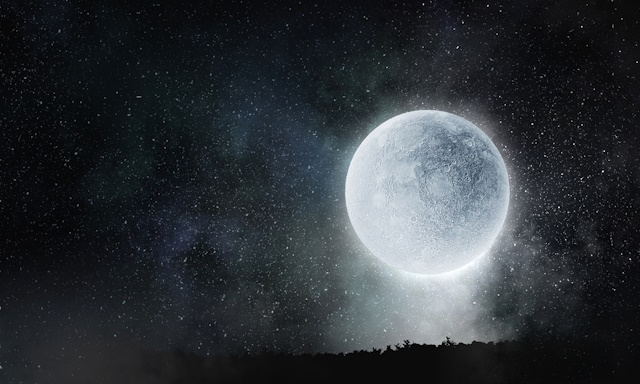
Photo by Depositphotos
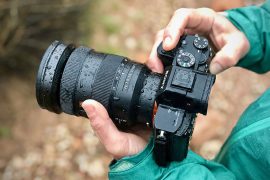
2. Equipment Needed
a. Camera
A DSLR or mirrorless camera is adequate to capture beautiful moon photos, however, there are some camera features that can enhance your photos, such as:
- Manual Mode: Shooting the moon requires precise control over your camera settings. Switching to manual mode allows you to adjust the aperture, shutter speed, and ISO to capture the moon’s details accurately.
- Large sensor: A camera with a large sensor will capture more light, which is essential for shooting in low-light conditions. A full-frame sensor is the best option, but a crop sensor will also work.
- High ISO Performance: Moon photography often requires shooting in low light conditions. A camera with excellent high ISO performance will allow you to capture well-exposed images without excessive noise.
Here are the top three recommended cameras for shooting the moon:
b. Telephoto lens
Using a telephoto lens can make a world of difference because it offers specific features that are ideal for shooting the moon and capturing its intricate details. Here are some key features of telephoto lenses for shooting the moon:
- Long Focal Length: Telephoto lenses have a long focal length, typically ranging from 250mm to 500mm or more. This allows you to get up close and personal with the moon, filling your frame with its mesmerizing beauty.
- Enhanced Magnification: With their long focal length, telephoto lenses provide enhanced magnification, allowing you to capture intricate details of the lunar surface. This is especially important when shooting the moon, as it is located at a considerable distance from Earth.
- Wide Aperture: Telephoto lenses often have wide maximum apertures, such as f/2.8 or f/4. This allows for better low-light performance and faster shutter speeds, which are crucial when shooting the moon in dimly lit conditions.
- Compatibility with Teleconverters: Telephoto lenses can be used in conjunction with teleconverters, which further extend their focal length. This allows you to get even closer to the moon and capture more detailed shots.
Here are five recommended lenses for shooting the moon:
- Canon EF 100-400mm f/4.5-5.6L IS II USM.
- Nikon AF-S NIKKOR 200-500mm f/5.6E ED VR.
- Tamron SP 150-600mm f/5-6.3 Di VC USD G2.
- Sigma 100-400mm f/5-6.3 DG OS HSM Sports.
- Sony FE 100-400 mm f/4.5-5.6 GM OSS
c. Tripod
Having a reliable tripod is essential. Here are some key features to look for:
- Stability: A sturdy tripod ensures sharp and blur-free images, especially during long exposures.
- Height Adjustability: Look for a tripod that allows you to adjust the height easily, enabling you to frame the moon perfectly in your shot.
- Lightweight and Portable: Opt for a tripod that is lightweight and easy to carry, making it convenient for outdoor shoots.
- Quick Release Plate: This feature allows you to attach and detach your camera quickly, saving time and ensuring stability.
- Pan and Tilt Head: A tripod with a pan and tilt head provides smooth and precise movements, allowing you to track the moon’s motion effortlessly.
- Compatibility: Ensure that the tripod can support the weight of your camera and lens
Here are two recommended tripods for shooting the moon:
d. Remote shutter release
Capturing stunning moon photography requires precision and stability. A remote shutter release is a handy tool that can greatly enhance your lunar shots and prevent camera shakes. Examples of good remote shutter releases are: JJC ML-L3 Wireless Remote Shutter Release (for Nikon) and Canon Wireless Remote Control RC-6 with Shutter Release (for Canon)
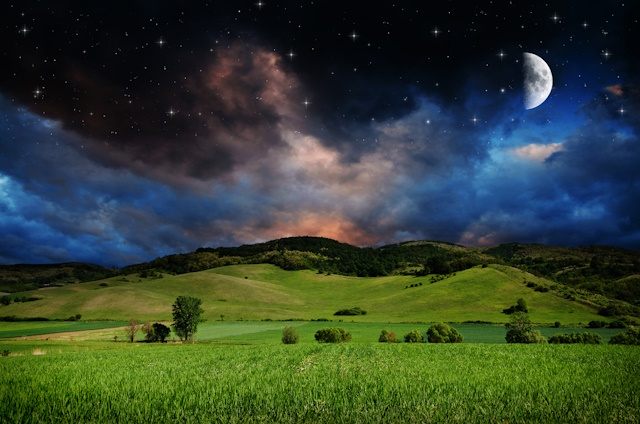
Photo by Depositphotos
III. Camera Settings
- Use Manual mode for exposure settings: Manual mode allows you to have full control over your exposure settings, giving you the flexibility to achieve the desired results. Using the manual mode allows you to set the ISO, aperture, and shutter speed according to the available lighting conditions.
- It’s best to keep the ISO low to minimize the noise in your images. Start with an ISO of around 100 or 200 and adjust accordingly based on the lighting conditions.
- Using a smaller aperture, such as f/8 or f/11, is recommended to ensure sharpness throughout the image because a smaller aperture (higher f-number) will result in a larger depth of field.
- When photographing the moon, a faster shutter speed is necessary to capture its details without blurring. Start with a shutter speed of around 1/125th of a second and adjust accordingly.
- Use the spot metering, spot metering is a useful technique for achieving accurate exposure in moon photography. It allows you to meter the light from a specific spot in the frame, ensuring that the moon is properly exposed. Aim your camera at the moon and activate the spot metering mode. This will measure the light specifically from the moon, disregarding the surrounding areas. Adjust your exposure settings based on the metering reading to achieve the desired exposure.
In summary, shooting moon photography requires understanding and adjusting your camera settings. By using manual mode, adjusting ISO, aperture, and shutter speed, and utilizing spot metering, you can capture stunning images of the moon.
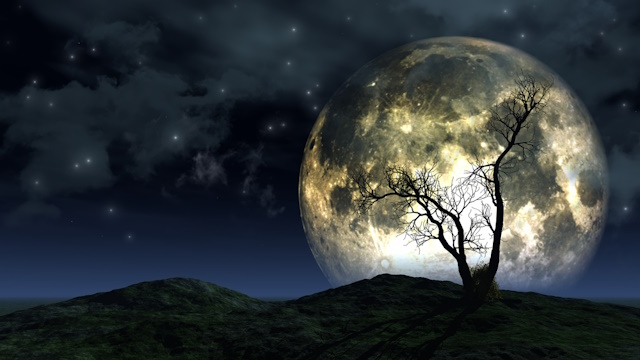
Photo by Depositphotos
IV. Focusing Techniques
When it comes to capturing stunning moon photography, one of the key factors to consider is achieving precise focus. In this section, we will explore two focusing techniques: manual focus and autofocus.
-
Manual focus:
Manual focus allows you to take full control over the focus of your camera. This technique is particularly useful when shooting the moon because it can be challenging for autofocus systems to accurately lock onto the moon’s surface. To manually focus on the moon, follow these steps:
- Set your camera to manual focus mode.
- Use live view and zooming in for precise focus, this method allows you to magnify the moon on your camera’s LCD screen, making it easier to fine-tune the focus.
- Use the focus ring on your lens to adjust the focus until the moon appears sharp and clear on the LCD screen.
-
Autofocus:
Autofocus is a convenient option that many photographers rely on for quick and accurate focusing. However, when shooting the moon, autofocus can sometimes struggle due to the lack of contrast and the moon’s brightness. To use autofocus effectively for moon photography, consider the following tips:
- Switch your camera to single-point autofocus mode to ensure precise focus on the moon.
- Aim the autofocus point directly at the moon or a prominent feature on its surface.
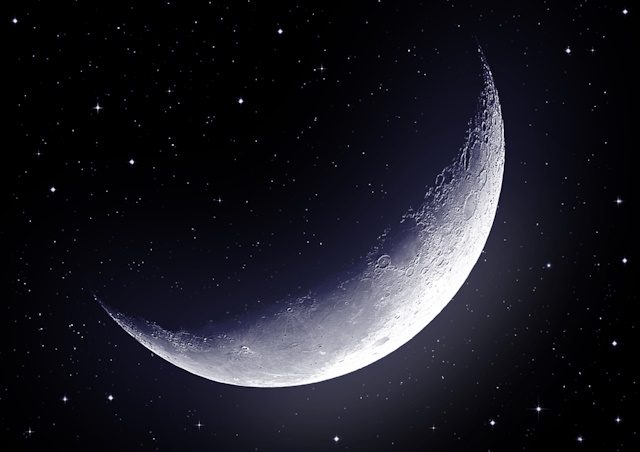
Photo by Depositphotos
V. Composition Tips
- Include foreground elements for context:
When photographing the moon, it’s essential to include foreground elements to provide context and add interest to your composition. By incorporating objects such as trees, buildings, or people in the foreground, you create a sense of scale and depth, making your moon photos more captivating.
For example, imagine capturing the moon rising above a serene lake, with the reflection of the moon shimmering on the water’s surface. This combination of the moon and the foreground element adds a unique touch to your photograph, making it more visually appealing.
- Rule of thirds and framing the moon:
By following the rule of thirds, you create a more balanced and visually pleasing composition. It also helps to avoid placing the moon right in the center of the frame, which can make the photo appear static and less engaging.
You may check my post about some composition rules here
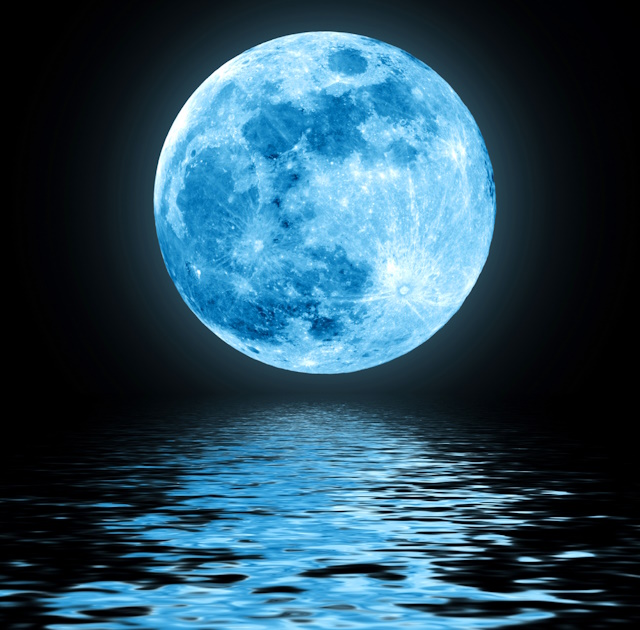
Photo by Depositphotos
VI. Shooting Techniques
We’ll explore some powerful techniques that can help you achieve stunning moon photography:
- Bracketing: Exposure bracketing is a technique where you take multiple photos of the same scene with different exposure settings. This can help you to avoid over or underexposure. To bracket, simply set your camera to take three or five photos, each with a different exposure setting. For example, you could set your camera to take one photo at f/11, ISO 100, and 1/15 second, one photo at f/16, ISO 100, and 1/30 second, and one photo at f/22, ISO 100, and 1/60 second.
- Focus Stacking: Stacking is a technique where you combine multiple images of the same scene at different focus points to create a single image with more detail. This is especially useful when shooting the moon, as it can be difficult to capture all of the detail in a single image due to the moon’s brightness and the limited dynamic range of most cameras.
- Moonrise and moonset: Moonrise and moonset are two of the most beautiful times to photograph the moon. The moon is low in the sky at these times, which can make it appear larger and more dramatic.
- Moon landscape: You can also use moon photography to create stunning landscape photos. By combining the moon with other elements in the landscape, such as mountains, trees, or bodies of water, you can create truly unique and memorable images.
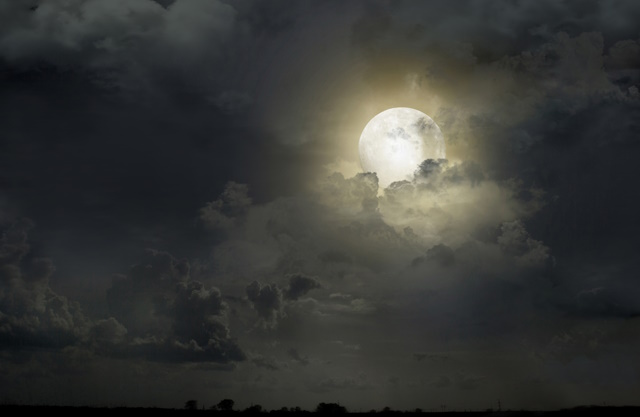
Photo by Depositphotos
VII. Post-Processing
Post-processing is important for moon photography because it allows photographers to enhance and optimize their images to bring out the best possible details, colors, and overall visual impact. The following are some post-processing activities you can try to enhance your moon photos:
- Adjusting Exposure: Moon photography often requires exposure adjustments to capture the details of the moon’s surface. Post-processing allows you to fine-tune the exposure, ensuring that the moon is neither overexposed nor underexposed.
- Enhancing Details: The moon’s surface is full of intricate details, such as craters and mountains. Post-processing techniques like sharpening and clarity adjustments can bring out these details, making the moon appear more defined and textured.
- Correcting Colors: Moon photos can sometimes have a bluish or yellowish tint due to atmospheric conditions or camera settings. Post-processing tools like white balance adjustments can help correct the colors, making the moon appear more natural.
- Noise Reduction: Post-processing software can apply noise reduction algorithms to reduce or eliminate the phot noise, resulting in a cleaner and smoother image.
- Cropping and Composition: Post-processing allows you to crop the image and adjust the composition to create a more visually appealing photograph. You can remove distracting elements, reframe the moon, or experiment with different aspect ratios.
- Adding Creative Effects: Post-processing also offers the opportunity to add creative effects to moon photos. You can apply filters, adjust the saturation or contrast, or experiment with black-and-white conversions to create unique and artistic interpretations of the moon.
Remember, post-processing should be used to enhance the original image and not to create a completely artificial representation of the moon. It’s important to strike a balance between enhancing the photo and maintaining its natural appearance.
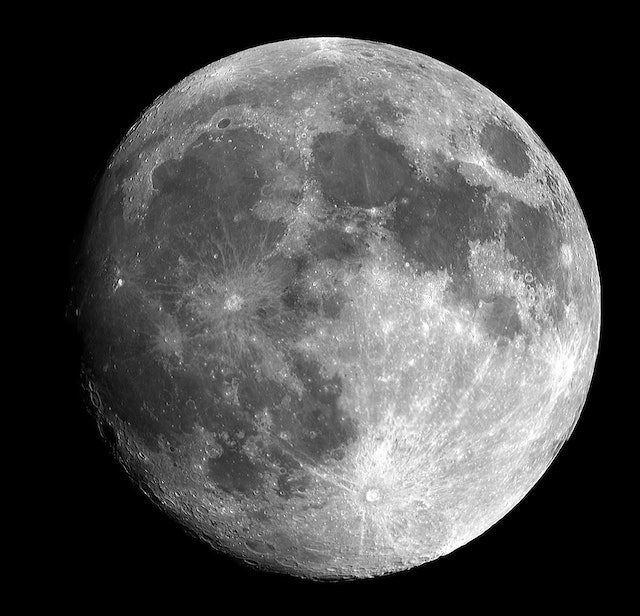
Photo by Pixabay
Conclusion
Moon photography is a challenging but rewarding endeavor that can produce stunning results. By following the tips and techniques in this guide, you’ll be well on your way to capturing amazing images of our lunar neighbor.
Here are a few key takeaways:
- Plan your shoot in advance. Consider the moon phase, time of day, and weather conditions when planning your shoot.
- Use the right equipment. A telephoto lens is essential for capturing close-up details of the moon. A tripod will help to prevent camera shake and ensure sharp images.
- Use manual mode to control your exposure settings. Start with a low ISO, small aperture, and fast shutter speed. Adjust these settings as needed to achieve the desired exposure.
- Focus manually. The autofocus system on most cameras is not accurate enough to focus on the moon. Use manual focus to achieve sharp images.
- Experiment with different compositions. The moon can be photographed in a variety of ways. Experiment with different compositions to find what works best for you.
- Consider using some Shooting Techniques such as: bracketing and focus stacking.
- Finally, make sure to use post-processing software to enhance your photos.
Thanks for reading, I hope you enjoyed the article, in case you have any questions just drop them below & I will be happy to answer you.
The Featured photo by Depositphotos
If you enjoy the site, don’t forget to subscribe, we will only inform you when a new article is posted.


Thank you for sharing this comprehensive guide on shooting moon photography. Your article not only provides valuable information but also instills a sense of wonder and appreciation for the beauty of our celestial neighbor.
I particularly appreciate how you emphasize the importance of moon photography as a means to connect with nature, express artistic creativity, and challenge oneself technically. It’s true that capturing the moon’s allure and sharing the experience through photography can inspire others and evoke a sense of wonder.
You’re welcome! I’m delighted that you found the moon photography guide valuable and inspiring. Connecting with nature and expressing creativity through photography can be truly captivating experiences. It’s wonderful to know that the article conveyed the sense of wonder and beauty that the moon holds. Keep capturing the allure of the celestial neighbor and sharing that inspiration with others.
Well, I never would have imagined that each phase of the moon would require a specific set of conditions that must be understood in order to photograph them to the optimal level. I am glad that you wrote this article explaining all of this because otherwise I would have been left out in the dark.
I’m having a little trouble understanding how the surface of a new moon can’t be seen because it is between the earth and the sun. Is this because the sun is so bright as to completely obscure what would otherwise be there in plain sight?
This also makes me wonder if a person can damage their eyesight by viewing the sun through the camera lens, even if it is only in the background?
Thank you for your feedback! I’m glad you found the article helpful.Regarding your question about the new moon, you’re correct in your understanding. The surface of the new moon is not visible from Earth because it is positioned between the Earth and the Sun. The Sun’s bright light overpowers the faint illumination of the new moon, making it difficult to observe directly.
As for viewing the sun through the camera lens, it is crucial to exercise caution. Looking directly at the sun, whether through the camera lens or with the naked eye, can be harmful and potentially cause damage to your eyesight. It is essential to use proper solar filters or eclipse glasses specifically designed for safe solar viewing when attempting to capture the sun in your photographs
If you have any more questions or need further clarification, feel free to ask. I’m here to help.