

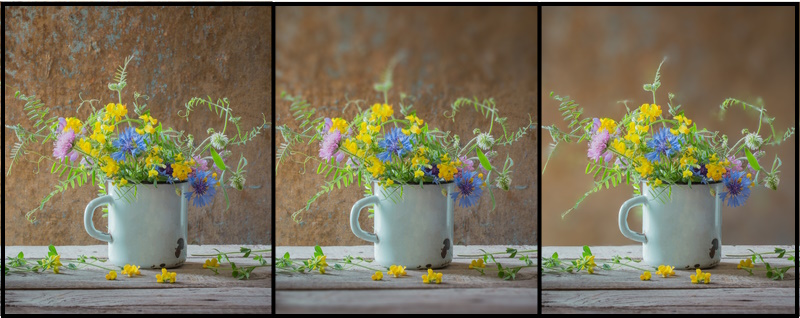
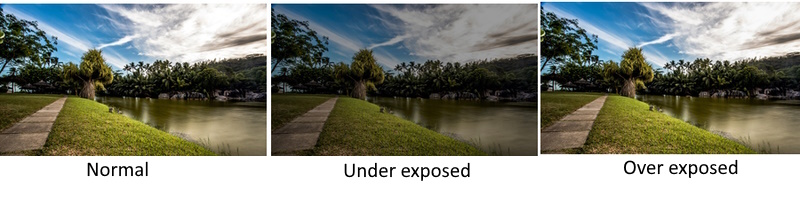
Exposure bracketing is one of the most useful techniques in photography. In simple words, it means taking multiple photos of the same subject with different exposure settings. Therefore, bracketing is about changing your exposure: one photo at the camera meter’s recommendation, one under-exposed, and one over-exposed. Then the three photos could be merged into one photo using editing software to produce a High Dynamic Range (HDR) photo.
This article explains everything you need to know about bracketing, what is it, its types, and how to use it in order to take take the best possible photos.
Finally, we will present an example to show you how to use the famous software “Photoshop” to merge three bracketed photos to produce an HDR photo.
What is bracketing?
Professional photographers use the bracketing technique to ensure that they set their cameras correctly to catch the proper exposure in their photos, especially in challenging lighting situations.
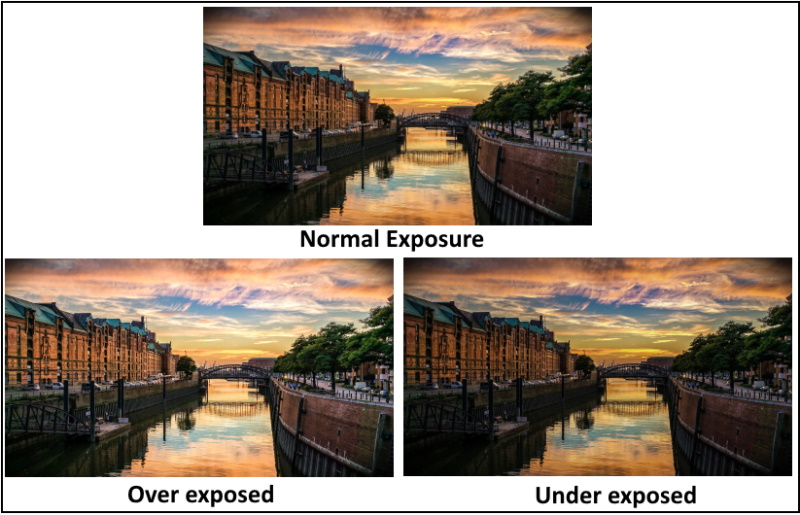
Exposure bracketing means that you take two more pictures of the same scene: one slightly under-exposed (usually by dialing in negative exposure compensation, say -1/3EV), and the second one slightly over-exposed (usually by dialing in positive exposure compensation, say +1/3EV), So you will end up having three photos with different exposure settings: the one that you think it has the proper exposure, the second that is underexposed, and the third that is overexposed.
What is the dynamic range?
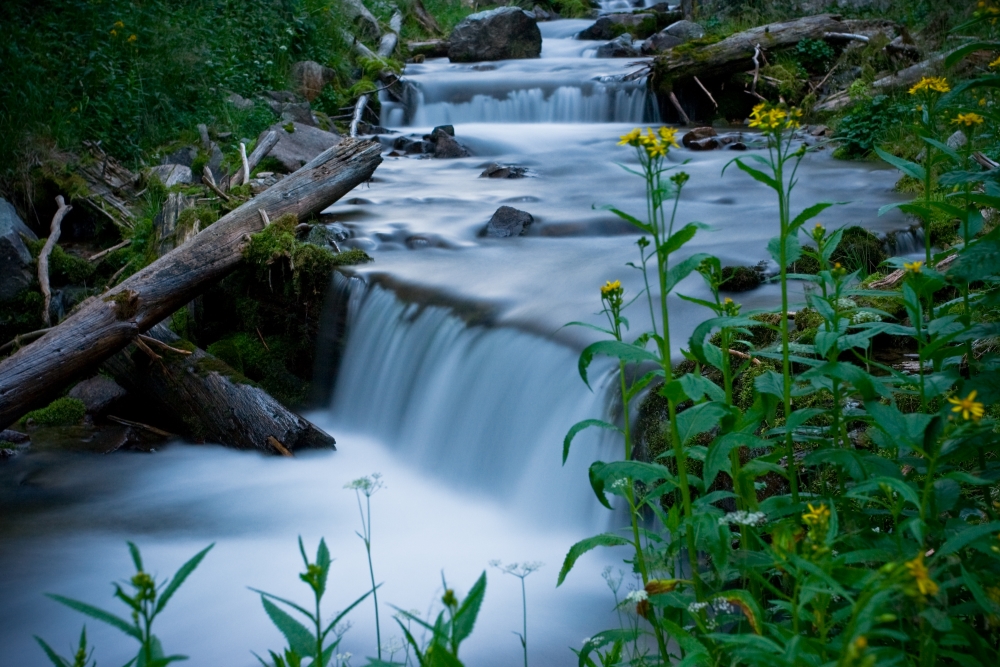
Simply, the dynamic range is the difference between the lightest and darkest tones in a scene, from pure white to pure black. In addition, a camera’s dynamic range refers to how many increments the image sensor can detect between pure black and white, and the tones in between.
The human eye can see almost 20 stops in perfect lighting conditions, while high-quality digital cameras can see only up to 15 stops of dynamic range. This means that our capability of seeing is superior to that of any advanced camera. In other words, our eyes can make out the level of details in the shadows and the highlights better than our cameras can.

Photo by depositphotos
So, when you spot an amazing scene with high dynamic range, and you want to catch it with your camera you have to remember the camera limitations and try to overcome them. Here comes the importance of using the bracketing technique.
What is HDR photography?
The term HDR stands for “high dynamic range.” For those who aren’t familiar with this technique. As we discuss the meaning of dynamic range in the previous paragraph, we know that if your scenes exceed the camera’s dynamic range, the highlights tend to wash out to white, and the shadows simply become black and you lose all the details. It is obviously difficult to take a photo that captures both ends of this spectrum (both highlights and shadows).
However, with some shooting techniques and advanced post-processing software, photographers have concluded ways to make it happen. This is basically what HDR is: a specific style of photo with an unusually high dynamic range that couldn’t otherwise be achieved in a single photograph.
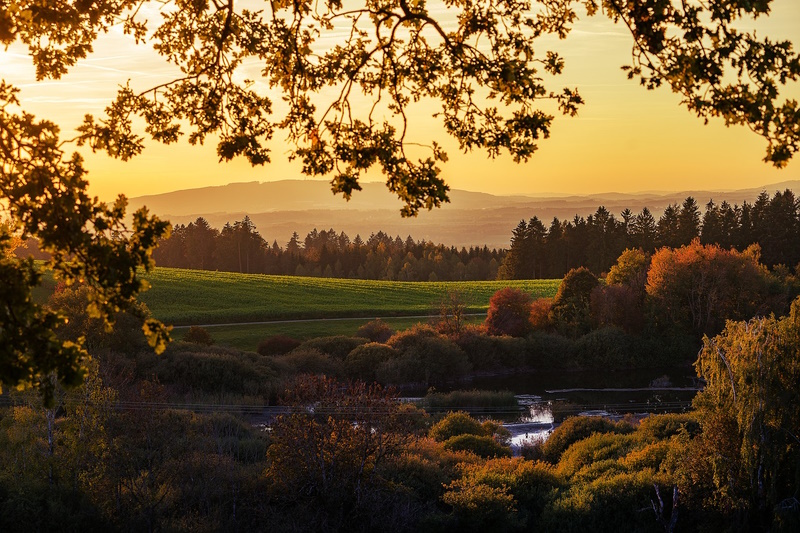
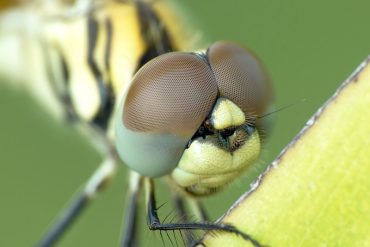
Image by Lars Nissen from Pixabay
Check the following video for more HDR sample photos
Why do we use exposure bracketing?
The reason we use the exposure technique is to overcome the situation when we are shooting at a high dynamic level of light in the scenes. We do this is because the camera might have been ‘deceived’ by the light (too much or too little) available and your main subject may be over or under-exposed. By taking these three shots, you are making sure that if this were ever the case, then you would have properly compensated for it.
As an example, you are taking a scene where there is a lot of light around your main subject (such as at the beach on a sunny day, or surrounded by bright snow). In this case, using Weighted-Average metering, your camera might be misjudged by the high light and exposed for it by closing down the aperture and/or using a faster shutter speed, with that setting, the main subject might be under-exposed. By taking an extra shot at a slight over-exposure, you would in fact be over-exposing the surroundings, but properly exposing the main subject.
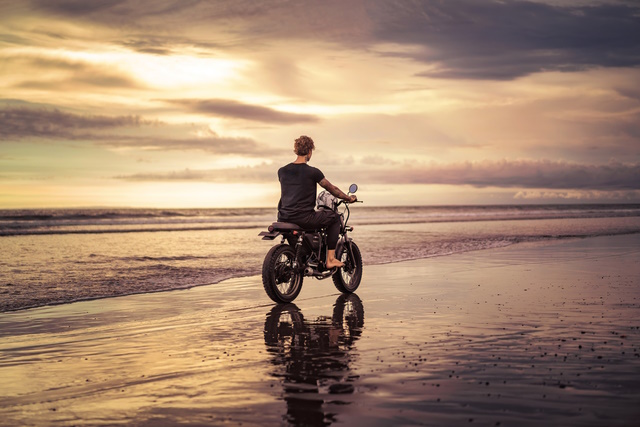
Photo by depositphotos
Another example is when you are shooting a scene where the background is too dark, and the camera exposes the low light by either opening up the aperture and/or using a slower shutter speed than the main subject might be over-exposed. By taking an extra shot at a slight under-exposure, you would in fact be under-exposing the background, but properly exposing the main subject.
Types of Bracketing
There are many types of bracketing techniques, and some of them may be available as a built-in feature in your camera. However, you can always practice them using the manual mode of your camera.
-
Exposure Bracketing
This is the most common type of bracketing that is used among photographers. In exposure bracketing, we take the same image several times at different exposure values or (EVs) in order to accommodate for the brightest highlights and the darkest shadows in the shot. Then the resulting images can be merged and processed together either in camera (in HDR mode) or by using editing software such as Photoshop. The resulting image will have a superior tonal range than every single image that you had taken.
-
Focus Bracketing (Stacking)
This bracketing technique (it is called also focus stacking) is useful when you have a limited depth of field. Several images are taken at different focal planes, from the nearest focus distance to the furthest focus distance. You have to keep all the other camera settings constant, your exposure should remain untouched, and the only thing to change is the focus point.
-
Flash Bracketing
The varying parameter in flash bracketing is the light intensity of your camera flash,, multiple images are taken of the same scene with varying light intensities from your camera flash, especially a fill flash. You then have a number of images all with different flash exposures from which you can pick the best one.
-
ISO Bracketing
The final bracketing technique in digital photography is ISO bracketing. As the name suggests, this method involves taking several images of the same scene at different ISO levels. Also, you have to keep your aperture and shutter speed constant which results in a number of images all with different signal-to-noise ratios and also different exposures.
ISO bracketing is useful because you get images with different amounts of noise. So you can pick the aesthetic that’s most pleasing to your eyes in that respect.
How to Use Exposure Bracketing in Your camera?
The main target is to alter the amount of light reaching your camera sensor, which in turn provides altered levels of exposure. I recommend reading the following articles to fully understand exposure, and what parameters define it:
To set up different values of exposures in a photo, you have the following options:
-
Use the manual Mode
- Manually alter your camera’s shutter speed: This means you keep your camera’s aperture and ISO steady while you experiment with different shutter speeds. (Longer shutter speeds let in more light.) This is the most common way to create exposure bracketing.
- Manually alter your camera’s aperture: In this version of exposure bracketing, you keep your shutter speed and ISO constant but vary your aperture. This produces variety in your images’ depth of field.
- Manually alter your camera’s ISO: In a nutshell, the higher your camera’s ISO, the brighter your image will be. The downside to high ISO is that it can produce a grainy effect (called “noise” in the parlance of digital photography), so most professional photographers do what they can to keep their ISO as low as possible without creating overly dark photos.
-
Use the semi-automatic modes:
- Set shutter speed priority: This version of automatic exposure bracketing keeps the shutter speed constant (you get to choose the speed) and automatically adjusts the aperture to create images with different exposures.
- Set aperture priority: This type of automatic exposure bracketing keeps the aperture fixed on a setting that you choose and automatically adjusts the shutter speed to create a range of short and long exposure shots.
-
Use Automatic Exposure Bracketing (AEB)
In today’s market, many top DSLR cameras offer automatic exposure bracketing as a setting. In fact, many smartphones offer this function, often as part of an HDR mode.
In auto-bracketing mode, you set your camera to take multiple pictures in a row (three or more photos) with the first photo at normal exposure, the next one at -1 EV (underexposed), and the third one at +1 EV (overexposed).
When you enable the feature in your camera’s menu, you can set the amount of under and overexposure (EV), and also the number of photos to be taken automatically in rapid succession.
The menu settings and the controls might be in different places for a different camera. Sometimes, manually bracketing and taking multiple shots may be a tedious job. And that is the main reason we use the Automatic Exposure Bracketing (AEB) feature available in most advanced DSLRs.
The following is how to set the AEB for Canon EOS 5D Mk III
- Select [Expo. comp./AEB]. Then press set

- Set the AEB amount.

- Turn the setting dial to set the AEB amount.
- You can set the exposure compensation amount with the < > dial. If AEB is combined with exposure compensation, AEB will be applied centering on the exposure compensation amount.
- Press <the setting dial > to set the amount.
- When you exit the menu, the AEB level will be displayed on the LCD panel.
- Take the picture.
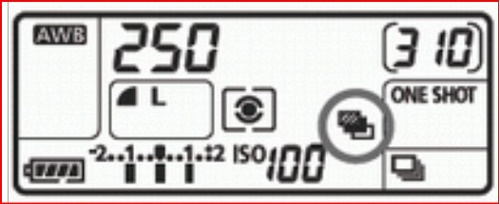
- Focus and press the shutter button completely. The three bracketed shots will be taken in this sequence: Standard, decreased, and increased exposure.
How to figure out the ABE Amount & No of shoots
Up till now, we have explained how to take a set of bracketed photos in order to process them later in special software such as Photoshop, Luminar Neo, and Photomatix Pro. And how to set your camera also to shoot three or more photos at different exposure settings.
WE NEED TO FIGURE OUT HOW MUCH WE OVER-EXPOSED OR UNDER-EXPOSED THE IMAGE.
Here is the recommended procedure:
- Set your camera to Aperture Priority (A) mode.
- Set the Metering Mode to ‘Spot Metering’.
- Position the focus point over the darkest part of the scene (Shadows). Write down the shutter speed reading for shadows. (say 1/10)
- Position the focus point over the brightest part of the scene (avoiding sun reflections and light bulbs). Write the shutter speed for highlights. (say 1/100)
- On your computer go to the site HDR Exposure Calculator.
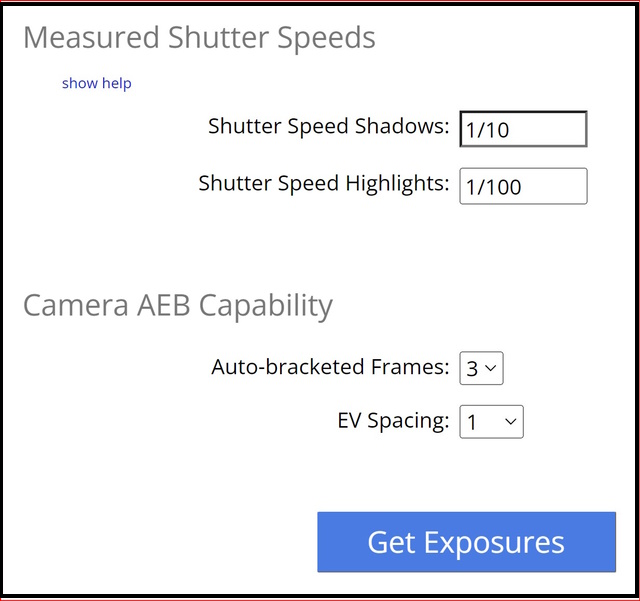
- Enter the two readings of the shutter speeds you have written in the appropriate fields.
- Enter the max number of frames your camera allows
- Enter the EV spacing.
- Press “Get exposures”
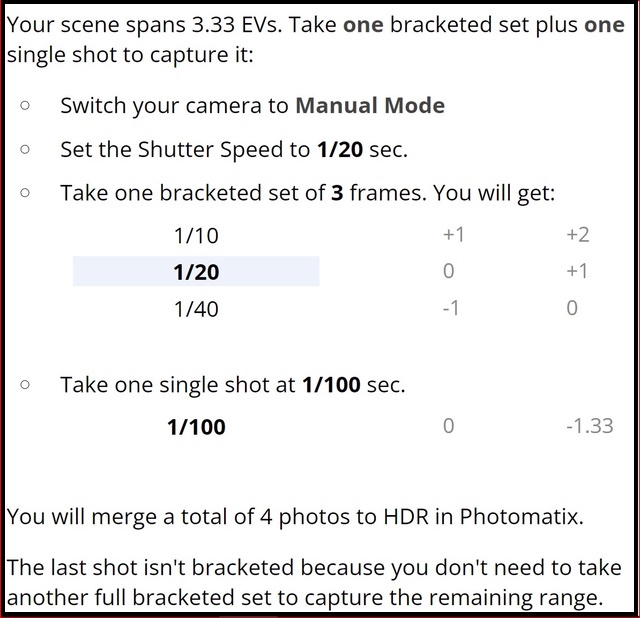
The outcome will show as below:
How to process bracket images in Photoshop?
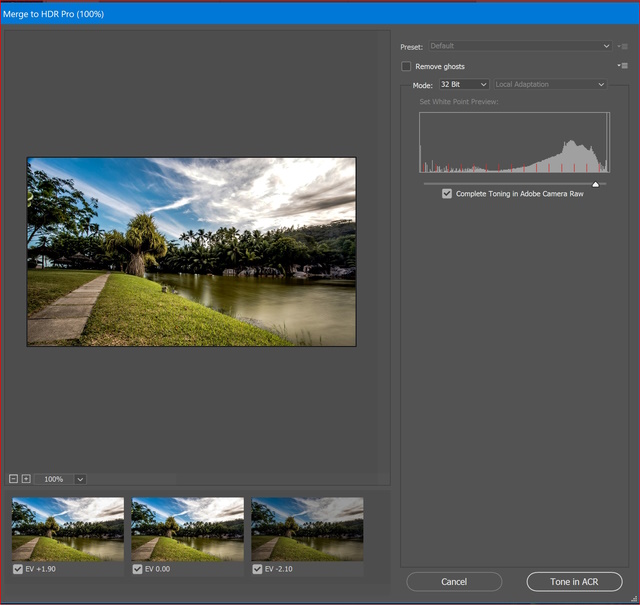
Open the three bracketed photos in Photoshop (File > Automate > Merge to HDR Pro)

Then the following windows will show up, you can change the mod to 32 Bit and remove ghosts.
After that click enhance the merged photo in ACR (Adobe Camera Raw) Filter > Camera Raw Filter
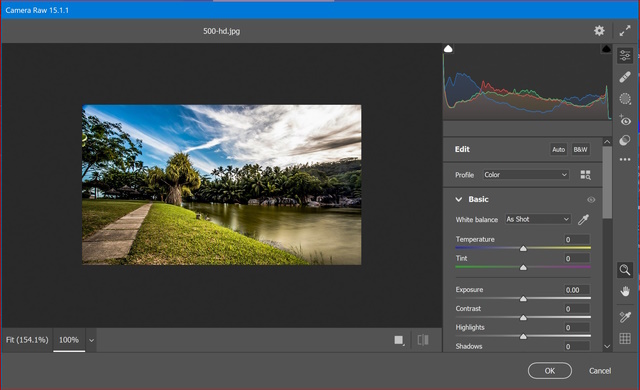
Apply some basic edits to the final photo. The result is shown below
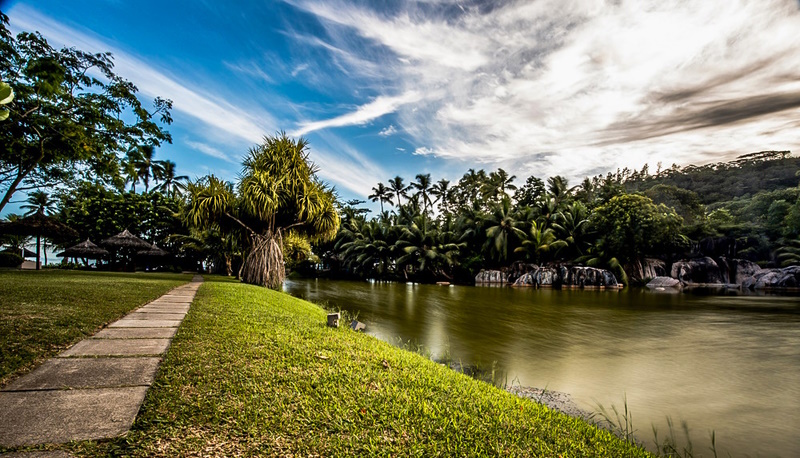
Photos by Ehab Amin
Related posts
The Best HDR Software- Photomatix Pro 5
How To Use The Exposure Compensation
Getting The Best Photos Sharpness By Using Photo Stacking
Bracketing – The Best Way To HDR Photography
Thanks for reading, I hope you enjoyed the article, in case you have any questions just drop them below & I will be happy to answer you.
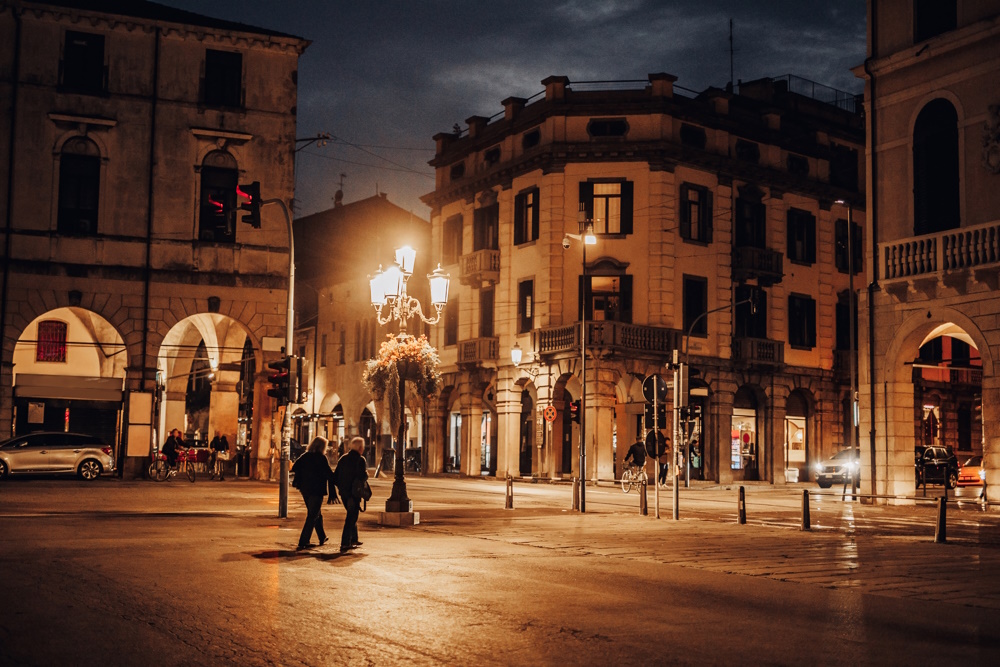
The features photo by depositphotos
If you enjoy the site, don’t forget to subscribe, we will only inform you when a new article is posted.


Thanks
Great blog post. Have to try this out. Great pictures.
Martin Belmont photography