


To use a digital background in your photos you have to do two things, first: select your subjects cut them out of their boring background, and second: drop them into your prettier digital background. Isolating your subject is the most delicate part and requires some time and patience, but if you do a good job, the results will be worth it.
I wrote this article two years ago, Photoshop has introduced many updates during these two years, so I thought it is better to make a short video to explain other updated tools to use a digital background.
There are many online resources on the internet where you can get free backgrounds. I personally found that Pixabay and Pexels are very useful. Both offer an astonishing set of backgrounds free of charge and with a free license. You can use them even in commercial ways. The following are some backgrounds I have recently downloaded and used them in the examples at the end of the post.

Photoshop also offers some options to let you create plain colors, patterns, and gradient backdrops.
Photoshop offers many different techniques for removing a background from an image or isolating your subject. For simple backgrounds, using the standard magic wand tool or quick selection tool to select and delete the background may, they can be useful and adequate for simple subjects. For more information, I recommend reading my post “How To Change A Sky In Photoshop”.
However, the Background Eraser Tool is especially useful with photos that contain lots of fine detail along the edges between your subject and its background, like, for example, if you want to erase the background in a portrait without erasing any part of your subject.
The Background Eraser is, in fact, a color eraser tool. It samples colors as you drag the tool over them and erases only those colors, leaving all other colors untouched.
The Background Eraser is one of the best tools in Photoshop for removing the background and unwanted areas of a photo, but it does have a major drawback. As an eraser tool, it physically deletes pixels from the image; it does edit the photo in a destructive way. Therefore, it’s very important to make a copy of your photo before starting editing.
Overview of the Background Eraser Tool
let’s learn the basics of how it works. To erase the central blue circle, I’ll move the cursor into the blue area, making sure that the crosshair in the center is directly over the blue color I want to erase:

When I click my mouse button, Photoshop samples the blue color under the crosshair and erases all of the matching blue pixels that fall within the cursor circle:

To complete the job, and to erase more of the blue circle, I just need to continue holding my mouse button down as I drag the Background Eraser over more of the area. Notice that even though the circle sometimes extends into one of the yellow circles, they remain untouched, and that’s because those pixels are not the same color as the color that Photoshop sampled. Keep moving the cursor but always keep the crosshair inside the blue area, Photoshop will only erase blue pixels.

If you make any mistake, and you want to undo, use the following shortcuts:
- Ctrl+Z (Win) / Command+Z (Mac) to undo.
- Ctrl+Alt+Z (Win) / Command+Option+Z (Mac) repeatedly to undo multiple steps
Selecting the tool
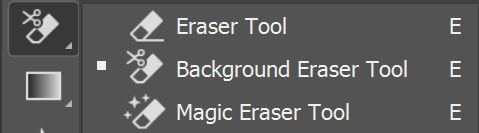
In the tools, panel right-click (Win) / Control-click (Mac) on the Eraser Tool, and then choose the Background Eraser Tool from the fly-out menu that appears, as shown below.
After selecting the Background Eraser tool, your mouse cursor will change into a circle with a small cross-hair in the center of it, and an options toolbar appears horizontally on the top of the screen.
Brush size
To adjust the brush size or you can use the following shortcuts:
- Left bracket key ( [ ) to make it smaller
- Right bracket key ( ] ) to make it larger.
- Shift+left bracket ( [ ) repeatedly to make the edges softer
- Shift+right bracket ( ] ) to make them harder.
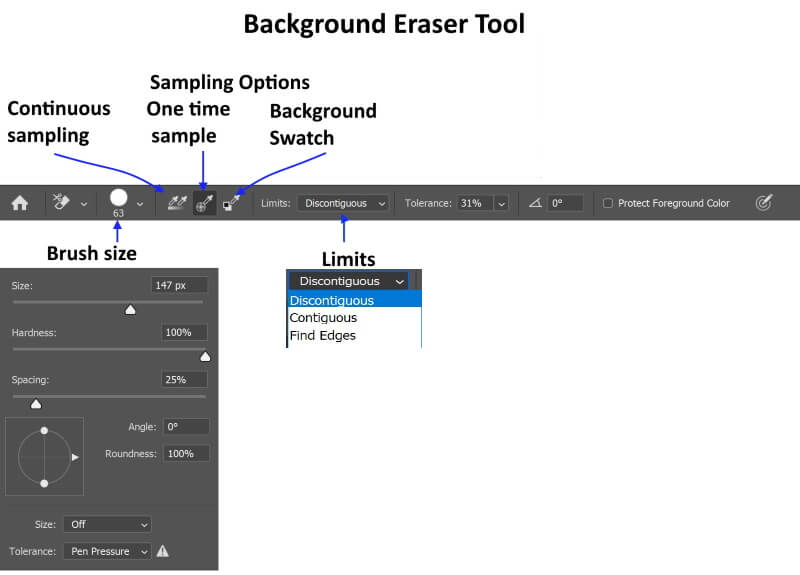
Sampling Options
This option allows you to decide how Photoshop samples color under the crosshair. There are three options:
**sampling option
- Continuous sampling: Photoshop continuously samples the color under the crosshair
- One time sample: It only samples the color once you click your mouse and keep that sample color as long as you keep pressing the mouse.
- Background Swatch: It allows you to choose a color from the Color Picker that matches the color in your image that you want to erase.
Limits
Another important option for the Background Eraser is Limits. Once Photoshop knows which color you want to erase, Limits tells it where it can look for pixels that match that color so it can erase them. The three options for Limits are
Discontiguous: discontiguous means that Photoshop is free to erase any pixels anywhere in the image that match our sampled color, whether they’re touching the crosshair or not. As long as the pixels fall within the larger circle surrounding the crosshair. The following picture may explain the idea:

Contiguous: Photoshop can only erase pixels in areas that are physically touching the pixel under the crosshair.

Find Edges: it is similar to Contiguous in that it can only delete pixels that are physically touching the pixel under the crosshair. However, Find Edges is more precise than Contiguous and better at maintaining sharp edge details.
Tolerance
The third of the three major options for the Background Eraser is Tolerance determines how different a pixel’s color and tone can be from the sampled color for Photoshop to erase it.
The default Tolerance value is 50% and that’s usually a good place to start. However, if the color of your background is too similar to your subject, causing part of your subject to be erased, try a lower Tolerance setting. If, on the other hand, you notice background color fringing around the edges, try a higher Tolerance value.
Protect Foreground Color
Protect Foreground Color allows you to sample a color from the image to set as your new Foreground color. Photoshop will then protect this color, preventing it from being erased.
Examples
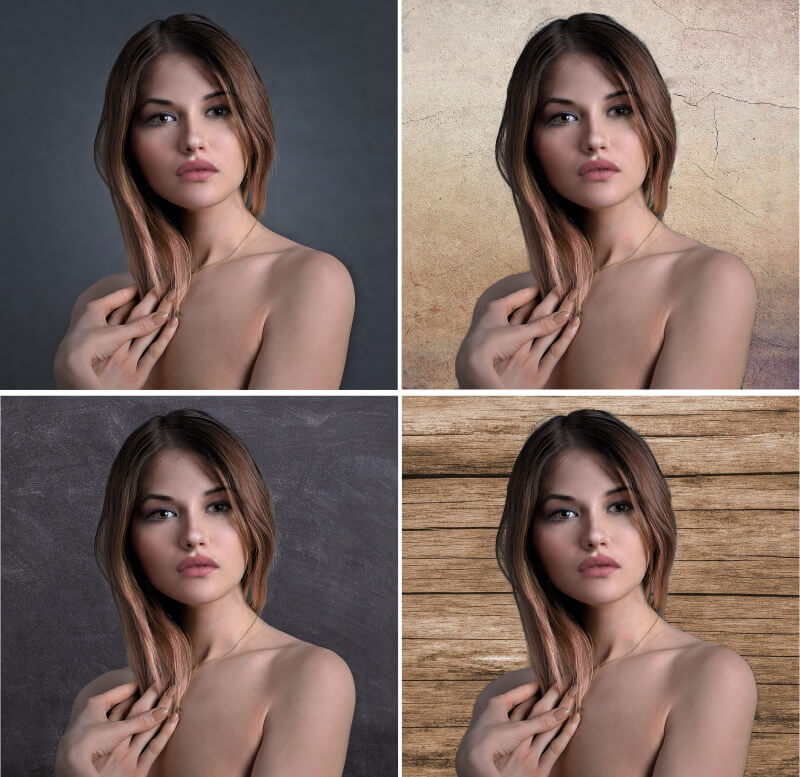
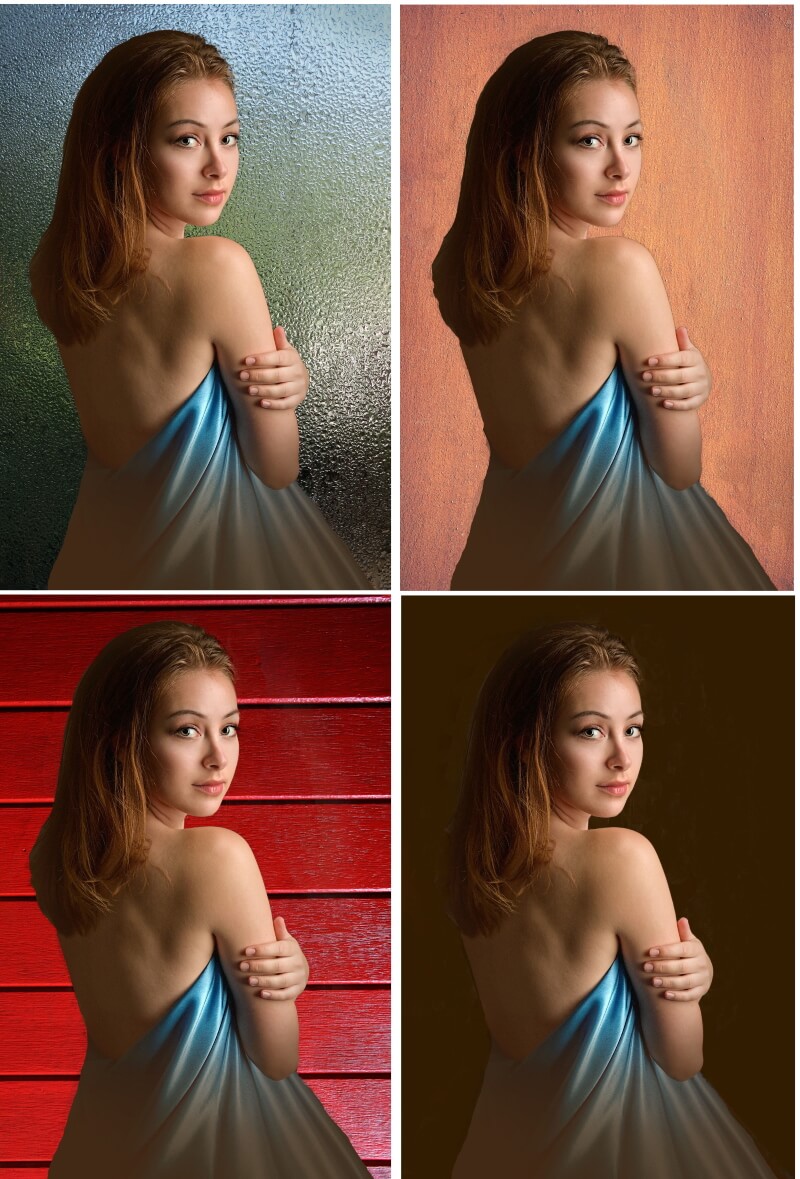
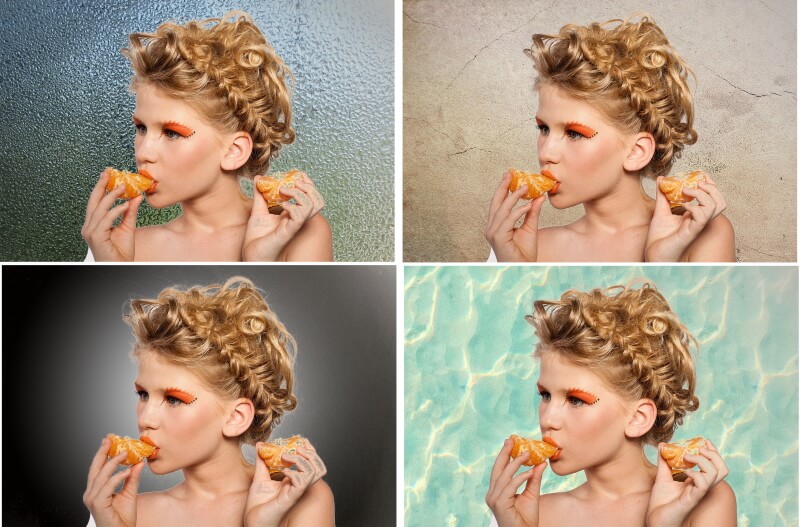
Image by Виктория Аникина from Pixabay
Conclusion
If you are willing to take your creativity to a completely different level, you should definitely consider exploring digital backgrounds. Use a digital backdrop when you want to make the backdrop appear more fashionable or artsy. The main benefit of using digital backgrounds is that your choices are limitless as far as colors, scenes, and objects.
There are many ways digital backgrounds can save you money and allow you to create images that would simply be impossible. There is a slight learning curve to digital composites, but, with the help of online videos, and tutorials, you can learn how to turn your images from basic to astonishing.
Are you looking for Photo editing resources?
If are looking for editing resources like actions, overlays, and textures, I highly recommend paying a visit to my store, it has amazing professional photo editing tools.
In addition, you can check my editing tutorials, there are many tips and tutorials there.
Related posts
How To Change A Sky In Photoshop
How To Make Digital Background In Photoshop
Thanks for reading, I hope you enjoyed the article if you have any questions just post below & I will be happy to answer you.
The featured Image by irkchik from Pixabay
If you enjoy the site, don’t forget to subscribe, we will only inform you when a new article is posted.


I am amazed on how you changed the background of the picture of the ladies here and actually this is the technique that I want to learn because I operate a mini-photo studio wherein people in my locality come in regularly for 1×1 or 2×2 ID pictures. What I have here is a white background only, I have my wall painted with white color and by using a Vivo cellphone I have my customers stand with their back on the white wall. For most customers, it is okay but some are complaining why I only have white background and can’t have blue or red backgrounds. This got me looking for ways on how to digitally manipulate photos and stumbled upon this article of yours. You said you used a background eraser, so I’d like to ask, is there a program like that? Or, do I have to download Adobe Photoshop in order to have that background eraser?
Hi Gomer
Thank you for your comment, The background eraser is a tool in Photoshop and it is used to separate the subject from the background. There are many other tools in Photoshop like magic wand, quick selection, lasso tool they can be used to select your background and change it. You need to subscribe and download Photoshop it will cost you about $10 per month. I hope you all the success in your business.
Ii really thought it was super difficult. I mean using Photoshop.
However, i think my point of view has been completely changed through going through your post. Thank you for making it seem quite easy to get around using and editing digital backgrounds.
I think i am going to take an interest at Photoshop. thank you
I wish you the best of luck in learning Photoshop, it is going to be a long way!
Thanks for your comment.
how did you come up with this idea on your site are you a photographer never once thought about changing the background on a pic can you do this perfesionaly boy does this spark ideas While i was in the navy I did a lot of photography and jest changed the background for different scenery I really like you’re creation site
Oh nice, this is very very good. I have never really tried using a digital background in Photoshop before. Normally, I would take the pictures without needing to use any background so I am very happy to be able to learn what you have here in your website about adding the background to a picture. What I heard is that adding a background can make the picture lose its reality. How true is this?
hi Riley
Well, you are right, sometimes, it really depends on the right choice of your background. For my self, I use it when I discovered that my photo has an awful background or it is a wish from the customer.
Thanks for your comment.
Digital backgrounds are awesome. They just always add a special feel to the way images are when properly edited. This is a very well detailed post and I surely love it. To be honest, I like this post and how elaborate it is here. If I can, I will try to boost my knowledge more and more on the concepts surrounding the development of digital editing of photos. Thank you
Thanks for the comment, glad you like the post
Hello Amin, it’s nice to be learning this wonderful art from your site and it’s been something instill find really difficult to do even of i know how to go about the whole thing. I have been into photography for a while now and I been learning quite a lot of things as well. Using digital background for your pictures however, gives it some really nice outlook when you do it perfectly and the cuts are neat. I would love to keep trying till i am better
Hi Benson
Thanks for your comment, using digital backgrounds open a wonderful new options for your photography, but it needs a lot of practicing, just give it some time!
I use photoshop for basic stuff, never been into deep in it.
I use to cut logos, and use only texts.
Thank you for this course, I have to try it your way, right now. Maybe I will make couple of pictures I always wanted them to be in my blog, I’ll make sure to go step by step.
Hi Mohamed
Thanks for your comment. I must admit that using Photoshop requires a lot of practice and it is a slow process.