

Canvas transfers are a rising trend in home decor and the art world. Unlike conventional prints or paintings, canvas transfers allow you to imprint your favorite photos onto textured canvases. They produce masterpieces that exhibit the combined strengths of photography and fine art.
Their allure lies in their unique texture, durability, and the aesthetic appeal they bring to any space. The key to unlocking the true beauty of canvas transfers is, first and foremost, picking the perfect photo. For all the art enthusiasts, interior decorators, and photographers out there, this detailed guide will steer you toward creating flawless canvas transfers.
Top Tips For Perfect Photos For Canvas Transfers
1. Choose Photos You Enjoy Looking At
Imagine entering a room and being greeted by your favorite memory, immortalized on canvas. That’s the power of a photo canvas. Your choice becomes a permanent fixture in your home, telling a story that’s close to your heart.
Prioritize pictures that evoke emotions, recall nostalgic moments, or captivate your soul. As these photos will grace your space daily, select ones that grow more cherished over time.

Photo by cottonbro studio
2. Use Only High-Quality Images
Once you’ve chosen a photo, check if it’s high-quality. In photo canvas transfers, pixelation is a common, yet preventable, issue. Crisp details get blurred if the resolution is low. Canvas, by its nature, exposes imperfections. Thus, high-resolution images are crucial, especially for larger prints. It should ideally have a resolution of 300 DPI or higher.
However, don’t rely on resolution alone. Proper composition ensures a balanced visual, lighting accentuates key details, and contrast can provide that dramatic flair. When assessing photos, prioritize the following aspects:
- Sharp focus: A blurry subject can diminish the overall impact.
- Good composition: Elements in the photo should harmoniously coexist, leading to a balanced visual.
- Vibrant colors: They should be realistic yet striking, adding depth to the image.
- Appropriate subject matter: Personal resonance is key. Whether it’s a serene landscape or a candid moment, it should resonate.
If your photo has a low resolution, you can enhance it using photo editing software. However, exercise caution to avoid over-editing and compromising image quality.
3. Retouch Older Photos
Time might fade memories, but your canvas shouldn’t. With their nostalgic charm, old photographs make prime options for canvas transfers. But they often need digital rejuvenation before they’re canvas-ready. To prepare them for transfer, scan your old photos to an ideal image file type, such as .jpeg, .jpg, or .png, and adjust brightness, saturation, and contrast as necessary.
Image enhancement tools can aid in restoring vintage photos or even in adding a touch of modernity. This touch-up process not only revives the image but also guarantees the canvas transfer retains the original photo’s essence.
4. Select A Canvas Size And Shape
There’s an art to picking the perfect canvas. While a panoramic landscape stretched on a vast horizontal canvas evokes awe, a square canvas might diminish its charm. Conversely, a close-up portrait stands out on a square canvas but may seem lost on a wide one. Before deciding, it’s crucial to:
- Align the canvas with the photo’s nature: A cascading waterfall might suit a vertical canvas, while sunsets generally fit horizontal ones.
- Consider the photo’s size: Zoom in and out. Will enlarging it distorts the details?
- Ponder the placement: A vast living room wall might need a sizable canvas, while a quaint study could do with a smaller one.
If you’re unsure which size and layout is ideal for your photo, experiment with different options until you find the right one. You could also consider multiple canvas panels, such as a diptych or triptych, to tell a story with your photos.
5. Prepare Your Photos For Canvas Transfer
A brilliant photo needs meticulous prepping for the canvas transfer. This involves ensuring the aspect ratio of the photo matches the canvas. For instance, a 16:9 photo might need cropping to fit an 8×10 canvas perfectly. While resizing, it’s vital to preserve the photo’s core elements. Techniques such as selective cropping can aid in this, allowing the essence of the image to shine through, irrespective of the canvas dimensions.
6. Decide On A Framing Option
The world of canvas printing offers many choices. It’s not just about the photo; it’s also about how it nestles on the canvas. The framing option you choose can either elevate or decrease its allure.
While selecting a printing service, look beyond pricing. Check reviews, scrutinize samples, and consider their customization options. Among the transfer methods, these are the most notable:
- Giclee printing: Renowned for its precision and color accuracy, it’s the method of choice in canvas printing. The process involves using archival ink to replicate the original photo on canvas as closely as possible.
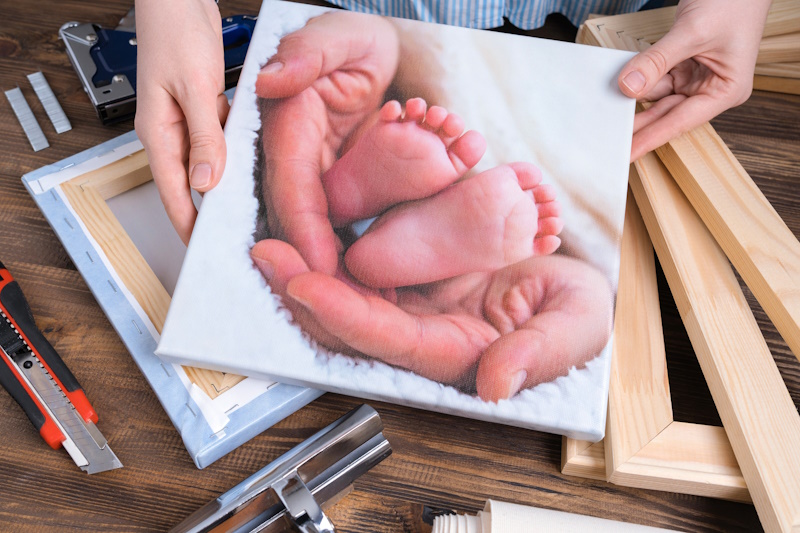
- Canvas transfer kits: For DIY aficionados, these kits allow you to print at home, albeit with varying results. The kits may include transfer paper and a gel medium. While these hands-on methods might be fun, they require meticulous attention to achieve professional-looking results.
Do you prefer eco-friendly canvases? The market now boasts several green printing options, so your art is environmentally friendly. These sustainable canvases are usually made of recycled plastic bottles stretched over a recycled frame.
The photo by AdobeStock_527660745
7. Common Pitfalls In Photo-To-Canvas Transfers
The path to a perfect canvas is filled with potential pitfalls. While some are easy fixes, others might cost you the entire canvas. Some prevalent missteps include:
- Low-resolution usage: Pixelated canvases lack clarity and finesse.
- Improper cropping or resizing: This can lead to awkwardly stretched or compressed images.
- Neglecting brightness and contrast: Proper adjustments can make images pop.
- Skipping image sharpening: This step ensures crispness in the final print.
- Settling for substandard canvas material: A quality canvas is the foundation of a long-lasting print.
Collaborating with a proficient canvas printing service minimizes these risks, guiding you to a flawless final piece. If you’re going the DIY route, research and consider making trial canvas transfers before printing out your chosen photos.
Final Thoughts
Canvas transfers breathe life into digital images, elevating them from fleeting screen displays to enduring art pieces. The journey from a digital file to a tactile canvas masterpiece depends on careful selection and preparation.
So go ahead and transform your favorite photos into beautiful canvas prints that will last a lifetime. Let your walls tell your stories.
Thanks for reading, I hope you enjoyed the article, in case you have any questions just drop them below & I will be happy to answer you.
The featured photo by AdobeStock_225684144
If you enjoy the site, don’t forget to subscribe, we will only inform you when a new article is posted.


I have personally had many photos transferred onto canvas to be displayed in my home. I believe they are a great way to display your memories. Previously, I have left all the work down to whoever I have bought the canvas off. Some times I am not as pleased with the end result as I would have hoped for. Going forwards I will now prepare my photos myself after learning some top tips from this article, making sure to include image sharpening, and adjusting the brightness and contrast to really make my picture pop.
Thank you for this very insightful article and I look forward to implementing some of your tips in the future.
I’m delighted to hear that you’ve had experience with canvas transfers and that you found the article’s tips on preparing your photos helpful. Taking a hands-on approach to fine-tuning your images, including sharpening, brightness, and contrast adjustments, can certainly help you achieve the results you desire and make your memories shine on canvas.
Thank you for your kind words, and I’m glad you found the article insightful. I hope that implementing these tips in the future brings even more joy and satisfaction to your canvas displays of cherished memories. Enjoy your creative journey!
These canvas transfers are such a great way of personalising the wall decor in your home, rather than just having random pictures with no meaning attached to them. Thanks for the tips on retouching older photos, these are after all often the ones we want to have on the wall and bring something beloved from the past back to mind. Thanks, too, for the list of pitfalls. Better to know that in advance than to settle for a sub-standard material and have to do it all again!
You’re absolutely right; canvas transfers offer a wonderful way to personalize your home decor with meaningful photos that evoke cherished memories. I’m glad to hear that the tips on retouching older photos were helpful to you. Bringing beloved moments from the past back to life through canvas transfers can be a heartwarming experience.
And yes, being aware of potential pitfalls in advance can save you time and disappointment. It’s always better to invest in quality materials and processes to ensure your canvas transfers stand the test of time and continue to bring joy to your space. Enjoy creating your personalized wall decor!