

Welcome, fellow photography enthusiasts, to a world where imagination dances with light, and creativity knows no bounds – the captivating realm of light painting tricks. Whether you’re a seasoned photographer or just embarking on this mesmerizing journey, this post is your gateway to mastering the art of light painting and transforming your photography skills into something truly extraordinary.
Photography lets us capture moments and emotions, freeze them in time, and share them with the world. But what if I told you there’s a way to not just capture moments, but to create them? This is where light painting tricks step in – they’re like the magic wand in your photographic toolkit, allowing you to paint with light and design scenes that defy the ordinary.
The Allure of Light Painting
Imagine a moonlit landscape where stars leave delicate trails across the night sky or a portrait that glows with an otherworldly aura. These are the kinds of images that light painting tricks can help you craft. The allure lies in the mystery and beauty that light painting brings – it’s like a secret dance between your camera, the darkness, and the light. With a few simple tools and some practice, you can unlock a world of creativity that will have you hooked from the very first try.
In the upcoming sections of this article, we’ll delve into the fundamentals of light painting, explore essential techniques that you can start practicing right away, and even take a dive into more advanced methods that will truly set your work apart. We’ll troubleshoot common challenges, share tips for perfecting your technique, and guide you on how to showcase your light painting masterpieces to the world.
Understanding Light Painting
Ready to dive into the captivating world of light painting tricks? Let’s begin by unraveling the magic behind this creative technique and exploring the fundamentals that make it all possible.

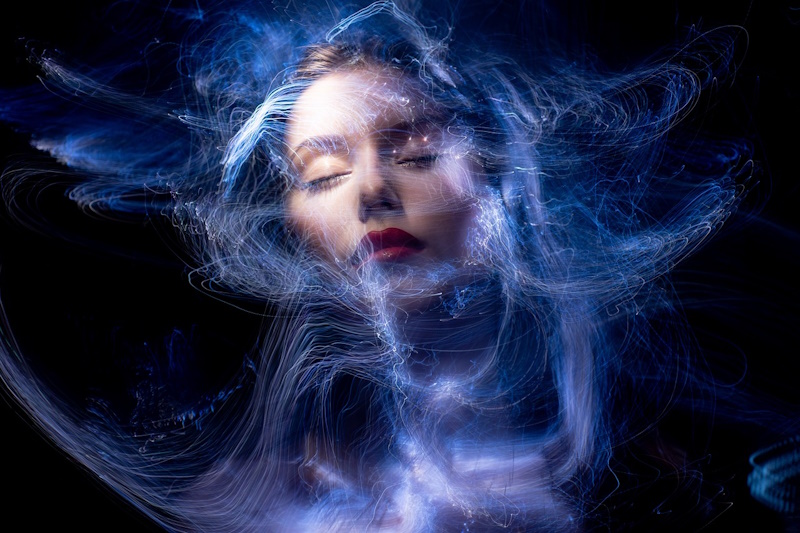
Photo by Pixabay
Fundamentals of Light Painting
At its core, light painting is all about using light as your paintbrush to create stunning visual effects in your photographs. Imagine yourself in a dark room with your camera on a tripod. As you open the camera’s shutter, you can use various light sources – flashlights, LED sticks, or even smartphone screens – to ‘paint’ in the air. The camera captures the path of the light, resulting in breathtaking light trails, shapes, and textures.
The magic of light painting tricks lies in your ability to control the light’s movement. By moving the light source strategically, you can craft intricate patterns, spell out words, or add a whimsical touch to your images. It’s like drawing in the air, but instead of ink, you’re using light to leave a trail of brilliance.
Tools and Equipment You’ll Need for Light Painting Tricks
Getting started with light painting doesn’t require a lot of specialized gear. In fact, you probably have most of what you need already. Here’s a simple checklist to ensure you’re ready to embark on your light painting journey:
- Camera with Manual Settings: To fully harness the power of light painting, your camera should allow manual control over settings like shutter speed, aperture, and ISO. This control is crucial for adjusting exposure settings according to your creative vision.
- Tripod: Since light painting involves longer exposure times, a stable platform is essential. A tripod ensures that your camera remains steady, preventing unwanted blurriness in your shots.
- Light Sources: Flashlights, LED wands, glow sticks, and even fire can serve as your ‘paintbrushes.’ Experiment with different light sources to achieve varying effects.
- Colored Gels and Filters: These can be used to modify the color of your light source, allowing you to paint with a rainbow of hues.
- Remote Shutter Release or Timer: To minimize camera shake during long exposures, a remote shutter release or timer can be immensely helpful.
- Dark Location: Light painting works best in low-light environments. Look for a location away from light pollution, like a dimly lit room, an open field at night, or an urban area during the ‘blue hour.’

Image by Raventhorne from Pixabay
Get ready to shoot light painting
Wearing the right attire during light painting photography can contribute to your comfort, safety, and overall experience. Here’s a simple guide on what a photographer should consider wearing:
- Dark Clothing:
Opt for dark-colored clothing to minimize your visibility during long exposure shots. This helps prevent unintentional light reflections on your clothing, which can affect the final image.
- Comfortable Clothes:
Choose comfortable clothes that allow you to move freely. Light painting often involves physical movements, so wearing clothes that don’t restrict your mobility is essential.
- Headlamp or Flashlight:
A headlamp or flashlight can be useful for navigating in the dark while setting up your shots or adjusting your camera settings. It leaves your hands free and ensures you have good visibility.

Camera Settings
When it comes to capturing mesmerizing light painting, camera settings play pivotal roles. Finding the right camera settings is crucial to capturing stunning and vivid light trails, shapes, and textures. Here’s a typical set of camera settings to get you started on your light painting journey:
-
Shooting Mode:
Use Manual (M) mode on your camera to have full control over settings.
For further reading check Exposure Modes Explained
-
ISO:
Set your ISO to the lowest value, usually around 100 or 200, to minimize noise in your images.
-
Aperture (f-stop):
Choose a narrow aperture (higher f-number) to maintain a larger depth of field. This ensures that both your light trails and the background remain in focus. A good starting point is around f/8 to f/16.
-
Shutter Speed:
This is where the magic happens. Since light painting involves capturing the movement of light sources, you’ll need longer exposure times. Start with a shutter speed of around 15 to 30 seconds. Depending on the effect you’re aiming for, you might need to adjust this further – shorter for more defined lines and longer for more intricate patterns.
-
White Balance:
Set your white balance to match the light conditions. You can use the “Daylight” or “Tungsten” preset as a starting point and adjust as needed during post-processing.
-
Focus:
Switch your camera to manual focus mode to prevent it from hunting for focus in the dark. Set the focus to infinity if you’re shooting landscapes, or use a distant light source to help you focus manually.
-
File Format:
Shoot in RAW format. RAW files retain more information, allowing for better adjustments in post-processing.
-
Noise Reduction:
Disable in-camera noise reduction. You can handle noise reduction during post-processing for more control.
-
Mirror Lock-Up:
If your camera has this feature, enable it to minimize vibrations caused by the mirror movement.
-
Remote Shutter Release or Timer:
To avoid camera shaking during long exposures, use a remote shutter release or your camera’s built-in timer.
Understanding these settings will give you a strong foundation for exploring the world of light painting.
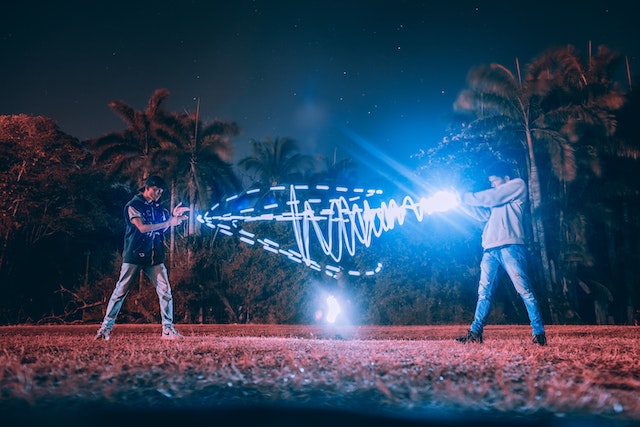
Photo by Luis Quintero
Popular light sources:
Here are some of the most popular light sources used for light painting:
-
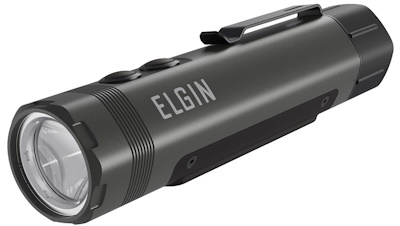
Flashlights:
Flashlights are a versatile and affordable option for light painting. They come in a variety of shapes, sizes, and brightness levels, so you can find one that fits your needs. Some flashlights also have features that are specifically designed for light painting, such as a focusable beam or a red light setting.
-
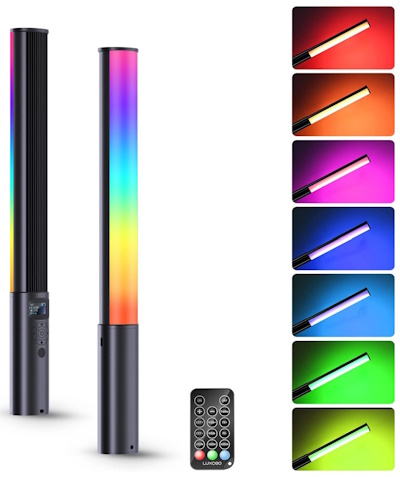
LED light wands:
LED light wands are another popular option for light painting. They are lightweight and easy to maneuver, and they come in a variety of colors. LED light wands can be purchased at most craft stores or online.
LUXCEO RGB LED Video Light Wand
-
Light painting brushes:
Light painting brushes are a specialized type of light source that is designed to create smooth, even strokes. They are made of a flexible material, such as plastic or fabric, and they have a long, thin handle.
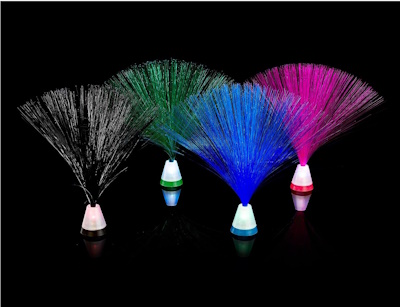
Playlearn Fiber Optic Light 4 Pack Multicolored Set 9″ Light Base
-
Glow sticks:
Glow sticks are a fun and inexpensive way to add color to your light paintings. They are available in a variety of colors, and they can be purchased at most party stores.
18 Colors Changing Glow Sticks

The best light source for you will depend on your budget, the type of light painting you want to do, and your personal preferences. Experiment with different light sources to find the ones that work best for you.
Essential Techniques for Light Painting
In this section, we’ll explore one of the most important aspects of this art form: creating captivating light trails. By mastering this technique, you’ll open the door to a world of endless possibilities for crafting dynamic and visually stunning images.
1. Creating Light Trails
Light trails are the hallmark of light painting tricks, Light trails are captivating visual phenomena that occur when a moving light source leaves a trail of illumination behind it, captured in a single photograph.
-
Choosing the Right Light Source
Selecting the right light source is the first step to crafting alluring light trails. Flashlights, LED wands, or even simple glow sticks can be your partners in this artistic endeavor. Opt for sources that emit a consistent and controllable beam of light. Additionally, experiment with different colors to infuse your trails with a touch of vibrancy and mood.
-
Mastering Controlled Movements
The secret to mesmerizing light trails lies in your movement. Hold the light source away from the camera and move it gracefully through the air to create smooth and flowing lines. The distance from the camera affects the width and brightness of the trail – the closer the light, the brighter the trail; the farther away, the dimmer and thinner the trail. Keep your movements steady and deliberate to achieve clean and captivating results.
-
Experimenting with Different Exposure Times
Here’s where your creativity truly shines. Adjusting the exposure time determines the length and visibility of your light trails. Start with exposure times ranging from 15 to 30 seconds and observe how the length of the trails changes. Longer exposure times result in more intricate and complex patterns, while shorter times yield more defined and bold lines. Play around with various settings until you find the perfect balance that matches your vision.
As you experiment with these techniques, keep in mind that practice makes perfect. Don’t be discouraged if your first attempts don’t turn out as expected – the journey of mastering light painting is about learning, refining, and discovering your unique style.
2. Light stencils and shapes
One of the most captivating techniques is the use of light stencils and shapes. These tools allow you to add intricate details, precision, and a touch of magic to your light painting creations, resulting in photographs that are as enchanting as they are artistic.
-
Crafting Your Own Stencils
Crafting light stencils is like sculpting with light. It’s the process of shaping and directing light through custom-made stencils to create distinct patterns and images in your photographs. The beauty lies in the ability to transform ordinary light into extraordinary shapes. Making your own stencils is a straightforward process – all you need is creativity, a sturdy material (like cardboard or plastic), and a sharp cutting tool. Design your desired shape, cut it out, and you’re ready to infuse your light painting with personal flair.
-
Achieving Precision in Shapes and Forms
Light stencils enable you to achieve precise shapes and forms that might otherwise be challenging to create freehand. From intricate swirls to geometric patterns, your stencil becomes your brush, and the canvas is the darkness. To achieve clean and well-defined shapes, ensure that the stencil is positioned close to the light source and camera. Experiment with distances to control the size and sharpness of the projected shape. The result is a striking visual narrative that showcases your meticulous craftsmanship.
-
Incorporating Multiple Elements in One Frame
The beauty of light stencils is their versatility. You’re not limited to using just one stencil per photograph – you can incorporate multiple elements in a single frame to craft complex and visually engaging scenes. Imagine creating a dreamy landscape with a moon, stars, and swirling galaxies, all delicately painted with light. By layering and carefully positioning different stencils, you open the door to limitless creative possibilities.
Layering stencils requires practice and patience, but the results are truly rewarding. Start with the foreground elements and gradually add layers to build your desired composition. Each stencil adds depth, dimension, and character to your light painting, allowing you to tell captivating stories through the interplay of light and shadow.
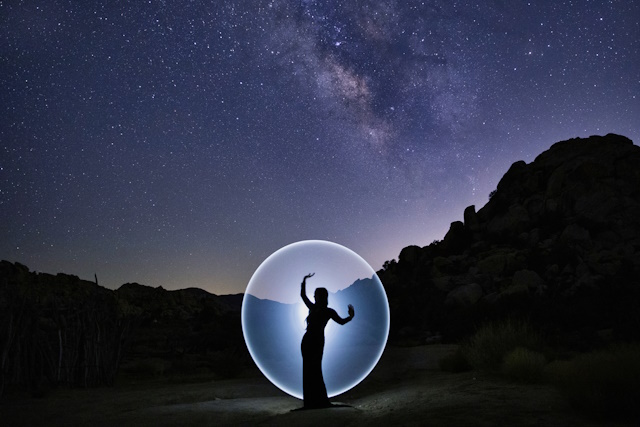
Photo by Depositphotos
3. Painting with colors and textures
In this section, we’ll explore how the interplay of colors and textures can elevate your light painting to new heights, turning your photographs into captivating works of art that evoke emotion and intrigue.
-
Using Gels and Filters for Vibrant Effects
Imagine your light source adorned with a burst of vivid color – that’s the magic of gels and filters in light painting. Gels are transparent colored sheets that you can attach to your light source to infuse your trails with a spectrum of hues. These gels allow you to paint your scenes with a painter’s palette of colors, evoking different moods and emotions. From fiery reds to tranquil blues, gels let you tell stories through the language of color.
-
Playing with Textures and Diffusion Tools
Textures add a tactile dimension to your light painting, turning your images into multi-sensory experiences. Consider using diffusion tools like sheer fabrics or frosted plastics to soften and scatter the light, creating a dreamlike atmosphere. As the light passes through these materials, it transforms into a gentle, ethereal glow that adds depth and enchantment to your compositions.
-
Combining Colors for Captivating Visuals
Now, imagine the possibilities when you combine colors and textures in a single frame. Picture a light trail painted with a warm, fiery red that gradually transitions into a cool, soothing blue. This dynamic interplay of colors creates a visual narrative that captures attention and conveys emotion. By layering colors and textures, you’re layering stories within your light painting, inviting viewers to explore and interpret the depths of your artistry.
Combining colors and textures requires experimentation and a keen eye for detail. Consider the emotions you wish to evoke – warm colors like reds and oranges can evoke passion and energy, while cooler tones like blues and greens create a sense of calm and tranquility. Don’t hesitate to experiment with different combinations to discover the ones that resonate most with your creative vision.
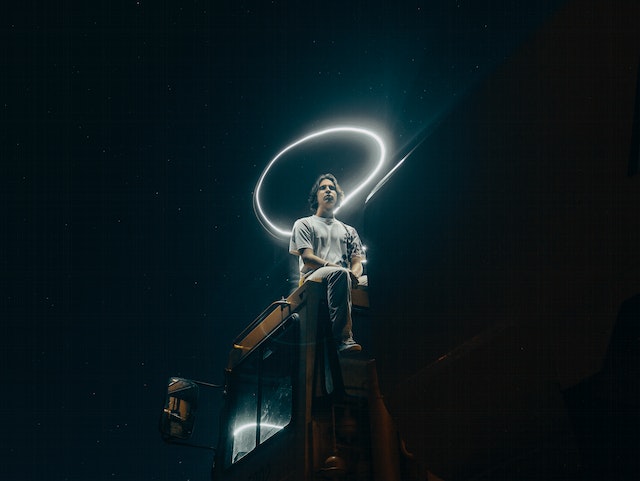
Photo by Aidan Roof
Advanced Techniques
In this section, we’ll explore the multiple exposures and layering in light painting tricks. These techniques open doors to boundless creativity, enabling you to craft images that are not just photographs but stories told through the interplay of light and imagination.
1. Multiple Exposure and Layering
Multiple exposures and layering are two techniques that are often used in light painting to create creative and visually stunning images.
-
Multiple exposures
Multiple exposures is a technique in which the camera shutter is opened more than once to expose the film or sensor multiple times. It is similar to the double exposure technique. This allows you to capture different elements of a scene in a single image. For example, you could use multiple exposures to capture the movement of stars in the sky while also capturing the details of a foreground subject.
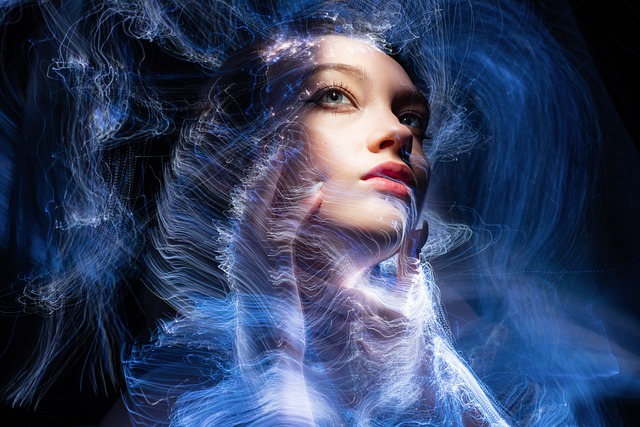
Image by Merlin Lightpainting from Pixabay
-
Layering
Layering is the process of combining multiple images together to create a single image. This can be done in post-processing software, such as Photoshop or Lightroom. When layering images, you can control the opacity of each layer to create different effects. For example, you could use layering to create a sense of depth in an image or to combine multiple light-painted elements into a single scene.
In light painting, multiple exposures and layering are often used together to create images that would be impossible to capture in a single exposure. For example, you could use multiple exposures to capture the movement of a subject while also capturing the details of the surrounding environment. Or, you could use layering to combine multiple light-painted elements into a single scene.
Layering light paintings grants your images a sense of depth and dimension that goes beyond the flatness of a single exposure. As you carefully position each element, you create a visual hierarchy that draws the viewer’s eye through the image.
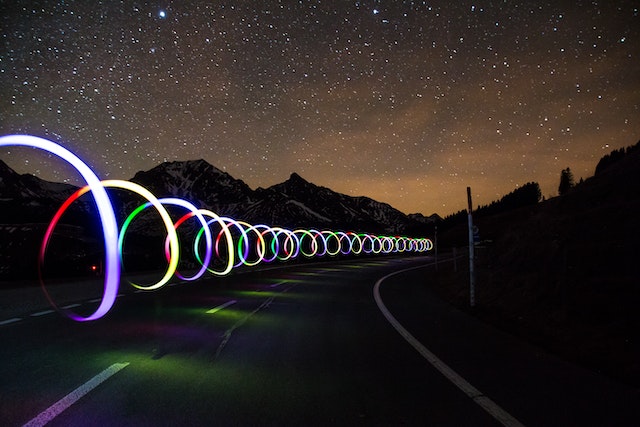
Photo by Pixabay
2. Light orbs and light spheres
Light orbs and light spheres are a popular technique in light painting. They can be used to create a variety of effects, from simple shapes to complex designs.
Crafting and controlling light orbs
Imagine holding a sphere of light that glows with an otherworldly radiance. Crafting light orbs is like capturing a fragment of starlight in your hands. The process involves swinging a light source in a circular motion, creating a mesmerizing loop of light that appears as a celestial orb in your photographs. With practice, you’ll discover that the size, speed, and direction of your circular motion all contribute to the unique qualities of the orb.
The beauty of light orbs lies in their adaptability. By adjusting the size of the circle you swing and varying the speed of your movement, you can create light orbs of different sizes and intensities.
A smaller circle yields a more concentrated orb, while a larger one results in a larger, more diffused orb. Faster movements lead to brighter orbs, while slower motions produce more delicate and subtle orbs.
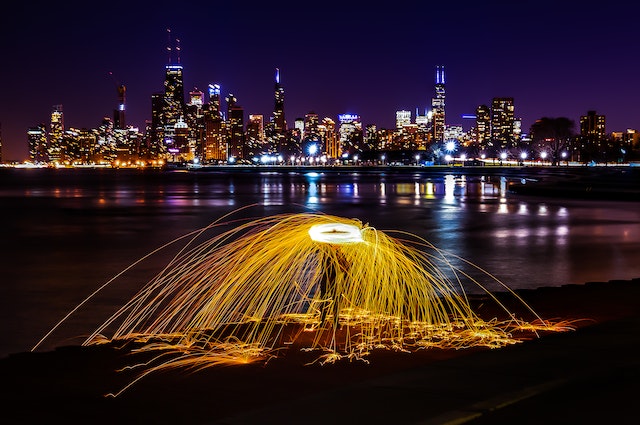
Photo by Bhargava Marripati
3. Incorporating Natural Surroundings:
We’ll explore the power of using landscapes as backdrops, the art of harmonizing artificial light with ambient surroundings, and the enchanting stories that emerge through contextual light painting.
-
Using Landscapes as Backdrops for Light Painting
Imagine standing in a vast landscape under the cover of night, your camera poised and your light source ready. The canvas before you is not just dark space; it’s a tapestry of nature waiting to be illuminated. Using landscapes as backdrops for light painting adds a layer of depth and context to your creations. Whether it’s a serene forest, a tranquil lake, or a rugged mountain range, the natural world becomes a canvas for your light painting artistry.
-
Harmonizing Artificial Light with Ambient Light
Incorporating natural surroundings means working with the interplay of artificial and ambient light. The challenge is to harmonize the two, creating a seamless blend that enhances the atmosphere. To achieve this, consider the color temperature of your light source. If you’re painting with warm-toned light, it might complement the golden hues of a forest at twilight. If your light is cooler in tone, it could contrast beautifully against a cold, moonlit beach.
-
Telling Stories through Contextual Light Painting
Imagine when you use light painting in a place that fits the story, it can make people feel something strong. Picture someone walking alone on a path lit by the moon, and their journey is lit up by a trail of light. This story is more than just what you see – it makes you feel things and helps you imagine more. The way light and nature come together in your picture brings everything to life and makes people feel like they’re in the story too.
Using natural surroundings isn’t just about finding a beautiful backdrop; it’s about collaborating with nature to tell stories that resonate. The shadows of trees, the reflections on water, the contours of mountains – these elements all become characters in your light painting story. They add context, depth, and a touch of magic that transforms your light painting into an immersive experience.
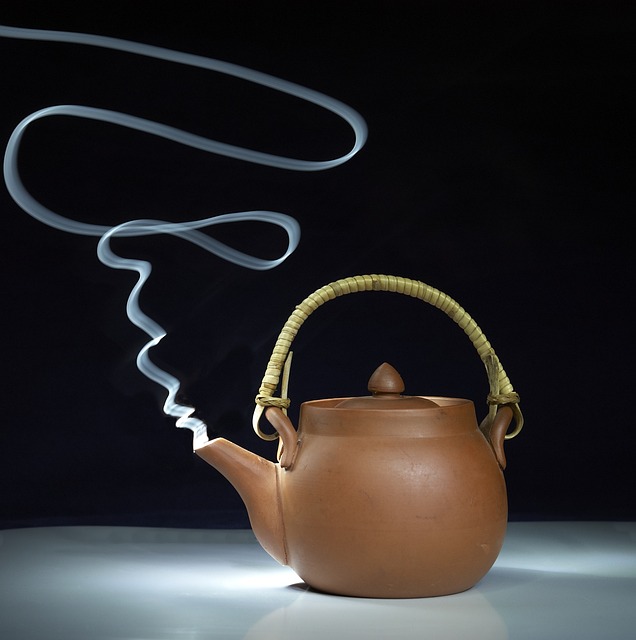
Image by Jan Mareš from Pixabay
Troubleshooting and Tips for Success in Light Painting
Starting the journey of light painting is an exhilarating experience, but like any artistic pursuit, it comes with its share of challenges. In this section, we’ll delve into troubleshooting common issues that light painters face and provide tips for overcoming them. From dealing with exposure problems to managing unwanted light spills, you’ll gain insights that will help you achieve light painting success.
Dealing with Common Challenges in Light Painting
-
Overexposure and Underexposure Issues
Achieving the right balance of light is essential in light painting. Overexposure happens when too much light enters the camera, resulting in overly bright areas that lack detail. Underexposure, on the other hand, occurs when the image is too dark, and important elements are lost in the shadows. To tackle these issues, adjust your camera settings – for overexposure, use a smaller aperture or decrease the exposure time; for underexposure, open up the aperture or increase the exposure time. Regularly check your camera’s histogram to ensure a balanced distribution of tones.
-
Unwanted Light Spills and Flares
Unintended light spills and flares can diminish the clarity of your light painting. To combat this, position your light source away from the camera’s lens to prevent direct light from hitting the lens and causing unwanted reflections. Experiment with the angle and direction of the light to control the glow and prevent it from overpowering the desired subject. Consider using a lens hood or your hand to shield the lens from any stray light.
-
Managing Shaky Hands and Blurriness
Long exposure times can make even the slightest hand movement result in blurry images. To counter this, use a sturdy tripod to keep your camera steady during the exposure. Additionally, consider using a remote shutter release or the camera’s built-in timer to eliminate any camera shake caused by manually pressing the shutter button. If you’re in a situation where a tripod isn’t feasible, find a stable surface to place your camera on.
Tips for Success in Overcoming Challenges
-
Practice and Patience:
Light painting is a skill that takes time to master. Practice different techniques and settings to become familiar with how your camera responds to light in various conditions.
-
Experiment with Lighting Angles:
Adjust the angle and distance of your light source to create different effects. Experimentation allows you to discover what works best for your creative vision.
-
Use Light Modifiers:
Consider using diffusers, gels, and other modifiers to control the quality and direction of the light. These tools can help you achieve the desired effects and reduce unwanted glare.
-
Review and Adjust:
Regularly review your captured images during the shoot. This allows you to identify issues early and make necessary adjustments before moving on to the next shot.
-
Post-Processing:
Don’t hesitate to use post-processing software to fine-tune your images. Adjustments to exposure, contrast, and color balance can enhance the final result.

Post-Processing Techniques to Elevate Your Light Painting Images
The final step in the enchanting journey of light painting is the post-processing phase. This is where you add the finishing touches that transform your raw captures into polished works of art. In this section, we’ll explore essential post-processing techniques that enhance your light painting images, breathing life into your illuminated creations and ensuring that they captivate the eye and stir the imagination.
-
Adjusting Colors and Contrasts
The colors and contrasts in your light painting images play a crucial role in conveying mood and enhancing the visual impact. During post-processing, consider adjusting the color balance to enhance the warmth or coolness of your scene. Experiment with contrasts to ensure that the illuminated elements pop against the darker areas. This process allows you to emphasize the essence of your light painting, making it visually captivating and emotionally resonant.
-
Removing Unwanted Artifacts
Light painting often involves intricate movements and careful orchestrations, but sometimes, unwanted artifacts may creep into your images. During post-processing, use tools like the clone stamp or healing brush to remove distractions or blemishes. Whether it’s a stray light source or an unintended element, your editing process can restore the purity of your composition, ensuring that viewers focus on the artistry rather than distractions.
-
Adding a Touch of Magic Through Editing
Editing is not just about correcting imperfections; it’s also about adding a touch of magic that elevates your light painting to another level. Consider adding subtle vignettes to draw the viewer’s gaze to the illuminated elements. Experiment with adding a soft glow or a gentle haze to enhance the ethereal quality of your light trails. The artistry of editing lies in using these touches to amplify the emotions and stories embedded in your light painting.
Post-Processing Tips
- If possible, shoot in RAW format to preserve the maximum amount of information for editing. RAW files offer more flexibility when adjusting exposure, color, and other elements.
- Use layers and adjustment layers to maintain the flexibility to tweak your edits without permanently altering the original image. This allows for experimentation without the fear of losing data.
- Focus your edits on specific areas that need enhancement. Use tools like masks to apply adjustments only to certain parts of the image, preserving the integrity of the rest.
- While editing can enhance your images, avoid overdoing it. Subtle adjustments often yield more natural and appealing results.
- Take breaks during the editing process and revisit your work with fresh eyes. This helps prevent over-editing and allows you to make more objective decisions.
Are you looking for Photo editing resources?
If are looking for editing resources like actions, overlays, and textures, I highly recommend paying a visit to my store, it has amazing professional photo editing tools.
In addition, you can check my editing tutorials, and my YouTube channel there are many tips and tutorials there.
Conclusion
As we conclude our journey through light painting tricks, you’ve unlocked a world where imagination meets illumination. From mastering basics to advanced techniques, you’ve discovered how to craft visual stories that resonate. Remember, light painting is more than photography; it’s a canvas for creativity, where darkness and light blend to evoke emotions. Whether you’re a beginner or a seasoned artist, embrace the dance of light, and let your creativity shine. Your journey is an enchanting adventure, where every stroke of light reveals stories uniquely yours.
Related posts
Light Painting Photography Technique
Long Shutter Speed Photography – How To Apply it?
Thanks for reading, I hope you enjoyed the article, in case you have any questions just drop them below & I will be happy to answer you.
The featured Image by Merlin Lightpainting from Pixabay
If you enjoy the site, don’t forget to subscribe, we will only inform you when a new article is posted.


Hey, exploring light painting techniques can truly unleash one’s creativity and add a magical touch to photography. Your article on ‘Mastering Light Painting Tricks’ is both informative and inspiring. I’m keen to dive into this fascinating world of light painting. Do you have any beginner-friendly tips or recommended resources for someone looking to get started with this unique form of artistic expression
Thanks for your kind words about my article. I’m glad you found it informative and inspiring.Here are a few beginner-friendly tips for light painting:
Start with the basics: Learn the basics of photography, such as aperture, shutter speed, and ISO. This will help you understand how to control the exposure of your light painting photos.Use a tripod: A tripod will help to keep your camera steady, which is essential for long exposure photography.Use a remote shutter release: A remote shutter release will allow you to trigger the shutter without touching the camera, which can prevent camera shake.Start with simple shapes: When you’re first starting out, it’s best to start with simple shapes, such as circles or lines. This will help you get the hang of the technique before you move on to more complex patterns.Experiment with different light sources: There are many different light sources that you can use for light painting, such as flashlights, glow sticks, and LED wands. Experiment with different light sources to see what kind of effects you can create.Be creative: Light painting is a great way to be creative and express yourself. Don’t be afraid to experiment and try new things.
Here are a few recommended resources for learning more about light painting:
The Light Painting Photography Workshop: This book by Peter Dench is a great resource for beginners. It covers everything you need to know to get started with light painting, from the basics of photography to advanced techniques.
The Light Painting Collective: This group on Flickr is a great place to find inspiration and learn from other light painters. There are thousands of photos to browse, as well as forums and tutorials.
I have always been captivated by light paintings. Even after watching tiktok after tiktok of them producing the photographs I still never understood how they got the the end result. This article clearly indicates what light painting is and how you can achieve it. It includes tips and tricks that I would have never thought of such as wearing dark clothing to minimilise your visibility. This article also includes some advanced techniques for those who are more competent. Although i won’t be trying these out too soon I definitely can’t wait to try some more basic techniques.
Would you recommend any simple shapes/patterns for a beginner to practice while they are still learning?
I’m glad to hear that you found the article helpful and that you’re interested in trying out light painting! For beginners, I would recommend starting with simple shapes and patterns like circles, spirals, and straight lines. These basic shapes can help you get a feel for the light painting process and allow you to practice your technique. Once you’re comfortable with these, you can gradually move on to more complex patterns and designs. Remember, practice makes perfect, so have fun experimenting and refining your skills!