


Welcome to the vibrant world of Color Gel Photography! In this article, we will embark on an exciting adventure into the realm of creative photography, discovering how color gels can transform your photos from ordinary to extraordinary.
What is color gel photography?
Color gel photography, also called gel lighting or gel photography, uses colored sheets known as color gels or lighting gels. These gels are placed in front of light sources like studio lights or flashes to add vibrant colors and create a dynamic atmosphere in your photos. The main aim is to inject your images with bursts of color, enabling you to convey stories, evoke emotions, and grab attention in a distinctive and artistic manner.
Importance of using color gels for creative photography
Color gels provide numerous creative opportunities. They allow you to manipulate the atmosphere and mood of your photos, making them perfect for various photography styles such as portraits, fashion, products, and still life. With color gels, you can create a specific setting, highlight particular elements, and evoke emotions that cannot be achieved with black-and-white or unfiltered light. In summary, color gels are a valuable asset for photographers seeking to add a hint of enchantment to their photographs.
Overview of what the blog post will cover
Now that you have an understanding of color gel photography and its importance in creative photography, let’s explore it further. In the upcoming sections, we will delve into the detailed aspects of color gel photography. You will discover the necessary equipment and setup required to begin, practical tips for capturing amazing shots, and techniques for enhancing your photos through post-processing.
Whether you are a beginner looking to explore this vibrant world or an experienced photographer seeking advanced techniques, this blog post offers something for everyone. So, grab your camera, and let’s start capturing spectacular shots with color gel photography!
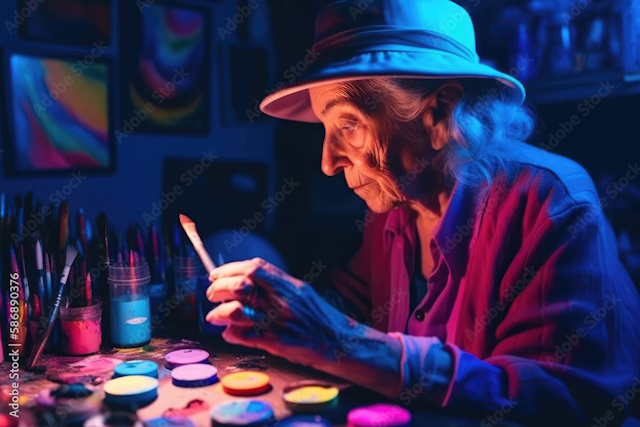
Photo by AdobeStock
Understanding Color Gel Photography
What are color gels
Color gels, also known as lighting gels or simply gels, are transparent sheets made of flexible material. They are coated with colored dyes in various hues. When placed in front of a light source, like a studio light or flash, they change the color of the light that passes through them. This allows you to add a range of colors to your photographs, acting as a creative filter for your light source and enhancing the depth and emotion in your shots.
What are color filters?
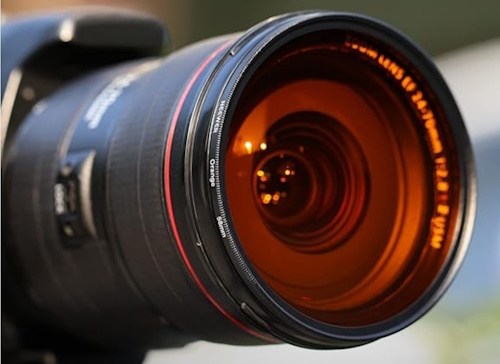
Color filters, on the other hand, are placed in front of the camera lens. They work by absorbing or reflecting certain wavelengths of light before they reach the camera sensor. This can be used to correct the color of an image or to create creative effects. Color filters are available in a wide variety of colors and densities, but they are typically used to make subtle adjustments to the overall color balance of an image.
Here is a table that summarizes the key differences between color gels and color filters:
| Characteristic | Color gels | Color filters |
|---|---|---|
| Placement | In front of the light source | In front of the camera lens |
| Function | Absorbs certain wavelengths of light and allows others to pass through | Absorbs or reflects certain wavelengths of light |
| Effect | Creates a colored light that can be used to illuminate a subject or scene | Makes subtle adjustments to the overall color balance of an image |
| Common uses | For studio photography | For outdoor photography |
The role of color temperature in photography
Understanding color temperature is important in color gel photography. Color temperature is measured in Kelvin (K) and describes the color quality of light. Daylight has a color temperature of around 5500K, giving it a cool, bluish tone. Tungsten light bulbs have a lower color temperature of around 3200K, producing a warm, yellowish light.
When using color gels, you can change the color temperature of the light source. For example, placing a blue gel over a warm light source creates a cooler, more blue-toned light. This interplay of color temperatures allows you to control the mood and ambiance of your photos, giving you creative control over the emotional impact of your image.
For further reading:
- Mastering Color Theory For Photographers: The Complete Guide
- Color Harmony In Photography- Things You Need To Know
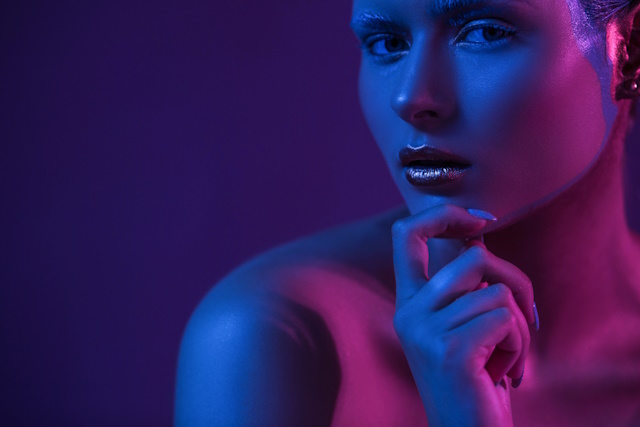
Photo by Depositphotos
Essential Equipment and Setup
1- Camera and lens selection
Having full control over exposure and color balance is crucial when exploring Color Gel Photography. To achieve this, it’s important to use a camera with manual settings and the ability to adjust white balance. Additionally, prime lenses with wide apertures, like a 50mm f/1.8, are ideal for creating stunning bokeh effects while maintaining focus on your subject.

2- Choosing the right color gels
Choosing the right color gels is crucial for creating the perfect shot. With a wide range of colors available, it’s important to select ones that match the mood and message you want to convey. For example, red gels can add warmth and intensity, while blue ones create a cooler, more serene atmosphere. Here, we’ll recommend some must-have color gels to enhance your creative photography:
-
Red Color Gels:
Red gels add warmth and intensity to your photos. They are perfect for creating passionate and energetic atmospheres. Use them to infuse a fiery glow in your portraits or accentuate the drama in your shots.
-
Blue Color Gels:
Blue gels introduce a cool, serene, and sometimes mysterious feel to your images. They are excellent for outdoor shots, creating a calming ambiance, or adding an otherworldly touch to your photos.
-
Green Color Gels:
Green gels can breathe life into your still life or outdoor shots. They evoke a sense of freshness and harmony. Experiment with them to bring a touch of nature to your photography.
-
Orange and Yellow Color Gels:
These gels are ideal for adding a warm and welcoming tone to your images. They are great for portrait photography, especially during golden hour, and for enhancing the beauty of your subjects.
-
Purple Color Gels:
Purple gels bring a touch of luxury and creativity to your shots. They are perfect for creating a regal or dreamlike atmosphere, making them an excellent choice for fashion and fantasy photography.
-
Color Correction Gels:
These gels are designed to correct the color temperature of your light source. They come in various strengths and are crucial when you need to match different light sources or eliminate unwanted color casts.
-
Color Effect Gels:
Get creative with color effect gels. These gels come in a range of exciting and unconventional colors like pink, lavender, or turquoise. They add a fun and imaginative touch to your images.
Don’t forget to experiment with different combinations to find what works best for your vision. Also, keep in mind the density and opaqueness of the gels, as they can affect the level of color saturation. Sometimes, a subtle touch of color can be just as impactful as a bold one.
3- Setting up your photography environment
Creating the right environment is important for successful color gel photography. Set up a dedicated space with a complementary backdrop. Use a plain, solid-color background to make the gel effects stand out.
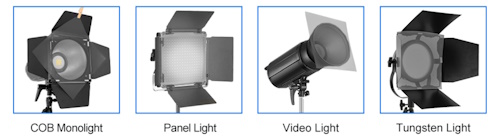
The lighting setup is also crucial. Position the light source behind the subject and attach the color gel to it. You can use gels designed for your flash or a separate lighting modifier like a softbox with a gel in front.
Experiment with the distance between the light source and the subject to control the color intensity. Make adjustments until you achieve the desired effect.
Remember to shoot in a controlled environment. Avoid mixing natural light with artificial gels, as it can affect the color balance. Shoot in a darkened room to enhance the vibrancy of the gel colors.
Tips for Capturing Spectacular Shots
1- Using Color Gels to Enhance Mood and Atmosphere
Color gels are like the paintbrushes of the photographer’s palette, allowing you to set the mood and atmosphere of your shots with precision. Here are some tips on how to use them effectively:
-
Warm and Cozy:
To create a warm and intimate atmosphere, use warm color gels like red, orange, or yellow. These colors infuse your shots with a cozy and inviting feel, perfect for portraits and indoor settings.
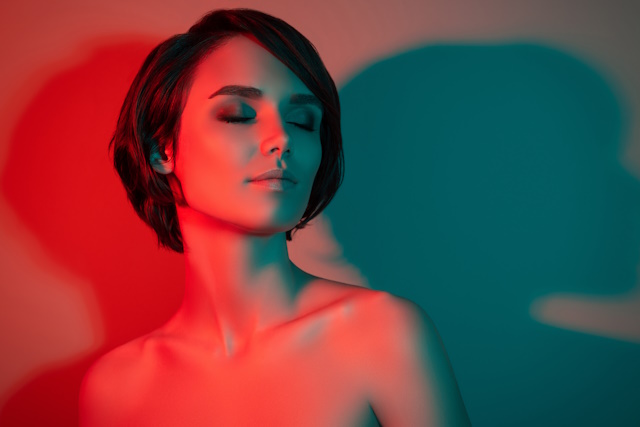
Photo by Depositphotos
-
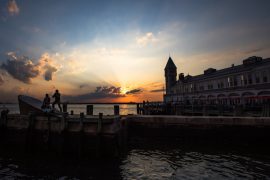
Cool and Mysterious:
For a cool, mysterious, or otherworldly vibe, opt for blue or green gels. These colors transform your images, making them appear ethereal and intriguing, ideal for outdoor.
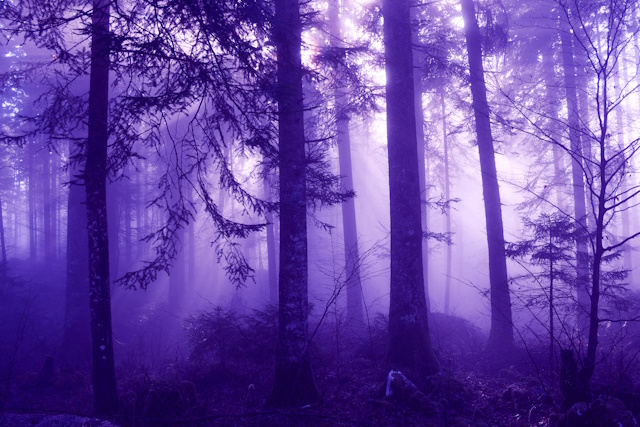
Photo by Depositphotos
-
Contrasting Emotions:
Experiment with contrasting colors to evoke complex emotions. For example, using warm and cool gels together can create a dynamic tension in your photos, adding depth and interest.
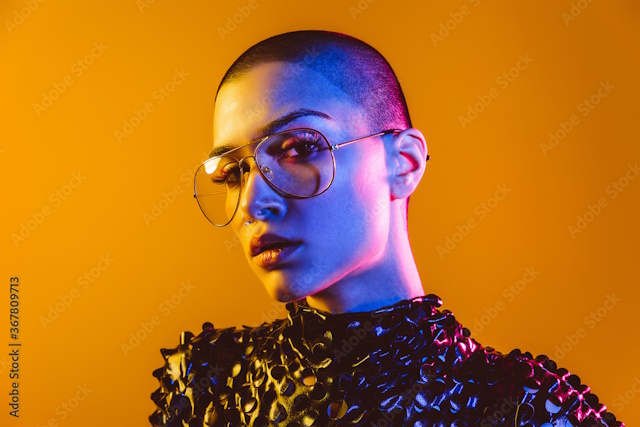
Photo by AdobeStock
-
Lighting Direction:
The angle and direction of the light matter. Position the light source with the color gel at different angles to see how it affects your subject. Side lighting can add drama, while front lighting can create a more evenly illuminated, ethereal look.
2- Creative Lighting Techniques with Color Gels
In the world of color gel photography, creativity knows no bounds. Here are some lighting techniques to help you take your photos to the next level:
-
Colorful Backgrounds:
Use color gels to illuminate your background, creating a stunning backdrop of vibrant colors. This technique works wonders for adding depth and visual interest to your shots.
-
Gobo Patterns:
Attach cutout patterns (known as gobos) to your light source with color gels. When the light passes through these patterns, it projects intricate shapes onto your subject or background, adding a unique dimension to your photos.
-
Color Gradients:
Create beautiful gradients by combining two or more color gels. Place them in a way that allows the colors to blend seamlessly, generating a captivating transition of hues across your image.
-
Coloring Shadows:
Don’t just focus on the highlights; color gels can also be placed in front of the light source to color the shadows. This creates an enchanting and surreal effect that can transform an ordinary photo into a work of art.
3- Color Combinations for Striking Effects
Choosing the right color combinations is a key aspect of mastering color gel photography:
-
Complementary Colors:
Colors that are opposite each other on the color wheel, like blue and orange or red and green, create striking and eye-catching contrasts. Experiment with these pairs to make your subjects pop.
-
Analogous Colors:
These are colors that are adjacent to each other on the color wheel, like blue and green or red and orange. They create a harmonious and soothing effect, perfect for creating a unified atmosphere.
-
Triadic Colors:
Triads are sets of three colors equidistant from each other on the color wheel. Combining these colors can produce vibrant and balanced compositions that draw attention.
4- Achieving Balanced Exposure with Color Gels
Balancing your exposure when using color gels is crucial to ensure that your subject is well-lit and the colors are accurately represented:
- Meter for the Subject: Set your camera’s exposure settings to correctly expose your subject without the color gel. This typically involves metering for the subject’s skin tone or key elements.
- Adjust for Color Gels: Once your subject is correctly exposed, adjust your camera settings to account for the color gels. You may need to compensate for the reduction in light caused by the gels. This might involve increasing the power of your light source or slowing down the shutter speed.
- Test and Refine: Don’t hesitate to experiment and take test shots to fine-tune your exposure settings. Practice makes perfect in color gel photography, and you’ll develop an instinct for what works best over time.
With these tips in mind, you’re well on your way to capturing spectacular shots with color gels. Experiment, embrace the creative possibilities, and let your imagination run wild. In the next section, we’ll delve into some practical examples and inspiration to fuel your color gel photography journey.
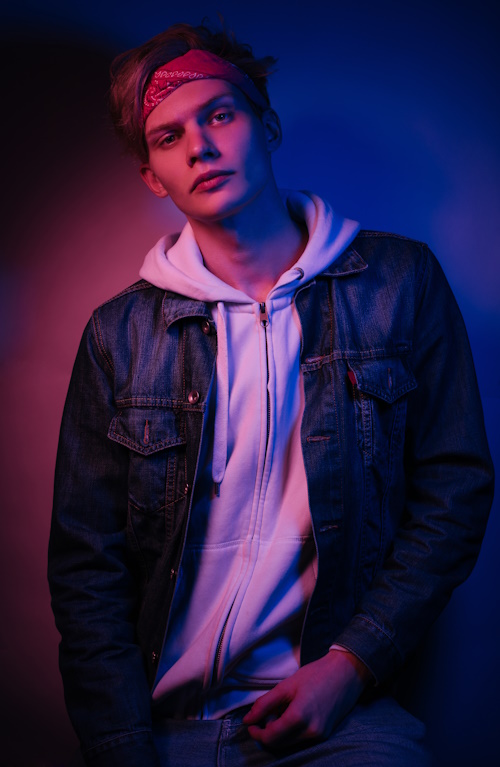
Photo by Depositphotos
Creative Examples and Inspiration
Showcase of Stunning Color Gel Photography
To truly grasp the potential of color gel photography, let’s dive into a showcase of incredible images that have harnessed the power of color gels. These stunning examples serve as a testament to the creative possibilities that await you:
- Vibrant Portraits: Color gels can breathe life into portrait photography. Imagine a dramatic portrait illuminated by a deep blue or fiery red gel, where the colors enhance the subject’s emotions and personality.
- Fashion Forward: In the world of fashion photography, color gels are often used to add an extra layer of style. Striking, monochromatic backdrops created with color gels can make your subject and clothing pop.
- Fantasy Worlds: Color gels can transport your viewers into surreal and fantastical realms. From ethereal landscapes to dreamlike scenes, the possibilities are endless.
- Product Photography: Color gels bring a unique twist to product shots. By carefully selecting colors that complement the product, you can create visuals that stand out in advertising and e-commerce.
- Event Photography: Whether it’s a wedding, concert, or corporate event, color gels can transform the ambiance and elevate the mood, capturing the essence of the moment.
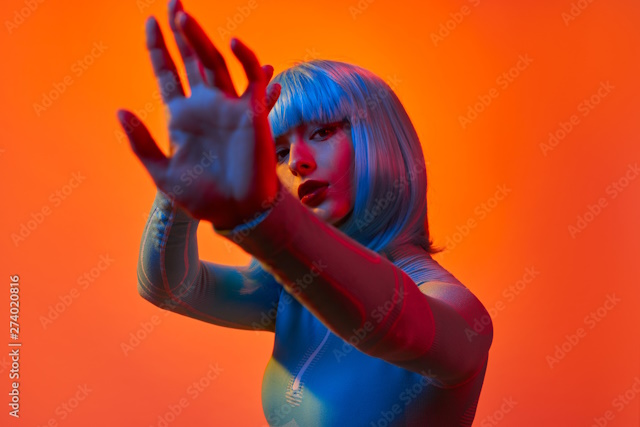
Photo by AdobeStock
How Famous Photographers Use Color Gels in Their Work
Learn from the best in the field of color gel photography by taking a peek into how some renowned photographers incorporate color gels into their work:
- Joel Grimes: Known for his dynamic portraiture, Grimes uses color gels to emphasize the unique character of his subjects. He often employs gels to create captivating and visually powerful effects.
- Lindsay Adler: A master of fashion photography, Adler is a trailblazer in using color gels to accentuate fashion and beauty. Her work showcases how color gels can add drama and sophistication to her images.
- Dave Hill: Hill’s iconic style blends elements of surrealism and fantasy. He harnesses the power of color gels to transport his viewers into extraordinary and imaginative worlds.
- Miguel Quiles: A portrait photographer with a distinctive style, Quiles frequently employs color gels to create breathtaking and vibrant headshots. His work showcases the versatility of gels in enhancing facial features and mood.
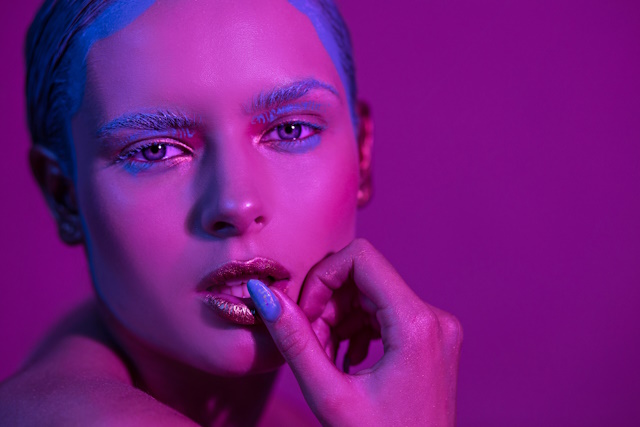
Photo by Depositphotos
Conclusion
Color Gel Photography is an art form that can bring personality and emotion to your images. By using the right equipment, understanding color theory, and being creative, you can transform ordinary photos into extraordinary works of art.
Whether you’re a beginner or an experienced photographer, color gels offer endless possibilities. They allow you to create mood, atmosphere, and visual interest that standard lighting can’t achieve.
So, grab your camera, choose your gels, and start your colorful journey. Experiment, make mistakes, and learn from them. With dedication and imagination, you’ll soon be creating stunning and visually captivating color gel photography that leaves a lasting impression. Happy shooting!
Thanks for reading, I hope you enjoyed the article, if you have any questions just drop them below & I will be happy to answer you.
The featured Photo by AdobeStock
If you enjoy the site, don’t forget to subscribe, we will only inform you when a new article is posted.


Thank you for an inspirational article, I’ll try the color gels soon 🙂
You are welcome