

In the world of photography, lighting is the soul that breathes life into images, and the same applies to still life photography. But what exactly is still-life photography lighting? Well, it’s the art and science of illuminating inanimate objects to create visually captivating and expressive pictures.
Lighting plays a vital role in setting the mood, highlighting textures, and guiding the viewer’s gaze. Whether you’re capturing a beautiful bouquet of flowers, a vintage teapot, or an assortment of fruits, the right lighting can make all the difference between an ordinary snapshot and a stunning masterpiece.
Good lighting enhances colors, adds depth, and brings out intricate details in the subject. Conversely, poor lighting can lead to dull, flat, and uninteresting photographs. Understanding the significance of lighting is vital for every aspiring still-life photographer who aims to capture the essence of their subjects with finesse.
How This Guide Will Help You Master Still Life Lighting
Are you ready to take your still-life photography to the next level? Look no further – this guide is your beacon of light! Packed with practical tips, expert advice, and inspiring examples, we’re here to illuminate your path to mastery in still-life photography lighting.
From grasping the basics of light direction and intensity to unraveling the mysteries of natural and artificial lighting, we’ll cover it all. Learn how to set up your studio like a pro, manipulate shadows and highlights, and harness the magic of different light sources.
Not only will you gain technical knowledge, but you’ll also discover the creative aspects of lighting. We’ll show you how to use light to convey emotions, tell stories, and infuse your still-life images with a touch of your unique personality.

The Basics of Still Life Lighting
Let’s delve into the key lighting concepts that will empower you to create captivating images that tell stories and evoke emotions.
-
Natural vs. Artificial Lighting
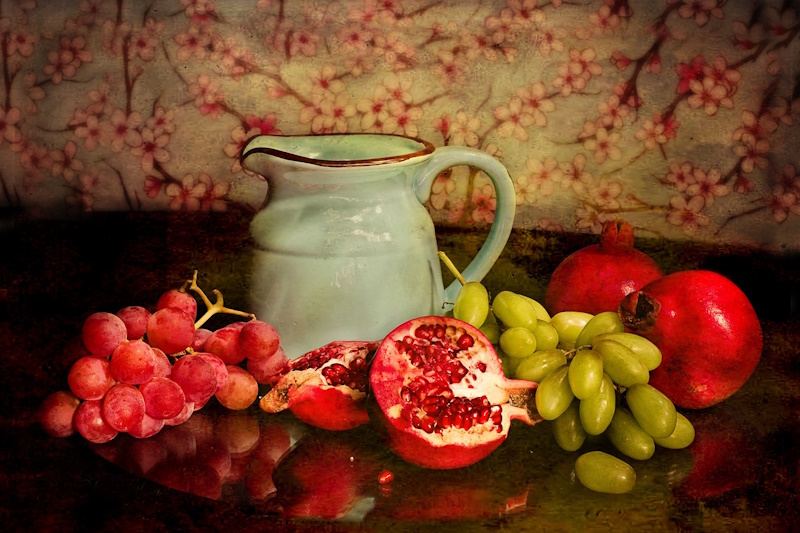
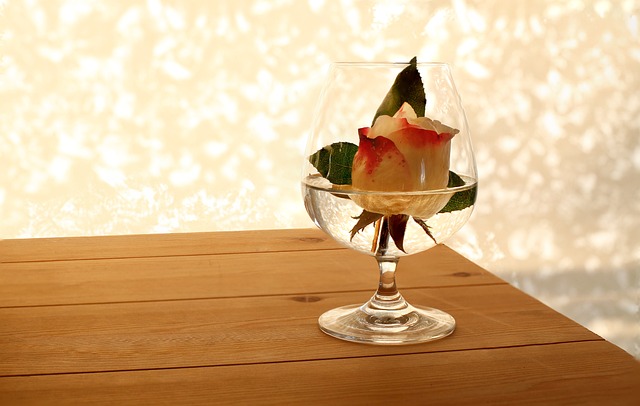
One of the first things to consider when approaching still-life photography is the type of lighting you’ll be using. Natural lighting, the soft glow of the sun, is a timeless favorite, casting gentle shadows and highlighting textures. It’s perfect for capturing the warmth and authenticity of your subjects.
On the other hand, artificial lighting, like studio strobes or continuous lights, provides precise control over the light’s direction and intensity. This versatile option allows you to sculpt your subject and create dramatic effects, making it a favorite among professionals.
The choice between natural and artificial lighting depends on your creative vision and the mood you want to convey in your still-life photographs. Experiment with both to discover your preference and create a unique visual language.
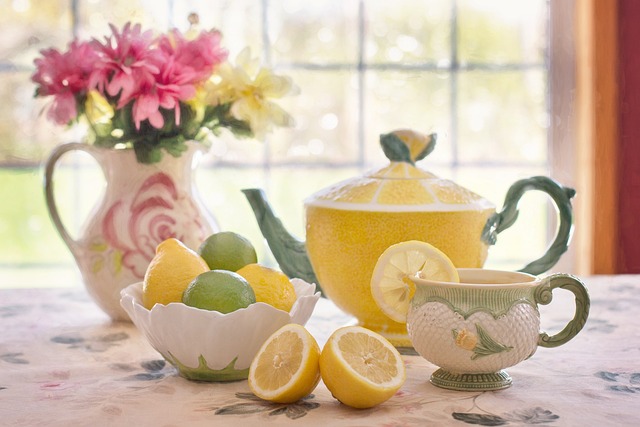
Image by Jill Wellington from Pixabay
-
Light Direction and Angle
The direction from which light hits your subject can dramatically transform its appearance. There are three main types
-
Front lighting:
Front lighting is a classic Still Life Photography Lighting technique that involves placing the light source directly in front of the subject.
Front lighting offers several benefits, making it a popular choice for many still-life photographers. By placing the light source in front of the subject, you create even illumination that showcases the details and textures of your objects. It’s perfect for capturing the essence of delicate subjects like flowers, where you want to highlight every petal and intricate feature.
However, front lighting comes with its challenges. With the light source directly facing your subject, you may encounter issues like flat lighting or lack of depth. Shadows tend to fall directly behind the objects, leading to a loss of dimensionality. Overexposure and washed-out highlights can also be concerns when using front lighting.
-
Side lighting
Side lighting is a powerful Still Life Photography Lighting technique that can add depth, texture, and drama to your images.
Side lighting works wonders in creating depth and texture in your still-life photographs. By placing the light source to the side of your subject, shadows are cast, adding dimensionality and a three-dimensional feel.
This technique is particularly effective in emphasizing textures, such as the grain on wooden surfaces or the wrinkles on fabrics. Side lighting reveals intricate details that might be missed with other lighting techniques, breathing life into your still-life subjects.
Experiment with different angles and positions of the light source to see how the interplay of light and shadow transforms your still-life scenes. Embrace the dynamic nature of side lighting, and watch as your images come alive with depth and texture.
While side lighting can add drama and depth, it may also create unwanted shadows, especially on the side opposite the light source. These harsh shadows can distract from your main subject and affect the overall balance of the composition.
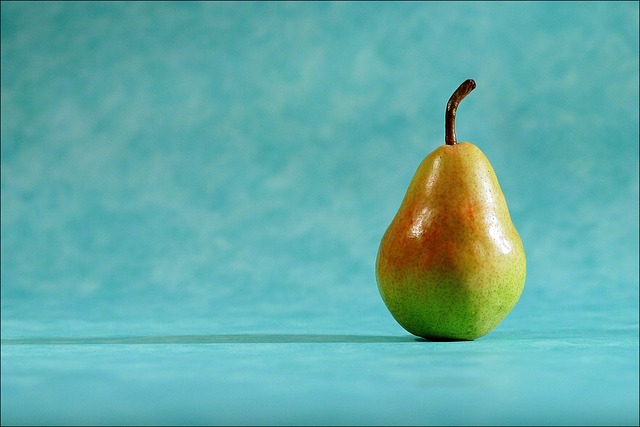
Image by Geraldine Dukes from Pixabay
-
Backlighting
Backlighting is a fascinating Still Life Photography Lighting technique that can add a touch of magic and drama to your images. Backlighting involves placing the light source behind your subject, creating a captivating halo of light around its edges.
This technique is perfect for capturing striking silhouettes and adding drama to your still life compositions.To create a silhouette, expose for the brightness of the background, allowing your subject to appear dark against the glowing light. Silhouettes add a sense of mystery and intrigue to your images, leaving room for your viewers’ imaginations to wander.
While backlighting can create beautiful effects, it also presents challenges like lens flare and unwanted highlights. Flare occurs when the light source directly enters your lens, resulting in hazy, washed-out spots in your image.
-
Light Intensity and Softness
The intensity of light influences the mood of your still-life photos. Soft light, achieved by diffusing the light source, creates gentle shadows and a smooth transition between highlights and shadows. This softness is ideal for capturing the subtleties of your subject, like in portraits or food photography.
On the other hand, hard light, produced by a direct, undiffused light source, casts distinct and sharp shadows. It adds drama and boldness to your images, making it perfect for emphasizing textures and shapes in your still-life compositions.
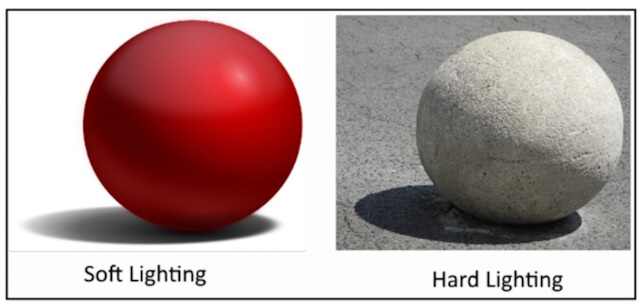
The softness or hardness of light can be adjusted through various lighting modifiers, like softboxes and reflectors. Mastering the balance between light intensity and softness allows you to convey the right emotions and aesthetics in your photographs.
As you venture into the captivating world of still-life photography lighting, remember that there are no strict rules – only boundless creativity. Embrace the freedom to experiment and let your artistic instincts guide you.
-
Light color
In the captivating world of Still Life Photography Lighting, understanding the color of light, and its temperature is key to creating visually stunning images that evoke the right emotions and set the perfect mood.
-
The Color of Light
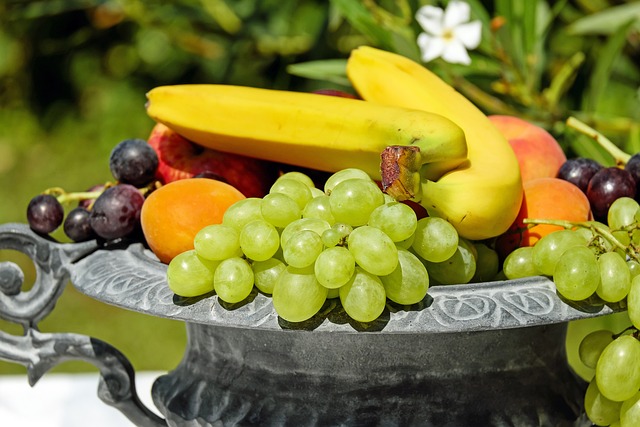
Light comes in various colors, often referred to as color temperatures. These colors can dramatically affect the overall ambiance of your still life photographs. Warm light, like the golden glow of a sunset, adds a sense of coziness and nostalgia, perfect for creating inviting and intimate scenes.
Conversely, cool light, such as the blue tones of a moonlit night, imparts a sense of calmness and serenity. Different light sources emit distinct colors, so pay attention to the colors around you and use them to your advantage when composing your still life images.
-
Light Temperature
Light temperature is measured on the Kelvin scale and indicates the warmth or coolness of the light source. Lower Kelvin values (around 2000K-4000K) correspond to warm light, while higher Kelvin values (5000K and above) represent cooler light.
Understanding light temperature is crucial for achieving accurate color representation in your photographs. Adjusting your camera’s settings to match the light temperature will help you capture colors as they appear to the naked eye, ensuring your still life images remain faithful to reality.
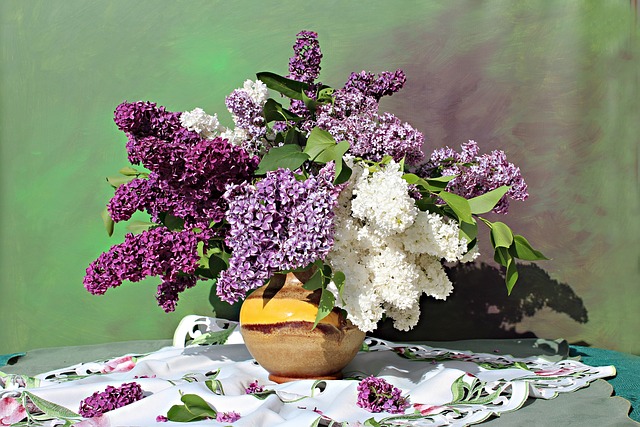
Image by Günther Schneider from Pixabay
Working with Natural Light
In the enchanting realm of Still Life Photography Lighting, harnessing the beauty of natural light can elevate your still-life images to breathtaking levels. Let’s dive into the magic of working with natural light and discover the wonders it can create in your photographs.
-
Harnessing Daylight for Stunning Shots
Daylight, with its soft and diffused quality, is a gift from nature for still-life photographers. By positioning your subject near a window or in an outdoor setting, you can capture gentle shadows and highlight intricate textures.
Embrace the versatility of daylight by experimenting with different angles and positions to find the most flattering light for your subjects. As the sun moves throughout the day, observe how the light changes and adapts to create various moods and visual stories.
-
Golden Hour and Blue Hour Magic
Golden hour, that magical time shortly after sunrise and just before sunset, is a true gem for still-life photographers. The warm, golden light casts a beautiful glow, adding a touch of enchantment to your images.
On the other hand, blue hour, which occurs just before sunrise and after sunset, fills the atmosphere with a dreamy blue hue. This ethereal light creates a captivating backdrop for your still-life subjects.
Both golden hour and blue hour provide an opportunity to infuse your still-life photography with a touch of magic. Embrace these fleeting moments and let the natural light paint your subjects with a mesmerizing glow.
-
Diffusing and Modifying Natural Light
While natural light is a gift, it can sometimes be a little too strong or harsh for certain still-life scenes. To soften the light and create a more even illumination, consider using diffusers.
Translucent materials, like white bedsheets or dedicated diffusers, can be placed between the light source and your subject. This softens the light, reducing harsh shadows and providing a more flattering appearance.
If you wish to add a creative touch, try using objects like branches or sheer curtains to cast interesting shadows and patterns on your subjects. These modifications to natural light allow you to craft unique and captivating compositions.
Working with natural light is an art that requires keen observation and a willingness to adapt. Each day brings new lighting conditions, and as a still-life photographer, you have the opportunity to embrace these changes and let them guide your creative journey.

Image by congerdesign from Pixabay
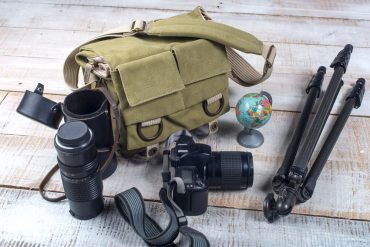
Working with Artificial Lighting
Artificial light sources offer a realm of creative possibilities. Let’s explore the wonders of working with artificial lighting and discover how it can elevate your still-life images to new heights.
1- Lighting type
Let’s explore two essential types that every still-life photographer should consider: continuous lighting and strobe lighting:
-
Strobe Lighting
Strobe lighting, also known as flash photography, is a powerful tool that provides precise control over light intensity and duration. With a burst of light, strobes freeze motion and capture sharp, stunning still-life compositions.
Experiment with different strobe lighting setups, angles, and modifiers to sculpt light and create dynamic shadows. As you master the art of strobe lighting, you’ll unlock the potential to craft visually striking still-life images that leave a lasting impression.
-
Continuous Lighting
Continuous lighting offers a constant and steady source of illumination, allowing you to visualize the lighting effect in real time. This versatility lets you experiment with various lighting styles and effects.
With continuous lighting, you can explore long exposure techniques, painting with light, and capturing the subtleties of your still-life subjects. Embrace the creative freedom that continuous lighting provides and let your imagination guide you.
-
Continuous Lighting vs. Strobe Lighting
Both continuous lighting and strobe lighting have their advantages, and the choice depends on your personal preferences and the specific needs of your photography projects.
For more information about this topic, check this post “Continuous Lighting Vs Flash Lighting”
Below is a comparison table outlining the pros and cons of continuous lighting versus strobe lighting.
Aspect Continuous Lighting Strobe Lighting
Pros
Real-time Visualization Allows you to see the lighting effect in real-time Offers versatility and control with flash duration
Ease of Use Simple setup and easy to adjust intensity Easy to freeze motion and capture dynamic still life shots
Affordable Generally more budget-friendly Long-lasting and energy-efficient
Cons
Heat Generation Continuous operation can generate heat Less heat generation due to short bursts of light
Power Consumption Consumes more power over extended shoots Consumes less power due to brief flashes
Limited Light Intensity May not produce enough brightness for certain scenarios Produces high-intensity light, suitable for various setups
Flash Recycling Time Longer recycling time after each burst Fast recycling time allows for quicker shooting
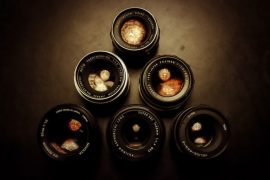
2. light Modifier
When it comes to shaping and modifying light, softboxes, umbrellas, and reflectors are your best allies.
- Softboxes diffuse the light, creating soft, even illumination with gentle shadows. They are perfect for achieving a natural and flattering look in portrait-like still-life shots.
- Umbrellas, with their large surface area, produce a soft and broad light source that wraps around your subject beautifully. They’re great for creating a gentle and enveloping ambiance in your still-life scenes.
- Reflectors, on the other hand, don’t emit light but bounce and redirect existing light. They come in various colors and surfaces, allowing you to add warmth, coolness, or fill light to your still-life compositions.
Having a collection of softboxes, umbrellas, and reflectors in your lighting kit opens up a world of creative possibilities. With these versatile tools, you can sculpt light to match your artistic vision and transform your still-life images into captivating works of art.
Below is a comparison table that outlines the pros and cons of Softboxes, Umbrellas, and Reflectors
| Aspect | Softboxes | Umbrellas | Reflectors |
|---|---|---|---|
| Pros | |||
| Soft and Even Lighting | Produce soft and diffused light | Create broad, enveloping light | Bounce and redirect existing light |
| Versatility | Suitable for various lighting setups | Great for portraits and general still life scenes | Offer different colors and surfaces |
| Controlled Light Direction | Offer more directional control over light | Provide a larger surface area for soft lighting | Reflect and fill in shadows |
| Cons | |||
| Space Requirement | Bulkier and may require more space to set up | Require adequate space for positioning and opening | Lightweight but less controllable |
| Cost | Can be more expensive compared to umbrellas | Generally less expensive than softboxes | Relatively affordable |
| Setup Time | May take longer to set up and adjust | Quick and easy to set up | Quick and easy to use |
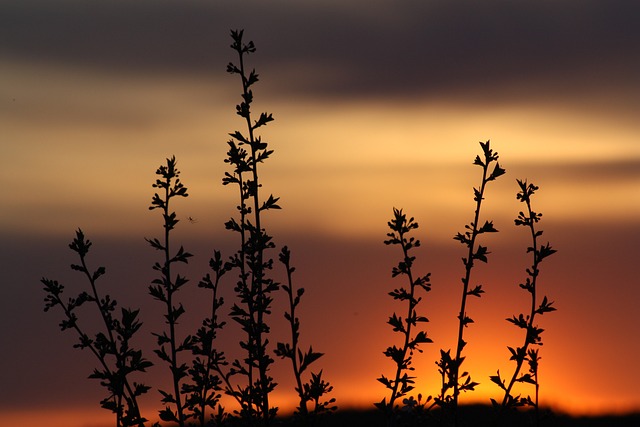
Image by liuksena from Pixabay
3. Combining Natural and Artificial Light Sources
The magic of still-life photography lighting lies in the harmony of different light sources. Combining natural light with artificial lighting can add depth and dimension to your images.
For instance, using strobe lighting to highlight your subject while letting the soft daylight illuminate the background can create a captivating contrast. By blending natural and artificial light sources, you can craft images with a rich and balanced visual narrative.
Working with artificial lighting is a dance of creativity and technical finesse. Embrace the potential of strobe lighting and continuous lighting to expand your artistic horizons in still-life photography.
Advanced Lighting Techniques
Mastering some advanced lighting techniques can take your images to a whole new level. Let’s delve into the magic of these techniques and explore how they can transform your still-life compositions.
-
High Key and Low Key Lighting
High key lighting involves using bright and even illumination to create a soft, airy, and ethereal atmosphere. It works wonders in capturing delicate subjects like flowers, adding a dreamy quality to your images.
On the other hand, low key lighting employs deep shadows and limited highlights to create a moody and dramatic effect. It’s perfect for adding intrigue and depth to your still life compositions, enhancing the overall storytelling.
Mastering both high-key and low-key lighting allows you to control the mood and emotion of your images. Experiment with these lighting styles to create diverse visual narratives that captivate your viewers.
-
Creating Reflections and Highlights
Reflections and highlights can add a touch of elegance and sophistication to your still-life photographs. Utilizing reflective surfaces, like mirrors or glass, you can introduce captivating reflections of your subjects.
Additionally, strategically placing highlights on your still-life scene can draw attention to specific areas, guiding your viewers’ gaze and creating a focal point. Highlights add sparkle and life to your images, elevating the overall visual appeal.
Embrace the art of creating reflections and highlights, and watch as your still-life photography transcends into an art form that speaks volumes.
-
Painting with Light
Painting with light is an artistic technique that allows you to have complete control over the illumination of your subject. Using a handheld light source, like a flashlight, you can selectively light specific areas of your still-life scene.
This technique opens up a world of creative possibilities, enabling you to accentuate certain elements, create highlights, and add a touch of drama. Embrace the art of painting with light, and watch as your still-life images come alive with a sense of magic and wonder.
As you explore advanced lighting techniques, remember that practice and experimentation are your best companions. Each technique offers unique opportunities to express your creativity and elevate your still-life compositions.
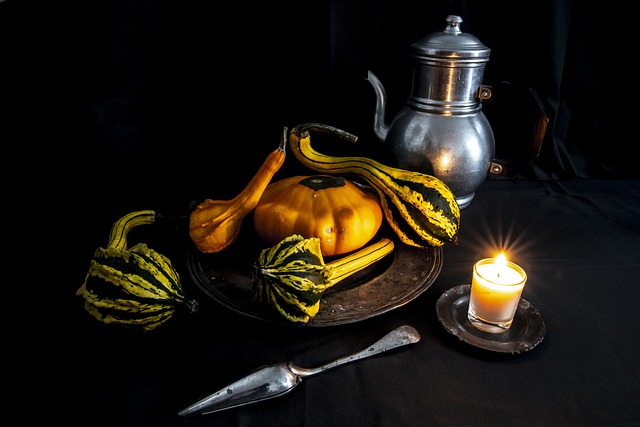
Image by CélineMartin from Pixabay
Tips for Troubleshooting Lighting Challenges
As you delve into the fascinating world of Still Life Photography Lighting, you may encounter some common challenges that can affect the quality of your images. Don’t fret; we’ve got you covered! Let’s explore valuable tips to troubleshoot and overcome overexposure, underexposure, glare, unwanted reflections, and other common lighting issues in your still life compositions.
-
Dealing with Overexposure and Underexposure
Overexposure occurs when too much light reaches your camera’s sensor, resulting in bright and washed-out areas in your image. On the other hand, underexposure happens when insufficient light reaches the sensor, leading to dark and shadowy regions.
To deal with overexposure:
- Adjust Aperture: Decrease the aperture size (higher f-number) to limit the amount of light entering your camera.
- Use ND Filters: Neutral density (ND) filters can help reduce the intensity of the light, preventing overexposure.
To address underexposure:
- Increase ISO: Raising the ISO sensitivity allows your camera to capture more light in low-light situations.
- Widen Aperture: Open up the aperture (lower f-number) to let more light into your camera.
Balancing exposure ensures your still-life subjects appear clear and vibrant, with no loss of detail due to extreme brightness or darkness.
-
Managing Glare and Unwanted Reflections
Glare and unwanted reflections can be distracting elements in your still-life images, impacting the overall visual appeal. To manage these challenges:
- Change Angles: Adjust the position of the light source or your camera to minimize glare and reflections.
- Use Polarizing Filters: Polarizing filters can help reduce reflections and enhance colors.
- Diffuse Light: Soften the light source to create a more even illumination and reduce harsh glare.
By managing glare and unwanted reflections, you can achieve a cleaner, more polished look in your still-life photography.
- Common Lighting Issues
Beyond exposure and reflections, you might encounter other common lighting issues in your still-life photography. Let’s address them:
- Shadows: To soften harsh shadows, use diffusers or reflectors to bounce light and fill in shadows.
- Hotspots: Hotspots are bright areas that draw attention away from your subject. Diffuse the light to even out the illumination and reduce hotspots.
- Color Casts: Different light sources can introduce color casts in your images. Set the appropriate white balance or adjust it in post-processing to achieve accurate colors.
- Flat Lighting: Flat lighting lacks contrast and depth. Use side lighting or other techniques to add dimension to your still-life compositions.
- Unwanted Noise: High ISO settings can result in digital noise. Use lower ISO settings and use a tripod for longer exposures to reduce noise.
Remember, troubleshooting lighting challenges is part of the creative journey in still-life photography. Embrace the process, learn from your experiences, and don’t be afraid to experiment with different lighting setups.
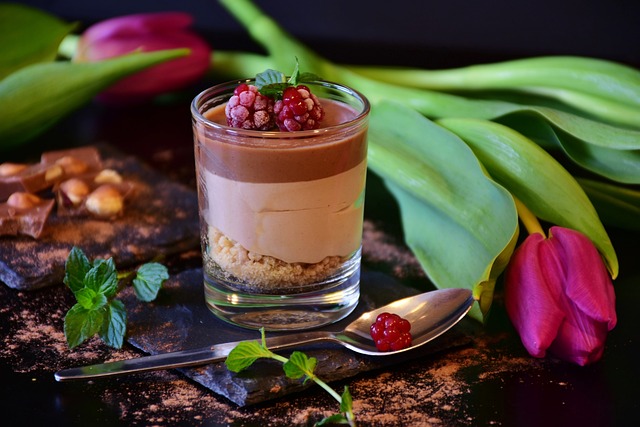
Image by –Rita-👩🍳 und 📷 mit from Pixabay
Conclusion
Throughout this journey, you’ve learned about various lighting techniques, from front lighting and side lighting to backlighting. Each technique offers unique possibilities to shape and sculpt light, bringing life and depth to your still life subjects. You’ve explored the magic of natural light and the versatility of artificial light sources, discovering their benefits and challenges.
As you continue to hone your still life photography lighting skills, remember that experimentation is your best friend. Embrace the beauty of trial and error, and don’t be afraid to push the boundaries of creativity. Through practice, you’ll gain a deeper understanding of how light interacts with your subjects, allowing you to capture the essence and emotion of each scene.
The world of still-life photography lighting is vast and ever-evolving. Your journey to mastery has only just begun. As you embark on this thrilling adventure, keep an open mind, be curious, and never stop learning. There are endless possibilities waiting to be explored, and each new discovery will enrich your artistic expression.
Related posts
Creative Still Life Photography Ideas- Tips & Examples
Food Photography Tutorials – The Ultimate Guide
Product Photography Tips And Tricks
Flower Photography – How To Take An Amazing Shot Of A Flower
Thanks for reading, I hope you enjoyed the article, in case you have any questions just drop them below & I will be happy to answer you.
The featured Image by Jill Wellington from Pixabay
If you enjoy the site, don’t forget to subscribe, we will only inform you when a new article is posted.


Wow, I knew lighting affected the quality of photography but I didn’t realize just how different light angles can add so much more depth to your photos. So if I want to create a more 3D effect then you say that lighting the piece from the side would work best?
I also had no idea that the temperature of the light played such an important part of how the photo looks. I will definitely be referring back to this article often.
Absolutely, you’re spot on! Lighting angles can indeed have a remarkable impact on the depth and dimensionality of your photos. If you’re aiming for a more pronounced 3D effect, lighting your subject from the side can create captivating shadows and highlights that enhance the visual depth.
The temperature of light, often measured in Kelvin, plays a crucial role in setting the mood and tone of your photographs. Cooler temperatures (higher Kelvin values) like those from a cloudy day or shade can lend a serene and calm atmosphere, while warmer temperatures (lower Kelvin values) such as during sunrise or sunset can infuse warmth and emotion into your shots.
Keep experimenting and practicing with different lighting angles and temperatures to discover how they can transform your photography. Don’t hesitate to revisit the article whenever you need a creative boost, Happy shooting!
A very comprehensive review of still photography lighting.
I am only an amateur photographer, looking to improve my photographic skills and I have learned a lot from the detail you have provided on the different situations for lighting in this review.
It is certainly a good reference for me to return to and check on the settings for various situations.
I’m delighted to hear that you found the review comprehensive and helpful for your photography journey! Learning about different lighting situations is a crucial step toward improving your skills, and I’m glad the details provided have been informative. Having a reliable reference to revisit for various lighting settings will undoubtedly aid you in capturing stunning photographs. Don’t hesitate to continue exploring and practicing – the more you immerse yourself in the world of photography, the more your skills will flourish. Keep up the great work!