


In this tutorial, we are going to learn how to remove halos from photos. We are going to use two different methods and will use three Photoshop tools.
What is a halo?
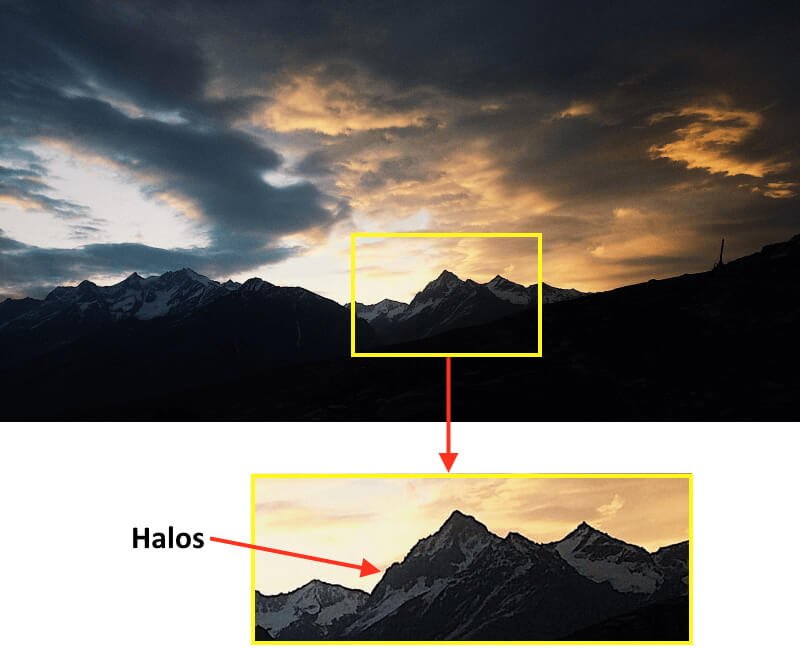
A halo is a bright (or dark) line that can appear in areas of high contrast on a photo when the photo has been edited. In other words, Halo is a band of light (or shadow) that follows edges in an image. They are most prominent along high contrast edges such as when the land meets the sky in landscape photography. Alternatively, around a subject’s edges and its background in portrait photography. Let us take a close look at the below photo, when we zoom in, we will find a hard line over the edges of the mountain, that line is called halos.
I will explain in detail how to remove halos from your photos using two different methods. I will use three tools from Photoshop, here are short descriptions of the three Photoshop tools:
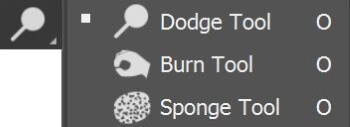
The Dodge tool and the Burn tool
The Dodge tool and the Burn tool lighten or darken areas of the image. These tools are based on a traditional darkroom technique for regulating exposure on specific areas of a print. Photographers hold back light to lighten an area on the print (dodging) or increase the exposure to darken areas on a print (burning). The more you paint over an area with the Dodge or Burn tool, the lighter or darker it becomes.
You can find the Dodge and Burn tools from the toolbar


- Select the Dodge tool or the Burn tool.
- Choose a brush tip and set brush options in the options bar.
- In the options bar, select one of the following from the Range menu:
- Midtones
Changes the middle range of grays
- Shadows
Changes the dark areas
- Highlights
Changes the light areas
- Specify the exposure for the Dodge tool or the Burn tool.
- Click the airbrush button to use the brush as an airbrush. Alternatively, select the Airbrush option in the Brush panel.
- Select the Protect Tones option to minimize clipping in the shadows and highlights. This option also tries to keep colors from shifting hue.
- Drag over the part of the image you want to lighten or darken.
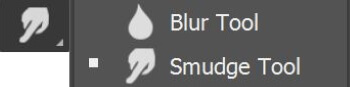
The Smudge Tool
The Smudge tool simulates the effect you see when you drag a finger through wet paint. The tool picks up color where the stroke begins and pushes it in the direction you drag. The smudge tool pushes your pixels around on the screen as if they consisted of wet paint, using the color that’s under the cursor when you start to stroke. You can use it on tiny areas of an image to soften the edges of objects in a way that often looks more natural than blurring tools
You can find the Smudge tool from the toolbar

How to use the smudge tool?
- Select the Smudge tool.
- Choose a brush tip and options for the blending mode in the options bar.
- Select Sample All Layers in the options bar to smudge using color data from all visible layers. If this is deselected, the Smudge tool uses colors from only the active layer.
- Select Finger Painting in the options bar to smudge using the foreground color at the beginning of each stroke. If this is deselected, the Smudge tool uses the color under the pointer at the beginning of each stroke.
- Drag in the image to smudge the pixels.
Remove Halos in Photoshop
Method 1 (using the smudge tool)
I will use the below photo, I will separate the subject from its background, and then change the background to a solid color layer. After this editing halos will appear around the subject’s edges. Then I use the smudge tool to remove the halos from the photo.

Photo by Marlon Schmeiski from Pexels
The following are the detailed steps
Step 1
Open the photo file by Photoshop.
Duplicate the layer Ctrl + J
Step 2
Use any of the selection tools to select the subject. My favorite tool is Select and Mask
Click Alt + Ctrl + R
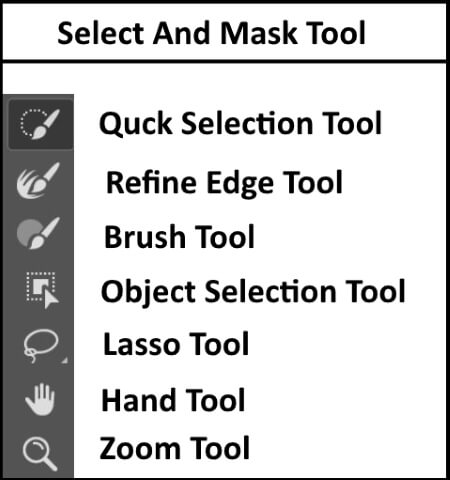
Use the Quick Selection tool to select the subject
Use the refine edge tool to refine the selection
Choose Output to Layer Mask from the Output Setting
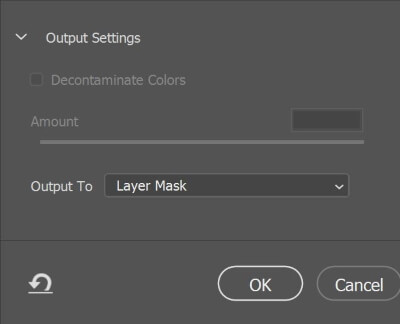
To see the selection hold the ALT key, and click on the Mask thumbnail. The selection is shown below

Step 3
I am going to add new background. Click Add a New Adjustment Layer.
![]()
Then choose Solid Color, and then choose the color.
Move the new background below the original layer.
Step 4
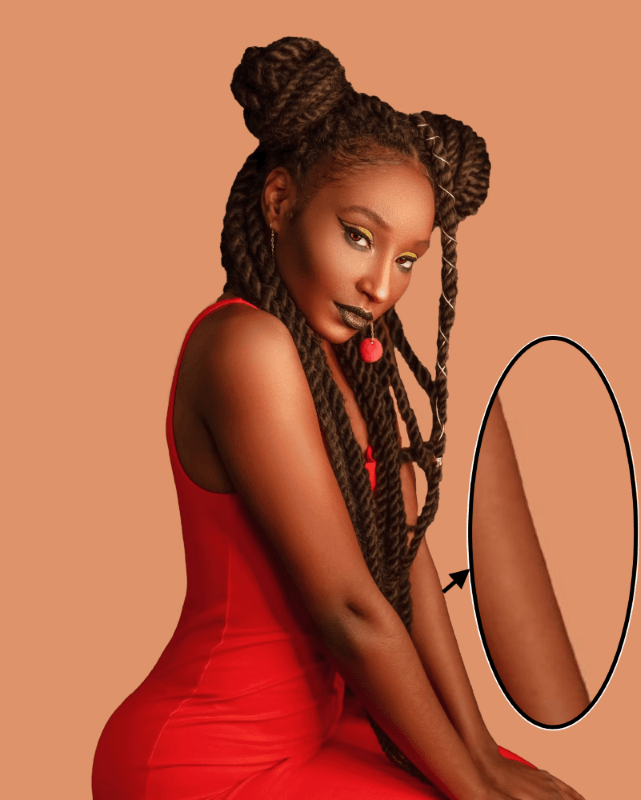
Zoom in using Ctrl + +
You can see halos on the edges of the subject
Step 5
To remove the dark halos around the subject edges, I will use the smudge Tool
Select the Tool from the toolbars.
Make sure to click on the Mask thumbnail.
Adjust the brush size, and then click and hold on the background and drag toward the subject until the halo disappears. (It is like moving the background towards the subject)
Repeat the process along all the edges of the subject, until all halos vanish.
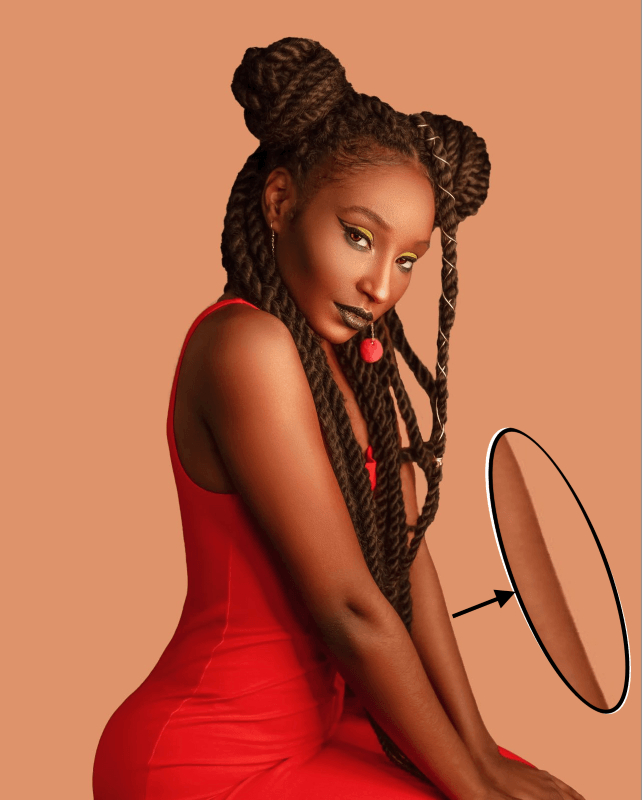
The final image after removing halos is shown below

Method 2 (using Burn & Dodge tools)
I will use the below photo, I will separate the subject from its background, and then change the background to a solid color layer. After this editing halos will appear around the subject’s edges. Then I use the smudge tool to remove the halos from the photo.

Photo by mehrab zahedbeigi on Unsplash
The following are the detailed steps
Step 1
Open the photo file by Photoshop.
Duplicate the layer Ctrl + J
Step 2
Use any of the selection tools to select the subject. My favorite tool is Select and Mask
Click Alt + Ctrl + R
Use the Quick Selection tool to select the subject
Use the refine edge tool to refine the selection
Choose Output to Layer Mask from the Output Setting
To see the selection hold the ALT key, and click on the Mask thumbnail. The selection is shown below

Step 3
I am going to add new background. Click Add New Adjustment Layer.
Then choose Solid Color, pick up the color.
Move the new background below the original layer.
Step 4
Zoom in using Ctrl + +
You can see halos on the edges of the subject

Step 5
To remove the white halos around the subject edges, I will start by using The Burn Tool to darken the shadows of the mask edges.
Make sure to click on the Mask thumbnail.
Select the Burn Tool from the Toolbar
Select Shadows from the Range (top menu)
Adjust the Exposure to 80 %
Adjust the brush size.
Start painting along the edges (Where the halos are apparent) to darken the whites outside the subject edges.
Then I will use The Dodge Tool to whiten the highlights of the mask edges.
Make sure to click on the Mask thumbnail.
Select the Dodge Tool from the Toolbar
Select Highlight from the Range (top menu)
Adjust the Exposure to 80 %
Adjust the brush size.
Start painting along the edges (Where the halos are apparent) to lighten the blacks inside the subject edges.
The final image after removing halos is shown below

Related posts
Remove Background From A Picture
What Are The Selection Tools In Photoshop?
Thanks for reading, I hope you enjoyed the article, in case you have any questions just drop them below & I will be happy to answer you.
Photo by Héctor J. Rivas on Unsplash
If you enjoy the site, don’t forget to subscribe, we will only inform you when a new article is posted.


I have learned a lot from this article. Starting from what is a Halo and the steps to remove it on photoshop. It has been my desire to learn to use photoshop. But the tech phobic in me keeps telling me its too complicated. You made it look so easy. and I am encouraged.. I am inspired to give it a go. Thank you .
Thanks for your comment, glad you find the article helpful for you.
I have some basic knowledge with Photoshop but your guides have taught me so much more. And I like how you write everything so clearly and with easy steps to follow and understand. Keep them coming. Halos was another area where I was not very sure how to remove them as they are pretty frequent in photography. You make things so much easier!
I really appreciate your comment, thank you very much