

Photography is like a beautiful dance between light and creativity. The way light interacts with your subject can turn a regular picture into a captivating tale. In today’s digital era, where every photo matters, grasping the importance of lighting in photography is similar to mastering the brush strokes of a painter. It’s the secret to unlocking the visual story you want to tell.
By using a suitable studio strobe lighting kit, you can have complete command over the brightness, orientation, and standard of light. It’s akin to being a painter with an infinite range of options, where every beam of light molds the atmosphere and soul of your picture. This blog aims to explore the marvels of these kits, delving into their parts, and advantages, and leading you through obtaining that desired flawless lighting.
What are the differences between a strobe and a flash?
The terms “flash” and “strobe” are often used interchangeably, but there is a subtle difference between the two. A flash is a single burst of light, typically used in photography to illuminate a subject in low-light conditions. A strobe, on the other hand, is a series of rapid bursts of light, typically used in studio photography to create a consistent and controlled lighting environment.
Here is a table summarizing the key differences between a flash and a strobe:
| Feature | Flash | Strobe |
|---|---|---|
| Definition | Single burst of light | Series of rapid bursts of light |
| Typical use | Photography in low-light conditions | Studio photography |
| Purpose | Illuminate a subject | Create a consistent and controlled lighting environment |
| Power output | Typically lower | Typically higher |
| Color temperature | Typically variable | Typically fixed |
| Recycling time | Typically slower | Typically faster |
In general, a flash is a good choice for casual photography where portability and ease of use are important. A strobe is a better choice for more serious photography where precise control over lighting is required.
Types of Lighting Kits
There are two primary categories of lighting kits for photography. These include continuous lighting kits and strobe lighting kits.
-
Continuous Lighting Kits:
These kits provide a constant flow of light, making them an excellent choice for photographers who want to see the effects of their lighting adjustments in real-time. They are also ideal for videography since they allow you to see the results of your lighting changes while recording.
-
Strobe Lighting Kits:
These kits emit a brief burst of light, similar to an oversized flashgun. Strobe lighting kits are perfect for photographers who want to create dramatic lighting effects or capture fast-moving subjects.
What are Studio Strobe Lighting Kits?
Studio strobe lighting kits are essential tools for professional photographers who want to achieve high-quality studio portraits and product shots. They provide a powerful and versatile lighting solution that allows photographers to control the direction, intensity, and color of light in their studio environment.
Unlike continuous lighting, which emits a constant stream of light, studio strobes produce brief bursts of light, similar to a camera flash. This allows photographers to freeze motion and capture sharp images with minimal motion blur. Studio strobes also offer a wider range of power output, enabling photographers to adjust the brightness of their lights to suit their specific needs.
Components of Studio Strobe Lighting Kits
A typical studio strobe lighting kit includes several key components:
-
Lights:
At the heart of the kit, studio strobes are the light sources that illuminate the subject. They come in various sizes and power outputs, ranging from compact monolights to powerful pack-and-head systems.
-
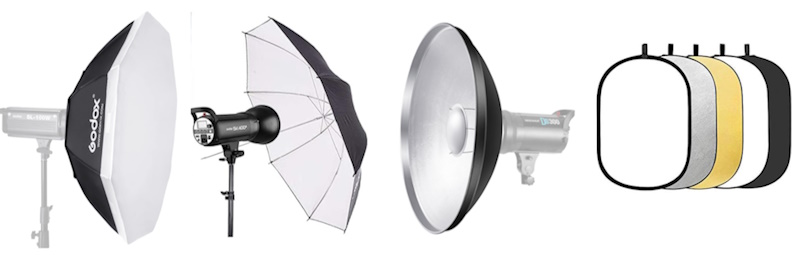
Modifiers:
Light modifiers are accessories that shape and control the light emitted by the strobes. They include softboxes, umbrellas, reflectors, beauty dishes, and grids. The best light modifier will depend on your individual needs and budget. If you need a versatile light modifier that creates soft, diffused light, a softbox is a good choice. If you need a portable and affordable light modifier, an umbrella or reflector is a good choice. And if you need a soft, focused light for portraiture, a beauty dish is a good choice.
The following table shows the characteristics of the above-mentioned light modifiers:
| Feature | Softboxes | Umbrellas | Reflectors | Beauty Dishes |
|---|---|---|---|---|
| Light Quality | Soft, diffused light | Soft, directional light | Bounces light, creates fill light | Soft, focused light |
| Shadow Control | Excellent | Good | Minimal | Good |
| Versatility | Portraiture, product photography, fashion photography | Limited to fill light and accents | Limited to fill light and accents | Portraiture, product photography, fashion photography |
| Portability | Moderately portable | Highly portable | Highly portable | Moderately portable |
| Cost | More expensive | Less expensive | Less expensive | Moderate |
-
Triggers:
Triggers are devices that activate the strobes when the camera shutter button is pressed. They can be wired or wireless, providing flexibility in studio setup.
-
Accessories:
Additional accessories, such as light stands, boom arms, sandbags, and carrying cases, are often included in studio strobe lighting kits to enhance the overall functionality and portability of the setup.
Key Features and Benefits
Studio strobe lighting kits are a must-have for professional photographers who want to achieve consistent and high-quality results in their studio work. These kits provide powerful illumination, allowing you to capture sharp images with minimal motion blur and achieve a variety of lighting effects.
They also offer a wide range of power output adjustments, enabling you to adapt your lighting setup to different shooting scenarios. Additionally, studio strobe lighting kits are built to last and provide consistent performance over time. With a vast range of modifiers available, these kits offer flexibility in achieving desired creative effects.
Why buy a kit rather than buying separate devices?
There are several advantages and disadvantages to buying a kit rather than separate devices.
Advantages
- Convenience: Buying a kit is the most convenient way to get all of the equipment you need in one package. You don’t have to worry about researching and sourcing compatible components from different vendors.
- Cost-effectiveness: Kits are often priced more competitively than buying individual components separately. This is because manufacturers can offer discounts on bulk purchases.
- Compatibility: All of the components in a kit are designed to work together seamlessly. This means you won’t have to worry about compatibility issues.
- Warranty: Kits typically come with a warranty that covers all of the components. This means you’re protected if there are any defects in the equipment.
Disadvantages
- Limited flexibility: Kits may not offer the same level of flexibility as buying individual components. For example, you may not be able to choose the strobes’ exact power output or the softboxes’ size.
- Potential for overspending: You may end up buying components that you don’t need if you buy a kit that includes everything you could want.
- Difficulty upgrading: It can be more difficult to upgrade individual components if you buy a kit. This is because the components may not be compatible with newer equipment.
In general, buying a kit is a good idea if you are a beginner or if you need a complete set of equipment right away. However, if you are an experienced photographer with more flexibility, you may want to consider buying individual components.
How to Choose the Right Kit
Choosing the right studio strobe lighting kit for your needs involves carefully considering the type of photography you do and the studio environment where you’ll be shooting. Here are some key factors to consider:
1- Type of Photography:
Portraiture, product photography, fashion photography, and still-life photography all have different lighting requirements:
- Portraiture: Portrait photography requires a soft, flattering light that will accentuate the subject’s features. A good starting point for portraiture lighting is a 200-400-watt strobe kit.
- Product Photography: Product photography requires more directional lighting to highlight the details of the product. A good starting point for product photography lighting is a 400-600-watt strobe kit.
- Fashion Photography: Fashion photography requires a variety of lighting setups, from soft and diffused light for close-ups to more dramatic and directional lighting for full-body shots. A good starting point for fashion photography lighting is a 600-800-watt strobe kit.
- Still Life Photography: Still life photography requires a variety of lighting setups, depending on the desired mood or effect. A good starting point for still-life photography lighting is a 400-600-watt strobe kit.
2- Studio Environment:
Consider the size of your studio space and the flexibility you need in positioning your lights. Monolight kits are compact and portable, while pack-and-head systems offer more power output and versatility.
- Small Studio: A small studio will require less powerful strobes than a large studio. A good starting point for a small studio is a 200-400-watt strobe kit.
- Large Studio: A large studio will require more powerful strobes than a small studio. A good starting point for a large studio is a 600-800-watt strobe kit.
3- Additional Considerations:
- The size and shape of your subject will also affect the power of the strobes you need. For example, you will need more powerful strobes to light a large group of people than you would to light a single person.
- The type of modifier you use will also affect the power of the strobes you need. For example, you will need more powerful strobes to light a large softbox than you would to light a small beauty dish.
- The distance between the strobes and your subject will also affect the power of the strobes you need. The farther away the strobes are from your subject, the more powerful they will need to be.
It is always best to err on the side of caution and choose a kit with more power than you think you need. This will give you more flexibility to create different lighting setups and to light different types of subjects.
Recommended Studio Lighting Kits
A- Strobe Lighting Kits
1- Godox Studio Strobe Lights Kit
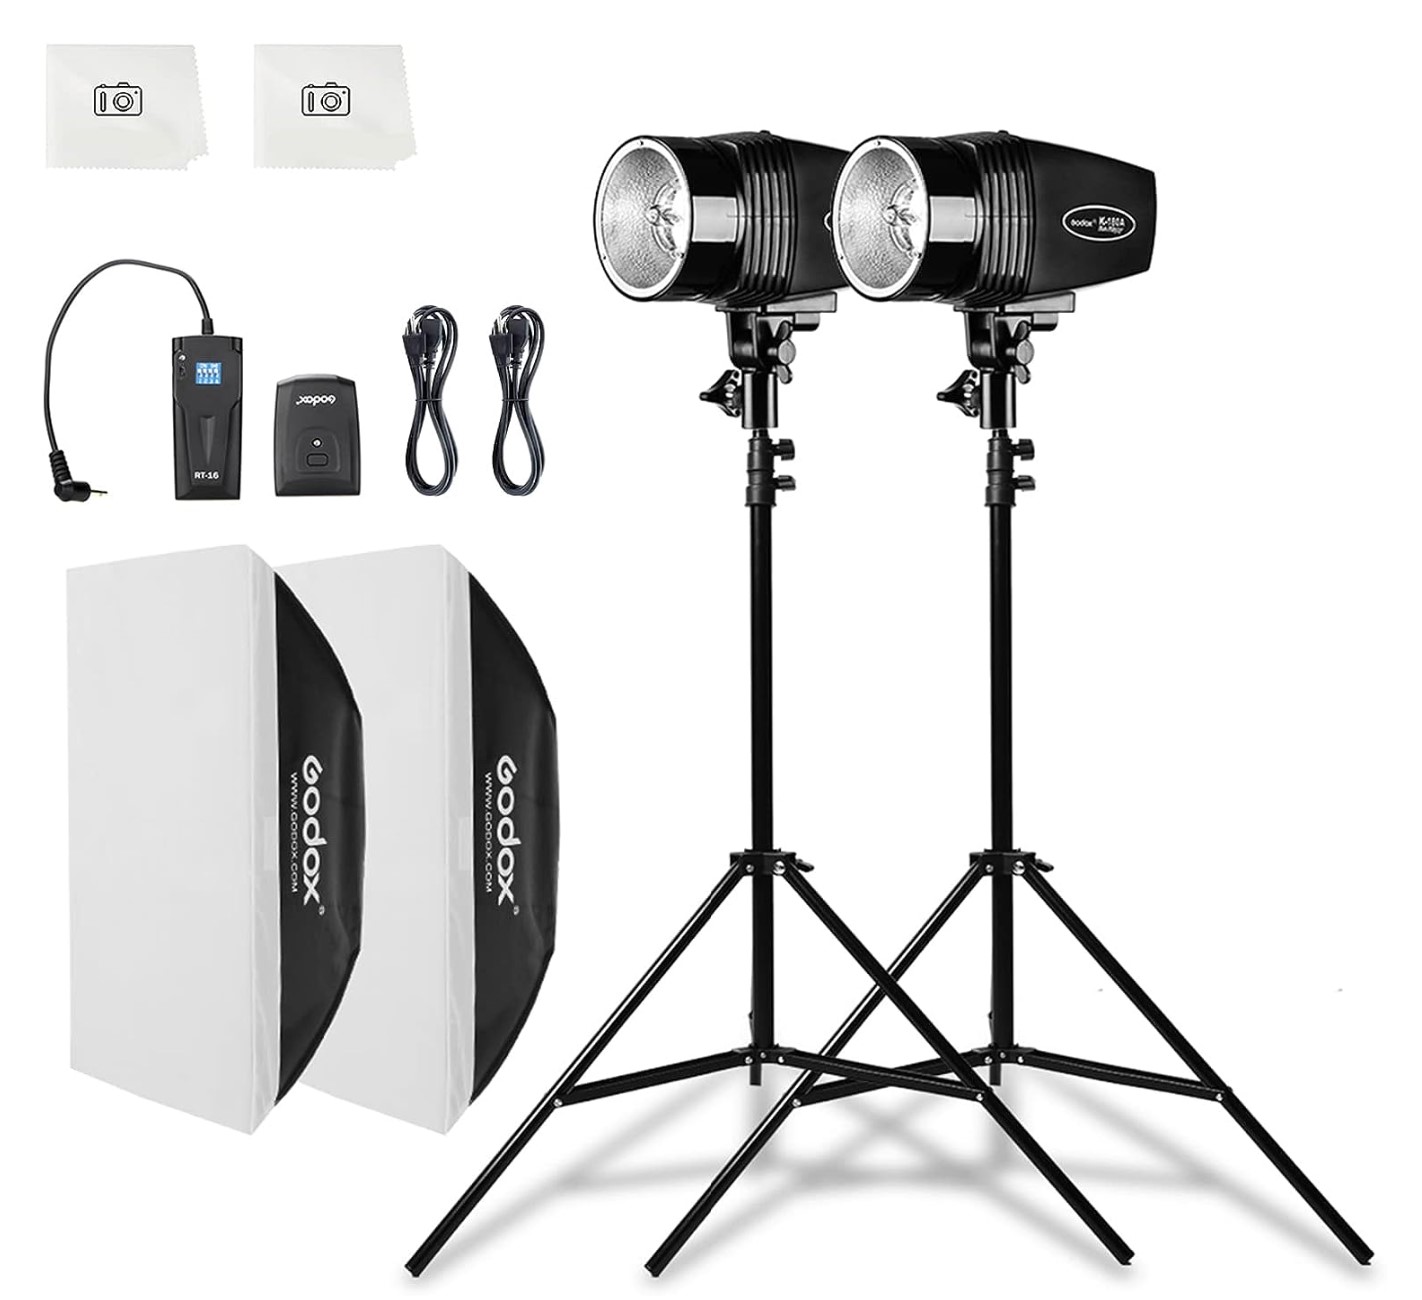
Package includes
- 2x 5600K Monolights (180W)
- 2x (50x70cm )Softbox
- 2x (190cm) Light Stands
- 2x Power cable
- 1x RT-16 Trigger set
- Compatible with Nikon /Canon //Fujifilm /Olympus /Pentax hot shoe.
2- Godox E300 Strobe Light Kit
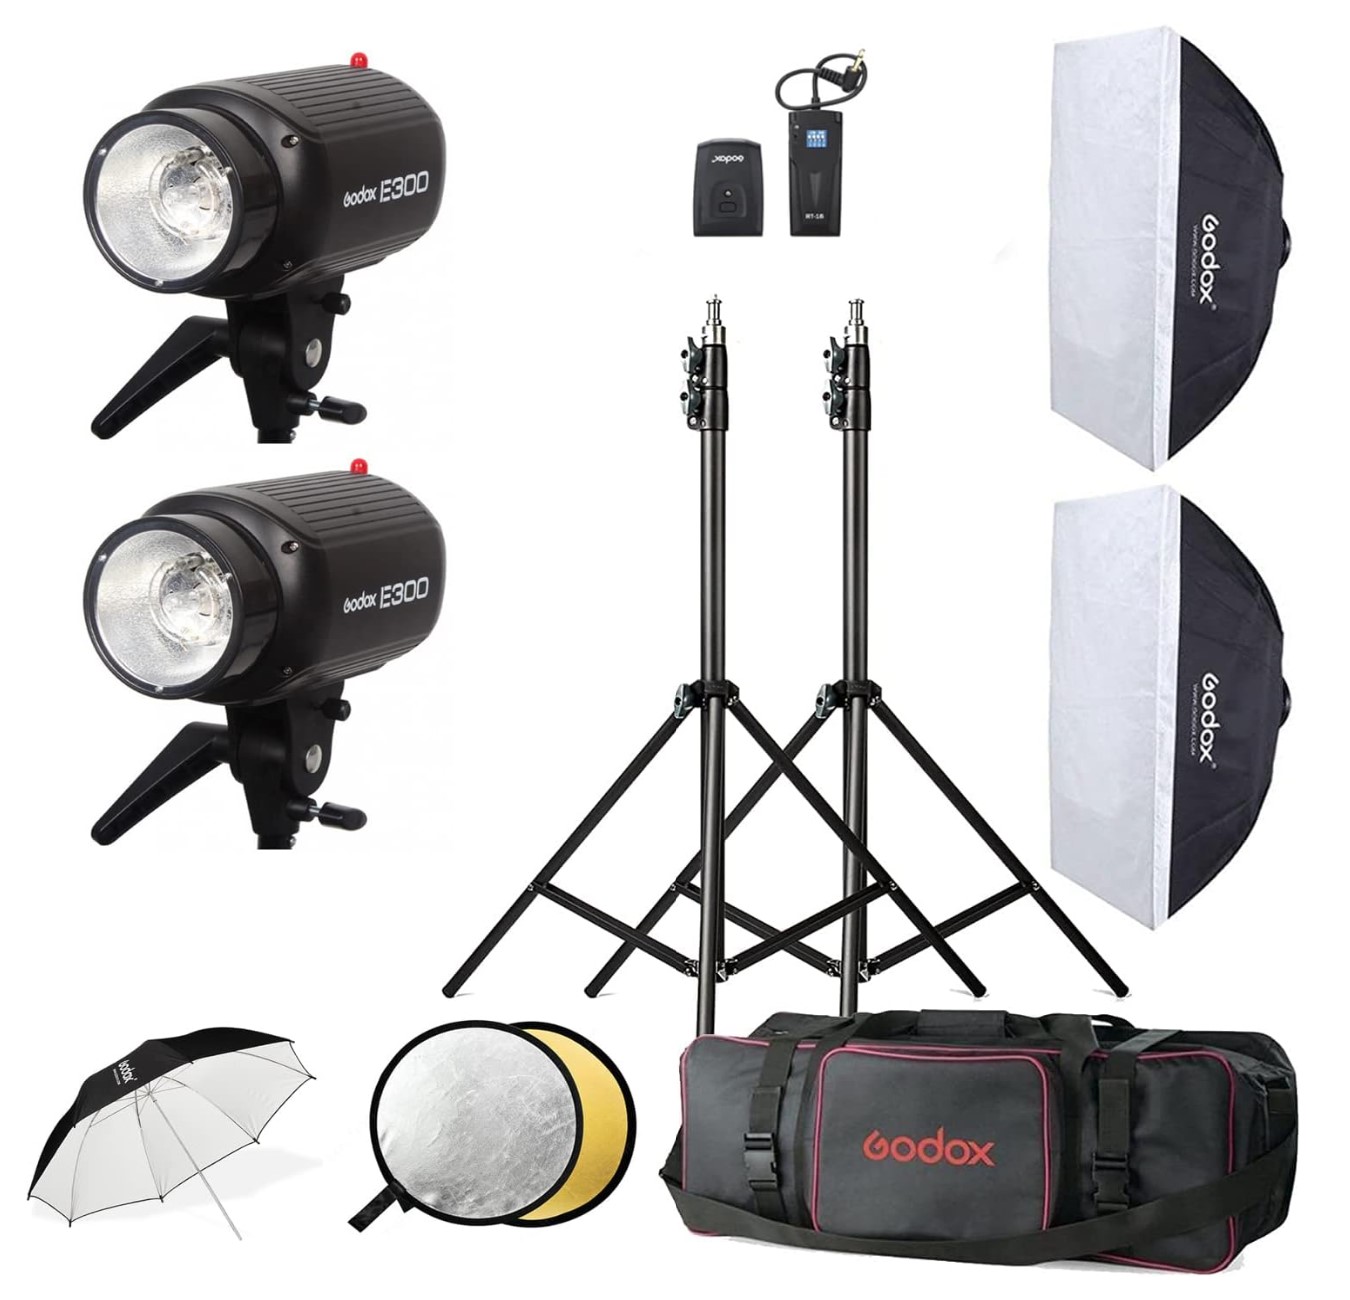
Package includes
- 2x Godox E300 Monolights (300WS)
- 2x (60x90cm) Softbox
- 2x (200cm) Light Stands
- 2x Power cord
- 1x RT-16 Trigger set
- 1x Umbrella
- 2x Reflectors
- 1x Carrying bag
3- Godox SK400II Professional Studio Kit
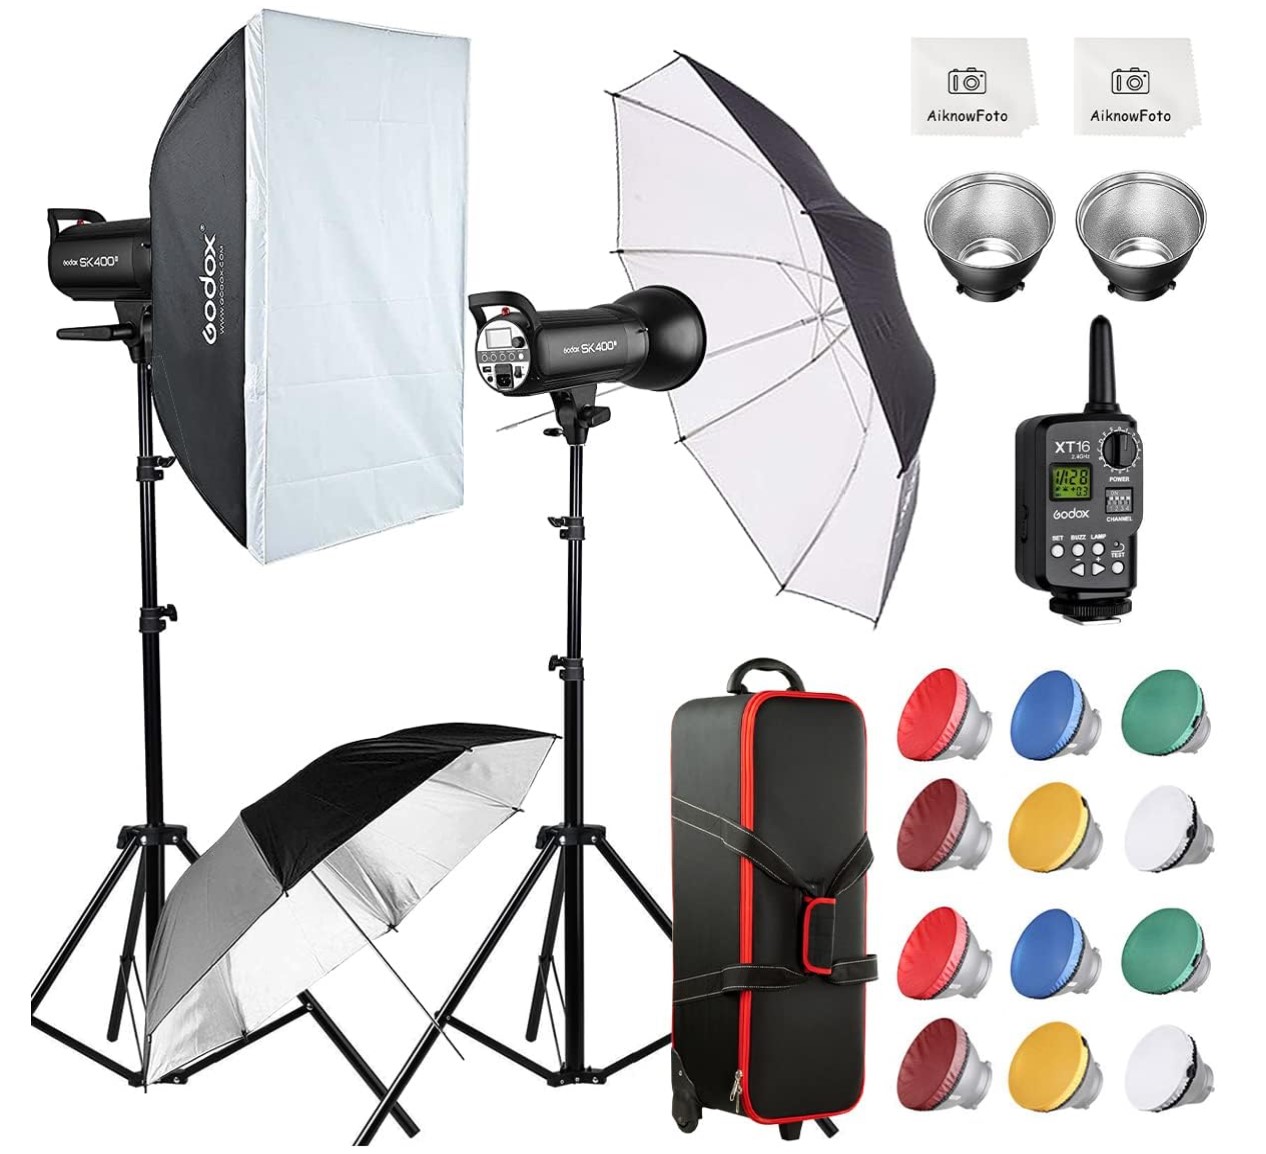
Package includes
- 2x SK400II Strobe flash Light (400Ws)
- 1x XT-16 flash trigger
- 2x 78.7″ (200cm) 304 Light Stand
- 1x SB-BW 60x90cm Softbox
- 2x Standard Reflector
- 1x 33″ Black/Silver Umbrella
- 1x 33″ Black/White Umbrella
- 1x CB-04 Carrying Case(72x25x25cm)
- 2x Clean Cloth
- 2x 6 color Soft Cloth.
4- Neewer 800W Photo Studio Lighting Kit:
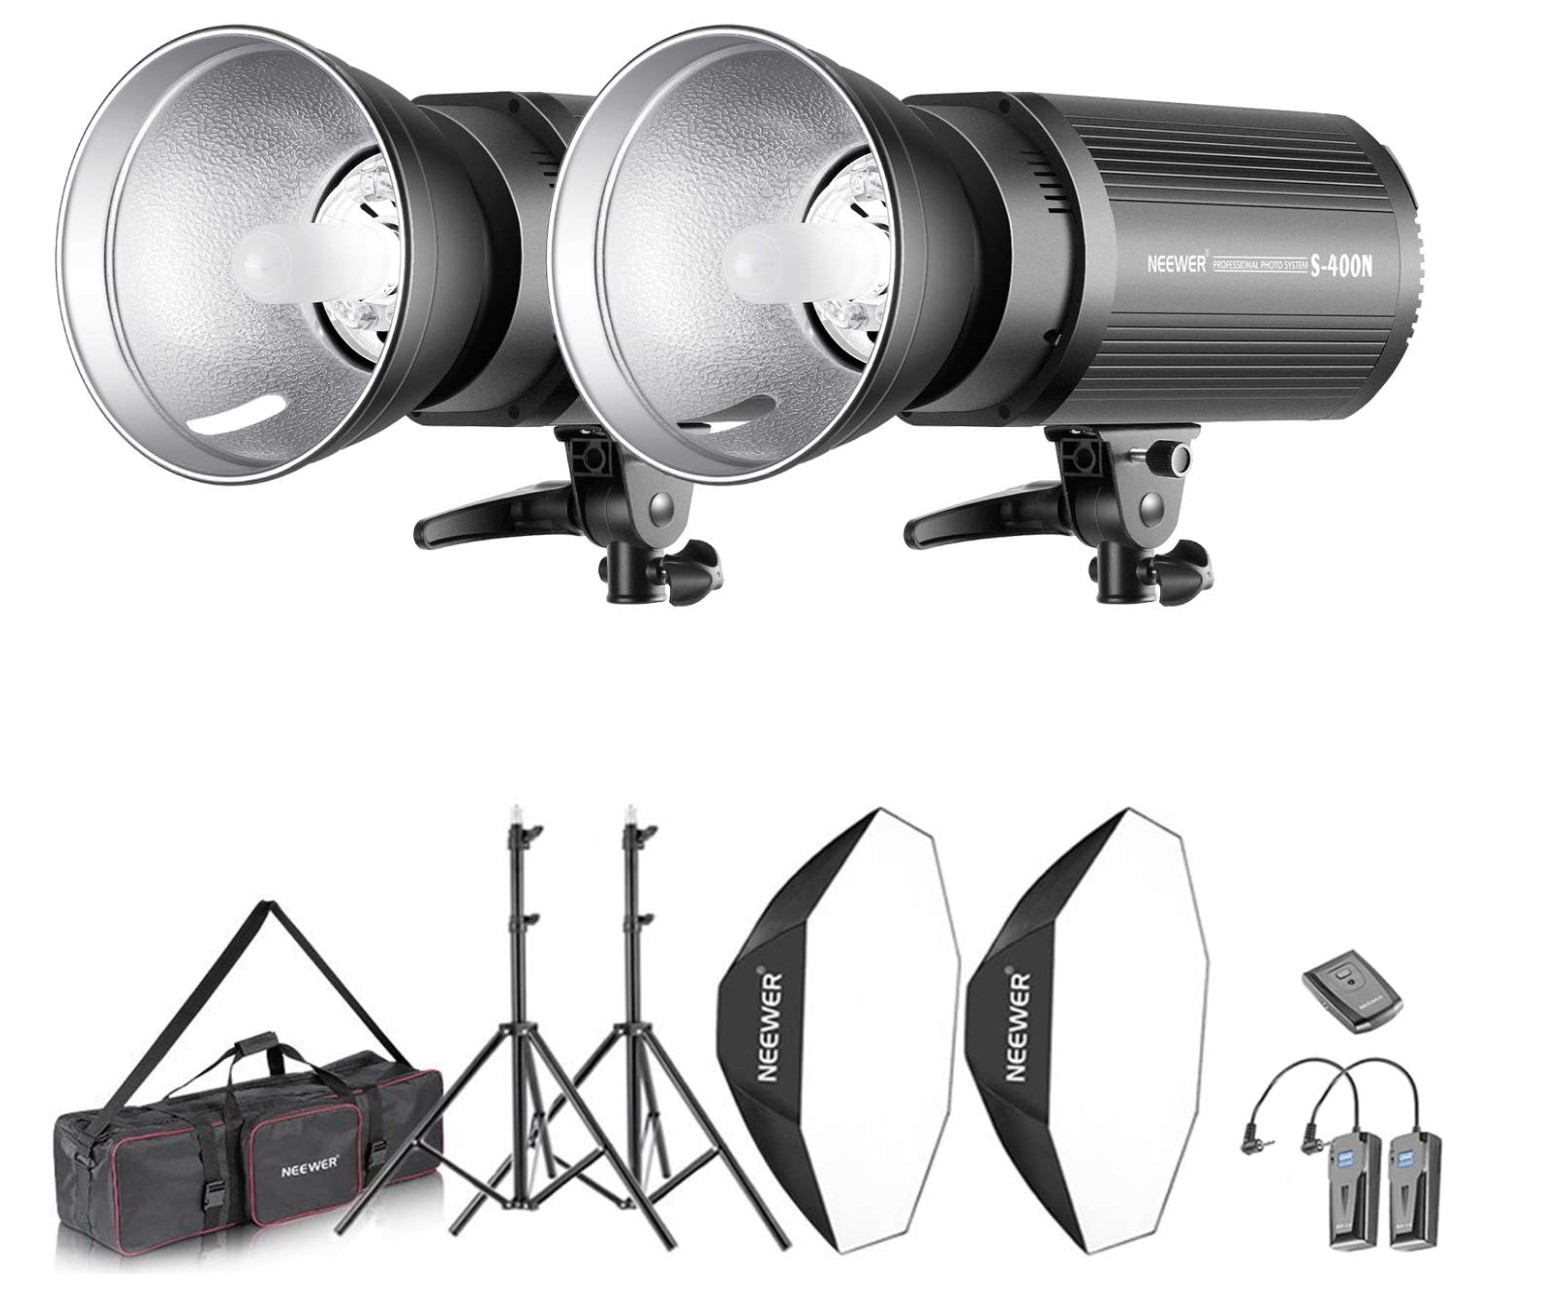
Package includes:
- 2x 400W (S-400N)Monolight Flash
- 2x Reflector Bowens Mount
- 2x Light Stand
- 2x Softbox
- 2x Modeling Lamp
- 1x RT-16 Wireless Trigger
- 1x Bag
B- Continuous Lighting Kits
5- EMART Photography Lighting Kit
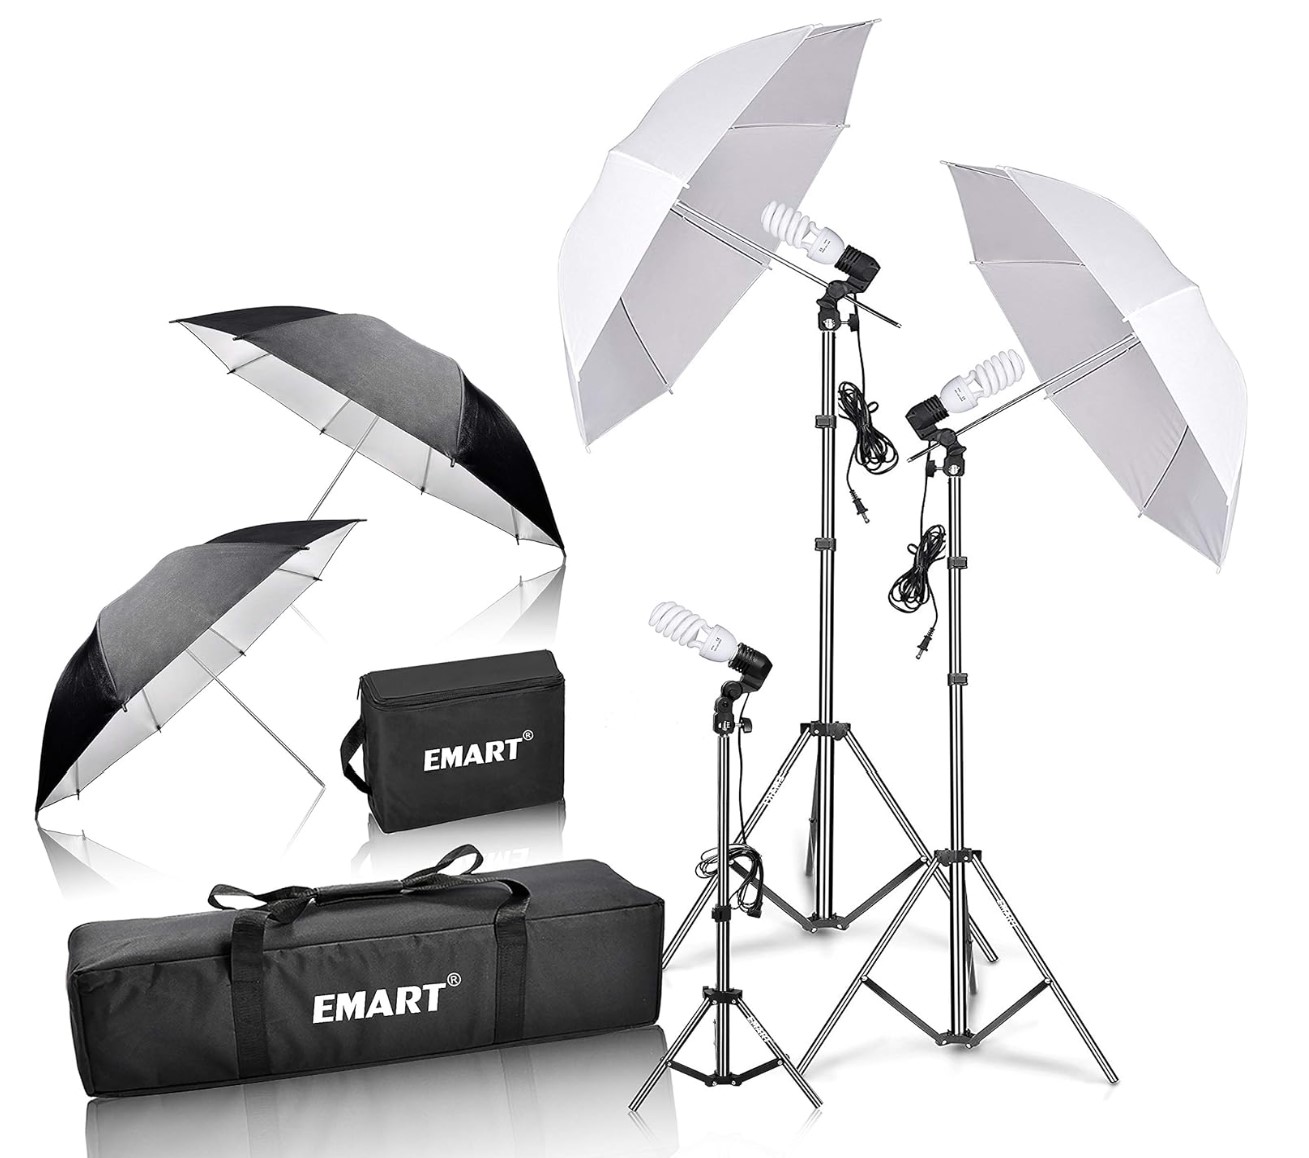
Package includes:
- 3x 45W (equals to 200W Incandescent Light) 5500K continuous photo bulb
- 2x White Umbrella Reflector
- 2x Sliver Umbrella Reflector
- 2x Adjustable Light Stand (83 inch)
- 1x Adjustable Light Stand (33 inch)
- 1x Carrying Bag
6- Yesker Photography Lighting Kit
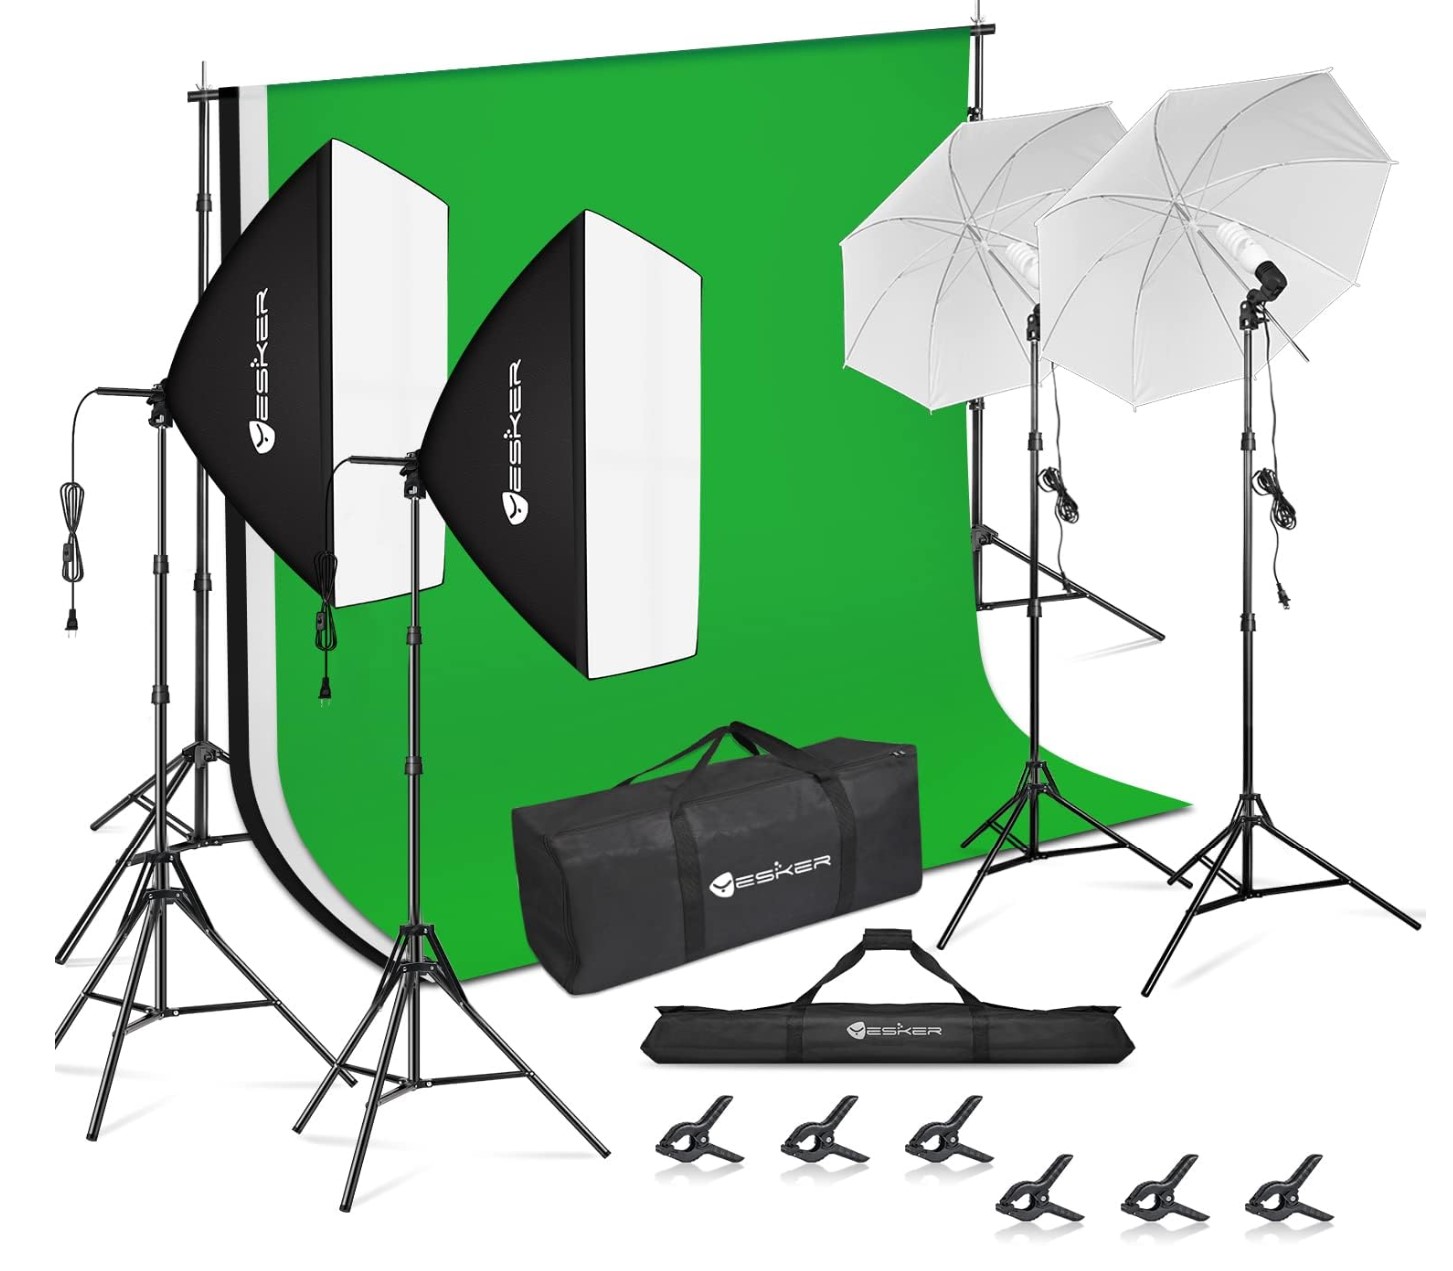
Package includes:
- 4x Light Stand (79-inch/200cm)
- 2x Single Head Light Holder
- 2x 45W CFL Daylight Bulb
- 2x 85W Energy Efficient Bulb
- 2x Umbrella (33-inch/84cm)
- 2x Softbox (24×24-inch/60x60cm)
- 1x Muslin Backdrop(Black, White and Green) (6×9 ft/1.8×2.8M)
- 6x Backdrop Clamps
- 1x Background Stand Support System (8.5x10ft/2.6x3M)
- 1x Carry Bag for Background Support System
- 1x Carry bag for Continuous Lighting Kit
7- LimoStudio (LMS103) 700W Soft Continuous Lighting Kit
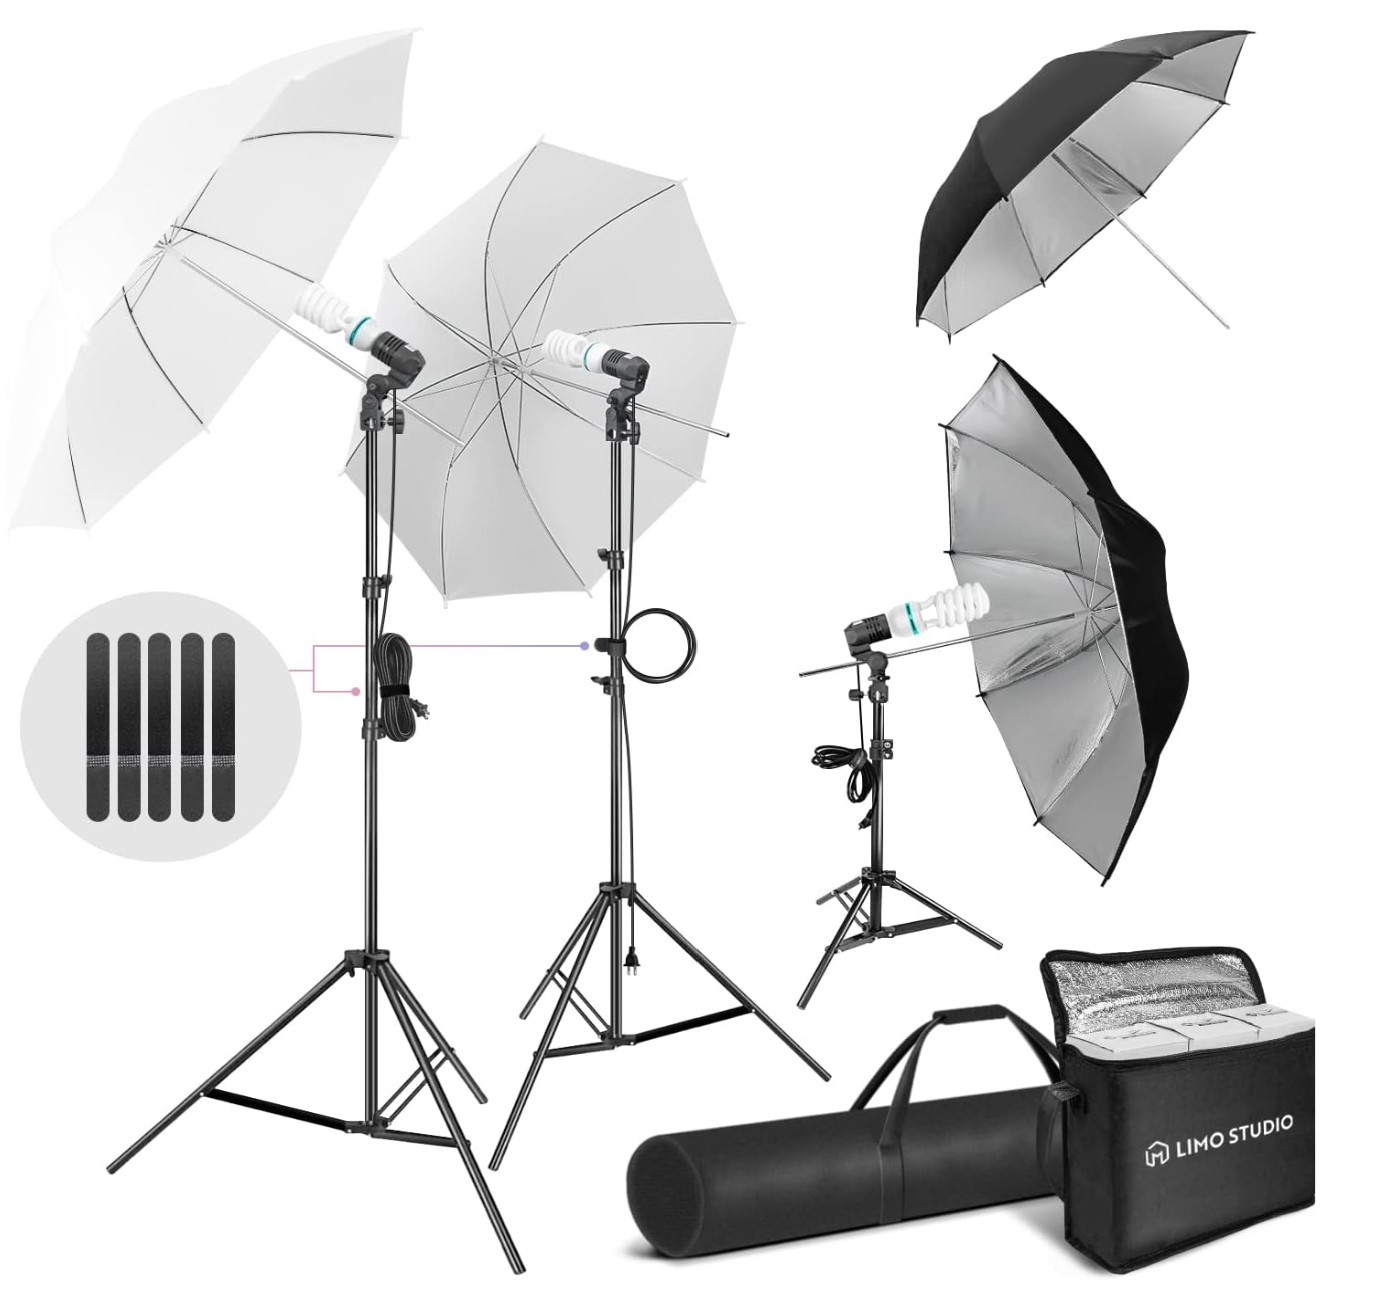
Package includes:
- 3x 45W CFL Bulb
- 2x Bulb Socket
- 2x White Umbrella Reflector (33-inch)
- 2x Black / Silver Umbrella Reflector (33-inch)
- 2x Light Stand (82.3 inch)
- 1x Light Stand (29.8-inch)
- 5x Reusable Fastening Cable Ties
- 1x Bulb Carry Bag
- 1x Photo Equipment Carry Bag
Tips and Techniques for Optimizing Illumination with Studio Strobe Lighting Kits
1- Positioning and Angle:
The effective use of studio strobe lighting kits depends on mastering the art of positioning and angle. Proper placement of lights can transform the look and feel of your photographs, creating dramatic effects or achieving a soft and flattering glow.
Key Considerations:
- Key Light: The key light is the primary source of illumination, typically positioned at a 45-degree angle to the subject. It establishes the overall tone and direction of light.
- Fill Light: The fill light reduces shadows and softens the contrast created by the key light. It’s often placed opposite the key light, filling in the darker areas and creating a more balanced exposure.
- Backlight: The backlight separates the subject from the background, adding depth and dimension to the image. It’s positioned behind the subject, typically at a higher angle.
- Hair Light: The hair light adds a subtle highlight to the subject’s hair, separating it from the background and creating a more dimensional look.
2- Use of Light Modifiers: Softboxes, Reflectors, and Diffusers
Light modifiers are essential tools for shaping and controlling the light emitted by studio strobes. They allow you to achieve a wide range of effects, from soft and diffused light to dramatic and directional lighting.
-
Softboxes:
- Softboxes diffuse the light from the strobe, creating a soft and flattering light that is ideal for portraits and product photography.
- They come in various sizes and shapes, allowing you to control the spread of light and achieve different effects.
- Larger softboxes produce softer and more diffused light, while smaller softboxes provide more focused illumination.
-
Reflectors:
- Reflectors bounce light back onto the subject, filling in shadows and adding depth to the image.
- They are versatile tools that can be used to create a variety of effects, from subtle highlights to dramatic accents.
- Different reflector surfaces produce different results. White reflectors reflect all colors, while silver reflectors add a slight contrast boost, and gold reflectors produce a warm and flattering light.
-
Diffusers:
- Diffusers are translucent materials that soften and diffuse light, creating a more gentle and even illumination.
- They are often used in conjunction with strobes to create a soft and flattering light for portraits and product photography.
- Various diffuser materials produce different effects. Silk diffusers create a soft and diffused light, while scrim diffusers produce a slightly more textured light.
3- Understanding Light Ratios and Balancing Techniques
Light ratios refer to the relative intensity of the key light and fill light. Proper light ratio control is crucial for achieving a balanced and natural-looking exposure.
Key Light Ratio:
- Represents the intensity of the key light relative to the fill light.
- A higher key light ratio creates a more dramatic and contrasty look, while a lower key light ratio produces a softer and more balanced exposure.
Balancing Techniques:
- Adjusting the distance or power output of the key light or fill light is used to balance the overall exposure and achieve the desired light ratio.
- Using light modifiers, such as softboxes or reflectors, can also help to control light distribution and achieve a balanced exposure.
Troubleshooting Common Issues and Solutions
Even the best studio strobe lighting kits might encounter issues occasionally. Here are some common problems and their solutions:
1- Lights Not Firing or Inconsistent Firing
- Check the connections between the trigger and the lights.
- Ensure the trigger batteries are charged.
- Verify that the lights are turned on and set to the correct channel.
2- Overheating of Lights
- Allow lights to cool down between prolonged use.
- Avoid using lights at maximum power for extended periods.
- Ensure proper ventilation and avoid covering the lights.
3- Uneven Lighting or Harsh Shadows
- Adjust the positioning of lights and modifiers.
- Experiment with different modifier combinations for softer light.
- Increase the distance between the light source and the subject for more even illumination.
4- Sync Issues Between Lights
- Confirm that all lights and triggers are set to the same channel.
- Check for interference from other electronic devices.
- Try using a different trigger or syncing method.
Upgrading and Expanding Your Kit
Upgrading and expanding your studio strobe lighting kit can enhance your photography capabilities. Here’s how:
1- Adding More Lights
- As you progress, consider adding additional lights for more complex setups.
- Extra lights provide flexibility in creating diverse lighting effects.
2- Exploring New Modifiers
- Invest in different modifiers to diversify your lighting options.
- Experiment with new modifiers like beauty dishes, grids, or gels for unique effects.
3- Upgrading to Advanced Triggers
- Advanced triggers offer more functionalities such as high-speed sync and remote control.
- Consider upgrading triggers for enhanced control and versatility.
4- Investing in Light Modelling Tools
- Light meters help measure and control light more accurately.
- Light modifiers like barn doors or snoots offer precise light direction.
5- Expanding Accessories
- Invest in additional accessories like backdrop systems, stands, or carry cases for better organization and convenience.
- Having spare batteries and bulbs can also be beneficial during shoots.
6- Exploring Wireless and Portable Options
- Consider wireless or battery-operated options for outdoor or on-location shoots.
- Portable kits provide flexibility and convenience.
Photography Lighting Kit FAQs
1- What are studio strobe lighting kits, and why are they essential for photographers?
Studio strobe lighting kits are comprehensive sets containing lights, modifiers, triggers, and accessories used to create controlled lighting setups. They’re vital for photographers as they offer adjustable and consistent lighting, crucial for professional-quality images.
2- What components typically come with a studio strobe lighting kit?
These kits usually include strobe lights (monolights), modifiers like softboxes and reflectors, triggers for synchronization, light stands, and carrying cases.
3- How do studio strobe lighting kits differ from continuous lighting setups?
Unlike continuous lighting, strobe lights emit powerful bursts of light, offering more control over intensity and duration. This control allows for sharper, freeze-frame captures, making them popular in professional photography.
4- What are the benefits of using light modifiers with studio strobe kits?
Light modifiers like softboxes and diffusers help control and shape the emitted light, resulting in softer, more diffused illumination. Reflectors bounce and redirect light, reducing harsh shadows and adding fill light to subjects.
5- Can beginners use studio strobe lighting kits effectively?
Absolutely! Studio strobe kits cater to photographers of all levels. Start with basic setups, experiment with different modifiers and positioning, and gradually build expertise in controlling and manipulating light.
6- How can I select the right studio strobe lighting kit for my needs?
Assess your photography requirements, consider the type of photography you pursue, the available budget, and the desired features. Research various brands read user reviews, and consult professionals if needed.
7- Are studio strobe lighting kits suitable for outdoor photography?
Yes, studio strobe kits can be used outdoors. However, power sources might be a concern. Some kits offer battery-operated options for outdoor use, while others may require additional power sources.
8- What are some common lighting techniques used with studio strobe kits?
Key lighting, fill lighting, and backlighting are commonly employed techniques. Adjusting light ratios, using multiple lights, and experimenting with angles and positions are also prevalent techniques.
9- How do I maintain and care for my studio strobe lighting kit?
Regularly clean the equipment, especially the bulbs and modifiers, to ensure optimal performance. Properly store the kit in a dry and safe environment to prevent damage.
10- Can studio strobe lighting kits be upgraded or expanded?
Yes, many kits offer expandability options. You can add more lights, different modifiers, or additional accessories to enhance your setup as your photography skills grow.
Conclusion
Studio strobe lighting kits are a must-have for photographers, offering precise illumination control with lights, modifiers, and accessories. With mastery, you can explore lighting techniques, adjust ratios, and unlock endless creativity.
These kits provide consistent, adjustable, and impactful lighting solutions for studio or outdoor shoots, elevating your photography. Experiment, troubleshoot, and expand your kit to enhance your skills and capture captivating images that stand out.
Related posts
Off Camera Flash For Beginners
How To Use Flash In Photography- The Full Guide
Continuous Lighting Vs Flash Lighting
How To Setup A Professional Photography Studio
What Is Beauty Dish – My Favorite Portrait Lighting
What Is A Reflector In Photography? – How To Use It
Thanks for reading, I hope you enjoyed the article, if you have any questions just drop them below & I will be happy to answer you.
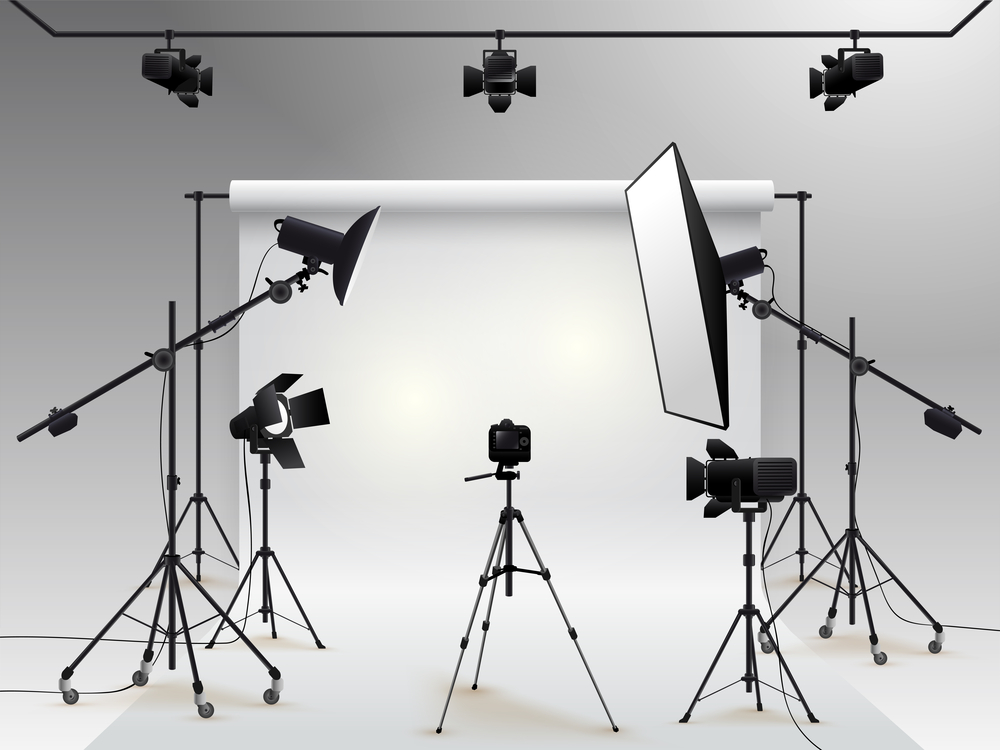
The feature photo by Depositphotos
If you enjoy the site, don’t forget to subscribe, we will only inform you when a new article is posted.