


Double Exposure photography is a technique that involves combining two exposures to create a single image. The goal of this technique is to produce art, creative, and astonishing photos in a unique way that can’t be achieved with a single shot.
This technique can be used with a DSLR camera by enabling Multiple Exposure in the shooting menu and manually capturing both exposures. However, to have more control over the process, you can achieve the same effect using Photoshop.
What is Double Exposure?
Double exposure is a photograph composed of two overlaid images. You can create double-exposure photos directly from your digital cameras using a special setting, or you may use Photoshop to have the same effect. The produced images often have a dreamy, otherworldly feel and you can use them for great artistic effect.

Double Exposure Photography Tips
How to shoot double exposures with a digital camera
Having the right equipment is essential before shooting double-exposure photos. You should have a digital camera with double exposure capabilities, a shutter release cable, a flash, and a tripod.
Get familiar with your camera’s multiple exposure features and settings. It will also help if you practice before going on an actual shoot.
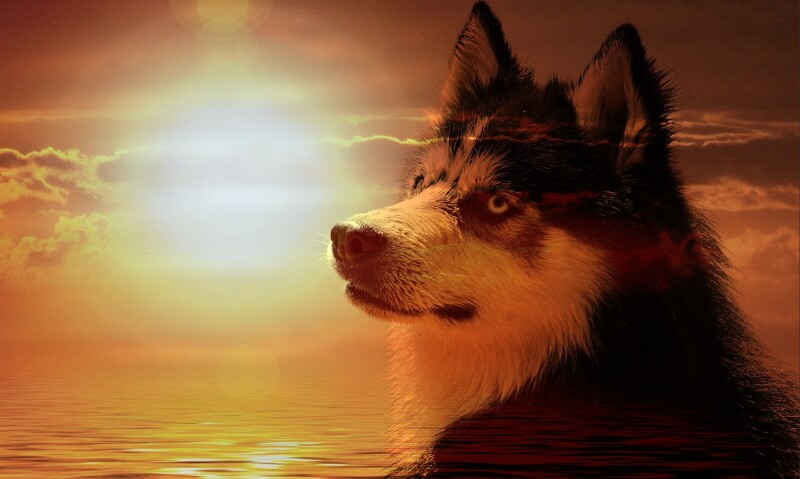
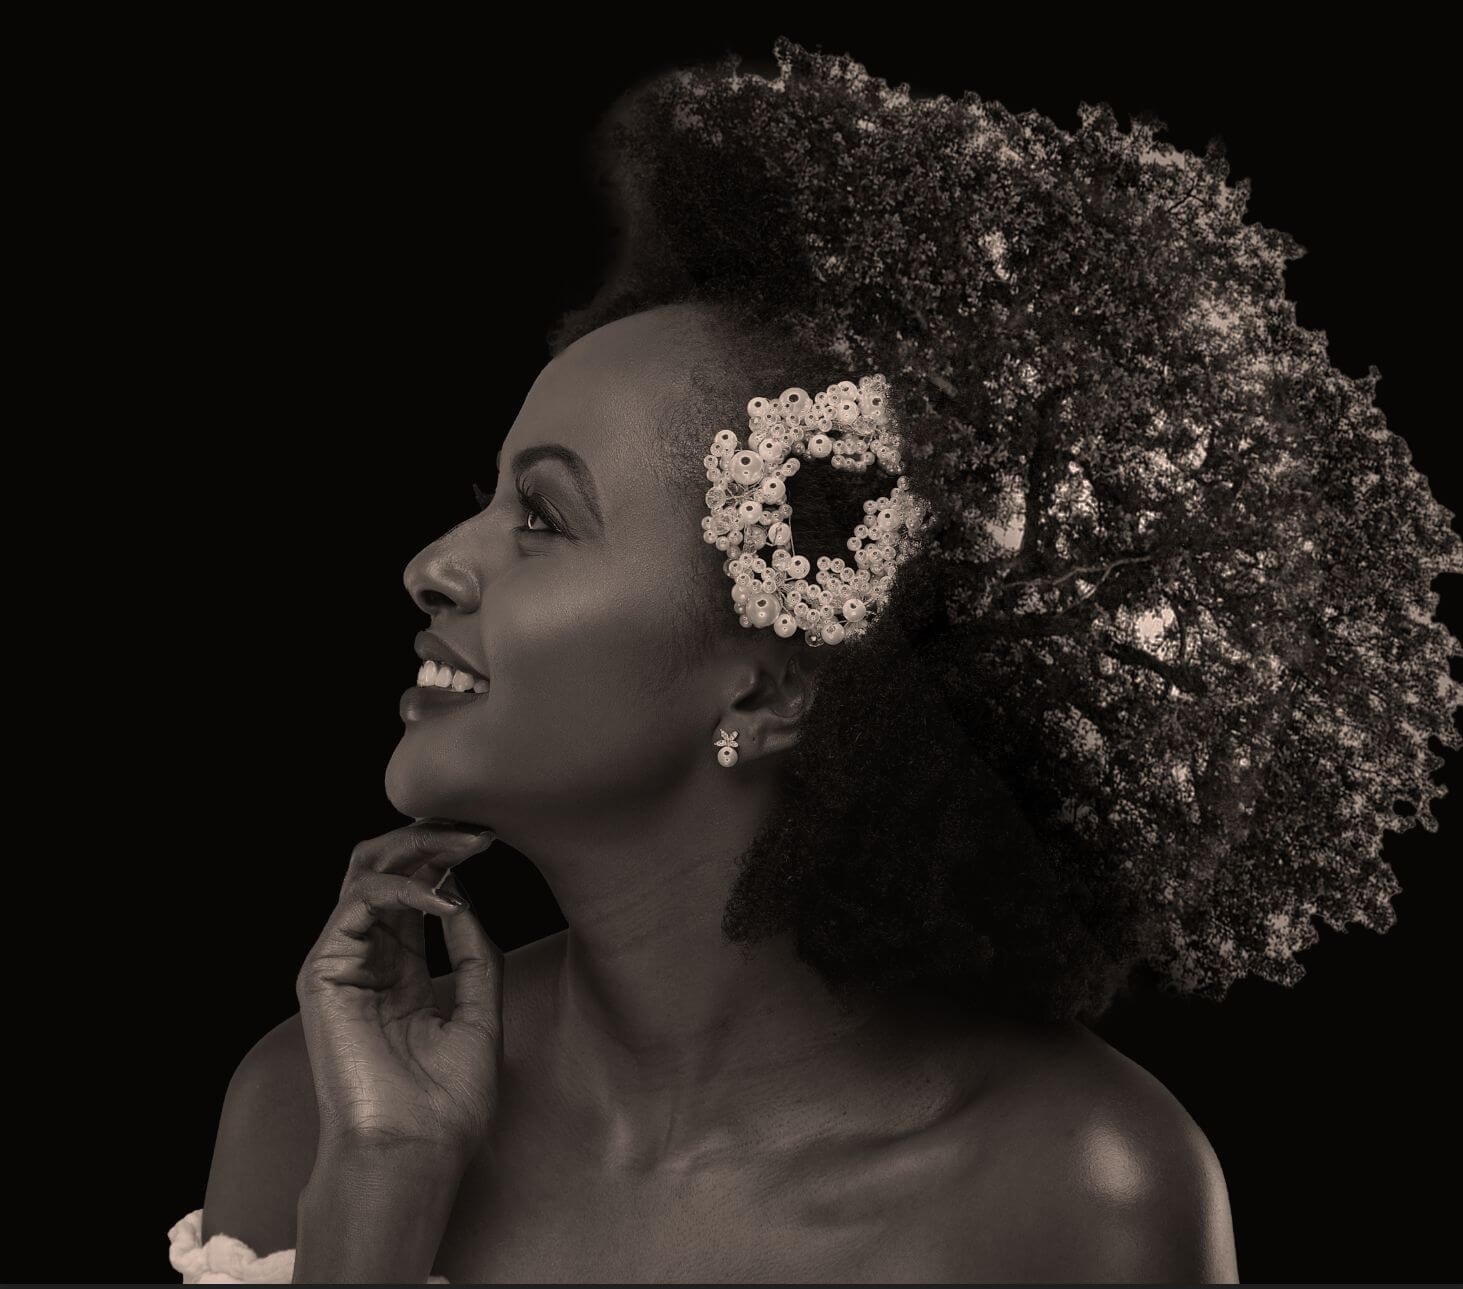
Creating a double-exposure photo normally requires one to take the first shot and then a second one to create the superimposed images. The first image will be your main subject, while the second image will be the supporting or supplementary. Normally, the first image is a portrait of a person or animal that has light or sun behind them (Silhouette Photos). The second image can either be a landscape, figures, flowery items, or a textured backdrop.
Once you know your camera setting, it’s time to shoot. Set your DSLR to Multiple Exposure mode and start shooting the first image or layer. You can also choose to use an image already saved on your memory card.
The next step is for you to shoot your second image. The two images should blend well. To do this, experiment with the angles so you’ll know which scenes complement each other well. You also should know that It is a lengthy process and involves a lot of trial and error.
How to do double exposures in Photoshop
Think and plan the project
You have to think of what you want your final image will look like. Think beyond the visual appeal and try to think of a good message to convey. All you really need are two images, so take your time in figuring out what you want them to be.
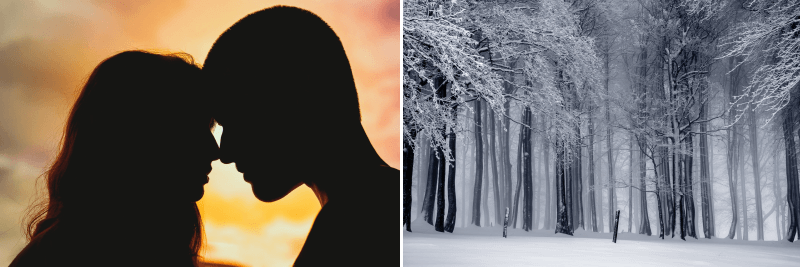
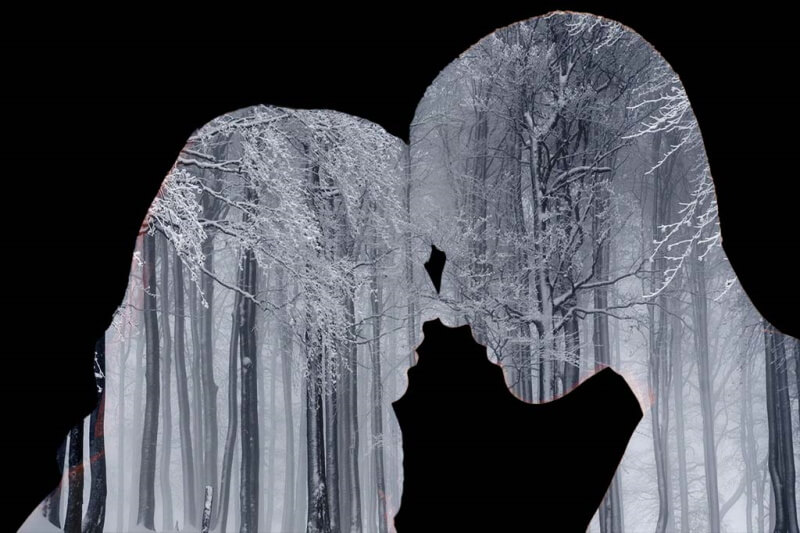
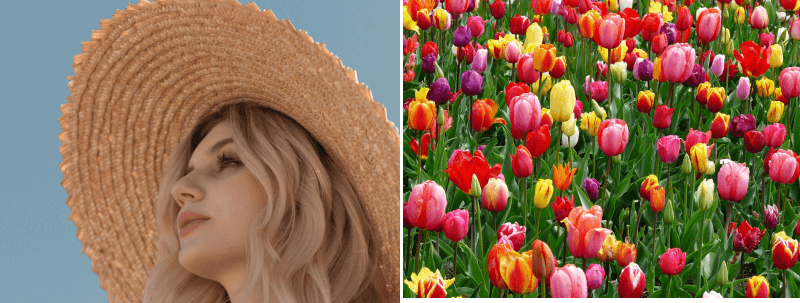
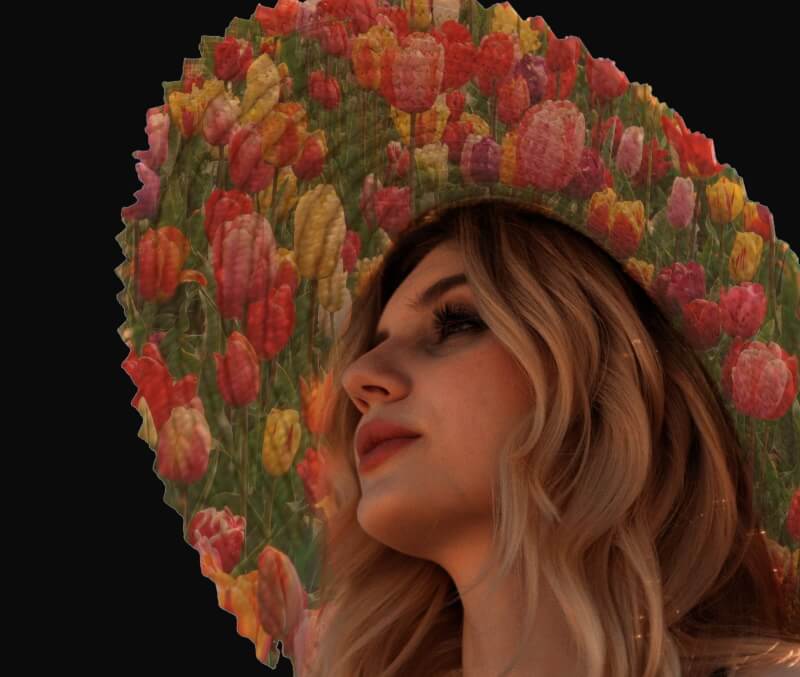
Some of the most compelling double-exposure images are composed of a portrait and an abstract or landscape photo with interesting textures. Create a connection between the two to produce an image that evokes certain emotions and makes your viewers take a few more seconds to observe the photo and contemplate the underlying message.
You may use photos that have an apparent negative space for the overlay of the second image. For example, you can take a portrait surrounded by sky, and then fill the sky with a texture from your second frame. Another common double exposure technique is to overlay silhouettes with an abstract texture or a pattern from nature.
You may use your own photos or photos from free stock to create your own double exposure shot so you can skip the entire process of having to take the photos yourself. Then again, going through the process manually gives you the most creative control over your final output.
Make a quick search online for inspiration and ideas to think of exactly how you want to compose the two photos.
Capture or choose the main photo
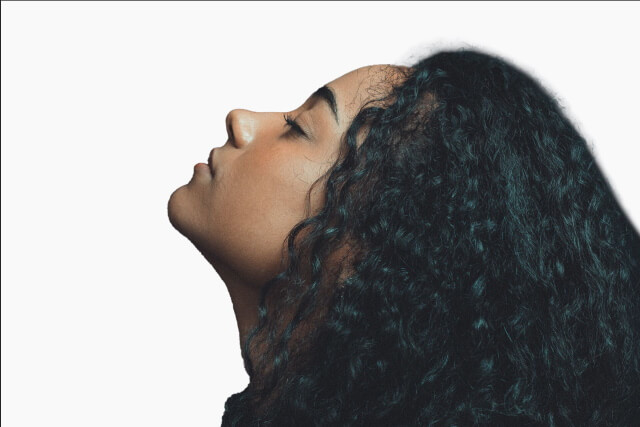
The main photo can be a portrait, a body part, or a still object. It should have the main subject, a good amount of highlights and shadows, and a background that is more or less clean, simple, and neutral so that it’s easier to edit later on.
Retouch the main photo
Edit the main photo, remove blemishes, tweak the brightness and add contrast in order to optimize the image for blending. Eliminate the background, and fill it with the appropriate color.
Recompose the photo by moving the subject to the center it or off-center to follow the Rule of Thirds, depending on your desired final composition.
Capture or choose the layer photo
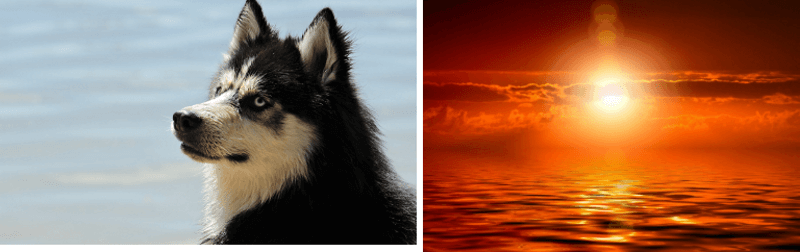
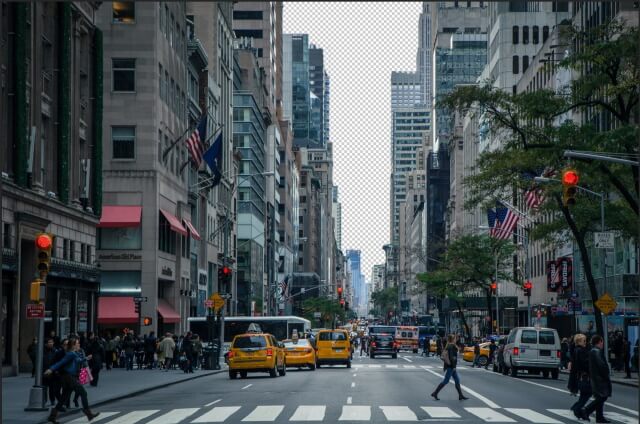
The layer photo can feature anything from an overhead shot of the city to a grassy yard or forest. Feel free to capture something with intricate details or anything abstract. The layer photo should have a good amount of highlights and shadows that would look more visible once blended with your base photo.
Blend the Images Together
Experiment with different layer blending modes and other options, depending on your desired effect. You can try using the Screen blending mode, which is one of the most commonly used layer blending options for double exposures. This blending mode makes the combined images appear lighter than either image. It offers a reduced opacity to reveal the second photo.
Step-by-step example
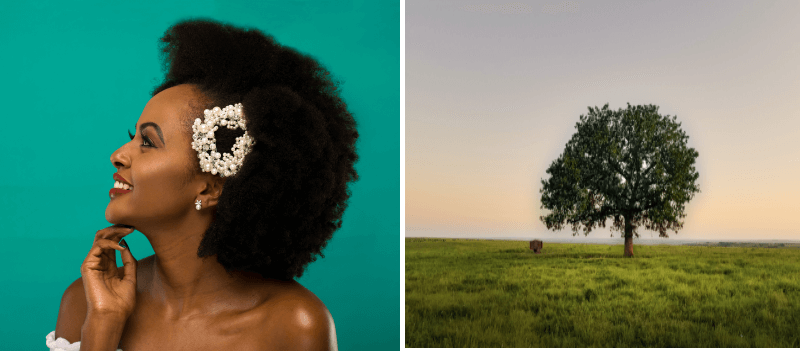
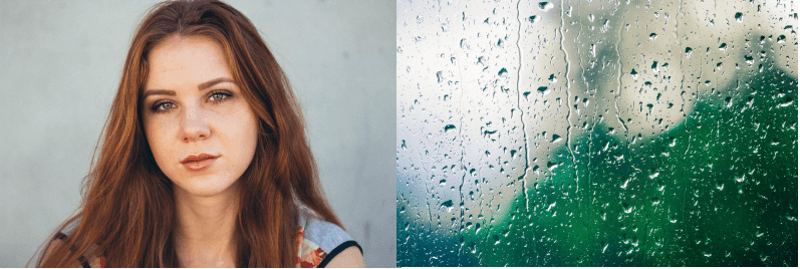
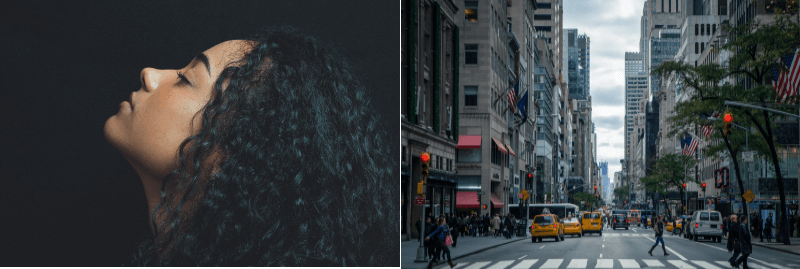
I will use the following two images to create a double-exposure image.
Step 1
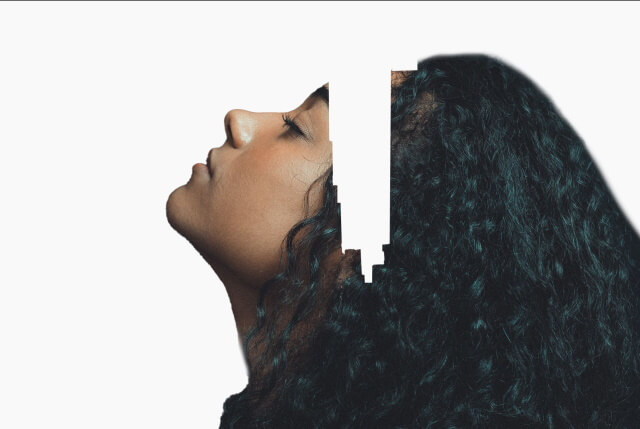
Open the portrait photo in Photoshop, and duplicate the layer (Ctrl + J)
Select the subject using Select and Mask, Then Select Subject
Invert the selection (to select the background), press delete to erase the background, and name the layer “subject”
Create a Solid Color adjustment layer (White color) and drag it under the subject layer
Step 2
Open the second image in a separate layer, and name it “city”.
Select the background of the “city” layer (the sky), and erase it.
Step 3
Use the selection from the “city” layer (the empty space) and apply it to the “subject” layer
Step 4
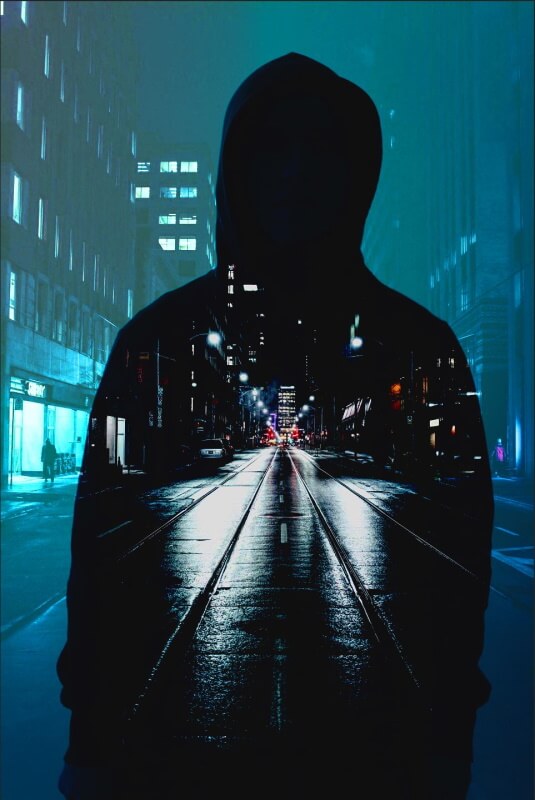
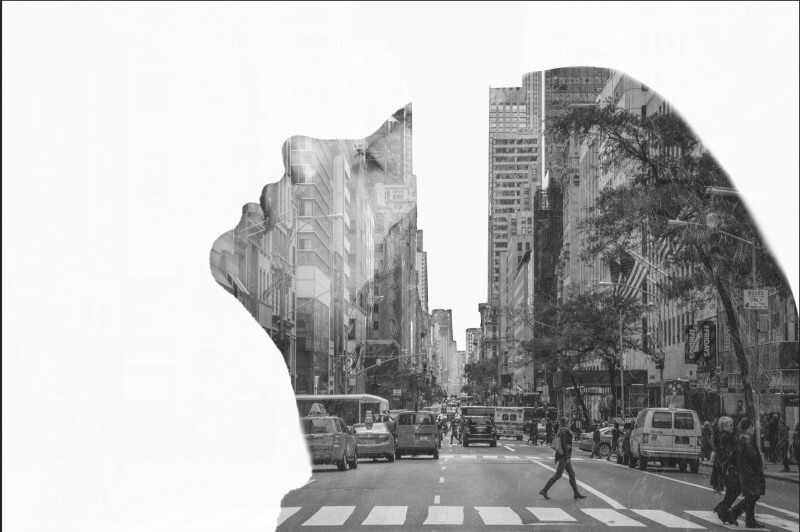
Change the blending mode of the “city” layer to Screen
Add a Black and White adjustment layer on the top
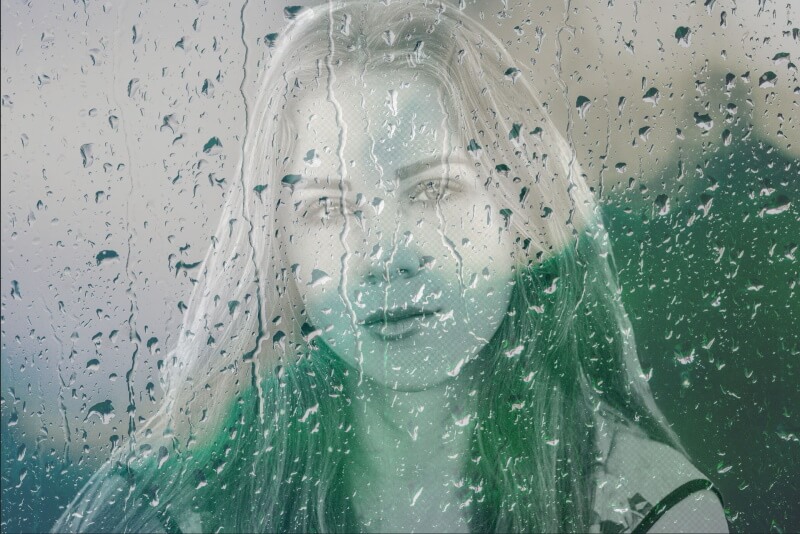
Here is the result
Acknowledgment
Although I have done all the editing and the combining of the above photos, I would like to thank the fellow photographers who actually take the shots.
Marcelo Chagas from Pexels
S. Hermann & F. Richter from Pixabay
Dimitar Veselinov from Pixabay
Ольга Солодилова from Pexels
Taylor Hunt from Pexels
Joseph Ruwa from Pexels
Heitor Verdi from Pexels
Jean Alves from Pexels
Baraa Jalahej from Pexels
Are you looking for Photo editing resources?
If are looking for editing resources like actions, overlays, and textures, I highly recommend paying a visit to my store, it has amazing professional photo editing tools.
In addition, you can check my editing tutorials, and my YouTube channel there are many tips and tutorials there.
Thanks for reading, I hope you enjoyed the article, in case you have any questions just drop them below & I will be happy to answer you.
If you enjoy the site, don’t forget to subscribe, we will only inform you when a new article is posted.


Hi Amin. Thank you for very interesting article. Im just starting my adventure with serious photography and I must admit that number of options and techniques available for DSLR cameras may be overwhelming. I never used previously double exposure but looking on your post it looks stunning and I can imagine multiple ways to use it in practice.
Thanks for your comment, glad you like the article
This is by far the best instructional material I found regarding double exposure, well excluding those courses I’ve encountered. The charge was kinda really pricey plus I wasn’t sure if it was worth it but this article just provided the information I needed for free. Thank you so much for this guide
I really appreciate your feedback, thanks!