


HDR (High Dynamic Range) photography is a captivating technique that allows you to capture stunning images with a wide range of tones and details. Unlike traditional photography, where you may struggle to capture both bright highlights and dark shadows in a single shot, HDR photography overcomes this limitation by blending multiple exposures of the same scene.
To create an HDR photo, you need to take a series of shots at different exposure levels. These shots typically consist of one properly exposed image, an underexposed image to capture details in highlights, and an overexposed image to reveal details in shadows. By combining these exposures, you can produce an image that showcases the full dynamic range of the scene, resulting in breathtaking and realistic visuals.
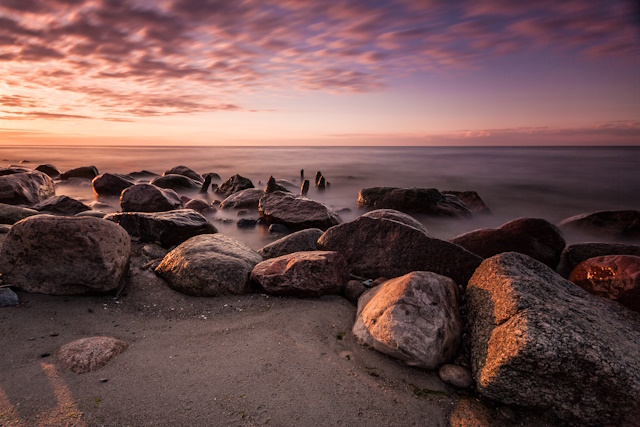
Photo by Depositphotos
Why Use HDR Photography Technique
The HDR photography technique offers several significant benefits that can elevate your photography to new heights.
- Enhanced Detail and Clarity: HDR photography brings out the intricate details in your images, making them sharp and vivid. From the texture of leaves to the intricate architecture of buildings, every element becomes more pronounced, drawing the viewer deeper into the scene.
- Balanced Exposures: With HDR, you can bid farewell to overexposed skies and underexposed foregrounds. The technique ensures a perfect balance between the brightest and darkest areas of your photo, resulting in well-exposed and visually striking images.
- Creative Expression: HDR allows you to showcase your artistic vision like never before. You have the freedom to experiment with various exposure settings, creating dramatic and surreal images that evoke emotions and awe.
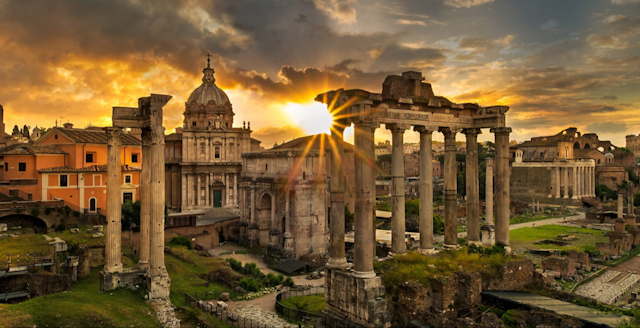
- Interior and Architecture Photography: In architectural and interior photography, achieving ideal lighting conditions can be demanding. HDR photography comes to the rescue by providing well-lit and balanced images that showcase the space’s ambiance and design.

Photo by Depositphotos
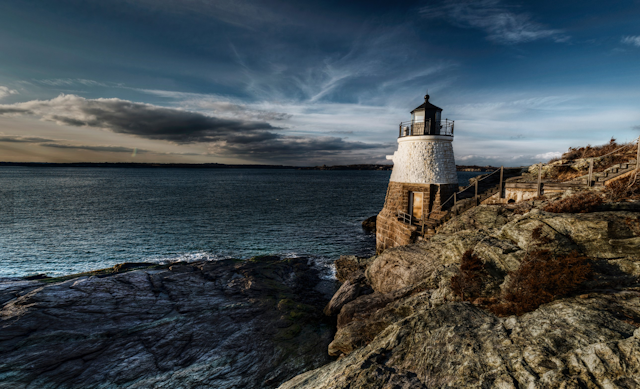
- Dynamic Landscapes: Landscape photographers benefit greatly from HDR, as they often encounter challenging lighting conditions in nature. By using HDR, you can capture the intricate beauty of landscapes, from sunrise to sunset, in all their natural splendor.
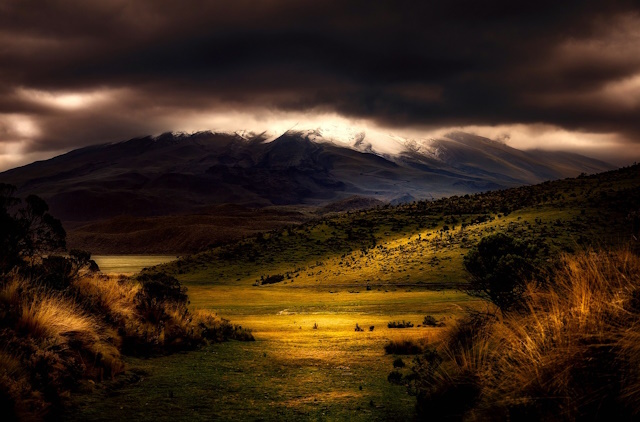
Image by David Mark from Pixabay
- Reduced Noise: The multiple exposures used in HDR photography can help reduce noise in your images, particularly in low-light situations. This results in cleaner and more appealing photographs.
- One Click, Multiple Results: Once you’ve taken the bracketed exposures, creating an HDR image is just a few clicks away with specialized software. This efficient workflow allows you to spend more time behind the camera, capturing captivating scenes.
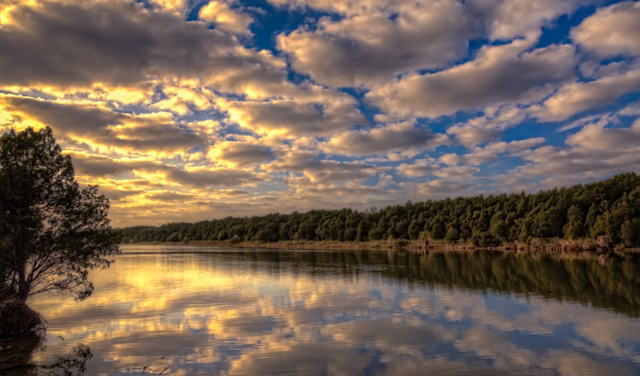
In conclusion, HDR photography is a powerful and rewarding technique that empowers photographers to go beyond the limitations of traditional photography. It opens up a world of possibilities, from landscape vistas to architectural wonders, providing a gateway to create visually striking and captivating images. So grab your camera, explore the wonders of HDR, and unlock the full potential of your photography skills. Happy shooting!
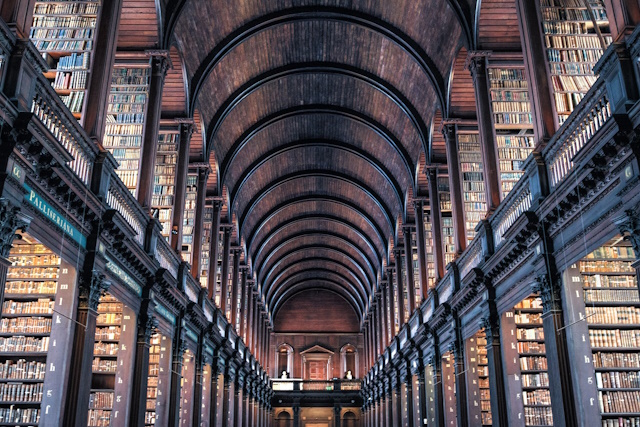
Image by Rudy and Peter Skitterians from Pixabay
Mastering HDR Photography
Gear & Settings
- Necessary Equipment and Gear
To embark on your journey into HDR photography, you’ll need a few essential pieces of equipment. Firstly, a digital camera with manual exposure settings is crucial to have full control over your shots. A tripod is equally important to maintain stability during multiple exposures.
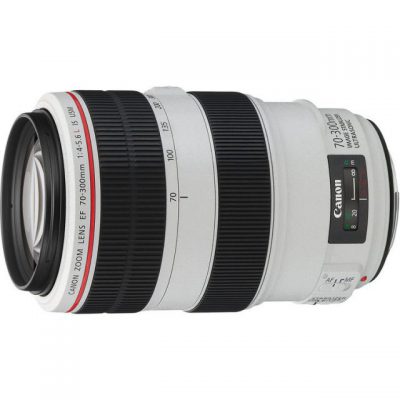
Furthermore, invest in a remote shutter release or use your camera’s built-in timer to avoid camera shake when capturing bracketed shots. Additionally, carrying a wide-angle lens will allow you to encompass more of the scene, making it ideal for landscape and architectural photography.
- Camera Settings for HDR Photography
Mastering the right camera settings is vital for successful HDR photography. Start by switching your camera to manual mode, enabling you to control both aperture and shutter speed. Shooting in RAW format is highly recommended, as it preserves more image data for post-processing.
For bracketing, set your camera to capture at least three exposures: one properly exposed, one underexposed, and one overexposed. The exposure increments will depend on the scene’s dynamic range, but generally, a 2-stop bracket (e.g., -2, 0, +2) works well.
Remember to turn off any image stabilization when using a tripod, as it can potentially introduce slight movement. Lastly, ensure that your camera’s focus is consistent across all bracketed shots by using manual focus or switching to autofocus and locking the focus before starting the bracketing sequence.
- Choosing the Right Subjects for HDR Shots
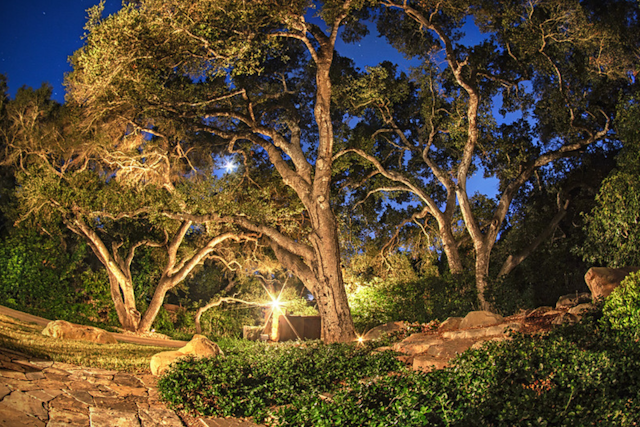
Not all scenes are ideal for HDR photography, so selecting the right subjects is key. High-contrast scenes with a wide range of brightness levels, such as sunsets, sunrises, or interiors with windows, are perfect candidates for HDR.
Landscape photography, particularly when the sky is brighter than the foreground, presents an excellent opportunity for HDR to capture the full beauty of the scene. Similarly, architecture and interior photography can greatly benefit from HDR to showcase details in both highlights and shadows.
Look for scenes with distinct textures, intricate details, and a mix of light and shadow for stunning HDR results. Experiment with different subjects to discover the magic of HDR and how it can transform ordinary scenes into extraordinary works of art.

Image by David Mark from Pixabay
Capturing Multiple Exposures
- Bracketing: The Key to HDR Success
In the HDR photography technique, bracketing is the secret sauce that unlocks the magic of capturing multiple exposures. Exposure Bracketing involves taking a series of shots of the same scene at different exposure levels.
The goal is to cover the entire dynamic range of the subject, capturing details in both the brightest highlights and the darkest shadows. Typically, you’ll take three bracketed shots: one correctly exposed, one underexposed, and one overexposed. This range ensures that you have all the necessary data to create a well-balanced and visually stunning HDR image.
- Setting Exposure Values for Bracketed Shots
When setting exposure values for bracketed shots, it’s essential to consider the scene’s dynamic range. Start by determining the appropriate exposure for the mid-tones, which is usually the average exposure for the entire scene. From there, you can adjust your camera settings to capture underexposed and overexposed shots.
The exposure increments will depend on the scene’s contrast, but a common approach is to use 1 to 2-stop intervals between each shot. For instance, if your mid-tone exposure is at f/8, 1/125s, you might set your underexposed shot to f/8, 1/500s and your overexposed shot to f/8, 1/30s.
- Tips for Bracketing
- Shutter Speed over Aperture: When bracketing exposures for HDR photography, focus on changing the shutter speed rather than the aperture. Altering the aperture value can affect the camera’s depth of field, potentially leading to unwanted blurry images in the final composite. To maintain a consistent depth of field, shoot in Aperture Priority or Manual mode while adjusting the shutter speed to achieve different exposures.
- Choose RAW Format: Whenever possible, shoot in RAW format to gather the most image data for post-processing. RAW files contain 12 or 14 bits of data per channel, providing more flexibility in editing and preserving finer details and colors in the image. If your camera doesn’t support RAW, shooting in JPEG is an alternative, but keep in mind that JPEG files are only 8-bit, which can limit the post-processing capabilities.
- Embrace Tripod Stability: To achieve unparalleled consistency in your bracketed shots, using a tripod is highly recommended. A tripod ensures that each frame is perfectly aligned, minimizing any movement between shots. This is especially crucial when capturing scenes with intricate details and when working in low-light conditions.
- Steady Support for Handheld Shots: If you find yourself without a tripod, try to steady yourself against a firm object to eliminate inconsistencies between frames. Lean against a wall, a rock, or any stable surface to reduce camera shake and improve the chances of capturing sharp handheld bracketed shots.
- Avoid Manipulating Single RAW Images: Some misguided advice suggests manipulating a single RAW image’s exposure values (Highlight and Shadow) and then combining them for HDR processing. However, this approach is not recommended as it does not replace the actual capturing of multiple exposure brackets. True HDR involves capturing different exposures, which provide a wider range of dynamic details that cannot be fully replicated by adjusting a single RAW image.
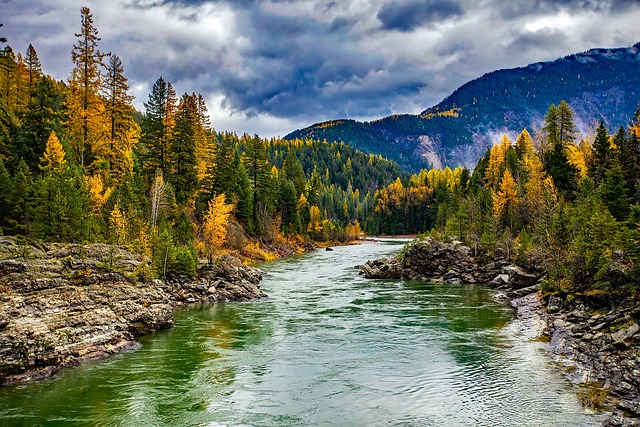
Image by David Mark from Pixabay
HDR Post-Processing Techniques
- Selecting the Best Software for HDR Editing
When it comes to HDR photography technique, choosing the right software for editing plays a crucial role in bringing out the best in your images. Several options are available, each with its unique features and capabilities. Look for software that allows you to merge bracketed exposures seamlessly and provides advanced tools for adjusting tone mapping, enhancing details, and improving contrast. Popular choices include Adobe Photoshop, Luminar NEO (Previously called Aurora), and Photomatix Pro. Evaluate their user-friendly interfaces and compatibility with your camera’s RAW files before making your decision.
-
Merging Bracketed Exposures
After capturing your bracketed shots, the next step in the HDR photography process is merging them together. Most HDR software simplifies this task, and the process typically involves loading the bracketed images into the program and letting it work its magic.
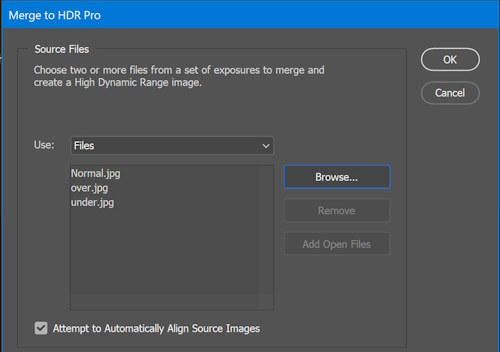
For example, when using Photoshop CC, click (File > Automate > Merge to HDR Pro) to load the bracketed files to Photoshop.
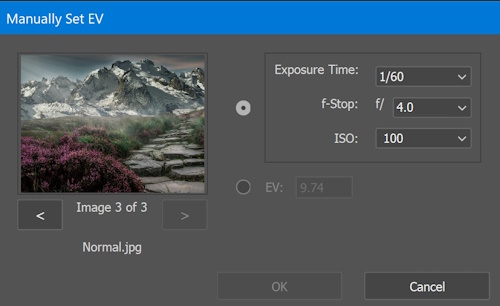
After loading the bracketed files, the software requested you to enter the exposure values for each loaded file.
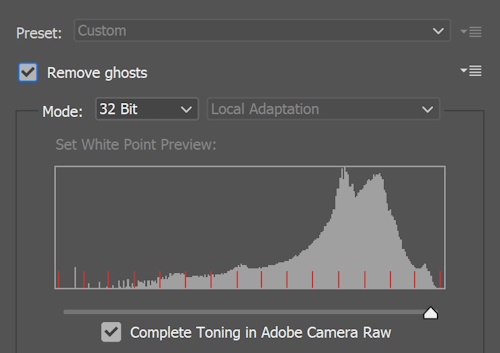
Then, the software aligns the exposures, eliminating any slight camera movements between shots, and blends them to create a single HDR image. This seamless merging ensures that all the details from each exposure are combined, resulting in a high-quality and dynamic photograph.
-
Adjusting Tone & Enhancing Details and Contrast
Finally, Photoshop allows you to retouch the final HDR image using the Camera Raw filter. You can adjust the clarity, contrast, texture, etc.
Image by David Mark from Pixabay
How to Avoid Common HDR Pitfalls
-
Overcooked HDR:
One of the most common pitfalls in the HDR photography technique is overcooking the final image. While HDR allows you to enhance details and dynamic range, it’s essential to strike the right balance. Avoid going overboard with saturation, contrast, and other adjustments, as it can result in an unrealistic and unnatural appearance. Instead, aim for a natural and appealing look that highlights the beauty of the scene without overwhelming the viewer. Remember, subtlety is often the key to creating visually pleasing HDR images that stand the test of time.
-
Handling Ghosting and Artifacts
Ghosting and artifacts can be troublesome issues when combining multiple exposures in HDR. Ghosting occurs when there are moving elements in the scene between shots, such as people, vehicles, or swaying branches. To avoid ghosting, try to capture bracketed exposures in scenes with minimal movement or use a faster shutter speed to freeze motion.
Artifacts, on the other hand, can manifest as strange halos, color shifts, or unnatural textures in your HDR images. These artifacts are often a result of aggressive tone mapping or merging errors. To handle artifacts, consider using HDR software with advanced algorithms and pay attention to the settings during the merging process. Additionally, opt for manual blending or exposure fusion methods if you encounter persistent artifact issues.
-
Dealing with Noise in HDR Photos
HDR photography can sometimes lead to an increase in digital noise, especially in the shadow areas of the image. Noise can be distracting and diminish the overall quality of your photo. To reduce noise, start by shooting at the lowest ISO possible to maintain image clarity and minimize digital noise. Additionally, during post-processing, use noise reduction tools sparingly and only apply them to the areas where noise is most prominent. Strive for a balance between noise reduction and preserving the essential details in your HDR images.
In conclusion, while the HDR photography technique opens up new creative possibilities, it also comes with some common pitfalls to be aware of. Avoid overcooked HDR by finding the right balance in your post-processing adjustments. Handle ghosting and artifacts by choosing appropriate scenes and using advanced HDR software. When dealing with noise, shoot at a low ISO and apply noise reduction selectively during editing.
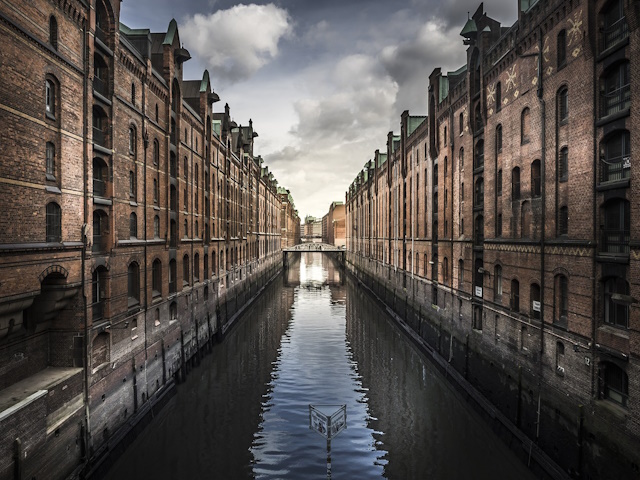
Image by fradellafra from Pixabay
Advanced HDR Photography Techniques
-
Creating Panoramic HDR Images
Combining the power of panoramic photography with HDR techniques can result in breathtaking and immersive images. To create panoramic HDR images, start by capturing a series of bracketed shots for each section of the panorama. Ensure that there is enough overlap between consecutive shots to aid in seamless stitching during post-processing. Use a sturdy tripod to maintain consistent framing and alignment.
After capturing the bracketed shots, process each set into individual HDR images. Then, use panorama stitching software to merge the HDR images into a panoramic composition. The result is a stunning wide-angle view with an extended dynamic range that captures the essence of vast landscapes and expansive scenes. Remember, practice and attention to detail are essential for achieving flawless panoramic HDR images.
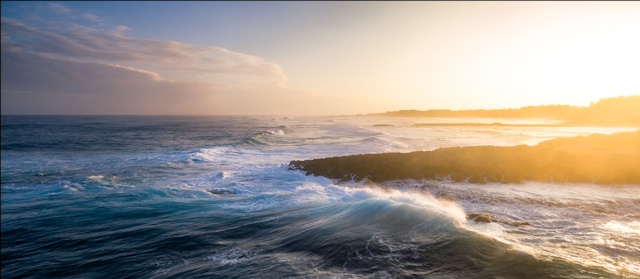
Photo by Alan Fullmer
-
HDR Timelapse Photography
Combining HDR with timelapse photography adds a dynamic and visually engaging element to your projects. To create an HDR timelapse, set up your camera on a stable tripod and choose a captivating scene with changing lighting conditions. Capture a series of bracketed shots at regular intervals throughout the time-lapse sequence.
During post-processing, convert each bracketed set into an HDR image and export them as individual frames. Then, use video editing software to compile the HDR frames into a seamless timelapse video. The result is a mesmerizing display of evolving light and shadows, revealing the beauty of the scene over time. HDR timelapse photography offers a unique way to tell stories and showcase the passage of time in a visually striking manner.
-
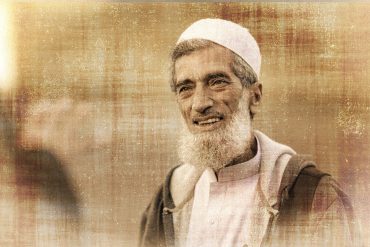
HDR Portraits:
HDR photography technique can also be applied to portrait photography, enhancing the visual impact and depth of your subjects. When shooting HDR portraits, it’s crucial to strike a balance between enhancing details and maintaining a natural look. Avoid over-processing the skin and facial features, as this can lead to unrealistic and unflattering results.
Instead, focus on using HDR to accentuate the finer details in the subject’s eyes, hair, and clothing. HDR can add depth and dimension to portraits, making them more captivating and evoking emotions in the viewer. Use HDR sparingly and with a gentle touch to create compelling portrait images that retain their authenticity and the essence of the person being photographed.
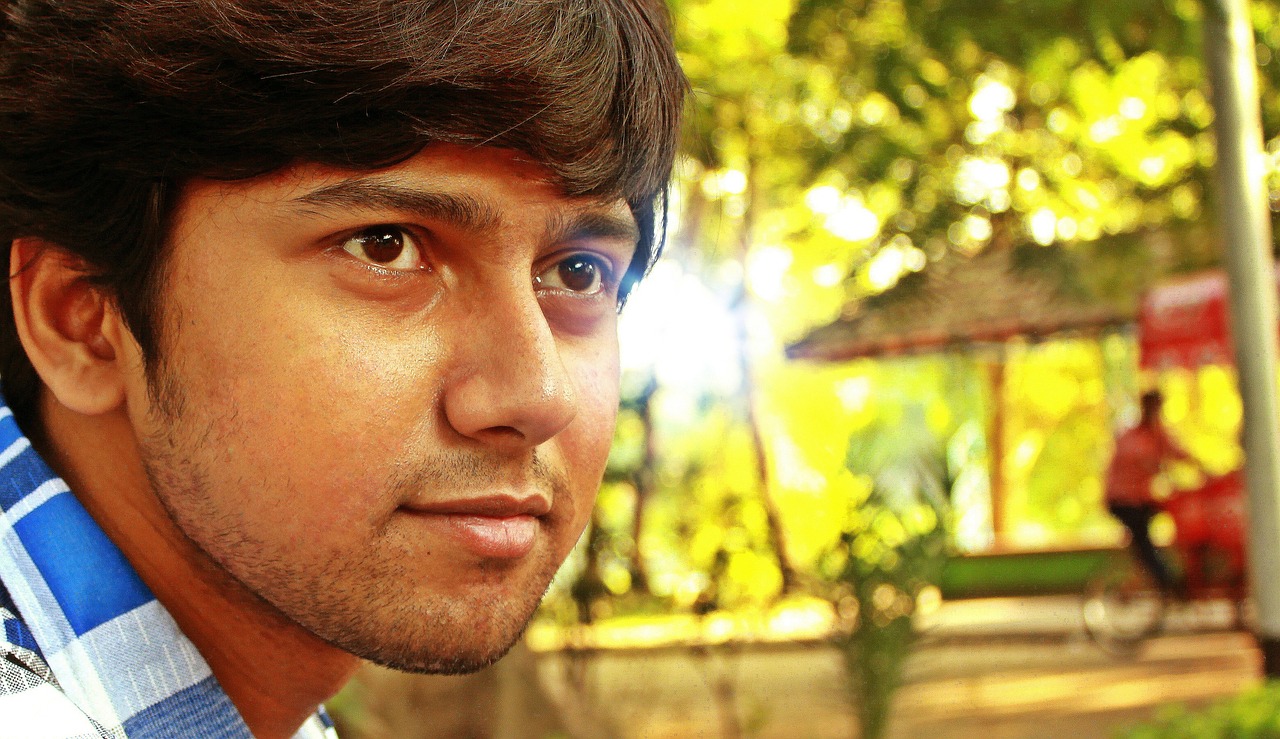
Image by Shouvik Raychowdhury from Pixabay
HDR Photography Inspiration
-
Showcasing Famous HDR Photographers’ Work
Finding inspiration for your HDR photography technique can be as simple as looking to the works of famous HDR photographers. Many talented artists have honed their skills in this niche, producing awe-inspiring images that push the boundaries of creativity. By studying their work, you can gain valuable insights into composition, lighting, and post-processing techniques.
Follow their social media accounts, visit their websites, or explore photography exhibitions to immerse yourself in their captivating creations. Observe how they use HDR to convey emotions, capture stunning landscapes, and highlight the beauty of their subjects.
-
Finding Inspiration in HDR Photography Communities
Engaging with HDR photography communities is a fantastic way to find inspiration and connect with fellow enthusiasts. Online platforms, such as forums, social media groups, and photography websites, host vibrant communities of photographers eager to share their knowledge and showcase their work. Participate in discussions, seek feedback, and learn from the experiences of others. By sharing your own HDR images, you can receive constructive criticism and valuable encouragement to refine your technique further. Being a part of an active and supportive community can motivate you to push your creative boundaries and unlock your full potential in HDR photography.

Image by David Mark from Pixabay
Related posts
What Is Exposure Bracketing In Photography?
The Best HDR Software- Photomatix Pro 5
How To Use The Exposure Compensation
Getting The Best Photos Sharpness By Using Photo Stacking
Bracketing – The Best Way To HDR Photography
Thanks for reading, I hope you enjoyed the article, in case you have any questions just drop them below & I will be happy to answer you.
The Featured Image by David Mark from Pixabay
If you enjoy the site, don’t forget to subscribe, we will only inform you when a new article is posted.


I thoroughly enjoyed reading your article on mastering HDR photography! Your explanation of how HDR technique enhances detail and balances exposures is really insightful. Your breakdown of the necessary equipment and camera settings provides a solid foundation for anyone looking to dive into this technique. I particularly appreciated your tips on dealing with common issues like ghosting and artifacts – those are challenges many beginners face. Your mention of panoramic HDR and HDR timelapse photography opened up exciting possibilities I hadn’t considered before. However, I’m curious about the impact of HDR on portrait subjects. How does the technique affect skin tones and facial features while maintaining a natural look? Thanks for sharing such a comprehensive guide!
I’m delighted you found the HDR photography article insightful! HDR can indeed create stunning results by enhancing details and exposures. Dealing with issues like ghosting and artifacts is crucial, and I’m glad you found those tips helpful.
Regarding portrait subjects, HDR can be used creatively but requires careful handling. It’s important to maintain a natural look, focusing on subtlety to retain skin tones and facial features. You might want to blend exposures selectively or use software that offers control over specific areas. Experimentation and post-processing finesse will help you achieve appealing HDR portraits while preserving the authentic beauty of your subjects. Keep exploring and capturing those captivating moments!
Hello, it’s Tripp!
Where can I find a good camera that will take pictures with all of these qualities? As a kid, I have always loved photography and this has been a big help for me and I am excited to get started with this! I have just never been able to find a decent camera and it has been my biggest struggle.
I’m thrilled to hear about your passion for photography! Finding the right camera can make a significant difference in your journey. There are several reputable options available that can deliver the qualities you’re looking for. Brands like Canon, Nikon, Sony, and Fujifilm offer a range of cameras suitable for different skill levels.
For beginners, mirrorless cameras like the Sony Alpha a6000 or Fujifilm X-T200, and DSLRs like the Canon EOS Rebel T7i or Nikon D3500 are popular choices. These cameras offer a balance of image quality, ease of use, and versatility.
When choosing a camera, consider factors such as your budget, preferred type (mirrorless or DSLR), and whether you plan to invest in interchangeable lenses down the line. It’s a good idea to visit a camera store, if possible, to get a hands-on feel before making a decision.
Remember, a camera is a tool, and while it’s important, your creativity and skills will ultimately determine the quality of your photographs. Enjoy your photography journey and the exciting world of capturing moments!