

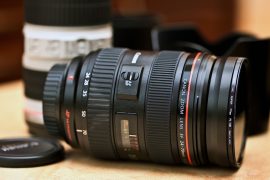
When it comes to capturing the smallest details of the world around us, great lighting plays a vital role in bringing those little wonders to life.
Macro photography focuses on capturing details up close, magnifying them to reveal intricate textures and intricate detail. Understanding and mastering the art of lighting is absolutely essential to achieving stunning results in this particular shoot.
What is Macro Photography Lighting?
In simple terms, Macro Photography Lighting refers to the techniques and equipment used to illuminate small subjects at close range. It involves manipulating light sources to create the perfect balance between shadows and highlights, accentuating the subject’s beauty and revealing its subtle nuances. By controlling the way light interacts with the subject, photographers can evoke emotions and tell compelling stories through their images.
The Importance of Proper Lighting in Macro Photography
Proper lighting is the backbone of great photography success. If you get the lighting right, a random shot can turn into a stunning masterpiece. Why is it so important, you may ask? Well, light affects every aspect of photography – from color and contrast to the focus and depth of your images.
Subjects in the world of macro photography tend to be small and fragile, parts of them can easily get lost in the shadows or become too exposed in strong light With precise control of light you can convey the beauty, texture, and detail of a subject later, giving the viewer the feeling of an intimate experience of the subject.
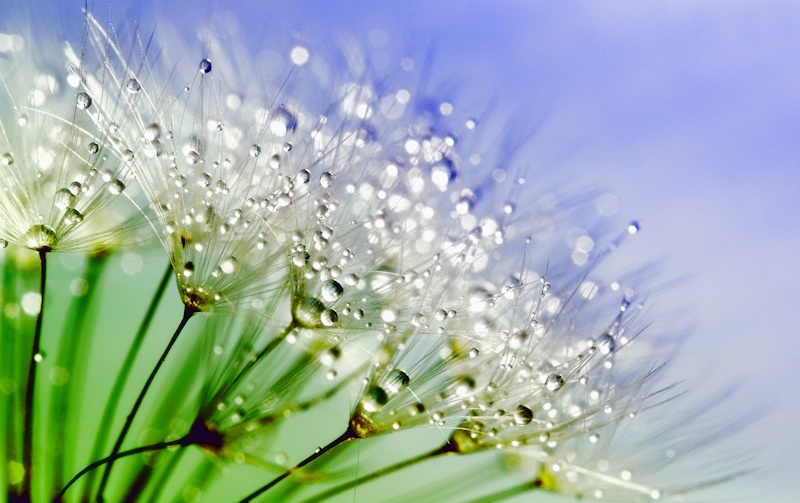
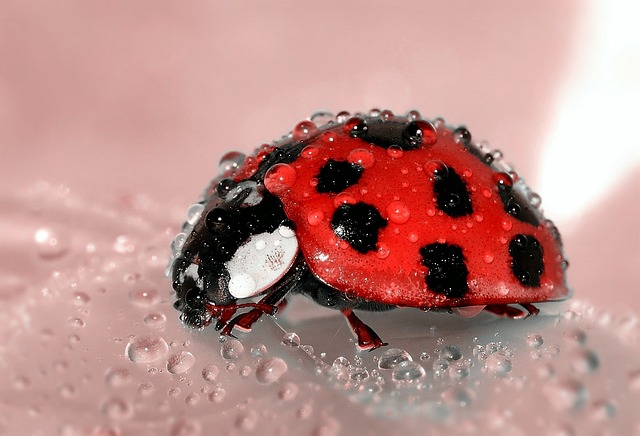
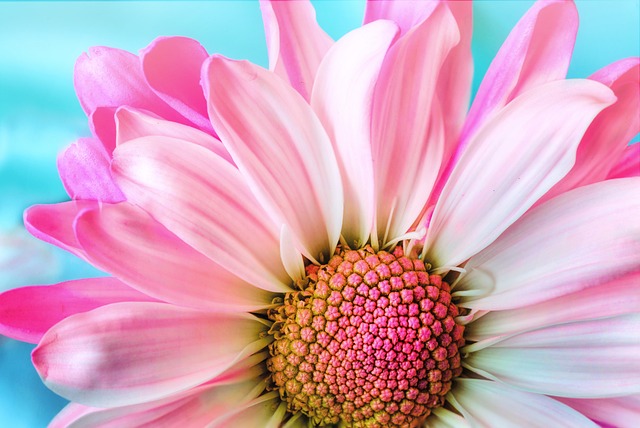 Image by Jill Wellington from Pixabay
Overview of the Blog Post
In this blog post, we will Dive into Macro Photography Lighting with our comprehensive guide. Learn essential techniques, equipment recommendations, and troubleshooting tips to enhance your macro shots. Uncover the magic of lighting and elevate your artistry today. By the end of this blog post, you’ll feel confident and well-equipped to embrace the magic of Macro Photography Lighting, elevating your shots to a whole new level of artistry and expression. So, let’s dive in and discover the captivating world of macro photography together!
Understanding Macro Photography Lighting
Key Concepts and Terms
Before we embark on our captivating journey into the world of Macro Photography Lighting, it’s essential to lay the groundwork by familiarizing ourselves with key concepts and terms that will serve as our guiding stars as we navigate through the realm of light and shadows in macro photography.
- Intensity: The measure of light’s strength that falls upon your subject. Think of it as the volume knob for your lighting setup. Adjusting intensity allows you to create a dynamic range of brightness and contrast in your macro shots, shaping the visual impact.
- Direction: Imagine light as a performer on a stage, casting its brilliance from different angles. The direction of light determines the placement of shadows and highlights on your subject. Experimenting with different angles can drastically alter the mood and visual texture of your photographs.
- Diffusion: Think of diffusion as nature’s softening filter for light. By dispersing light through diffusers or modifiers, you can reduce the harshness of shadows, creating a gentle and even illumination across your subject. Diffusion is your secret weapon for achieving that delicate balance between light and shadow.
- Color Temperature: Just like your favorite filter on a photo app, color temperature adds a touch of mood to your images. Measured in Kelvin, it dictates whether your macro shot will have warm, golden hues or cool, bluish tones. Mastering color temperature allows you to convey emotions and atmosphere through the interplay of light.
- Contrast: Contrast is the storyteller in the world of macro photography lighting. It’s the juxtaposition between the brightest and darkest areas of your image. Playing with contrast can enhance the drama, emphasize textures, and draw the viewer’s eye to specific details, creating a visual narrative.
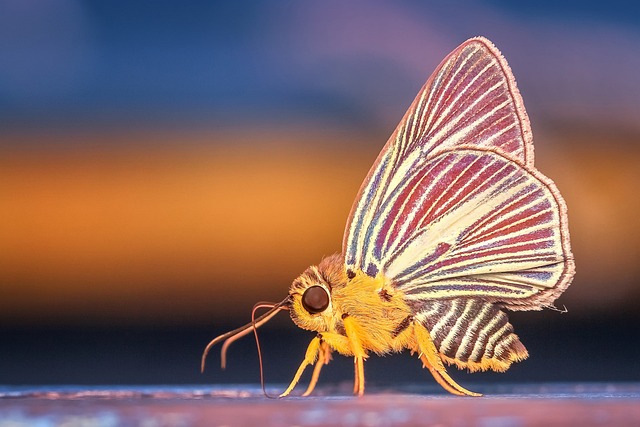 Image by Ronny Overhate from Pixabay
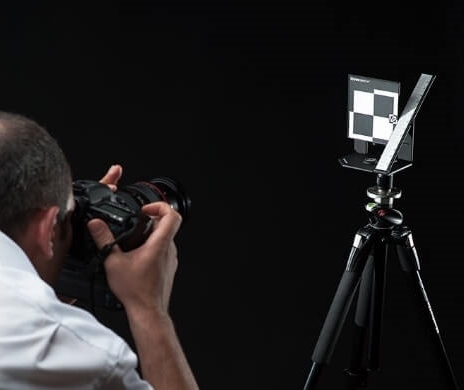
Types of Lighting Equipment for Macro Photography
Just as a painter chooses brushes and colors, a macro photographer selects lighting equipment to craft their visual masterpiece. Let’s delve into the instruments that possess the capability to shape and sculpt light within the domain of macro photography.
- On-Camera Flash: Picture this as your pocket-sized sun. It’s a convenient burst of light right atop your camera. Beware of its strong shadows; soften its effects with diffusers to achieve a balanced illumination.
- Off-Camera Flash: Cut the cord and set your light free. Detached from your camera, off-camera flash provides you with creative control over light direction and intensity. Use it to sculpt captivating highlights and shadows.
- Continuous Lighting: Enter the steady glow of continuous lighting, commonly seen in the world of filmmaking. This consistent light source gives you a real-time preview of how light interacts with your subject, allowing for precise adjustments on the fly.
- LED Panels: Imagine a wall of fireflies emitting light. LED panels are the energy-efficient fireflies of macro photography. They offer constant and adjustable lighting, making them versatile companions for illuminating your subjects.
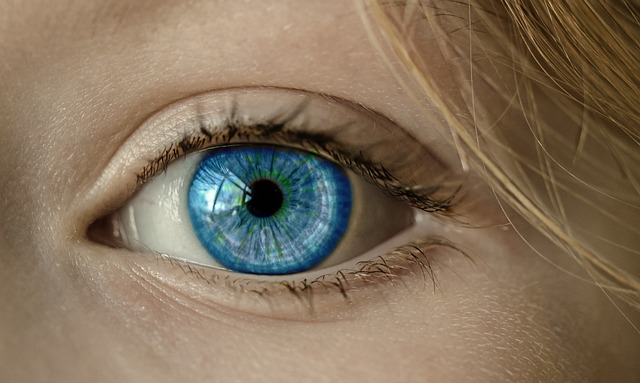
- Ring Lights: Ever noticed that enticing ring-shaped glint in someone’s eye? Ring lights, as the name suggests, encircle your lens, casting a flattering and even light that minimizes shadows. This makes them a favorite for capturing intricate details up close.
Natural Light and Its Role in Macro Photography
While artificial lighting steals the show in macro photography, we mustn’t overlook the enchanting allure of our oldest and most reliable source of illumination: natural light.
- Soft Daylight: Early mornings and late afternoons gift us with soft, diffused sunlight. It’s like a gentle embrace that unveils the delicate textures of your subject, adding a touch of enchantment.
- Backlighting: Imagine your subject framed by a radiant halo. Backlighting places the light source behind your subject, creating a captivating glow that accentuates outlines and contours.
- Side Lighting: The sun takes the stage from the side, casting shadows that reveal every curve and crevice. Side lighting adds depth and three-dimensionality to your macro shots, transforming them into living, breathing art.
- Overcast Sky: Clouds become nature’s softbox, scattering light evenly and minimizing harsh contrasts. An overcast sky serves as your large-scale diffuser, wrapping your subject in gentle illumination.
- Golden Hour: Behold the golden hour, a magician’s hour just after sunrise or before sunset. It paints everything with warm, golden tones, adding a touch of ethereal beauty to your macro photographs.
As you embark on your journey through macro photography lighting, keep these concepts close to your heart. They’ll be your guiding stars as you explore and experiment, unveiling the hidden wonders that only the interplay of light and shadow can reveal.
Mastering Macro Photography Lighting Techniques
-
Managing Shadows and Highlights
Managing shadows and highlights is an art that can transform your images from ordinary to extraordinary. Shadows add depth and dimension, while highlights accentuate details, striking a perfect balance to create visual harmony.
By adjusting your light source’s position and intensity, you can control the interplay of shadows and highlights. For instance, casting a soft side light can produce elegant gradients, revealing intricate textures. Experiment with angles to manipulate shadow length and direction, enhancing the three-dimensional feel of your subjects.
-
Controlling Light Intensity
Mastering light intensity is akin to wielding a magical wand in macro photography. It enables you to dictate the mood, drama, and overall impact of your shots. Intensity adjustments influence the contrast between light and dark areas, shaping the visual story you wish to tell.
Explore your equipment’s settings to modify the power output of your lighting sources. Dim the intensity for a delicate and dreamy ambiance or crank it up for bold and dynamic compositions. By deftly controlling light intensity, you can guide the viewer’s gaze to your subject’s focal points, creating captivating visual narratives.
-
Angles and Direction of Light
The angle and direction from which light strikes your subject are pivotal in macro photography. The slightest change can completely transform the mood and texture of your image. Frontal lighting minimizes shadows, revealing intricate details, while side lighting adds depth and drama.
Experiment with varying angles – low angles can emphasize texture, while high angles create a sense of depth. Don’t hesitate to move around your subject, observing how light interacts from different viewpoints. With each shift, you’ll unlock new perspectives and artistic possibilities.
-
Using Diffusers and Reflectors
Diffusers and reflectors are essential tools for sculpting macro photography lighting. Diffusers soften harsh light, creating a gentle glow that reduces harsh shadows. They’re especially useful when working with bright sunlight or artificial light sources.
Reflectors, on the other hand, bounce light onto your subject, filling in shadows and adding a touch of sparkle to your images. These versatile accessories come in various colors, allowing you to play with warm and cool tones for artistic effects.
Further reading:
-
Creating Dramatic Effects with Macro Lighting
Consider backlighting to create stunning silhouettes or experiment with chiaroscuro (a technique that emphasizes strong contrasts between light and dark areas). By playing with light and shadow, you can tell intriguing stories and evoke powerful feelings through your macro compositions.
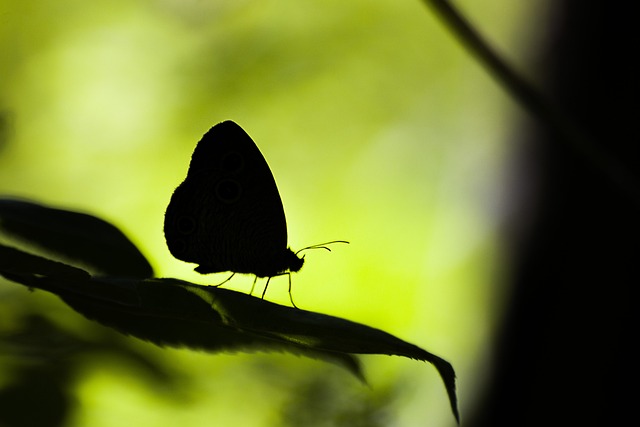
Image by Kai Vogel from Pixabay
Setting up a Macro Photography Lighting Kit
-
Must-Have Equipment and Accessories
Building your macro photography lighting kit is akin to assembling the tools of a craftsman. Each piece plays a crucial role in shaping your illumination masterpiece, whether you’re capturing the intricate details of a flower petal or the texture of a small object.
- Light Sources: Start with a reliable light source. On-camera or off-camera flashes, continuous LED panels, and ring lights are popular options.
- Diffusers and Reflectors: Soften harsh light with diffusers and bounce light onto your subject using reflectors.
Gear Recommendations
Godox MF12 MF12-K2 Macro Flash
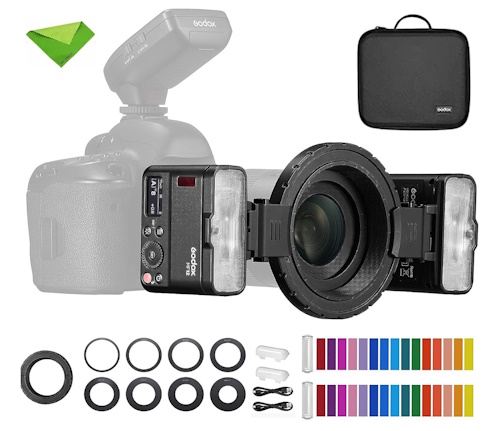
If you are looking for a powerful and versatile macro flash that is compatible with a wide range of camera brands, then the Godox MF12 MF12-K2 is a great option. It is well-built, easy to use, and provides excellent performance. The Godox MF12 MF12-K2 Macro Flash is a powerful and versatile macro flash that is compatible with a wide range of camera brands. It features a 12W output, 2.4G wireless control, TTL/M mode, and a built-in 3.7V/6.29W lithium battery.
It can be used as an on-camera or off-camera flash, and it can be triggered wirelessly by a Godox XPro, X1T, or X2T trigger. It also has a guide number of 36 (ISO 100, m), a recycle time of 0.01-1.7 seconds, and a flash duration of 1/200-1/20,000 second.
Here are some of the key features of the Godox MF12 MF12-K2 Macro Flash:
- 12W output: Provides plenty of light for macro photography
- 4G wireless control: Can be triggered wirelessly by a Godox XPro, X1T, or X2T trigger
- TTL/M mode: Supports TTL and manual flash modes
- Built-in 3.7V/6.29W lithium battery: Provides long battery life
- Guide number of 36 (ISO 100, m): Provides good light coverage for macro photography
- Recycle time of 0.01-1.7 seconds: Fast recycle time for continuous shooting
- Flash duration of 1/200-1/20,000 seconds: Provides precise control over the flash output
Here are the pros and cons of the Godox MF12 MF12-K2 Macro Flash:
Pros:
- Powerful output: 12W of output is plenty of light for macro photography, even in low light conditions.
- 4G wireless control: The MF12 can be triggered wirelessly by a Godox XPro, X1T, or X2T trigger, which gives you more flexibility in terms of placement.
- TTL/M mode: The MF12 supports both TTL and manual flash modes, so you can choose the mode that best suits your needs.
- Built-in 3.7V/6.29W lithium battery: The MF12 has a built-in rechargeable battery that provides long battery life.
- Guide number of 36 (ISO 100, m): The MF12 has a guide number of 36, which is good for macro photography.
- Recycle time of 0.01-1.7 seconds: The MF12 has a fast recycle time, so you can take multiple shots quickly without having to wait for the flash to recharge.
- Flash duration of 1/200-1/20,000 seconds: The MF12 has a fast flash duration, which is ideal for freezing fast-moving subjects.
- Affordable price: The MF12 is very affordable for a macro flash with this many features.
Cons:
- Can be bulky and heavy: The MF12 is a bit bulky and heavy, so it may not be the best choice for travel photography.
- Not as portable as a traditional flash: The MF12 is not as portable as a traditional flash, as it requires a stand to use.
- Requires a dedicated Godox trigger to use wirelessly: The MF12 requires a dedicated Godox trigger to use wirelessly, which can add to the cost.

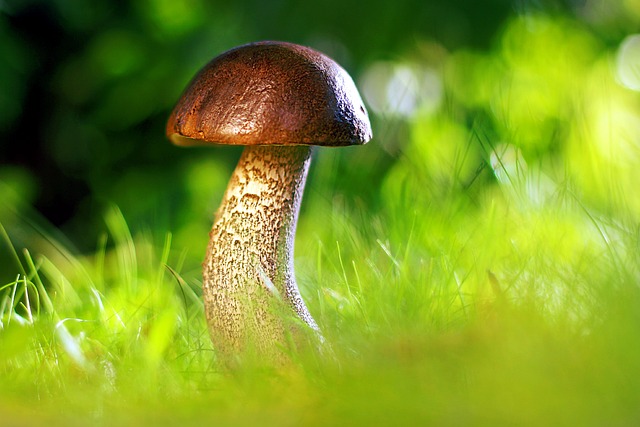
Image by Michael Reichelt from Pixabay
GODOX MF-R76 Macro LED Ring Flash Speedlite
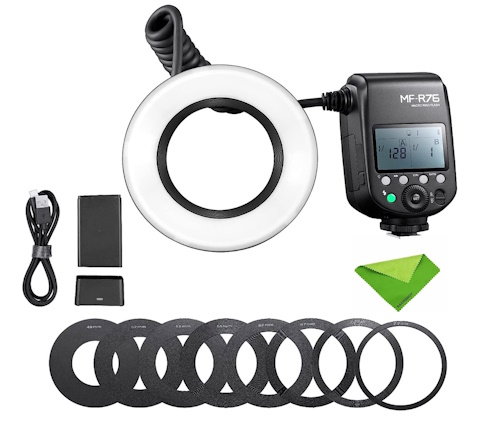
The GODOX MF-R76 Macro LED Ring Flash Speedlite is a powerful and versatile macro flash that is compatible with a wide range of camera brands. It features a 76W output, dual flash tubes, power adjustment from 1/128 to 1/1, 10 levels of power ratio, and a built-in rechargeable lithium battery.
The MF-R76 can be used as an on-camera or off-camera flash, and it can be triggered wirelessly by a Godox XPro, X1T, or X2T trigger. It also has a guide number of 38 (ISO 100, m), a recycle time of 0.05-1.5 seconds, and a flash duration of 1/200-1/20,000 second.
It is a great choice for macro photography, as it can provide the high output and precise lighting needed to capture close-up details. The MF-R76 is a well-built and easy-to-use flash that is a great value for the price.
Here are some of the key features of the GODOX MF-R76 Macro LED Ring Flash Speedlite:
- 76W output: Provides plenty of light for macro photography
- Dual flash tubes: Provides even and diffused light
- Power adjustment from 1/128 to 1/1: Provides precise control over the flash output
- 10 levels of power ratio: Allows you to create a variety of lighting effects
- Built-in rechargeable lithium battery: Provides long battery life
- Guide number of 38 (ISO 100, m): Provides good light coverage for macro photography
- Recycle time of 0.05-1.5 seconds: Fast recycle time for continuous shooting
- Flash duration of 1/200-1/20,000 seconds: Provides precise control over the flash output
Here are some additional pros and cons of the GODOX MF-R76 Macro LED Ring Flash Speedlite:
Pros:
- Powerful output
- Dual flash tubes
- Power adjustment from 1/128 to 1/1
- 10 levels of power ratio
- Built-in rechargeable lithium battery
- Long battery life
- Guide number of 38 (ISO 100, m)
- Fast recycle time
- Flash duration of 1/200-1/20,000 second
- Affordable price
Cons:
- Can be bulky and heavy
- Not as portable as a traditional flash
- Requires a dedicated Godox trigger to use wirelessly
Image by Hermann Traub from Pixabay
Special gear for Advanced Photographers
As your skills evolve, your macro photography lighting kit can also grow in sophistication.
Glendan Portable Photo Studio Light Box
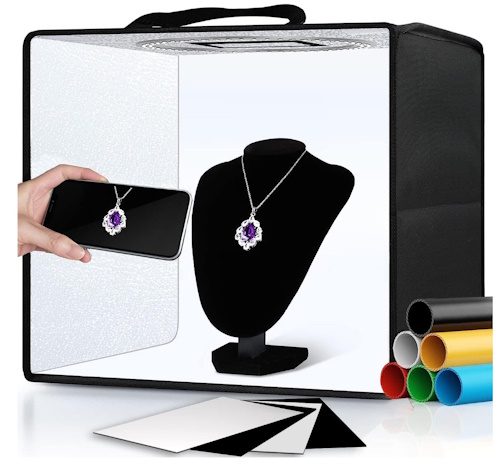
The Glendan Portable Photo Studio Light Box is a great option for photographers who want to take professional-looking product photos of small items like jewelry, cosmetics, and food. The light box is made of durable PVC material and folds up into a compact size for easy transport.
It includes 112 LED lights that can be dimmed to create the perfect lighting effect, and it comes with 6 different colored backdrops to choose from.
Here are some of the pros and cons of the Glendan Portable Photo Studio Light Box:
Pros:
- Portable and lightweight: The lightbox folds up into a compact size and weighs just 3.3 pounds, making it easy to transport and set up.
- Durable construction: The light box is made of durable PVC material that can withstand wear and tear.
- Dimmable LED lights: The 112 LED lights can be dimmed to create the perfect lighting effect for your product photos.
- 6 different backdrops: The lightbox comes with 6 different colored backdrops to choose from, so you can create a variety of different looks for your product photos.
- Affordable price: The Glendan Portable Photo Studio Light Box is very affordable for the features it offers.
Cons:
- Small size: The light box is only 12″ x 12″, so it is not suitable for taking photos of large items.
- Not suitable for outdoor use: The light box is not weatherproof, so it is not suitable for use outdoors.
- Requires batteries: The lightbox requires 8 AA batteries to operate, which can be a nuisance to change.
Image by PublicDomainPictures from Pixabay
IVISII G2 Pocket RGB Camera Light
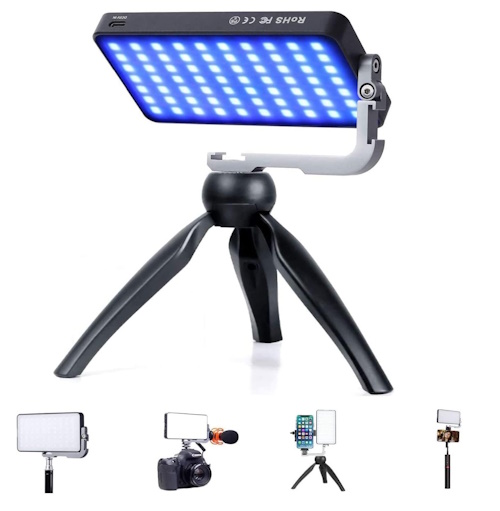
The IVISII G2 Pocket RGB Camera Light is a versatile and powerful light that can be used for a variety of applications, including video conferencing, video shooting, interviews, live streaming, YouTube, and studio lighting. It features a built-in 4300mAh rechargeable battery that provides up to 4 hours of runtime, a 360° full-color gamut with 9 light effects, and a high CRI/TLCI of 97. The light is also very compact and lightweight, making it easy to carry and transport.
Here are some of the pros and cons of the IVISII G2 Pocket RGB Camera Light:
Pros:
- Versatile and powerful light that can be used for a variety of applications
- Built-in 4300mAh rechargeable battery with up to 4 hours of runtime
- 360° full-color gamut with 9 light effects
- High CRI/TLCI of 97
- Compact and lightweight design
- Affordable price
Cons:
- The light can be somewhat bulky when used with the included tripod stand
- The light does not have a built-in diffuser, so you may need to purchase one separately if you want to soften the light
- The light does not have a wireless remote control, so you will need to adjust the settings manually
Overall, the IVISII G2 Pocket RGB Camera Light is a great option for anyone looking for a versatile and powerful light that is affordable and easy to use. It is perfect for a variety of applications, and it is sure to improve the quality of your videos and photos.
Here are some additional details about the IVISII G2 Pocket RGB Camera Light:
- The light has a brightness range of 0-100% and a color temperature range of 2600K-10000K.
- The light has 9 built-in light effects: RGB, Flash, TV, Candlelight, Party, Storm, Fireworks, Police Car, and SOS.
- The light has a smart LCD display that shows the brightness, color temperature, and battery level.
- The light comes with a mini tripod stand, a carrying case, and a user manual.

14Inch LED Macro Arm Light
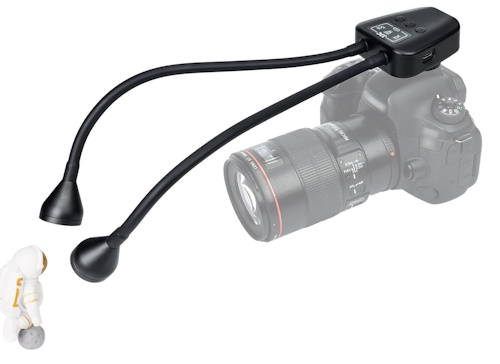
The 14Inch LED Macro Arm Light is a versatile and affordable light that can be used for macro photography, jewelry photography, and other close-up photography applications. It features two LED lights with 10 adjustable brightness levels, three lighting modes (left, right, and both), and a 5600K color temperature. The light is also very portable, with a flexible arm that can be extended to 29cm.
Here are some of the pros and cons of the 14Inch LED Macro Arm Light:
Pros:
- Versatile and affordable light for macro photography
- Two LED lights with 10 adjustable brightness levels
- Three lighting modes (left, right, and both)
- 5600K color temperature
- Flexible arm that can be extended to 29cm
- Portable and lightweight design
Cons:
- The light is not as powerful as some other macro lights on the market
- The light does not have a built-in diffuser, so you may need to purchase one separately if you want to soften the light
- The light does not have a wireless remote control, so you will need to adjust the settings manually
Here are some additional details about the 14Inch LED Macro Arm Light:
- The light is powered by a USB-C cable, which is included.
- The light has a battery life of about 2 hours on the highest brightness setting.
- The light is compatible with most DSLR and mirrorless cameras with a hot shoe mount.
- The light comes with a carrying case.
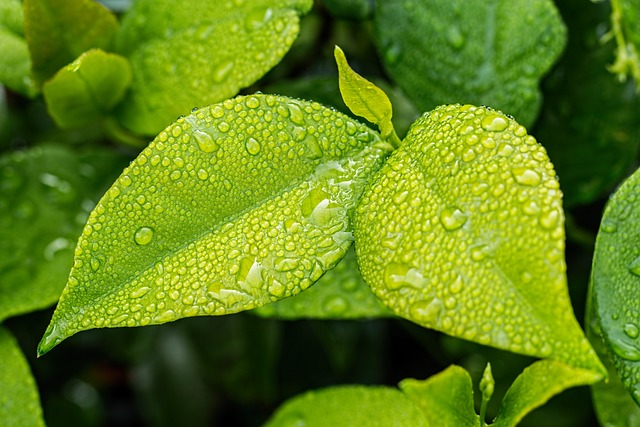
Image by Steve Buissinne from Pixabay
Practical Tips for Mastering Macro Lighting
Choosing the Right Lighting Setup for Different Subjects
Just as a painter selects the perfect brush for each stroke, your choice of lighting setup influences how your macro subjects come to life.
- Soft Light for Delicate Subjects: Flowers, insects, and other delicate subjects often benefit from soft, diffused light. Use diffusers or shoot during overcast conditions for even, gentle illumination.
- Bold Lighting for Textured Surfaces: Objects with intricate textures, like weathered wood or rough stones, thrive under dramatic lighting. Experiment with side lighting to emphasize texture and depth.
Working with Moving Subjects
Capturing the essence of a fluttering butterfly or a buzzing bee requires adaptability and quick thinking. When your subjects are in constant motion, continuous lighting sources like LED panels provide real-time visibility, allowing you to adjust as needed.
Macro Lighting for Indoor and Outdoor Shoots
Whether you’re indoors or exploring the great outdoors, lighting plays a pivotal role.
- Indoor Setups: Utilize a mix of artificial lighting sources, such as off-camera flashes and LED panels, to recreate natural lighting effects.
- Outdoor Magic: Embrace the sun’s ever-changing light during outdoor shoots. Position yourself to make the most of available light, or employ reflectors to manipulate it.
Overcoming Common Lighting Challenges in Macro Photography
Every photographer encounters challenges; it’s how we overcome them that defines our skill
- Harsh Shadows: Diffuse light using modifiers like softboxes or white sheets to soften shadows and create an even glow.
- Uneven Lighting: Reflectors can bounce light onto shadowed areas, balancing out the overall illumination.
- Color Casts: Control color temperature with white balance settings or Employ color correction gels on your light sources, it can neutralize color temperature disparities. Remember, you can also Fine-tune color temperature during post-processing to achieve the desired color rendition.
- Glare and Reflections: Adjust angles to minimize glare, altering the angle of your light source or your camera can minimize glare-causing reflections. Or attach a polarizing filter to your lens to mitigate glare and reflections from shiny surfaces.
- Limited Space: Experiment with compact lighting setups, like ring lights, to navigate tight spaces.
- Lighting relatively Larger Subjects: When your macro subject isn’t as tiny as a dewdrop, achieving even lighting can be a tad trickier. Use Multiple Light Sources: Employ multiple light sources from different angles to ensure uniform illumination.
Conclusion
As you embark on your macro photography journey, let’s illuminate the path with a quick recap of the essential lighting insights you’ve gained.
- Balance Shadows and Highlights: Skilful manipulation of shadows and highlights creates depth and dimension in your macro shots.
- Control Intensity: Adjust light intensity to set the mood and emphasize key features of your subject.
- Experiment with Angles: Play with different lighting angles to bring out textures and add visual interest.
- Diffusers and Reflectors: These magical tools soften the light and control its direction, enhancing your creative control.
- Master Dramatic Effects: Dive into dramatic lighting for captivating storytelling and emotional impact.
Becoming a maestro of macro photography lighting requires practice, patience, and a willingness to experiment. Don’t hesitate to venture into uncharted territory. Embrace failures as learning opportunities, and each successful shot will be a testament to your dedication.
Remember, the most exceptional photographers aren’t just recorders of light – they are sculptors, shaping and crafting the very essence of their subjects through the power of illumination. With these newfound insights, step confidently into the world of macro photography lighting and watch as your creations come to life in ways you never thought possible.
Related posts
Macro Photography Tips and Tricks – Guidelines & Examples
Best Flash for Macro Photography
Off Camera Flash For Beginners
What Is Ring Lighting For Photography?
Thanks for reading, I hope you enjoyed the article, in case you have any questions just drop them below & I will be happy to answer you.
The featured Image by InspiredImages from Pixabay
If you enjoy the site, don’t forget to subscribe, we will only inform you when a new article is posted.


This is a fascinating topic, especially for someone like me that didn’t take much interest in photography until I started my website. I try to take as many of my own photos as I can for my content, but they’re definitely not as good as I’d like them to be. I’m going to save this article for future reference, since I need all the help I can get. Lighting is definitely something I could use a lot of help with and you seem to have that covered quite well.
I’m glad to hear you found the topic fascinating and relevant to your journey! Photography can indeed make a significant difference in the visual appeal of your website content. Lighting plays a crucial role in enhancing the quality of your photos, and I’m pleased to know that the article provided valuable insights.
By saving the article for future reference, you’re taking a proactive step toward improving your photography skills. Learning and experimenting with lighting techniques can go a long way in elevating the overall aesthetic of your website.
If you ever have specific questions or need further guidance, feel free to reach out. Keep up the great work, and I wish you all the best in your journey of creating visually appealing content for your website!
This article brilliantly unveils the critical role that lighting plays in the captivating world of macro photography. The comprehensive guide on macro photography lighting techniques, equipment, and concepts is an invaluable resource for both beginners and experienced photographers alike. The emphasis on mastering the interplay between shadows and highlights, as well as the insights on controlling light intensity and experimenting with angles, brings a whole new level of artistry to macro compositions. The diverse range of lighting equipment recommendations, from the Glendan Portable Photo Studio Light Box to the IVISII G2 Pocket RGB Camera Light, adds practicality to the theory. The piece not only educates but also inspires, serving as a testament to the transformative power of mastering lighting in the realm of macro photography.
Your thoughts and insights on this article would be much appreciated! Is there a specific lighting technique or piece of equipment that resonates with your own macro photography journey?
Thank you for your enthusiastic and insightful comment! I’m thrilled to hear that you found the article on macro photography lighting techniques so valuable and inspiring.
In my own macro photography journey, I’ve personally been captivated by the beauty of using backlighting to create a stunning and ethereal atmosphere. The way light filters through translucent subjects, such as flower petals or leaves, can result in truly magical and dreamy images. Additionally, experimenting with diffusers and reflectors to manipulate light and minimize harsh shadows has been a game-changer for achieving more balanced and visually pleasing compositions.
It’s wonderful to see how the interplay between light and shadow can elevate macro photography into an art form of its own. Your feedback serves as a reminder of the transformative potential that mastering lighting holds, and I’m grateful for the opportunity to share in this journey of creative exploration. Keep experimenting and pushing the boundaries of your macro compositions – the possibilities are endless!