

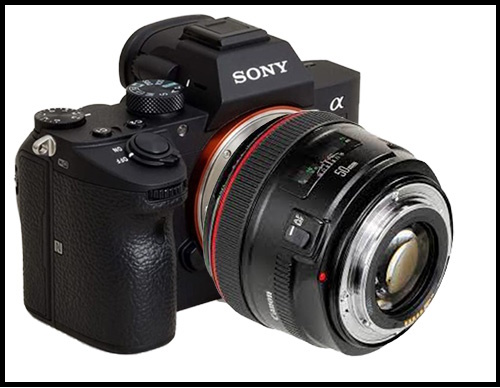
Freelensing is a unique photography technique that involves detaching the lens from your camera and holding it manually in front of the sensor. This creates a simulation of a tilt-shift and or a lensbaby effect, allowing you to have control over the focus and depth of field in your images. It’s a creative and experimental approach that breaks free from the traditional constraints of lens attachments.
Why Freelensing is Gaining Popularity in the Photography Community
- Creative Freedom: Freelensing offers photographers a whole new world of creative possibilities. By manually adjusting the lens position, you can achieve selective focus, dreamy bokeh, and unique blur effects that add an artistic touch to your images.
- Affordable Alternative: While tilt-shift lenses are expensive, freelensing provides an affordable alternative for photographers who want to experiment with tilt-shift effects. You can achieve similar results without breaking the bank.
- Embracing Imperfection: Freelensing embraces imperfections and unpredictability. The subtle movements and lens adjustments during freelensing create a sense of whimsy and add a touch of organic charm to your photographs.
- Enhancing Creativity and Skill: By mastering freelensing, you develop a deeper understanding of focus, depth of field, and lens behavior. This knowledge translates into improved skills and a greater ability to manipulate your camera settings to achieve desired effects.
Freelensing is not without its challenges, though. It requires practice, patience, and a willingness to embrace unexpected outcomes. However, the rewards of this technique are worth the effort. By exploring freelensing, you can expand your creative boundaries, add a unique touch to your photography, and stand out in the photography community.
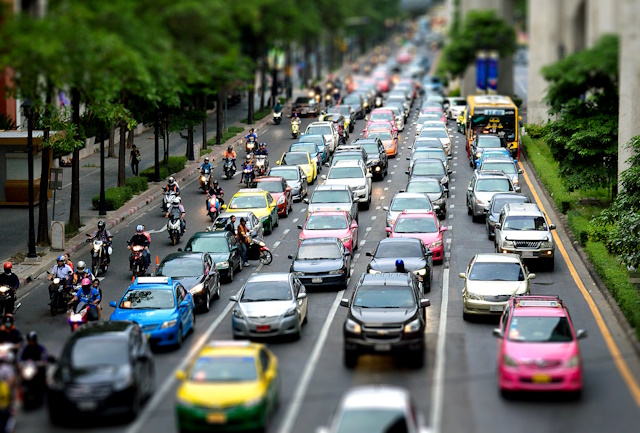
Photo by Depositphotos
The Concept and Principles Behind Freelensing
The unconventional approach of detaching the lens from your camera and manually holding it in front of the sensor allows you to manipulate the focus and depth of field in your images.
Let’s dive into the concept and principles that make freelensing such a fascinating technique.
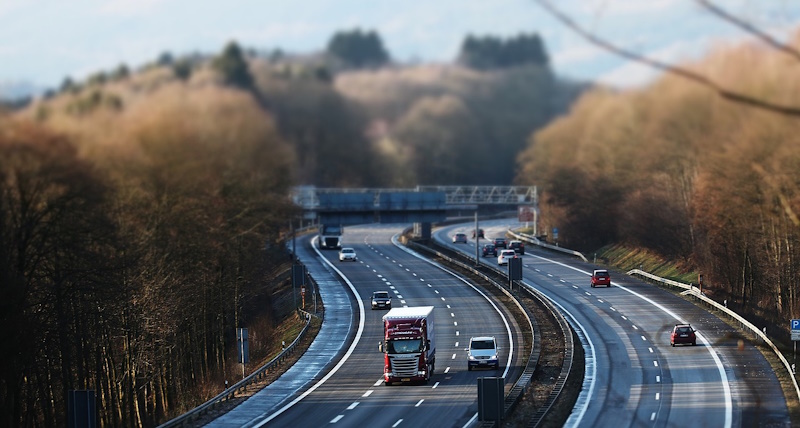
1. Understanding Depth of Field:
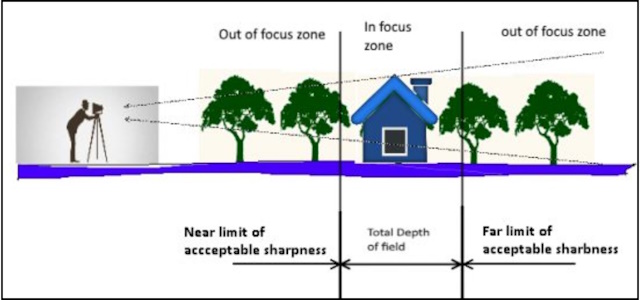
In photography, depth of field refers to the range of sharpness in an image, from the foreground to the background. With freelensing, you have the freedom to control this depth of field manually by:
-
Control the aperture:
Using a wide aperture (e.g., f/1.4, f/2) allows for a shallow depth of field. This means that only a small portion of the image will be in sharp focus, while the background or foreground gradually blurs.
While closing down the aperture (e.g., f/8, f/11) increases the depth of field. More elements in the scene will be in focus, resulting in a greater area of sharpness.
Lastly, the distance between the subject and the camera also influences the depth of field. The closer you are to the subject, the shallower the depth of field becomes. Experiment with different distances to achieve the desired effect.
2. Lens Tilting and Rotating Effect:
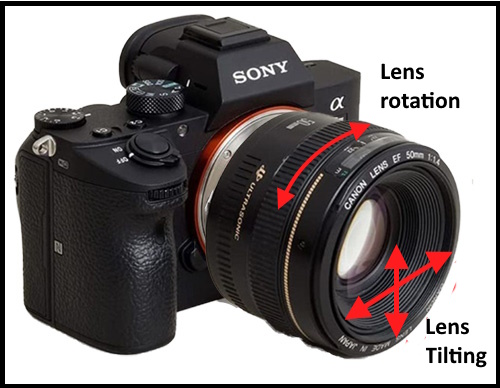
The tilt effect, traditionally achieved with specialized lenses called tilt-shift lenses, this effect can be recreated through freelensing.
When you tilt the lens, you change the orientation of the lens relative to the camera’s sensor plane. This tilting motion allows you to control the angle of the plane of focus. By tilting the lens away from the camera body, you can achieve a selective focus effect. This means that only a specific portion of the image will be in sharp focus, while the rest gradually blurs into a pleasing Bokeh.
On the other hand, rotating the lens refers to turning it around its axis while keeping it parallel to the camera’s sensor plane. This rotation can impact the orientation of the depth of field, affecting how the sharpness falls within the image.
By rotating the lens, you can alter the plane of focus and depth of field. For example, rotating the lens sideways can create a diagonal or horizontal tilt effect. This technique allows you to explore different angles and perspectives, giving you more control over how elements within the frame are rendered in focus or out of focus.
4. Reverse lens technique:
The reverse lens technique involves mounting a lens backward on the camera body, to increase its magnification, so a normal lens can be used as a macro lens. This technique can be used in freelensing photography. After detaching your lens from your camera, flip it around and hold it in front of the camera body with the rear element facing towards the subject. You got yourself a new macro lens!
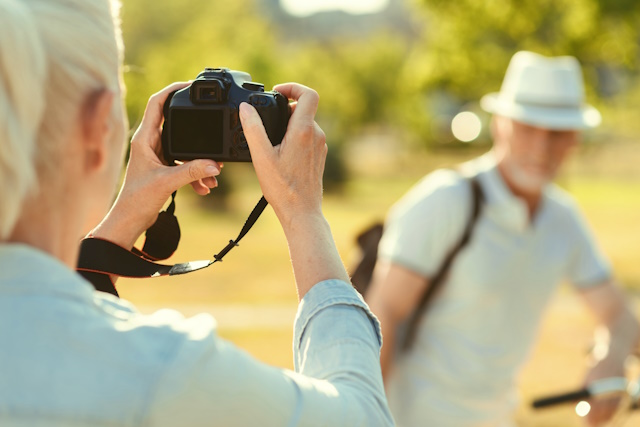
Photo by Depositphotos
Getting Started with Freelensing
1. Essential Equipment Needed for Freelensing
To begin your freelensing journey, you’ll need a few essential pieces of equipment. Here’s what you should have:
A camera: Any DSLR or mirrorless camera with interchangeable lenses will work for freelensing. Ensure it has manual focus capability and allows you to detach the lens.
Prime lenses: Prime lenses are ideal for freelensing due to their wider maximum apertures and superior image quality. They provide better control over depth of field and allow for stunning bokeh effects. Consider the following factors when choosing a lens:
- Focal length: A lens with a focal length between 35mm and 85mm is a popular choice for freelensing. This range provides versatility and allows for creative compositions.
- Wide aperture: Opt for lenses with wider maximum apertures (e.g., f/1.4, f/1.8) as they allow more light to enter the lens. Wider apertures also enable you to achieve a shallow depth of field and create beautiful Bokeh.
- Manual focus: Ensure the lens has a manual focus ring. Freelensing involves manually adjusting the focus, so a lens that allows precise manual focusing is essential.
A tripod: Although you do not need a tripod for freelensing photography, but it is highly recommended. A tripod will give you more control over the process, it will hold the camera for you. Holding both the camera and the lens in front of it with both hands can be tiring, especially if you are doing it for a long time. A tripod will help you to reduce fatigue, so you can focus on taking photos.

Photo by Depositphotos
2. Setting up your Camera for Freelensing
To get started, follow these steps to set up your camera for freelensing:
Enable Manual Mode:
Switch your camera to manual mode to have complete control over the settings. This allows you to adjust the aperture, shutter speed, and ISO according to your preferences and lighting conditions. Normally, set the aperture to a wide value (e.g., f/2.8 or wider), the ISO to lower values, and finally adjust the exposure for the above aperture value, ISO, and this will be your shutter speed
Detach the Lens:
Carefully detach the lens from your camera body by pressing the lens release button. Ensure a clean environment to minimize the risk of dust or debris entering the camera.
When you remove the lens from a camera while it is on, the lens settings will be reset to their default values. This includes the aperture, shutter speed, ISO, and white balance. The camera may also display a warning message, such as “Lens Not Attached.”
Hold the Lens Properly:
Hold the detached lens close to the camera’s sensor, ensuring no light enters through the disconnected mount. Maintain a firm grip on the lens to avoid accidental drops or mishandling.
Adjust the Focus Manually:
With the lens detached, rely on manual focus to achieve the desired sharpness. Move the lens closer or farther away from the camera to adjust the focus point. Be patient and experiment with different positions to find the perfect focus.
Here’s how you can master this important aspect of freelensing:
- Hold the detached lens close to the camera’s sensor, ensuring a secure grip.
- Move the lens closer to the camera to focus on objects nearer to you, and move it farther away to focus on distant subjects.
- Be patient and experiment with different positions to find the perfect focal point.
- Fine-tune the focus by making slight adjustments and checking the result through the camera’s LCD screen.

Photo by Depositphotos
Control the depth of field
One of the exciting aspects of freelensing is the control it gives you over the depth of field. Here’s how you can make the most of this creative freedom:
- Choose a wide aperture setting, such as f/2.8 or wider, to achieve a shallow depth of field and create a beautiful bokeh effect.
- Experiment with different aperture values to find the balance between a sharp subject and a pleasing background blur.
- Tilt or rotate the lens slightly to create a unique plane of focus, separating your subject from the background even more effectively.
- Explore various distances and angles to play with the depth of field, bringing different elements in your frame into focus while blurring others.
- Remember that the wider the aperture, the more challenging it can be to achieve precise focus.
Experimenting with Angles:
Tilting or rotating the lens while freelensing allows you to explore different angles and perspectives. This adds a dynamic and creative element to your images, enabling you to capture scenes in a unique and captivating way.
Safety Measures:
When freelensing, be mindful of the fragile nature of the equipment and the potential risks. Avoid excessive force or abrupt movements that could damage the lens or camera. Always secure the camera strap or hold it securely while freelensing to prevent accidental drops.
Practice, Practice, Practice:
Like any skill, freelensing requires practice to master. Take your camera out and experiment with different subjects, lighting conditions, and angles. The more you practice, the more confident you’ll become in achieving the desired results.
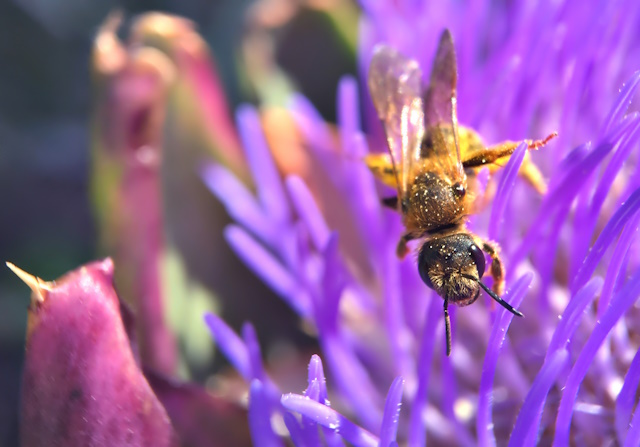
Photo by Depositphotos
Tips and Tricks for Achieving Desired Effects
To make the most of your freelensing experience and capture stunning images, consider these tips and tricks:
- Start with stationary subjects: When beginning with freelensing, it’s easier to practice still subjects before moving on to more dynamic scenes.
- Use a tripod or stabilize yourself: To minimize camera shake, use a tripod or brace yourself against a stable surface while freelensing.
- Experiment with different lighting conditions: Lighting plays a crucial role in photography, and freelensing is no exception. Try shooting in different lighting situations to see how it impacts your images.
- Embrace imperfections: Freelensing often results in unique imperfections like light leaks, lens flares, or vignetting. Embrace these characteristics as they can add a touch of creativity and personality to your photographs.
- Practice caution and protect your equipment: Freelensing involves handling your equipment differently, so be mindful of the lens and camera’s safety.
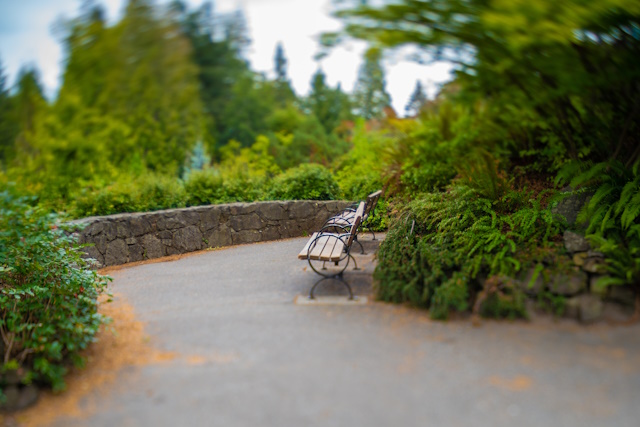
Photo by Depositphotos
How to Deal with Potential Issues: Dust and Lens Flares
While freelensing can bring a unique charm to your photographs, it’s important to be aware of potential challenges that may arise. Two common issues are dust and lens flares. Let’s explore how you can handle these challenges effectively:
Dust:
- Keep your camera sensor clean: Before embarking on a freelensing session, ensure that your camera sensor is free from dust and debris. Any particles on the sensor can appear as unsightly spots in your images. Use a sensor cleaning kit or seek professional cleaning if needed.
- Minimize dust exposure: When freelensing, there’s a chance of dust entering your camera body as the lens is detached. Be mindful of your surroundings and avoid dusty or windy environments. Additionally, handle the lens carefully to prevent dust from settling on the rear element.
- Regularly clean your lenses: Dust on the lens surface can affect image quality. Use a microfiber cloth or lens cleaning solution to gently clean the front and rear elements of your lenses. This helps ensure optimal image sharpness and clarity.
Lens Flares:
Understand lens flare characteristics: Lens flare occurs when bright light enters the lens and interacts with the lens elements, causing scattered reflections. While lens flares can add a creative touch, they can also reduce contrast and introduce unwanted artifacts.
- Control the light source: Be aware of the position and intensity of light sources when composing your shots. Adjust your shooting angle or use a lens hood to minimize the chances of lens flare.
- Experiment with lens positioning: Tilt or rotate the lens to control the direction and appearance of the lens flare. This experimentation can help you achieve desired artistic effects or eliminate unwanted flare.
- Use lens filters: Certain filters, such as a UV filter or a polarizing filter, can help reduce lens flare by minimizing reflections. Experiment with different filters to find the one that works best for your specific shooting conditions.
By being mindful of potential issues like dust and lens flares, you can take proactive steps to minimize their impact on your freelensed images. Regular cleaning, careful handling, and thoughtful composition can go a long way in ensuring clean and stunning photographs.

Photo by Depositphotos
Troubleshooting common problems in freelensing
There are several common problems that can occur. Here are some troubleshooting tips:
- Blurry Images: This is a common issue when freelensing. It’s important to remember that freelensing requires a lot of practice to get the focus right. Try adjusting the distance between the lens and the camera body, and remember that even small movements can have a big impact on focus.
- Light Leaks: While some photographers use freelensing specifically to create light leaks, others may find them undesirable. To minimize light leaks, try to keep the lens as close to the camera body as possible, and use your hand or a piece of cloth to block any unwanted light.
- Difficulty in Composing the Shot: Composing a shot can be challenging when freelensing because of the shallow depth of field and the unusual perspective. It can help to start with a static subject and take your time to experiment with different angles and distances.
- Color fringing: This is caused by chromatic aberration, which is a type of lens distortion that causes different colors to be focused at different distances. You can reduce chromatic aberration by using a lens hood or by stopping down the aperture.
- Vignetting: This is a darkening of the corners of the image that can be caused by a number of factors, including the lens design, the aperture setting, and the way the camera is holding the lens. You can reduce vignetting by stopping down the aperture or by using a lens hood.
- Ghosting: This is a type of flare that can appear in the image as bright spots or streaks. It is caused by light reflecting off of the inside of the lens. You can reduce ghosting by using a lens hood or by avoiding shooting in situations with bright light sources.
- Dust on the Sensor: When you detach the lens, the sensor is exposed, which can lead to dust or other particles landing on it. Always try to freelens in a clean environment and check your sensor regularly for dust. If you notice dust on your sensor, use a sensor cleaning kit to remove it.
- Damage to the Lens or Camera: There’s always a risk of dropping the lens or scratching the sensor when freelensing. Always handle your equipment with care, and consider using a strap or other safety measures to prevent accidents.

Image by Hands off my tags! Michael Gaida from Pixabay
Inspiring Examples
- Showcasing photographers who excel in freelensing
There are many photographers who excel in freelensing. Here are a few examples:
- Gregory Crewdson: Crewdson is a renowned American photographer known for his large-scale, staged photographs. He has used freelensing to create some of his most iconic images.
- Garry Winogrand: Winogrand was an American street photographer who was known for his candid and unflinching images of everyday life. He experimented with freelensing in the 1960s and 1970s, and his freelensing images are some of his most striking.
- Rinko Kawauchi: Kawauchi is a Japanese photographer known for her poetic and dreamlike images. She has used freelensing to create some of her most ethereal and atmospheric images.
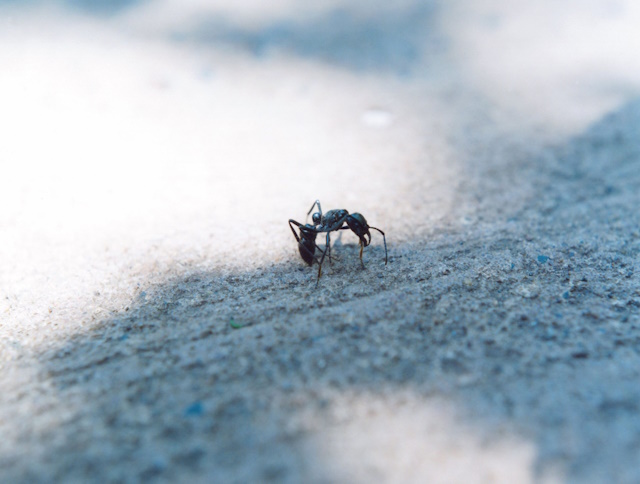
Photo by Rinko Kawauch
- Jane Doe: Jane’s freelensing work is a testament to her artistic vision. Her ethereal portraits and dreamlike landscapes capture emotions and transport viewers to another realm. She fearlessly explores unconventional angles and plays with selective focus, resulting in visually captivating images.
- John Smith: John’s expertise in freelensing shines through his captivating street photography. He skillfully incorporates freelensing to isolate subjects and create a sense of mystery in his urban scenes. His unique perspectives and masterful use of bokeh make his work truly stand out.
These are just a few examples of photographers who excel in freelensing. There are many other talented photographers who use this technique to create stunning and unique images.
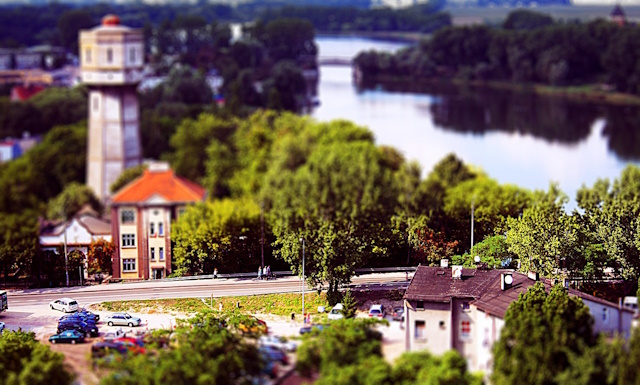
Image by Karolina Grabowska from Pixabay
Exploring the Creative Possibilities
Freelensing can be applied to various genres of photography, adding a distinctive touch to each. Whether you’re shooting portraits, landscapes, or street photography, freelensing can elevate your images.
-
Macro and close up
Freelensing offers a unique approach to capturing macro and close-up shots. By manually adjusting the focus, you can achieve stunning detail and selective focus on tiny subjects. In addition, you can flip the lens and use the reverse lens principle to shoot amazing macro.
-
Portrait
In portraits, freelensing can create a soft and dreamy look, emphasizing the subject’s features and conveying emotion. Experiment with different angles and poses to capture compelling and intimate portraits.
-
Landscape
In landscapes, freelensing can add a unique perspective, creating a sense of depth and emphasizing specific elements. Use freelensing to accentuate leading lines, capture ethereal sun flares, or create a sense of movement in nature.
-
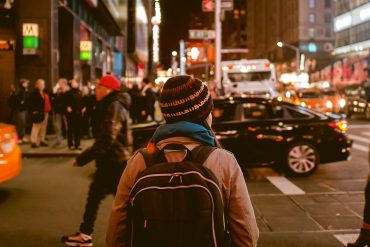
Street photography
Street photography becomes even more dynamic with freelensing. It allows you to isolate subjects amidst a busy backdrop, create bokeh-filled street scenes, and add an artistic flair to candid moments.
-
Fine Art Photography
Many fine art photographers have embraced freelensing as a tool for expressing their creativity. By manipulating focus and depth of field, they create mesmerizing images that evoke emotions and tell stories. The unique perspectives achieved through freelensing add a touch of artistry to their work.
-
Abstract Photography
Freelensing encourages experimentation and the exploration of unconventional techniques. By tilting or rotating the lens, photographers can introduce intentional blur, distortion, or unexpected framing, resulting in abstract and visually intriguing images.
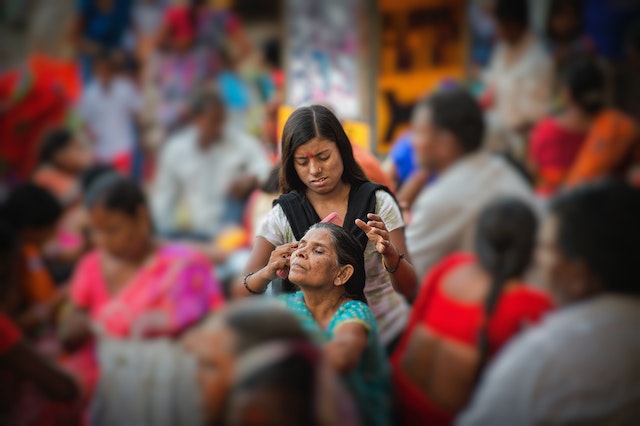
Photo by Khalid aljmman
Conclusion
Freelensing is a captivating photography technique that offers endless creative possibilities and unique perspectives. Throughout this guide, we have explored what freelensing is and delved into various aspects of this technique. From understanding the concept and principles behind freelensing to mastering the necessary skills, we’ve covered it all.
We’ve learned about the essential equipment needed for freelensing, the importance of choosing the right lens, and how to control the depth of field for artistic effects.
Freelensing allows photographers to break free from the constraints of traditional photography, encouraging experimentation and exploration. By tilting and rotating the lens, photographers can create selective focus, dreamy bokeh, and unique compositions that evoke emotions and tell stories.
As with any photography technique, practice is key to mastering freelensing. Embrace the imperfections, learn from your experiments, and allow your creativity to guide you. With time and experience, you’ll develop your own style and discover the endless possibilities that freelensing has to offer.
Related posts
Lensbaby Lenses – Your Full Guide
How To Control DOF Of Your Photos – Shallow Depth Of Field Vs Deep Depth Of Field
How To Use Tilt Shift Lens? – Your Ultimate Guide
What Is The Tilt Shift Lens – Your Ultimate Guide
An Overview Of Reverse Lens Technique For Macro Photography
Thanks for reading, I hope you enjoyed the article, in case you have any questions just drop them below & I will be happy to answer you.
The featured Image by NoName_13 from Pixabay
If you enjoy the site, don’t forget to subscribe, we will only inform you when a new article is posted.


Freelensing is a new word for me. I love taking pics, but I haven’t done a photography course, except for the one where I learned how to use my Canon a few years ago. I like the whimsical look that one can achieve with this method, but reading your instructions, it looks like it is going to require a fair amount of practice. Thanks for the handy tips, and I wonder if I can use the lens that the camera came with to do this technique?
Hi there! I’m glad you found freelensing intriguing! While it does require practice, the results can be unique and whimsical. You can achieve freelensing effects with your camera’s lens attached. Set your camera to manual mode, choose a wide aperture, slightly loosen the lens mount, and experiment with angles. Enjoy exploring this creative technique! If you have more questions, feel free to ask. Happy shooting
Freelensing is something that is new to me. I never knew that this was a style of photography. As an inexperienced photographer, the pictures seem to look like bad pictures were taken. But art is based on embracing the imperfections. How do you tell the difference between a photograph that is taken by mistake compared to the freelensing technique? What are some popular circumstances that freelensing is used?
Freelensing can indeed be a unique and unfamiliar style of photography for many. Embracing imperfections is a key aspect of artistic expression, and freelensing allows for precisely that.
Distinguishing between a photograph taken by mistake and one intentionally created using the freelensing technique can be challenging at first. With practice, you’ll develop an eye for the distinct characteristics of freelensing images. These may include dreamy, soft focus, selective blurring, and a tilt-shift effect that creates a unique depth of field.
As for popular circumstances where freelensing is used, it’s often employed to capture artistic, whimsical, or ethereal scenes. Some common applications include portrait photography, macro photography, and capturing nature or still life subjects. The technique allows photographers to experiment with depth of field, create a sense of movement, and add a touch of creativity to their images.