

Navigating the realm of photo editing in Photoshop can be both exciting and intricate. Crafting a seamless workflow that transforms your raw captures into striking visual masterpieces requires a clear and effective approach. In this guide, we’ll walk you through a simple yet powerful workflow to edit photos in Photoshop, unraveling the essential steps and techniques that will empower you to enhance your images with finesse. Whether you’re a beginner or a seasoned editor, these insights will pave the way for impactful edits that truly shine.
Photoshop is a photo editing and graphics creation software that was developed by Adobe. Photoshop offers a wide variety of image editing features as well as the capability to create complex graphics. It has become the industry standard for many creatives as it is very versatile and is usually one of the first programs many learn to use.
It is a very powerful yet intuitive software that can help you bring out the best in your images, so if you are a serious photographer, it is essential that you learn how to edit pictures with Photoshop.
In this article, we will discuss a simple workflow using Photoshop to edit your photos easily. We will use an example with detailed steps to show our simple workflow of editing. The editing workflow consists only of two Photoshop tools: the Crop tool, and the Camera Raw Filter.
How to edit photos in Photoshop:
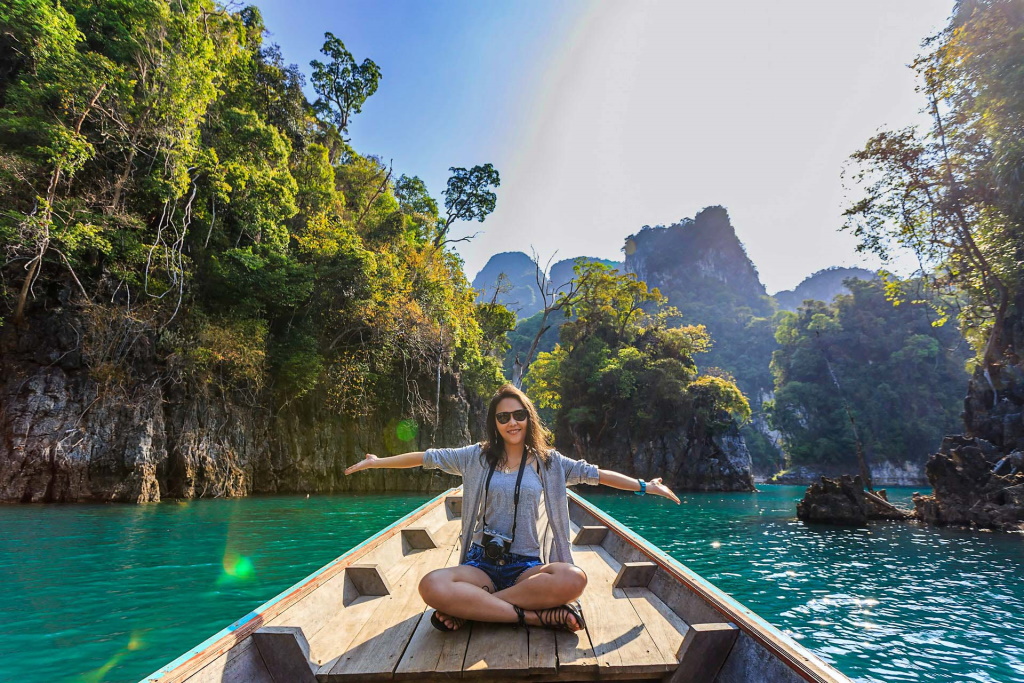
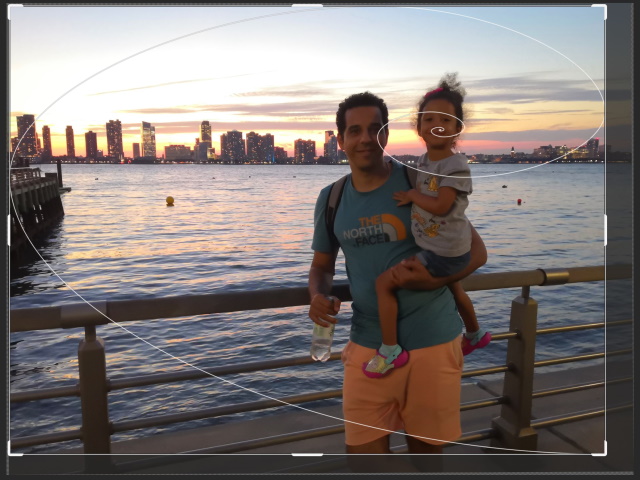
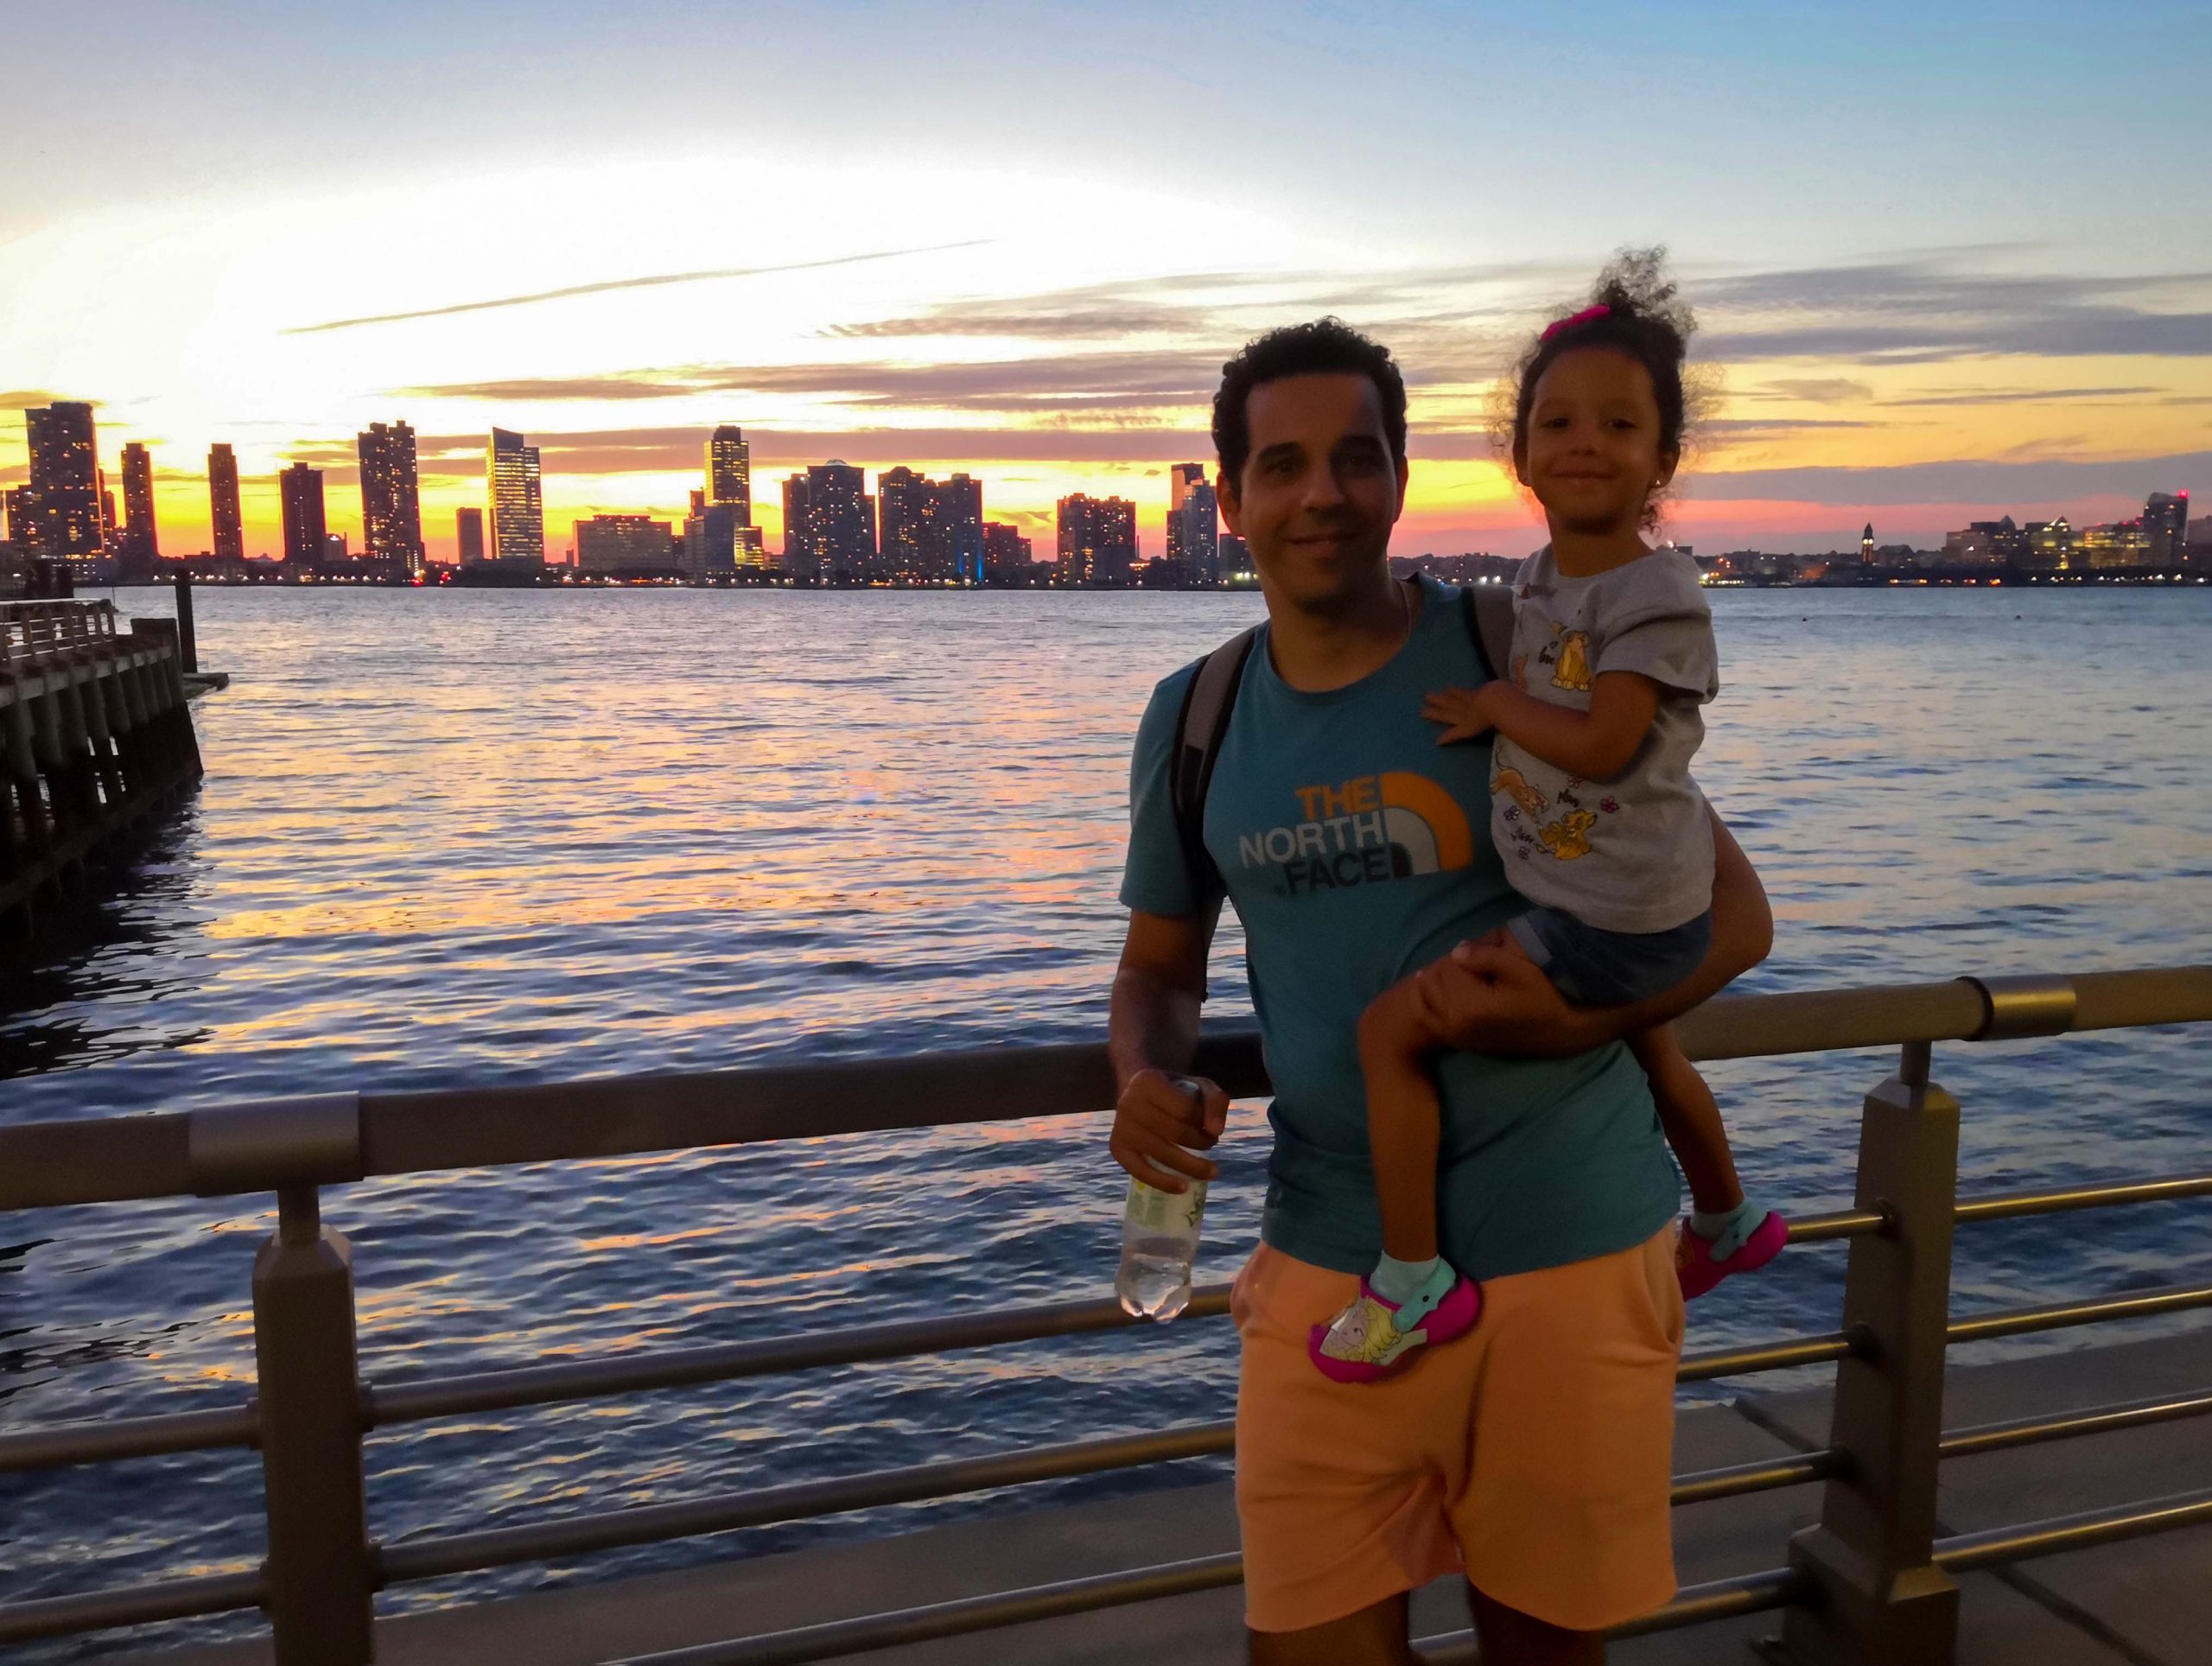
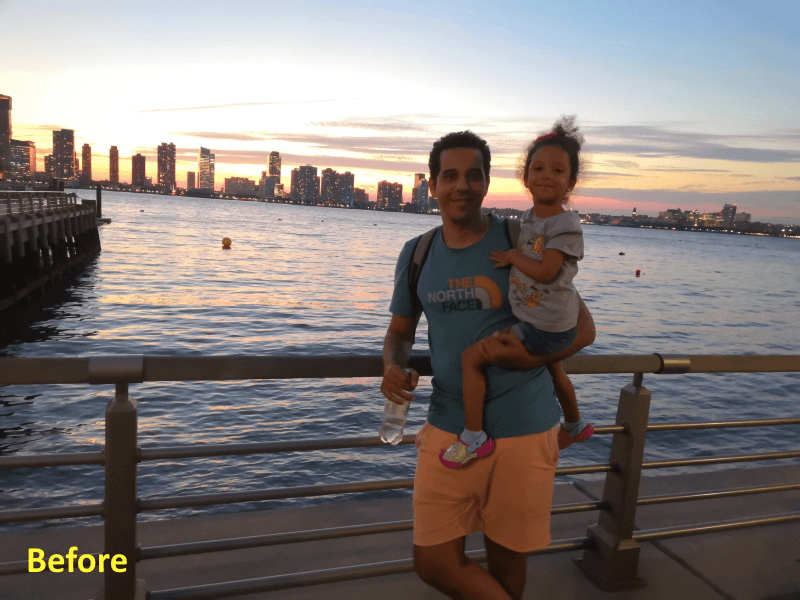
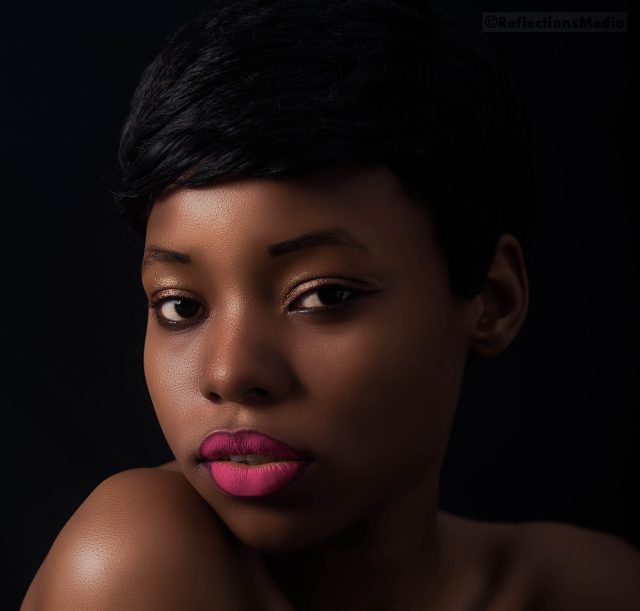
We will use the following photo
-
Enhance the composition
A simple crop of your photo can make all the difference. It can change the composition to put more focus on the subject, remove unnecessary elements, and can also straighten the horizon to create more drama for maximum impact.
In our example, it is obvious that the horizon is not horizontal, and the composition can be improved.
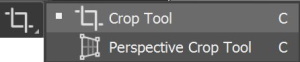
- Open the photo in Photoshop
- Select the crop tool from the toolbox.
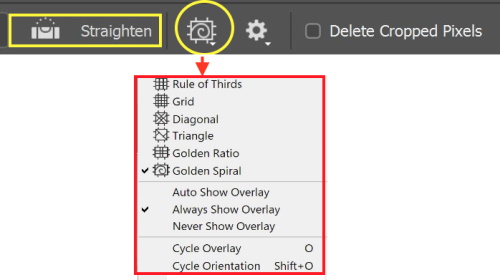
- Set the options from the top menu, you may select the overlay that shows rules for composition; I have chosen the golden spiral.
- Drag the corners or the edges of the photo to achieve your desired crop, or you can move the photo within the crop frame.
- To straighten the horizon, click on Straighten tap, and draw a line on the area that you want to make it horizontal. Press O.K
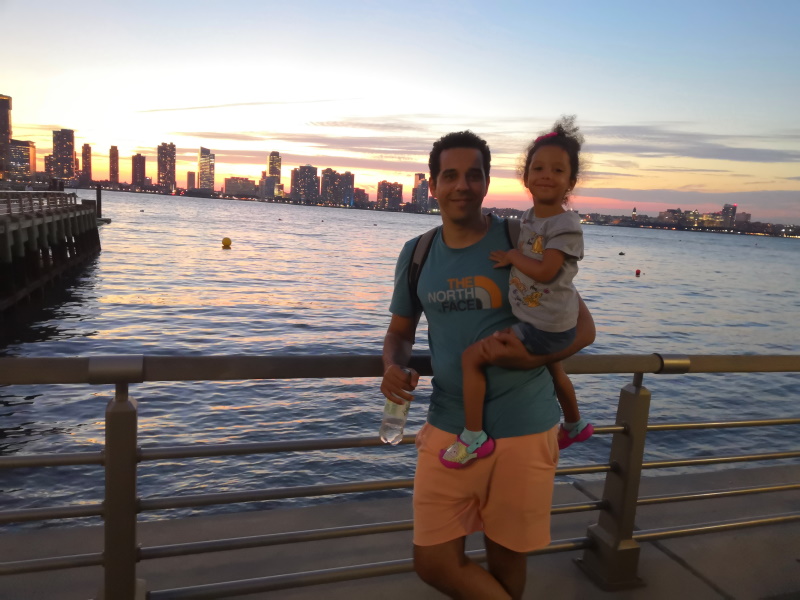
The result is shown below

-
Make Overall Adjustment
We will use the Camera Raw Filter to make overall editing of the photo. The Photoshop Camera Raw Filter opens up the use of almost full functionality of Adobe Camera Raw (ACR) anywhere in your Photoshop workflow. The Camera Raw Filter can also be set as non-destructive filters, by transforming the image to a Smart Object, so you preserve the original image and can go back at any time to change these adjustments.
- Duplicate the layer (Ctrl + J)
- Change the layer to Smart Object (Filter > Convert to Smart Filter)
- Load the Camera Raw Filter (Filter > Camera Raw Filter), and choose Edit, expand Basic. The following menu Shows up
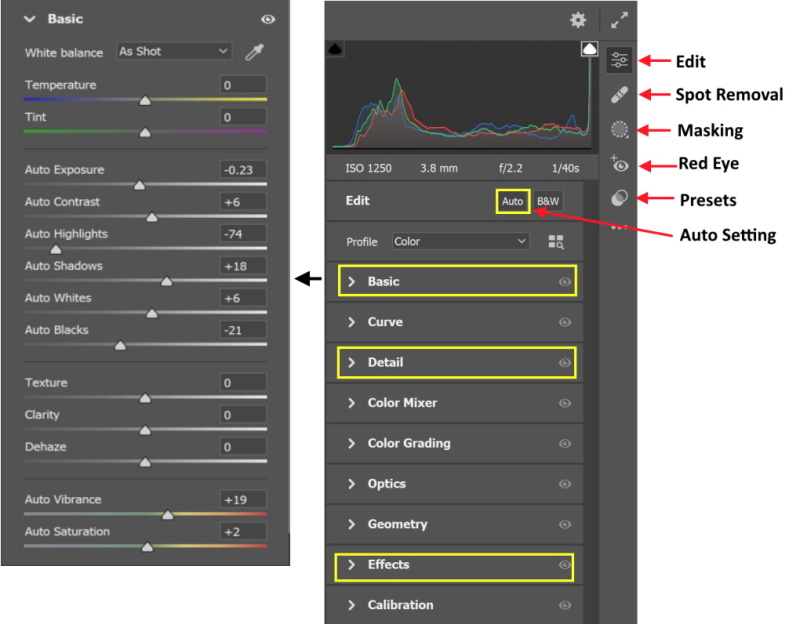
- You can click on the Auto tap to adjust the image automatically using the power of Adobe Artificial Inelegance features (AI). The basic sliders, allow you to fine-tune the exposure, contrast, highlights, shadows, white, and black.
If there are unwanted or distracting objects, you can easily remove them
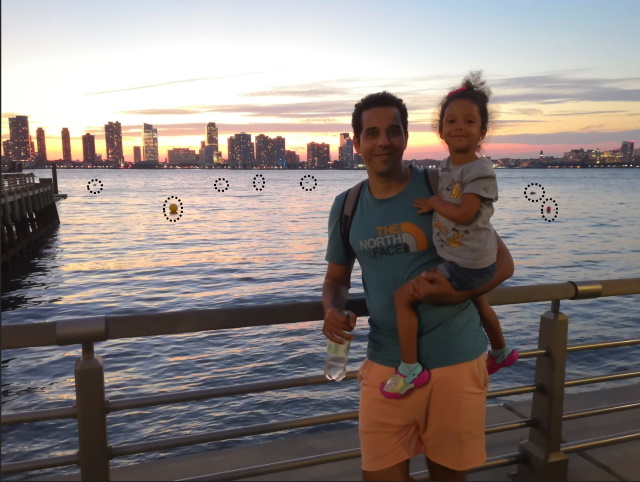
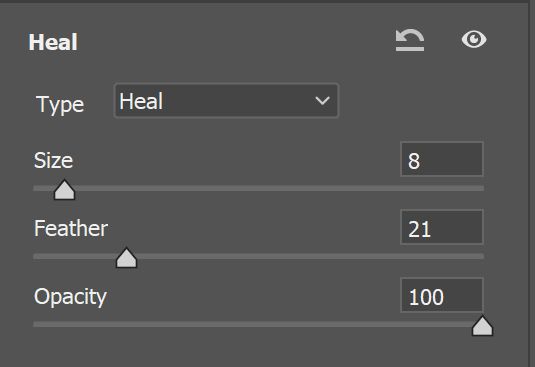
- Click on the spot removal tab, and adjust the brush size, feather, and opacity
- Click on the subject you want to remove. The result is shown below
-
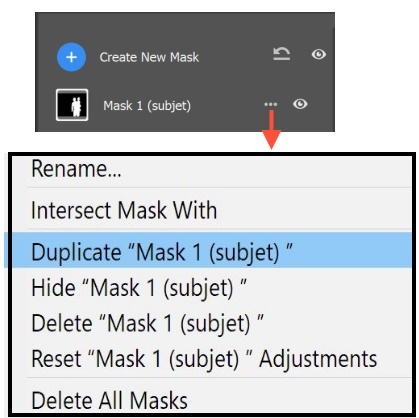
Make Local adjustment
Now it is time to make local adjustments for some objects: the subjects, the background, and the sky. The Camera Raw Filter can create a mask of a certain object automatically, and allow you to do the local adjustment.
3-1 Subject adjustment
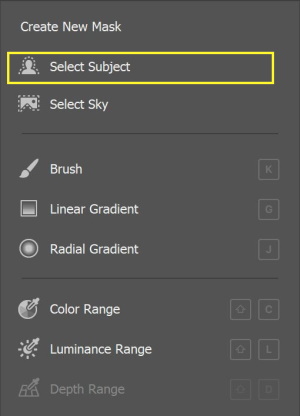
- Click on the Masking tab, then Select Subject (make sure that the overlay box is checked)
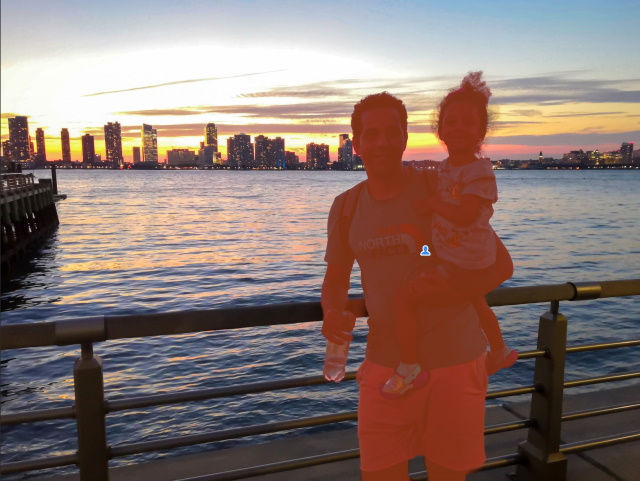
The filter will automatically select and mask the man and the kid
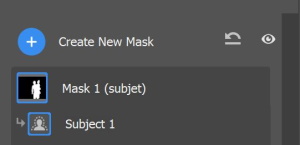
- You can modify the mask by using adding or subtracting tabs
Now, we will apply some adjustments, and it will only affect them (the man and the kid).
- Use the Light tab to change the exposure, contrast, highlights, and shadow
- Use the Effect tab to edit the texture, and adjust the Clarity
- Use the Details to add sharpness and reduce the noise.
3-2 Background adjustment
To make local adjustments to the background only without affecting the rest of the image, do the following:
- To create a mask of the background, select the subject mask, and choose to duplicate the mask
- Click on the subject, and from the drop-menu select invert
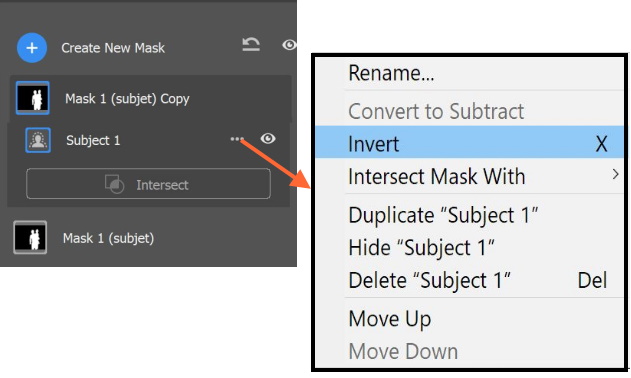
Now, we will apply some adjustments, and it will only affect the background
- Use the Color tab, increase the saturation
- Use the Effect tab to increase the Dehaze
3-3 Sky adjustment
To make local adjustments to the sky only without affecting the rest of the image, do the following:
- To create a mask of the sky, press Add New Mask and choose Select Sky
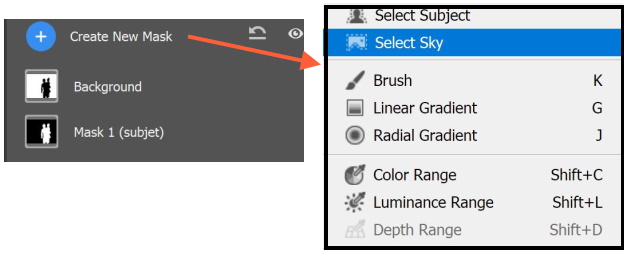
Now, we will apply some adjustments, and it will only affect the sky
- Use the Light tab to change the highlights and shadow
- Use the Color tab, increase the saturation
- Use the Effect tab to increase the Dehaze
The before and after images are shown below:
Additional examples
I apply the same editing workflow to a set of different photos and here are the results:

Photo by Kindel Media from Pexels
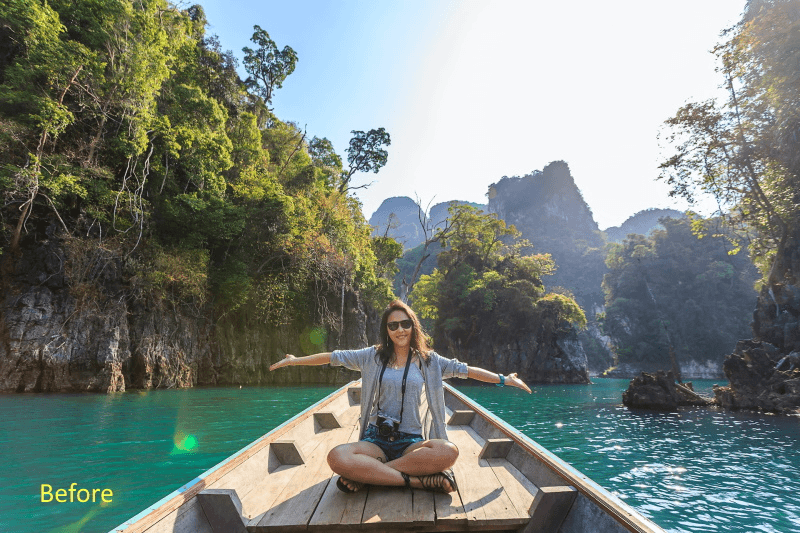
Photo by Te lensFix from Pexels
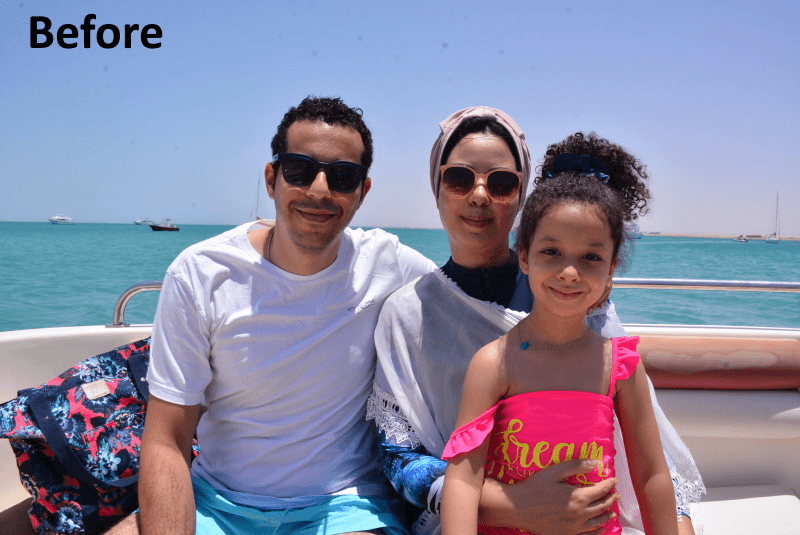
Photo by Ehab Amin
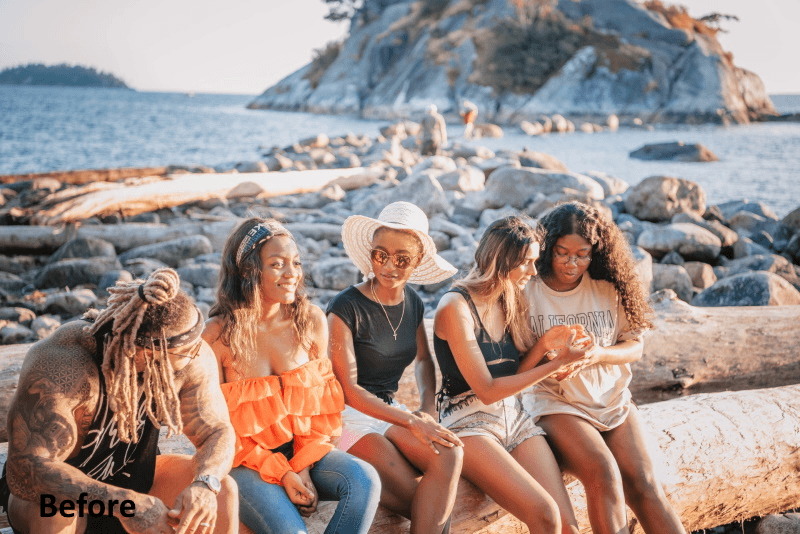
Photo by PNW Production from Pexels
Conclusion
When Photoshop CC came along, Camera Raw was included as a filter that you can apply to any image. If you struggle with color correction, lens distortion, or just want a simple, one-stop-shop for all kinds of adjustments, Camera Raw Filter could be your answer. The Camera Raw filter has some great features:
- Non-destructive image adjustments if applying to a Smart Object
- Available to use on non-raw files such as JPEG, TIFF, and video files
- Can be used on one individual layer or multiple layers
Related Posts
How to Crop Pictures In Photoshop
Golden Ratio And Photography Composition
10 Rules for Photo Composition
What Is A Mask In Photoshop? – A Complete Beginner’s Guide
What Are The Selection Tools In Photoshop?
If you are interested in reading more about post-processing tips and tricks, you may check our photography editing articles.
Thanks for reading, I hope you enjoyed the article, in case you have any questions just drop them below & I will be happy to answer you.
If you enjoy the site, don’t forget to subscribe, we will only inform you when a new article is posted.


I have a question, can anyone use photoshop to edit their pictures or does it have to be done by a professional photographer? I am big on taking pictures and when it comes to editing, I have to pay for it. My question is can I do all that by myself?
Thanks for your comment, definitely YES, anyone with some patient can learn and use Photoshop, especially for photo editing
Fantastic just what I have been looking for a descriptive article on photo shop, As we have our wedding coming up next year we have decided not to hire a photographer but to let my father in law do the photo’s and this article is ideal as we are going to need to photoshop the pictures!!
I’ll now be able to use your article to sort them out and looking perfect, Thamkyou
Keep up the great work!!
Thanks, I wish you all the best, congratulations in advance!