


Nature photography is a form of photography that involves capturing images of natural landscapes, wildlife, and other elements of the natural world. It is an important form of art and documentation, allowing us to appreciate the beauty of nature and raise awareness about the importance of preserving our natural environment.
-
Types of Nature Photography:
-
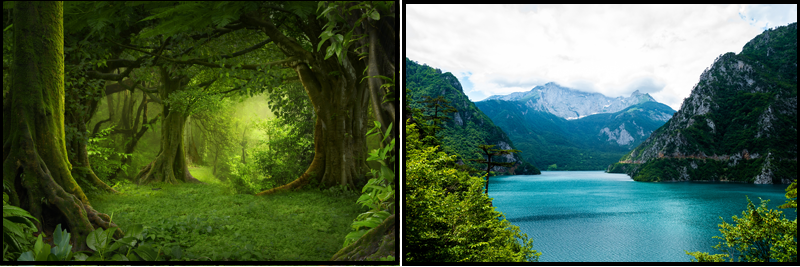
Landscape photography
Capturing wide, sweeping views of natural landscapes such as mountains, oceans, forests, and deserts.
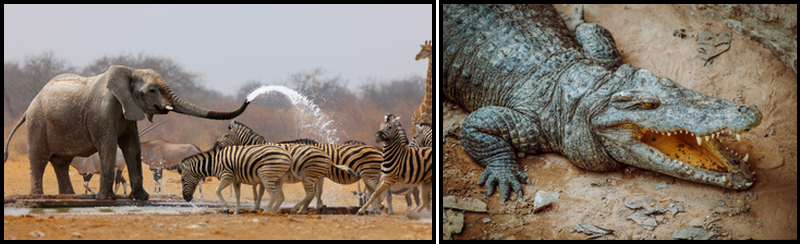
Capturing images of animals in their natural habitats, including wild animals, mammals, reptiles, and insects.
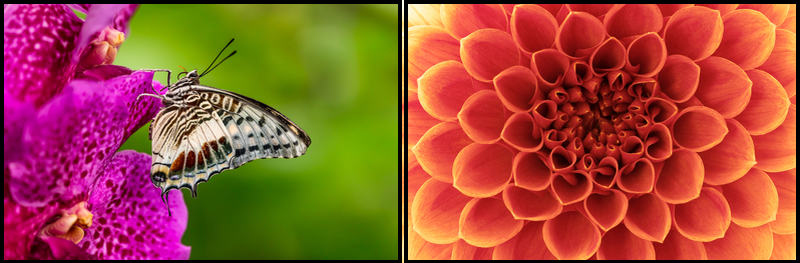
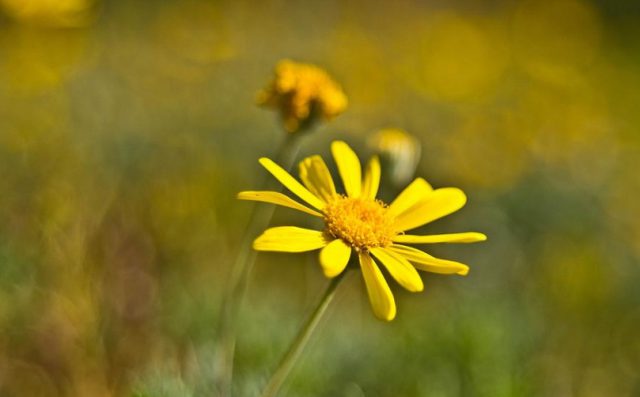
Capturing close-up images of small objects in nature, such as flowers, insects, and textures.
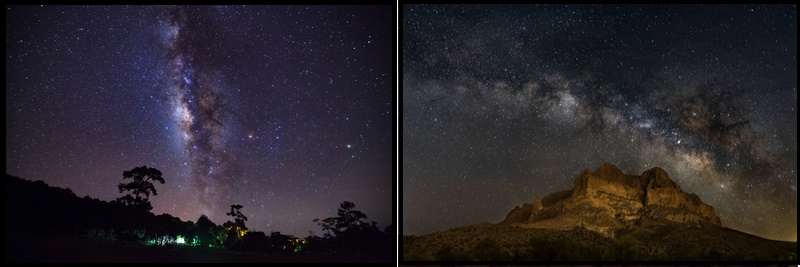
Capturing images of the night sky, including stars, galaxies, and the Milky Way.
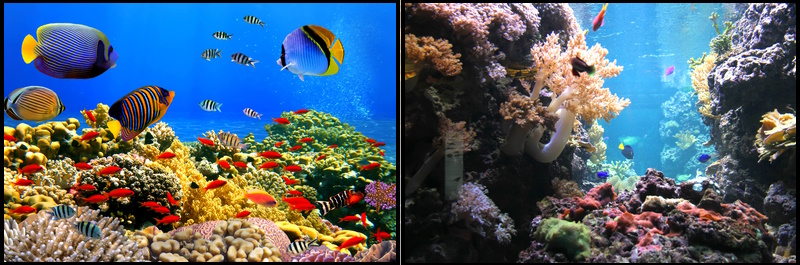
Capturing images of marine and underwater life.
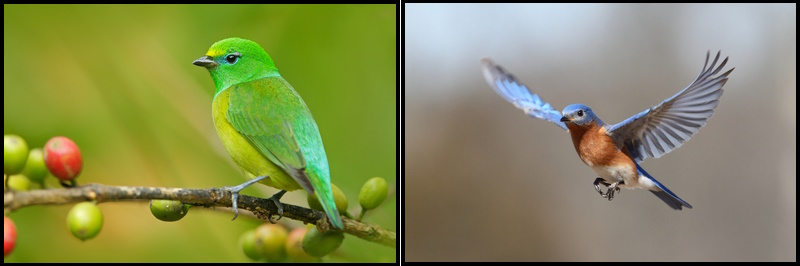
Capturing images of birds in their natural habitats, including both static and action shots.
-
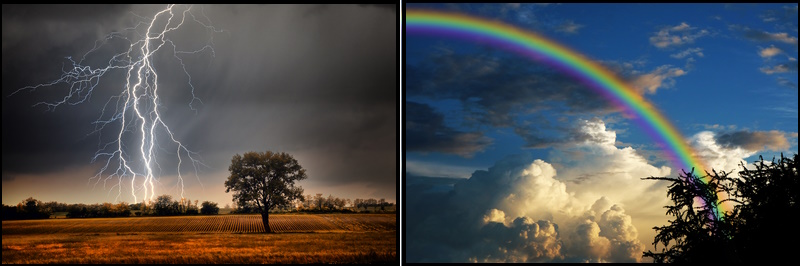
Weather photography:
Capturing images of weather events, such as lightning, rainbows, and storm clouds.
-
Importance & Benefits of Nature Photography:
- Documenting the natural world: Nature photography allows us to document and record the beauty and diversity of the natural world. This can be important for scientific and educational purposes, as well as for creating a visual record of the natural world that can be enjoyed by people for generations to come.
- Raising awareness about environmental issues: Nature photography can be a powerful tool for raising awareness about environmental issues, such as climate change, habitat destruction, and wildlife conservation. By capturing and sharing images of threatened habitats and endangered species, nature photographers can help inspire action and promote conservation efforts.
- Promoting appreciation and conservation of nature: Nature photography can help people appreciate the beauty and value of nature, and inspire them to take action to protect it. By showcasing the beauty and diversity of the natural world, nature photography can help foster a sense of connection and responsibility towards the environment.
- Providing a creative outlet: Nature photography can be a rewarding form of artistic expression, allowing photographers to explore their creativity and share their vision with others. It can also be a way to connect with nature and experience a sense of mindfulness and relaxation.
- Encouraging eco-tourism: Nature photography can help promote eco-tourism, which is a sustainable and responsible form of tourism that promotes conservation and protects natural habitats. By capturing and sharing images of natural landscapes and wildlife, nature photographers can help promote these areas as destinations for responsible travel and adventure.
- Creates a sense of wonder and appreciation: Nature photography can help people appreciate the beauty and complexity of the natural world, fostering a sense of wonder and connection to nature.
- Provides an artistic outlet: Nature photography can be a rewarding form of artistic expression, allowing photographers to create stunning images and share them with the world.
In summary, nature photography is an important form of art and documentation that allows us to appreciate and preserve the beauty of the natural world. By capturing and sharing images of landscapes, wildlife, and other elements of nature, photographers can raise awareness about environmental issues, inspire conservation efforts, promote mental and physical health, create a sense of wonder and appreciation, and provide an artistic outlet.
-
How natural light and weather condition affect nature photography
Understanding natural light and weather conditions is crucial for nature photographers as it plays a significant role in creating high-quality and visually appealing images. Here are some reasons why understanding natural light and weather conditions is important:
- Enhances the quality of the image: Natural light and weather conditions affect the mood, tone, and quality of the image. Photographers who understand how light and weather affect their subjects can make informed decisions on when and how to shoot to capture the best possible image.
- Helps to create unique and interesting images: Understanding natural light and weather conditions can help photographers create unique and interesting images. Different weather conditions, such as rain, fog, or snow, can create different moods and textures that add interest to the image.
- Saves time and effort: Photographers who understand natural light and weather conditions can plan their shoots accordingly. For example, they can choose to shoot during the golden hour (the hour after sunrise and the hour before sunset) when the light is soft and warm, rather than the harsh midday sun, saving them time and effort in post-processing.
- Improves safety: Weather conditions such as heavy rain, thunderstorms, or strong winds can pose a risk to photographers. Understanding the weather conditions can help photographers plan their shoots to ensure their safety and prevent damage to their equipment.
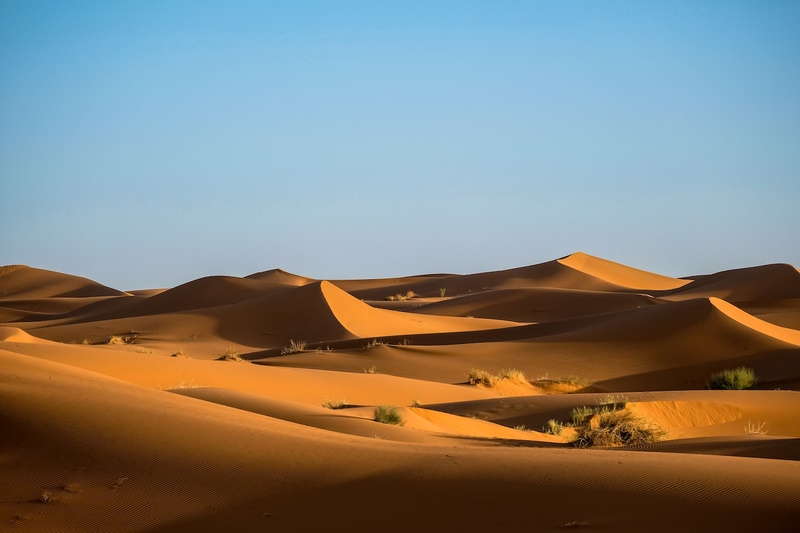
Photo by Francesco Ungaro
Nature Photography Tutorial
Part 1: Essential Gear for Nature Photography
Because nature photography includes large genres of photography, it is very hard to define the required features of cameras and lenses. For the sake of simplicity, I provide the following three tables that conclude the three most important features of each type of nature photography.
-
Camera options for nature photography
The below table can provide a starting point for photographers who are looking to choose a camera for a particular type of nature photography.
| Nature Photography | Camera Feature (1) | Camera Feature (2) | Camera Feature (3) | ||
|---|---|---|---|---|---|
| Weather Photography | Weather-sealed body | Fast shutter speed | Image stabilization | ||
| Underwater Photography | Water-sealed housing | High resolution sensor | Strobe or continuous lighting | ||
| Time-lapse Photography | Intervalometer | Time-lapse mode | Long battery life | ||
| Infrared Photography | Infrared filter or camera | High ISO capabilities | Long exposure capability | ||
| Landscape Photography | High resolution sensor | Wide angle lens | Dynamic range | ||
| Macro Photography | High magnification capability | Image stabilization | Focusing system | ||
| Astrophotography | High ISO capabilities | Full frame sensor | Image stabilization | ||
| Black and White Photography | High dynamic range | Monochrome or black and white mode | Long exposure capability | ||
| Wildlife Photography | Fast autofocus system | High continuous shooting speed | Image stabilization | ||
| Aerial Photography | Drone or aerial camera | Gimbal or image stabilization | Obstacle avoidance sensors |
-
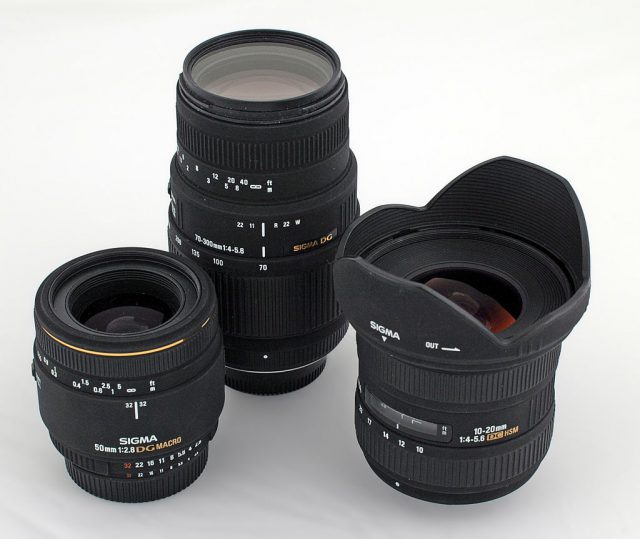
Lenses for nature photography: wide-angle, telephoto, and macro lenses
Here is a table outlining some important lens features for different types of nature photography:
| Type | Focal Length | Aperture | ISO |
|---|---|---|---|
| Landscape Photography | Wide angle (10-24mm) | f/4-f/11 | Low (100-400) |
| Wildlife Photography | Telephoto (200-600mm) | f/2.8-f/5.6 | Medium to high (800-3200) |
| Macro Photography | Macro (60-105mm) | f/2.8-f/5.6 | Low to medium (100-800) |
| Bird Photography | Telephoto (300-800mm) | f/5.6-f/8 | Medium to high (800-3200) |
| Plant Photography | Macro (60-200mm) | f/2.8-f/8 | Low to medium (100-800) |
| Weather Photography | Wide angle or telephoto | f/4-f/11 | Low to medium (100-800) |
| Infrared Photography | Infrared (720nm or 850nm) | f/1.8-f/4 | Low to medium (100-800) |
| Time-lapse Photography | Wide angle or zoom | f/4-f/8 | Low to medium (100-800) |
| Aerial Photography | Wide angle or zoom | f/2.8-f/5.6 | Low to medium (100-800) |
| Black and White Photography | Wide angle or zoom | f/2.8-f/8 | Low to medium (100-800) |
These features are not necessarily the only important ones for each type of photography, and different photographers may have different preferences depending on their shooting style and the specific conditions they’re working in. However, this table can provide a starting point for photographers who are looking to choose a lens for a particular type of nature photography.
-
Accessories for nature photography: tripods, filters, and memory cards
Here is a table outlining some important accessories and equipment for different types of nature photography:
| Type | Tripod | Filters | |
|---|---|---|---|
| Landscape Photography | Essential | ND, Graduated ND, Polarizer | |
| Wildlife Photography | Optional | Polarizer, UV, ND | |
| Macro Photography | Essential | Macro, UV | |
| Bird Photography | Optional | Polarizer, UV, ND | |
| Plant Photography | Optional | Polarizer, UV, ND | |
| Weather Photography | Essential | Polarizer, ND | |
| Infrared Photography | Optional | Infrared | |
| Time-lapse Photography | Essential | ND | |
| Aerial Photography | Essential | Polarizer, ND | |
| Black and White Photography | Optional | ND |
Once again, these are general recommendations and photographers may have different needs or preferences depending on their specific situation. However, this table can provide a good starting point for photographers who want to be prepared with the right accessories and equipment for different types of nature photography.
Photo by Razvan Ioan on Unsplash
Part 2: Understanding Composition and Framing in nature photography
Composition and framing are critical elements of nature photography that can transform an ordinary photo into a captivating one. Here’s how understanding composition and framing can enhance your nature photography:
- Composition: Composition refers to the arrangement of elements within the image frame. It includes factors such as the placement of the subject, the use of lines and shapes, and the balance of the image. In nature photography, a well-composed image can showcase the beauty of the natural world and evoke emotions in the viewer.
Some key composition techniques used in nature photography include:
- Rule of thirds: Place the subject off-center to create a more visually appealing image.
- Leading lines: Using lines in the image to draw the viewer’s eye towards the subject.
- Symmetry: Using symmetrical elements in the image to create balance and harmony.
- Framing: Framing refers to using natural elements such as trees, leaves, or rocks to frame the subject within the image. It can help to add depth and interest to the image and create a sense of place. Framing can also help to draw the viewer’s attention to the subject and create a more visually appealing image.
Some keyframing techniques used in nature photography include:
- Natural frames: Using natural elements such as branches or leaves to frame the subject within the image.
- Negative space: Including empty space around the subject creates a more visually appealing image.
- Layers: Using multiple layers of natural elements to create depth and interest in the image.
In conclusion, understanding composition and framing can take your nature photography to the next level. By using these techniques, you can create visually appealing images that showcase the beauty of the natural world and evoke emotions in the viewer.
Photo by Pixabay
Part 3: Steps & Techniques for Nature Photography
1- Find the right locations
Finding the right location for nature photography is crucial to capturing stunning images. Here are some tips to help you find the perfect spot:
- Do your research: Start by researching the area you want to photograph. Look for information on national parks, state parks, wildlife refuges, and other protected areas. Check online resources such as photography blogs, social media platforms, and photo-sharing websites to find inspiration and recommendations.
- Scout out locations in advance: Once you have identified a potential location, it’s important to scout it out in advance. This can involve visiting the area, checking out the landscape, observing the wildlife, and scouting out potential vantage points.
- Consider the time of day: The time of day can make a huge difference in the quality of your photographs. Consider the time of day when the lighting will be most favorable for the type of photography you plan to do. Early morning and late afternoon tend to be the best times for natural light.
- Look for unique features: Try to find unique features that can add interest to your photos. This could include rock formations, waterfalls, mountains, or other natural landmarks.
- Be aware of the weather: Weather can play a big role in photography. Be aware of the weather forecast and plan your shoot accordingly. Cloudy days can create interesting lighting effects, while sunny days can create harsh shadows.
- Ask locals for recommendations: Locals can be a great resource for finding the best spots for nature photography. Ask around at nearby shops or restaurants, or even ask park rangers or other officials for recommendations.
- Be respectful of the environment: Remember always to respect the environment and the wildlife you are photographing. Follow any guidelines or rules set by the park or wildlife refuge, and be mindful of your impact on the environment. Never disturb wildlife or leave trash behind.
By following these tips, you can increase your chances of finding the perfect location for your next nature photography shoot.
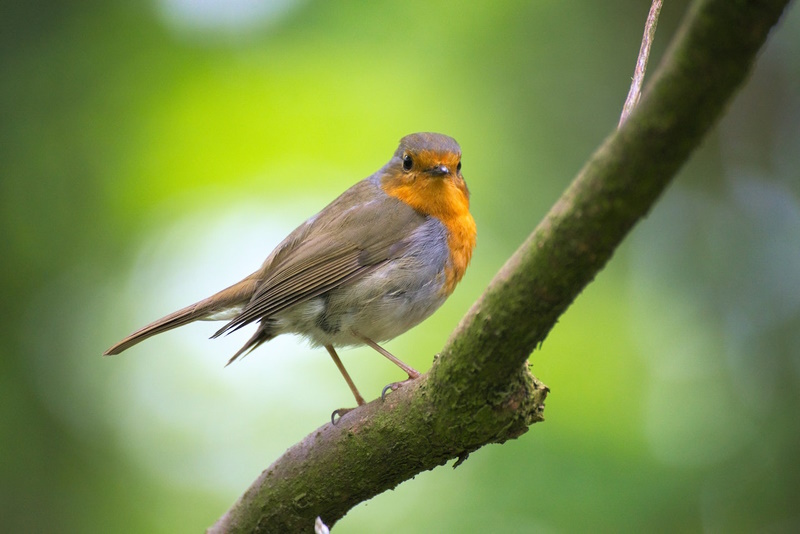
Photo by Pixabay
2- Understand the exposure settings
Understanding the exposure triangle is crucial for achieving the right exposure in your photographs. The three key settings that control exposure are aperture, shutter speed, and ISO. Here’s a brief explanation of each:
- Aperture: The aperture is the opening in the lens through which light passes. It is measured in f-stops, with a lower number indicating a larger opening and more light entering the camera. Aperture also affects the depth of field, or how much of the image is in focus. A wider aperture (lower f-stop) creates a shallower depth of field, while a narrower aperture (higher f-stop) creates a deeper depth of field.
- Shutter speed: Shutter speed refers to the length of time that the camera’s shutter is open. It is measured in fractions of a second, with a faster shutter speed (1/1000th of a second, for example) letting in less light but freezing motion, while a slower shutter speed (1/30th of a second, for example) lets in more light but allows for motion blur.
- ISO: ISO measures the camera’s sensitivity to light. A higher ISO setting lets in more light but can also create more noise or grain in the image, while a lower ISO setting creates less noise but requires more light to enter the camera. It’s best to use the lowest ISO possible to achieve the desired exposure, but in low-light situations, a higher ISO may be necessary.
In order to get a properly exposed image, you need to balance these three settings. For example, if you want a shallow depth of field (wide aperture) but there’s too much light entering the camera, you can increase the shutter speed or lower the ISO to compensate. Conversely, if you want a deeper depth of field (narrow aperture) but there’s not enough light, you can decrease the shutter speed or increase the ISO.
Keep in mind that the right settings will depend on the specific situation and the effect you want to achieve. By experimenting with these settings, you can create a wide range of creative and stunning images.
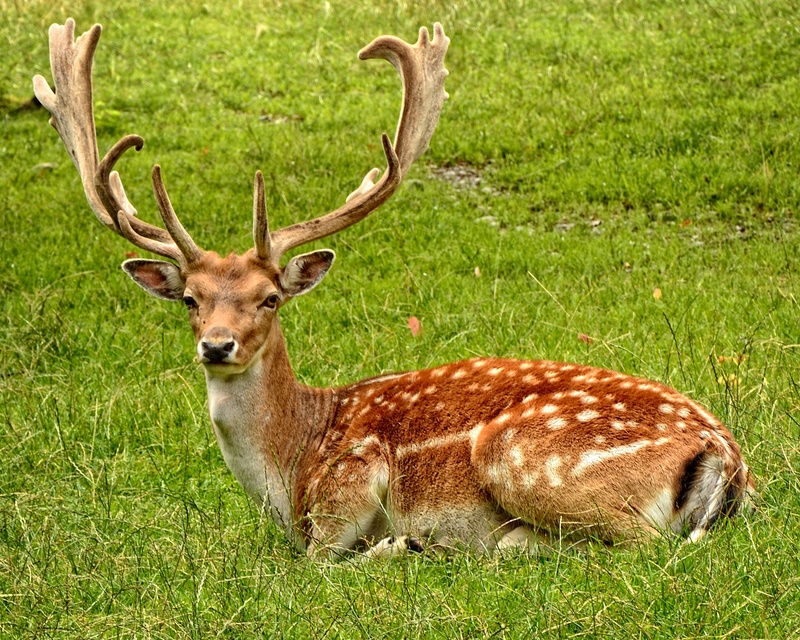
Photo by Pixabay
3- Focus on the right subject
Focusing on the right subject is critical in nature photography as it can make or break the image. Here are some tips on how to focus on the right subject in nature photography:
- Identify the subject: The first step in focusing on the right subject is to identify it. In nature photography, the subject could be a flower, animal, landscape, or any other natural element that you want to capture. Once you have identified the subject, you can focus on it using your camera’s autofocus system.
- Use selective focus: Selective focus involves focusing on a specific area or part of the subject while blurring the rest of the image. This technique can help to draw the viewer’s attention to the subject and create a more visually appealing image. To achieve selective focus, you can use a wide aperture (such as f/2.8 or f/4) and focus on the specific area of the subject that you want to highlight.
- Use manual focus: In some cases, the autofocus system may not be able to focus on the subject properly. In these cases, you can switch to manual focus and adjust the focus manually until you achieve the desired result. This technique is particularly useful when shooting macro photography or in low-light conditions.
- Consider the background: When focusing on the subject, it’s important to consider the background. A busy or distracting background can take away from the subject and make the image less appealing. To avoid this, you can use a wide aperture to blur the background, or you can adjust your position to find a more suitable background.
- Practice and experiment: Finally, the best way to improve your ability to focus on the right subject is to practice and experiment. Try different techniques and settings, and review your images to see what worked and what didn’t. With time and practice, you’ll be able to focus on the right subject and create stunning nature photography images.
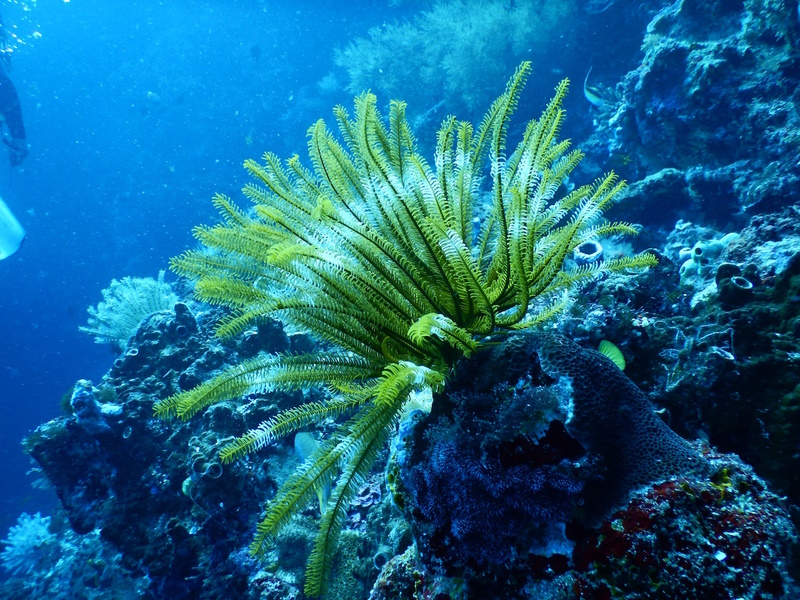
Photo by Tom Fisk
4- Techniques for capturing motion
Capturing motion in nature photography can create dynamic and visually interesting images. Here are some techniques for capturing motion in nature photography:
- Shutter Speed: One of the most important techniques for capturing motion is adjusting the shutter speed. A fast shutter speed (1/500 sec or higher) can freeze the motion and capture sharp images, while a slow shutter speed (1/30 sec or lower) can create motion blur and convey a sense of movement.
- Panning: Panning involves following the subject with your camera while using a slow shutter speed. This technique can create a sharp subject with a blurred background, which conveys a sense of motion.
- Multiple Exposures: Multiple exposures involve taking multiple images of the same subject and layering them together to create a sense of motion. This technique is particularly useful when shooting waterfalls, waves, or clouds.
- Intentional Camera Movement (ICM): ICM involves moving the camera intentionally while taking a photograph. This technique can create abstract and impressionistic images that convey a sense of motion and emotion.
- Zoom Burst: Zoom burst involves zooming in or out while taking a photograph with a slow shutter speed. This technique can create a sense of motion and energy in the image.
- ND Filters: Neutral density (ND) filters can be used to reduce the amount of light entering the camera, which allows for slower shutter speeds in bright conditions. This technique can create motion blur in bright conditions, such as when photographing waterfalls or rivers.
In conclusion, capturing motion in nature photography can create dynamic and visually interesting images. Experiment with different techniques and settings to find what works best for your subject and style.

Photo by Sebastian Arie Voortman
Part 4: Editing Your Nature Photography
1- Overview of popular editing software and their features
There are several popular editing software available in the market for nature photography. Here’s a brief overview of some of the most popular editing software and their features:
- Adobe Lightroom: Adobe Lightroom is one of the most popular editing software for nature photography. It’s a comprehensive tool that allows photographers to manage, edit, and share their images. Some of its features include non-destructive editing, batch processing, presets, and a wide range of adjustment tools for exposure, color, sharpness, and more.
- Adobe Photoshop: Adobe Photoshop is a powerful image editing software that can be used for advanced image editing and manipulation. Some of its features include layers, masks, selection tools, and a wide range of filters and effects. While it’s not specifically designed for nature photography, it’s a versatile tool that can be used for a wide range of editing needs.
- Luminar AI: Luminar AI is a new editing software that uses artificial intelligence to automate some of the editing processes. It includes features such as sky replacement, portrait editing, and a wide range of editing tools for exposure, color, and detail. It’s designed to be user-friendly and accessible for photographers of all levels.
- Capture One: Capture One is a professional-grade editing software that’s popular among professional photographers. It offers advanced color correction tools, tethered shooting, and a wide range of editing tools for exposure, color, and detail. It also supports a wide range of cameras and offers exceptional image quality.
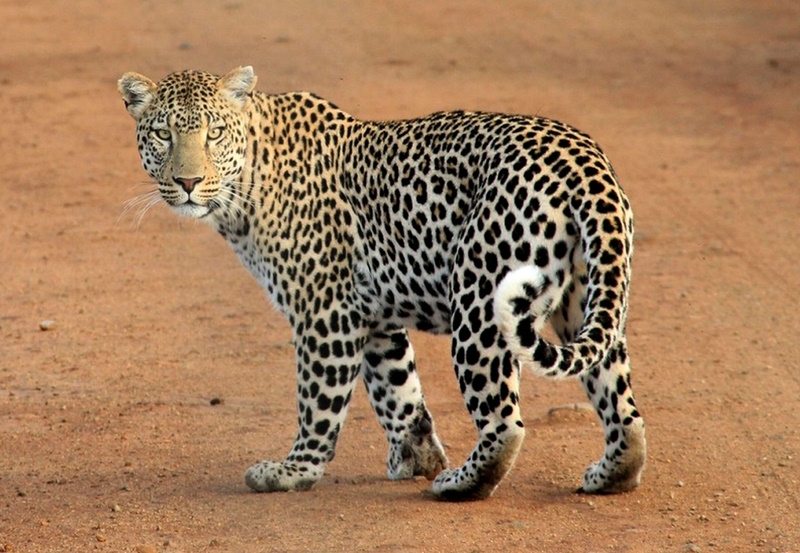
Photo by Pixabay
2- Understand and learn the basic editing techniques:
Basic editing techniques for nature photography can enhance the visual appeal and quality of your images. Here are some of the basic editing techniques you can use:
- Cropping: Cropping is the process of removing unwanted parts of the image to improve composition. It’s a simple but effective technique that can be used to eliminate distractions and emphasize the subject.
- Exposure adjustments: Exposure adjustments can help correct overexposed or underexposed images. Adjusting exposure can help you bring out more details in the shadows or highlights of the image.
- Color correction: Color correction can help adjust the colors in your image to make them more natural or enhance their vibrancy. You can adjust the white balance, saturation, hue, and other color parameters to achieve the desired look.
- Sharpening: Sharpening can help improve the clarity and sharpness of your image. You can use sharpening tools to bring out more details and enhance the edges of your subject.
- Noise reduction: Noise reduction can help reduce the grain or noise in your images, especially when shooting in low-light conditions. You can use noise reduction tools to smooth out the image and improve its overall quality.
- Contrast adjustments: Contrast adjustments can help improve the dynamic range of your image. You can adjust the contrast to make the image more punchy or to enhance the details in the shadows and highlights.
In conclusion, basic editing techniques can help enhance the visual appeal and quality of your nature photography. Experiment with different techniques to find the ones that work best for your images and style.
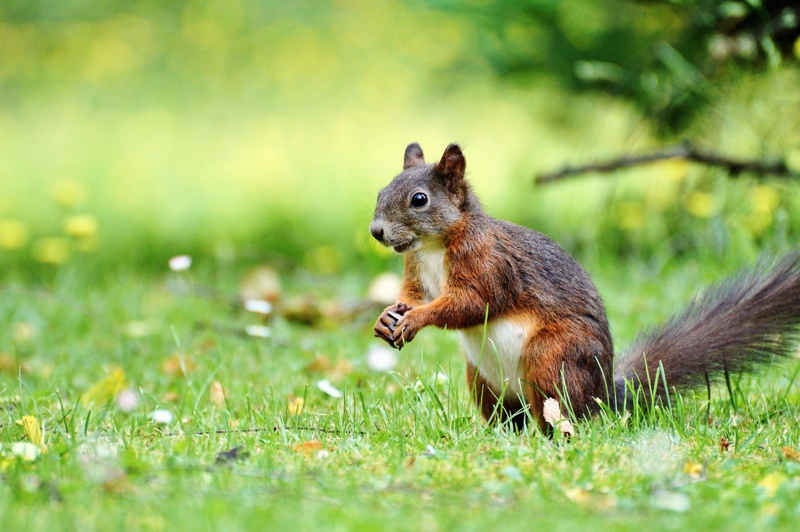
Photo by Pixabay
3- Understand the Advanced editing techniques
Advanced editing techniques can take your nature photography to the next level. Here are some of the advanced editing techniques you can use:
- Cloning: Cloning is the process of removing unwanted elements from the image. You can use cloning tools to remove distracting elements, such as power lines or people, from your image. You can also use cloning to duplicate and move elements in your image to create a more balanced composition.
- Compositing: Compositing involves combining multiple images into a single image. You can use compositing to create a more dynamic and interesting image. For example, you can combine a sky image with your landscape image to create a more dramatic effect. You can also use compositing to remove unwanted elements from the image or to add elements that weren’t there during the shoot.
- Image stacking: Image stacking is the process of combining multiple images to create a single, sharper image. You can use image stacking to improve the sharpness and detail in your images. For example, you can take multiple images of the same scene with different focus points and combine them to create a final image that is sharper and more detailed.
Selective adjustments: Selective adjustments involve adjusting specific areas of the image, rather than the entire image. You can use selective adjustments to adjust the exposure, color, or contrast of specific areas of the image. This technique can help you bring out more details and create a more balanced image.
If are looking for editing resources like actions, overlays, and textures, I highly recommend paying a visit to my store, it has amazing professional photo editing tools.
In addition, you can check my editing tutorials, and my YouTube channel there are many tips and tutorials there.

Photo by Pixabay
Part 5: Tips for Taking Your Nature Photography to the Next Level
If you want to take your nature photography to the next level, here are some tips to consider:
- Experiment with different techniques: Try different techniques, such as long exposure, time-lapse, and panorama to add variety to your nature photography.
- Learn about your subject: Take the time to research and learn about the plants, animals, and landscapes you want to photograph. Understanding your subject can help you capture unique and interesting images.
- Use different lenses: Experiment with different lenses, such as wide-angle and telephoto lenses, to capture different perspectives and focal lengths.
- Play with light: Use different lighting conditions, such as golden hour and blue hour, to add drama and interest to your images.
- Practice patience: Nature photography often requires patience and persistence. Take the time to wait for the perfect moment and be prepared to visit locations multiple times to capture the perfect shot.
- Edit your images: Don’t be afraid to edit your images to enhance their visual appeal and quality. Basic editing techniques, such as exposure and color adjustments, can go a long way in improving your images.
Thanks for reading, I hope you enjoyed the article, in case you have any questions just drop them below & I will be happy to answer you.
The feature Photo by Pixabay
If you enjoy the site, don’t forget to subscribe, we will only inform you when a new article is posted.


How does nature photography promote eco-tourism and responsible travel to protect natural habitats? What are the benefits of nature photography in terms of promoting mental and physical health, and encouraging mindfulness and relaxation? How does nature photography showcase the importance of conservation and encourage a sense of responsibility towards the environment? How does natural light affect the mood, tone, and quality of nature photographs? How do weather conditions such as heavy rain, thunderstorms, or strong winds impact the safety of nature photographers and their equipment? What are some basic editing techniques for nature photography, such as cropping, exposure adjustments, color correction, sharpening, noise reduction, and contrast adjustments, and how can they enhance the visual appeal and quality of your images?
These are all great questions that highlight the various benefits and challenges of nature photography.
Nature photography can promote eco-tourism and responsible travel by showcasing the beauty and importance of natural habitats and encouraging people to visit them in a way that is respectful and mindful of the environment. This can help to support conservation efforts and protect natural habitats from the negative impacts of tourism.
In terms of mental and physical health, nature photography can encourage mindfulness and relaxation by providing a way to connect with nature and escape from the stresses of everyday life. It can also promote physical activity by encouraging photographers to explore and hike in natural settings.
Nature photography can showcase the importance of conservation by highlighting the beauty and diversity of natural habitats and the importance of preserving them for future generations. This can encourage a sense of responsibility towards the environment and promote conservation efforts.
Natural light plays a crucial role in nature photography as it can affect the mood, tone, and quality of photographs. Photographers need to be mindful of the direction and intensity of light to create stunning and impactful images.
Weather conditions can impact the safety of nature photographers and their equipment. It is essential to be prepared for different weather conditions and have appropriate gear to protect oneself and equipment.
Basic editing techniques such as cropping, exposure adjustments, color correction, sharpening, noise reduction, and contrast adjustments can enhance the visual appeal and quality of nature photographs. However, it is important to use editing techniques in moderation to maintain the authenticity of the natural setting and avoid over-processing the images.
Your articles are pure gold and really help a lot in understanding what you need to know about making your photos distinguish themselves from simple amateur made ones. To be honest there are so many little details that feels a bit overwhelming but the more time you spend time with this the better you will surely become.
Thank you so much for your kind words! I’m glad to hear that you find my articles helpful and informative. You are right that there are many details to consider when it comes to photography, and it can be overwhelming at first. However, with practice and patience, you can definitely improve your skills and make your photos stand out from amateur ones. Remember that photography is a journey, and the more you immerse yourself in it, the more you’ll learn and grow as a photographer. Don’t be afraid to experiment and try new things, and most importantly, have fun with it!