


Light Trails Photography is a fascinating technique that can produce stunning images. It involves capturing the movement of light sources, such as cars, trains, or even fireworks, as they move through the frame. The result is a beautiful and dynamic image that captures the energy and motion of the scene.
The importance of Light Trails Photography lies in its ability to create unique and eye-catching images. It allows photographers to capture the beauty of motion and create images that are both artistic and technically impressive. Light Trails Photography is a great way to experiment with different techniques and push the boundaries of traditional photography.
To create captivating light trail compositions, the primary technique is to use longer exposure times that capture the movement of light.
Light trails are not visible to the naked eye and only exist as an illusion in photography. This makes light trail photography a unique and fascinating genre, as it allows you to capture something that doesn’t exist in a single moment. While most people expect photographs to accurately represent reality, light trail photos offer a creative way to showcase a different perspective without distorting the truth.
One of the great things about Light Trails Photography is that it can be done with relatively simple equipment. All you need is a camera, a tripod, and a remote shutter release. Of course, having a good lens and a camera with manual controls will help you achieve better results, but it’s not necessary to have the latest and greatest gear to get started.
Another benefit of Light Trails Photography is that it can be done in a variety of locations and at different times of the day. You can capture light trails in the city, on a highway, or even in a rural area.
In conclusion, Light Trails Photography is a fun and creative way to capture the beauty of motion and create unique and visually stunning images. With the right equipment, location, and technique, anyone can try their hand at this exciting form of photography. So grab your camera, find a good location, and start experimenting with Light Trails Photography today!
Popular types of light trails photography
Light Trails Photography is a fascinating technique that captures the movement of light in a still image. It’s a popular form of photography that has gained a lot of attention in recent years. There are several types of light trail photography, each with its unique style and approach. In this section, we’ll explore some of the most popular types of light trail photography.
-
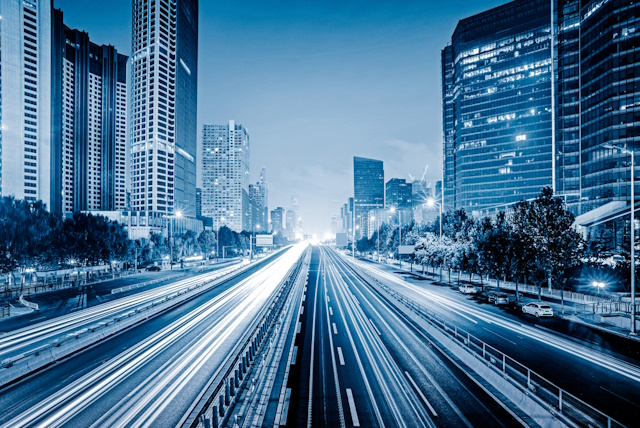
Traffic Light Trails Photography
One of the most common types of light trail photography is traffic light trails. This technique involves capturing the light trails created by moving vehicles on a busy road. It’s a great way to capture the hustle and bustle of city life and create stunning images.
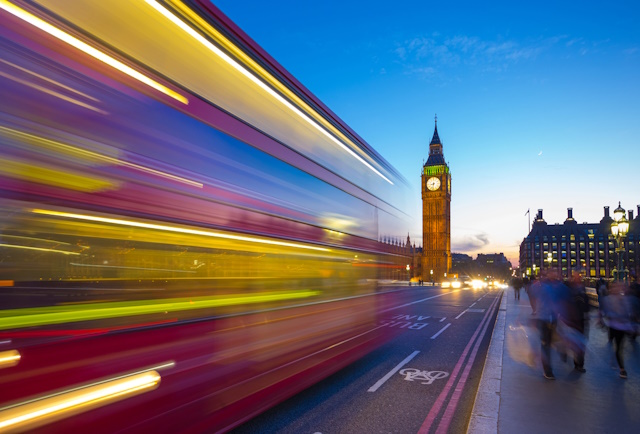
Photo by Depositphotos
-
Firework Light Trails Photography
Firework light trail photography is another popular type of light trail photography. It involves capturing the light trails created by fireworks in the night sky. It’s a challenging technique that requires a lot of patience and skill, but the results can be truly breathtaking.

-
Star Trails Photography
Star trail photography is a technique that involves capturing the movement of stars in the night sky. It’s a challenging technique that requires a lot of patience and skill, but the results can be truly stunning. By using a long exposure, you can capture the movement of the stars as they move across the sky, creating beautiful and mesmerizing images.
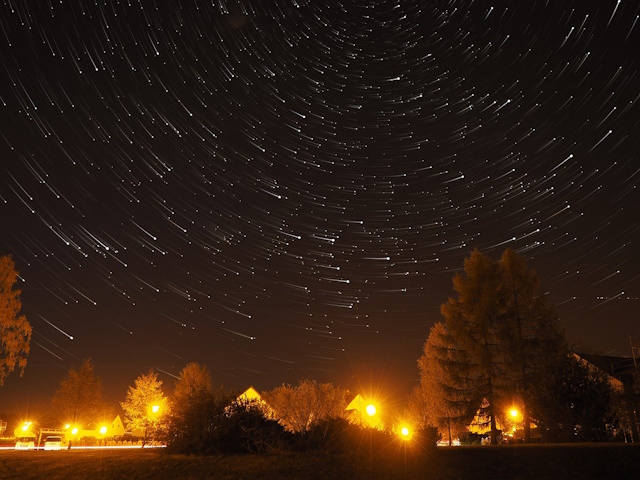
Image by Norbert Pietsch from Pixabay
-
Light Painting Photography
Light painting photography is a technique that involves using a handheld light source to paint light onto a subject while the camera’s shutter is open. It’s a creative and fun technique that can produce some truly unique and beautiful images.

Photo by Depositphotos
-
Rotating & spinning objects
If you’re looking to capture some stunning light trails photography, an amusement park is a great place to go. One of the most iconic rides to photograph is the rotating wheel, which can create mesmerizing light trails as it spins.
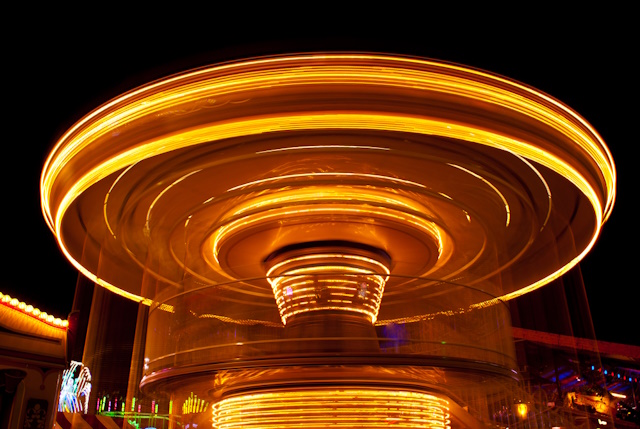
Photo by Depositphotos
In conclusion, light trails photography is a fascinating and creative form of photography that offers endless possibilities for experimentation and creativity. Whether you’re capturing traffic light trails, firework light trails, or light painting, there’s always something new and exciting to explore. So grab your camera and start experimenting with light trails photography today!

Light Trails Photography Tips
1- Choose the right equipment
If you have an interest in Light Trails Photography, there are certain essential tools and equipment you’ll require to begin. The following compilation outlines the necessary items you’ll need to initiate your light trail shooting endeavors:
-
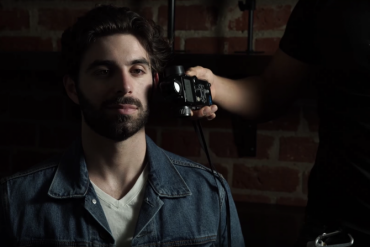
Camera:
A camera with manual controls is ideal for Light Trails Photography. This will allow you to adjust the shutter speed, aperture, and ISO to get the best results. However, even a basic point-and-shoot camera can work if it has a manual mode. If you’re looking to invest in a new camera, consider a DSLR or mirrorless camera with good low-light performance and a fast burst mode.
-
Tripod:
A sturdy tripod is essential for keeping your camera steady during long exposures. This will help prevent camera shake and ensure that your images are sharp. Look for a tripod that is sturdy enough to support your camera and lens, and that can be adjusted to different heights and angles.
-
Remote Shutter Release:
A remote shutter release allows you to trigger the camera without touching it, which can help prevent camera shake. This is especially important for longer exposures, as even the slightest movement can cause blur in your images. There are several types of remote shutter releases available, including wired and wireless options.
-
Lens:
When it comes to light trails photography, any lens can be used to capture stunning images. However, there are a few factors to consider when choosing the right lens for the job.
- The lens aperture is an important consideration, as light trails are best captured in low light conditions and with a longer shutter speed. This means that a fast lens is not necessary, and you can use any lens with a wide enough aperture to allow for longer shutter speeds.
- Autofocus and image stabilization are not essential for light trail photography, as you will be using a tripod to keep your camera stable during the exposure. Manual lenses can work just as well as autofocus lenses.
- The choice of focal length depends on your location and personal taste. Fisheye and wide-angle lenses are great for capturing bird’s eye views of city streets or tall monuments. Telephoto lenses work best when looking down a road, as they can compress the perspective and create a sense of depth in the image.
Ultimately, the choice of lens for light trails photography is up to you and depends on the effect you want to achieve. A superzoom lens, such as the Sigma 18-200mm f/3.5-6.3, can be a good choice for capturing a variety of scenes and perspectives.
In summary, any lens can be used for light trails photography, but factors such as lens aperture, autofocus, image stabilization, and focal length should be considered when choosing the right lens for the job.
When choosing your equipment, keep in mind that you don’t need the most expensive gear to get started with Light Trails Photography. A basic DSLR or mirrorless camera, a tripod, and a remote shutter release are all you need to get started. As you become more experienced, you can invest in more advanced equipment.
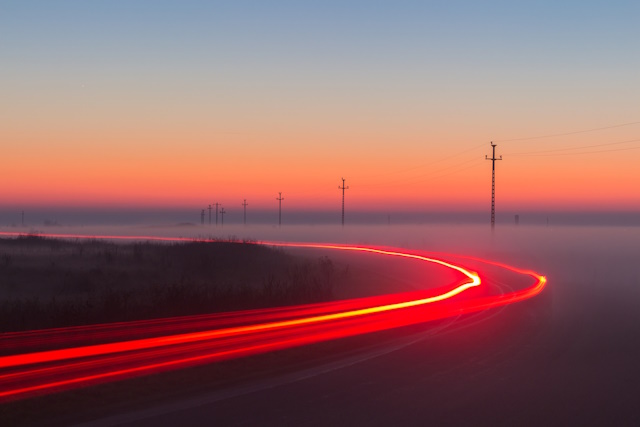
Photo by Depositphotos
In addition to the basic equipment, there are a few other accessories that can be helpful for Light Trails Photography. These include:
- Filters: Neutral density filters can be used to reduce the amount of light entering your lens, allowing for longer exposures. Polarizing filters can be used to reduce glare and enhance colors.
- Extra batteries and memory cards: Long exposures can drain your camera’s battery quickly, so it’s always a good idea to have a spare battery on hand. Similarly, shooting in RAW format can take up a lot of memory card space, so it’s a good idea to have a few extra cards on hand.
In summary, the equipment you need for Light Trails Photography is relatively simple and affordable. A camera with manual controls, a tripod, a remote shutter release, and a wide-angle lens are the essentials. With these tools, you’ll be ready to start experimenting with Light Trails Photography and capturing stunning images of motion and light.
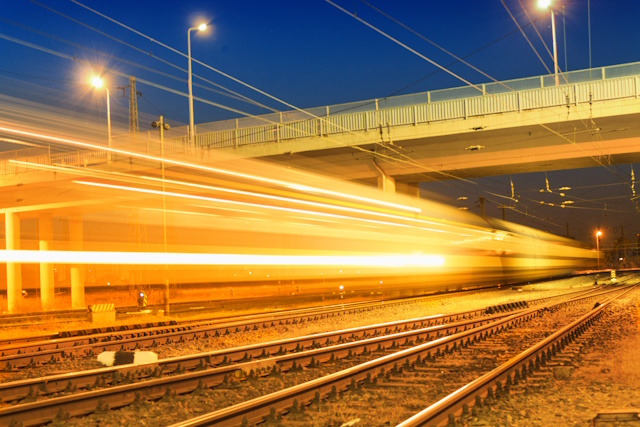
Photo by Depositphotos

2- Look for interesting Locations & Best time
Selecting the ideal location and timing plays a pivotal role in capturing outstanding results in Light Trails Photography. To assist you in embarking on this endeavor, here are a few valuable tips to consider:
-
Choosing the right location:
Look for locations with interesting light sources, such as busy streets, highways, or bridges. Consider the background and foreground of your shot, and look for elements that can add interest and depth to your image. Experiment with different angles and perspectives to find the best composition.
-
Best time to shoot:
The best time to shoot Light Trails Photography is during the night and when the sky is dark. In addition, you can also try, for some scenes to shoot in the blue hour, which is the period of twilight before sunrise or after sunset. This is when the sky has a deep blue color, and the contrast between the light trails and the background is most striking.
- Weather conditions:
Weather conditions can have a big impact on your Light Trails Photography. Rainy or foggy conditions can create interesting reflections and diffused light, while clear skies can create a stark contrast between the light trails and the background. Consider the weather conditions when planning your shoot, and be prepared to adapt to changing conditions.
When choosing your location, keep in mind that safety should always be your top priority. Avoid shooting in areas with heavy traffic or where it may be dangerous to set up your equipment. Always be aware of your surroundings and be respectful of others who may be using the area.
In summary, choosing the right location and timing is essential for getting great results in Light Trails Photography. Look for interesting light sources, shoot during the night or at the blue hour, and be prepared to adapt to changing weather conditions. With the right settings and equipment, you’ll be able to capture stunning images of motion and light.
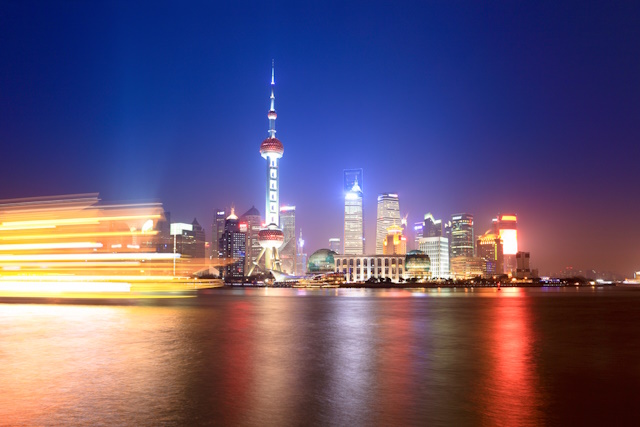
Photo by Depositphotos
3- Master your Camera Settings
In light trails photography, capturing stunning images is all about mastering your camera settings. Let’s dive into the essential settings you need to know:
-
Shutter Speed:
Shutter speed controls how long your camera’s sensor is exposed to light. In light trail photography, you’ll need a slow shutter speed to capture the movement of light over time.
Start with a shutter speed of 10-30 seconds. This will give you enough time to capture the light trails as they move through your frame. Don’t be afraid to experiment with different shutter speeds to achieve the desired effect.
-
Aperture:
A smaller aperture (higher f-number) will keep more of your scene in focus. Aim for an aperture between f/8 and f/16. This ensures sharpness throughout your image.
-
ISO:
Keep your ISO low, around 100-200, to minimize the noise in your photos. A low ISO setting will produce cleaner, more vibrant images.
-
White Balance:
Set your white balance to “Auto” or “Tungsten” for accurate colors. This will help balance the warm tones of artificial light sources.
*
Photo by Depositphotos
4- Use the Long Exposure Technique
Being interested in light trails photography, then you need to master the art of long exposure. Long exposure is a technique that involves using a slow shutter speed to capture the movement of light over time. Below are valuable tips to effectively utilize long exposure in your photography:
- Start with a shutter speed of 10-30 seconds to capture the light trails as they move through your frame.
- Experiment with different shutter speeds to achieve the desired effect. A longer shutter speed will create longer light trails, while a shorter shutter speed will create shorter trails.
- Remember to balance your shutter speed with the appropriate aperture and ISO settings. A smaller aperture (higher f-number) and a low ISO will help maintain image sharpness and minimize noise.
In summary, mastering long exposure is crucial for creating stunning light trail photography. Keep these tips in mind, and don’t be afraid to experiment with different settings to achieve the desired effect. Happy shooting!
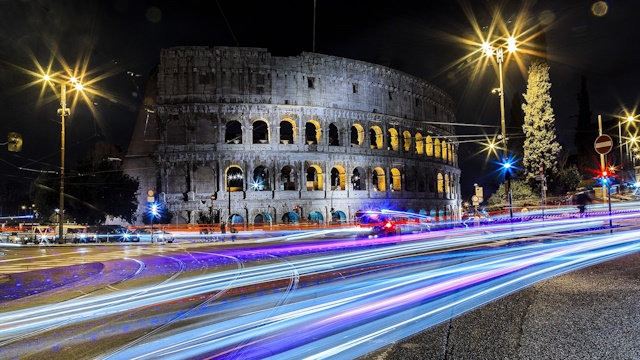
Photo by Lewis McNeal
5- Experiment with different Compositions & angles
One of the best ways to create unique and captivating light trail photos is to experiment with different compositions and angles. By changing your perspective, you can create images that stand out from the rest and showcase your creativity.
Below are some suggestions to assist you in exploring various angles in light trails photography:
- Get low: Try shooting from a low angle to capture the light trails from a different perspective. This can create a more dramatic effect and make the light trails appear larger and more prominent.
- Shoot from above: Shooting from a high angle can also create interesting and unique light trail photos. You can capture the light trails from a bird’s eye view, which can create a mesmerizing effect.
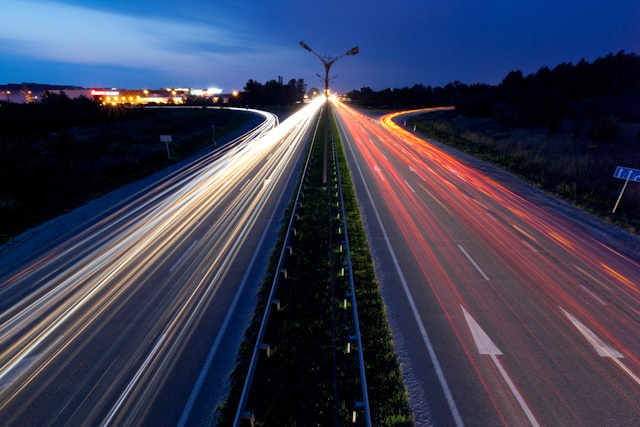
Photo by Depositphotos
- Explore Different Camera Orientations: Experiment with both horizontal and vertical compositions to see how they affect the overall impact of your light trails. Each orientation can create a different sense of movement and composition.
- Move around: Don’t be afraid to move around and try different angles. Walk around the scene and look for interesting perspectives that can make your light trail photos stand out.
- Play with reflections: Look for reflective surfaces, such as water or glass, to capture the light trails’ reflections. This can create a stunning effect and add depth to your photos.
- Embrace Symmetry or Asymmetry: Depending on the scene and your creative vision, you can experiment with symmetrical or asymmetrical compositions. Symmetry can bring a sense of balance and harmony, while asymmetry can add a dynamic and unconventional touch to your images.
In conclusion, experimenting with different compositions and angles is a great way to create unique and captivating light trail photos. Don’t be afraid to try new things and explore different perspectives. With a little creativity and practice, you can capture stunning light trail photos that showcase your unique style and vision.
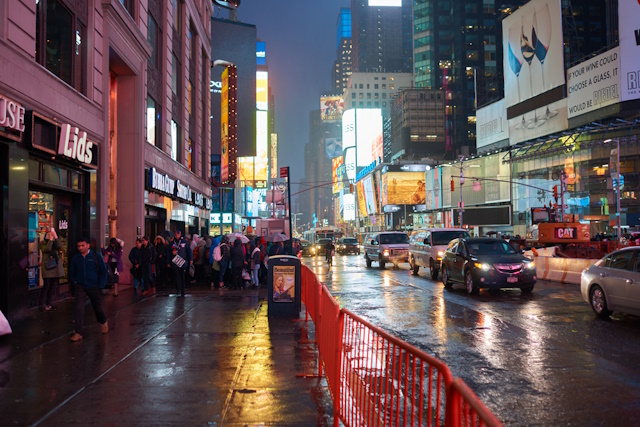
Photo by Depositphotos
6- Shoot in RAW format
Shooting in RAW format is important for photographers who want to have more control over their images during the editing process. RAW files contain all the data captured by the camera’s sensor, which means they offer greater flexibility and more options for editing compared to JPEG files.
RAW files allow photographers to adjust the exposure, white balance, and other settings without losing image quality. This is because RAW files are uncompressed and unprocessed, which means they retain all the details and information captured by the camera.
On the other hand, JPEG files are compressed and processed by the camera, which means they lose some of the original data and details. This can limit the photographer’s ability to make significant adjustments during the editing process.
7- Experiment with the light painting technique
If you’re looking to add some creativity to your light trails photography, experimenting with light painting is a great way to do it. Light painting involves using a light source to paint or draw in the air while taking a long exposure photograph. This technique can add a unique and artistic touch to your light trail photos.
To get started with light painting, you’ll need a few things. First, you’ll need a camera that allows for long exposures. A tripod is also essential to keep your camera steady during the long exposure. You’ll also need a light source, such as a flashlight, LED strip, or glow sticks.
Once you have your equipment ready, find a dark location with minimal ambient light. Set up your camera on the tripod and adjust the settings for a long exposure. Start with a shutter speed of 30 seconds and adjust as needed.
Next, use your light source to paint or draw in the air while the camera is taking the long exposure. You can experiment with different colors, shapes, and movements to create unique light paintings. Try moving the light source in different directions, or even have someone else move it while you take the photo.
In summary, light painting is a fun and creative way to add some variety to your light trail photography. With a few basic tools and some experimentation, you can create unique and artistic photos that stand out from the crowd. So grab your camera, tripod, and light source, and start painting with light!
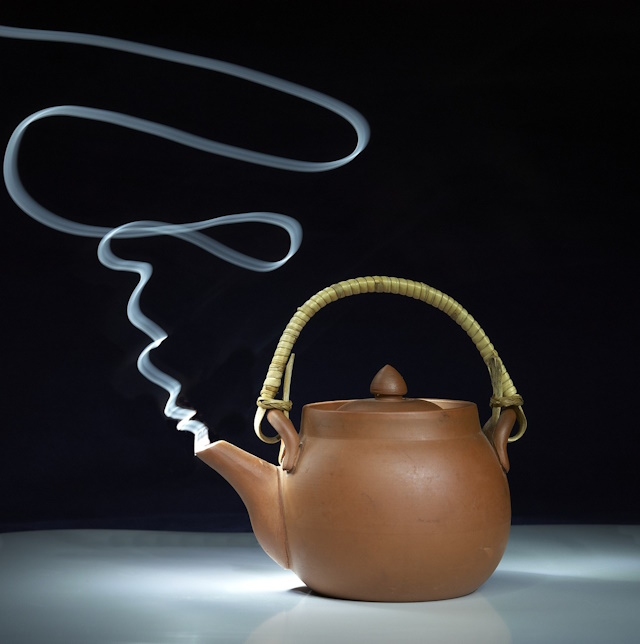
Image by Jan Mareš from Pixabay
8- Be patient and keep practicing
Remember, practice makes perfect. Don’t get discouraged if your first few attempts don’t turn out the way you want them to. Keep experimenting and trying new things.
9- Edit your photos
Once you’ve captured some stunning light trail photos, it’s time to edit them to make them even more impressive. Editing your photos can help you enhance the colors, contrast, and overall look of your images. Here are a few suggestions to assist you in editing your light trail photos:
-
Adjust the exposure:
Light trail photography often involves shooting in low light conditions, which can result in underexposed images. Adjusting the exposure can help you bring out the details and make your photos look brighter and more vibrant.
-
Play with the colors:
Light trails photography can create some stunning colors, especially when shooting in urban environments. Experiment with color balance and saturation to make your photos pop.
-
Crop and straighten:
Cropping and straightening your photos can help you improve the composition and make your images look more balanced. Look for distracting elements in the frame and crop them out to create a cleaner and more focused image.
-
Use filters:
Filters can help you add a unique and creative touch to your light trail photos. Look for filters that enhance the colors and contrast of your images, or try black and white filters for a more dramatic effect.
-
Sharpen your images:
Light trails photography can sometimes result in blurry images due to camera shake or movement. Sharpening your images can help you bring out the details and make your photos look sharper and more defined.
Finally, editing your light trail photos can help you enhance the colors, contrast, and overall look of your images. By following these tips, you can create stunning and unique light trail photos that showcase your creativity and vision. Remember to experiment and have fun with your editing, and you’ll be sure to create some amazing photos.
For further reading, you can check my editing tutorials, and my YouTube channel there are many tips and tutorials there.
Image by Lars Nissen from Pixabay
Conclusion
In conclusion, light trails photography is a fascinating and creative technique that can produce stunning results. It’s a great way to capture the energy and movement of a cityscape at night. However, it’s not an easy technique to master. It requires a lot of practice, patience, and experimentation.
To get started with light trail photography, you need to find a good location, set up your camera on a tripod, and experiment with different settings. Use a wide-angle lens, shoot in manual mode, and try different shutter speeds and apertures to get different effects.
Remember, safety should always be your top priority. Make sure you’re not obstructing traffic or putting yourself in danger. Use a remote shutter release or the self-timer function to avoid camera shake.
Don’t get discouraged if your first few attempts don’t turn out the way you want them to. Keep practicing and experimenting. With time and practice, you’ll be able to capture stunning light trails photos that will amaze your friends and family.
In summary, light trail photography is a fun and creative way to capture the energy and movement of a cityscape at night. It’s a technique that requires practice, patience, and experimentation, but the results can be truly stunning. So, grab your camera, find a good location, and start shooting!
Related posts
Slow Shutter Speed Photography Ideas
Long Shutter Speed Photography – How To Apply It?
Fireworks Photography Settings – Steps & Guidelines
Light Painting Photography Technique
Thanks for reading, I hope you enjoyed the article, in case you have any questions just drop them below & I will be happy to answer you.
The featured Photo by Andrei Photo
If you enjoy the site, don’t forget to subscribe, we will only inform you when a new article is posted.


I recently discovered this captivating article on light trails photography, and I must say it provides an excellent resource for photographers eager to explore this creative and mesmerizing genre. Your insightful tips and tricks make it a valuable guide for anyone looking to capture stunning light trail images and add a touch of magic to their photography portfolio.
What impressed me most about this article is the author’s clear passion for light trail photography. They convey their enthusiasm through detailed explanations of the technical aspects and artistic considerations involved in capturing compelling light trail images. Their expertise shines through, inspiring readers to embark on their own light trail photography journey.
I highly recommend this article to photography enthusiasts who wish to delve into the captivating world of light trail photography. Your passion, expertise, and practical guidance make it a valuable resource. By incorporating the tips and tricks outlined in this article, photographers can master the art of light trails photography, capturing breathtaking images that showcase the beauty of motion and light in a unique and artistic way.
Thank you so much for your kind words and thoughtful feedback! I’m thrilled to hear that you found my article on light trail photography to be a valuable resource for photographers looking to explore this creative and mesmerizing genre. It’s always my goal to convey my passion for photography and inspire others to embark on their own creative journeys.
I’m glad that you found my tips and tricks to be insightful and practical, and I hope that they will help you and other photographers capture stunning light trail images that showcase the beauty of motion and light in a unique and artistic way. If you have any further questions or feedback, please don’t hesitate to let me know.
I think that traffic light trails is one of the most common type of photography there is. I have seen literally hundreds of such photos and it is amazing how good they look. I particularly like light trails that reflect on water and those star movements. Because I do not see such very often. Another great article you made. Excellent read!
Thank you for your feedback and kind words! I’m glad to hear that you enjoyed my article on traffic light trails in photography. It’s true that light trails can be a popular subject for photographers, but there are many ways to capture them creatively and make them stand out. I’m also glad to hear that you appreciate light trails that reflect on water and star movements, as these can indeed create stunning and unique images. If you have any further questions or topics you’d like me to cover, please don’t hesitate to let me know.