

As a well-trained photographer, taking beautiful photographs should be your top priority. However, no matter how much you tweak your camera settings to ensure they are perfect for the subject and location, you may hit upon some complications that only photography post-production can set right.
But if you are new on the scene and need to learn more about post-processing photography, this is the guide for you.
Let’s start from the basics, shall we?
What is Photography Post Production?
Photography post-production refers to all the action or processes you take after the shooting phase. This term is usually used interchangeably with terms like post-processing, post-production, or just post. Therefore, let’s break the term into photography and post-production for a better understanding.
‘Production‘ in photography refers to the real action on set or location, i.e., what you do when you wander around with a camera in your hand and taking photographs.
‘Post-production‘ or ‘Post-processing‘ refers to everything that happens after you are done shooting or taking photographs in the field. It is any form of modification on any image after the exposure has been entirely completed.
Most images that come straight out of any camera are never suitable for direct publication.
How much post-production is involved in photography and how long it takes depends significantly on the project. You can process several dozen photographs within one hour unless you are doing some major retouching.

Some of the popular post-production editors include:
- Photoshop
- Lightroom
- GIMP
- MS Paint
- Advance Camera Raw
- Dark Table
- UFO Raw editor
There are several steps involved in post-production. But before checking it out, let’s find out why post-processing photography is essential.
Why is Post-processing Important?
Photography post-production is as crucial as the actual production. In fact, it is a substantial part of doing excellent work, and for a few reasons.
First of all, post-processing photography gives you the chance to fix any small issue that you may have overlooked while on location. You will be able to correct exposure and color, and you will make all the necessary things you need to do to ensure your work looks professional and good.
It is during post-production photography that you can effectively stamp your work. You can make any photograph of that famous tourist spot or street-side café that most tourists love to visit to look somewhat different during this period. This is where you get the chance to develop or create a consistent look for all of your work or a particular piece of work.
Post-processing photography is also where you get to prepare all your work for different mediums such as Facebook, Instagram, Flickr, etc. Of course, if you plan to print your work, you may have to do other things a bit differently from the norm.
Post-production service in photography is not new, even though it is getting a lot of attention these days. It is so essential that almost all great photographers – and movie directors – spend as much time as they do during a shooting.
One thing you need to be sure of is that post-production photography is not a magic bullet. You will never be able to fix any major flaws. This is why you need to work very hard when you are on location in order to get the best shots and angles at all times.
Photo by James Wheeler from Pexels
Photography Post-Processing Techniques
Processing photographs include:
- Creating hyper-realistic images
- Adjusting images back to reality
- A few abusive uses no one will complain about, etc.
Processing photographs should be a significant source of enjoyment for most photographers. However, it is a painful endeavor for many others. But at the end of the day, your processing efforts pay off, and your photographs look spruced up.
Below are some photography post-production techniques and a few tips that will make all your photographs come to life:
Apply Curves using Photoshop
Photographers use curves to fine-tune their exposure. They do this by separating the light levels in photographs. Exposure options help to adjust entire images at once.
Although Lightroom has individual sliders within the basic panel, which gives room for more control, curves adjust middle tone, darks, and lights pixels individually. Curves can be adjusted through a graphical representation or individual sliders.
Curves are divided into the following:
- Lights
- Highlights
- Shadows
- Darks
When you adjust the curves, it reduces contrast if you aim to get a muted look or creates contrast. Making lights much lighter and darks darker helps color ranges in photographs really pop since they enhance the difference between tones.
Curves can be adjusted via the curves graph or sliders in Photoshop or Lightroom, under image -> Adjustments -> Curves.
Sharpen Image Tools
No post-processing can fix one thing: focus unless you have a light field camera that comes with an adjustable focus. However, some tools can help to make photographs sharper.
When shooting in RAW, no sharpening is applied to the image, unlike with a JPEG. This implies that it is vital to add your sharpening.
You will find sharpening options in Lightroom, all of which are under the detail slider. The number of options controls how much sharpening effect you should apply. The radius will determine if the sharpening will happen at the middle of the pixel or the edges.
A larger radius generates more defined edges, while the detail option focuses much more on the photographs’ finer details instead of the whole image.
Masking also allows you to easily control every area of the photograph the effect is applied to. If you move the slider to the right, the sharpening effect will be applied to fewer areas and vice versa.
Dodge and Burn
Dodge lightens particular areas of photographs while Burn darkens. Both are Photoshop tools within the toolbar. The top menu allows you to adjust the exposure and range or how dark or light the effect is along with the brush size, especially if the latter has a faded or solid edge.
Frequently Asked Questions
Where to Get Photography Post Production Services?
If your Lightroom or Photoshop skills are not up to par, you can seek post-production services for your photograph in your area or online. Here are some of the top post-production service providers:


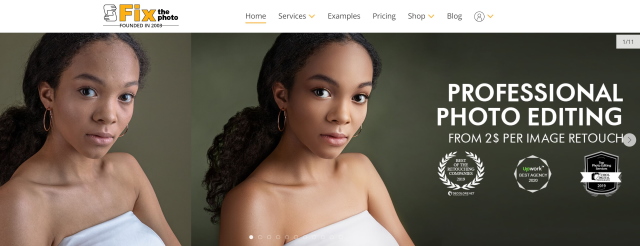


These service providers have their respective strong and weak points. Make sure you perform your due diligence before doing business with them.
Where to start post-production in photography?
Most post-production in photography starts from the following:
- File Preparation
- Pre-visualization
- Building Up
- Pre-Print
- Output
Each of these steps has numerous sub-steps that allow for a wide range of creative control. This holistic way of thinking about post production in photography helps beginners and experienced photographers remain organized and build their skills.
What is done in the post-production of photography?
- A lot is done in post-production photography such as all or some of the following:
- Importing each material that was shot and backing them up in cloud storage or hard drive
- Running through the entire shot materials and taking the time to pick the outstanding ones, i.e. photo editing/image culling
- Correcting color, brightness, and exposure settings, i.e. photo manipulation and retouching
- Fixing every possible issue such as dust spots, crooked horizons, blemishes, etc.
- Applying the same stylistic or color toning adjustments
- Preparing each picture for export and printing, posting, or even sharing them online
How long does photography post-production take?
A lot of variables are involved in the post-production services of photography. However, the 3 significant criteria to focus on include:
- The number of photographs you want to edit
- The way you shoot, whether in batches or haphazardly
- What your business model is based on.
For instance, let’s say you attend a wedding attended by up to 150 guests and you shoot 400 images. And you are the type of photographer that shoots in batches. If you push yourself hard, it shouldn’t be too difficult to turn the original 400 pictures into 360/370 corrected and final images within 2 days.
Of course, this depends significantly on how tricky the lighting was when you took the photographs as well as the time pressures you had.
Therefore, post-production photography can only take as long as the 3 criteria listed above, including how hard you decide to push yourself during the entire editing process.
Conclusion
It is believed you now have a much better understanding of what photography post-production is all about; making your photographs the best via the use of software editors on your computer.
And it is assumed that you also know and understand the importance of post-processing photography. If you want your photographs to look as captivating as those you see online, you should do your best to learn how to engage in post-production for your photos.
Hone your Lightroom or Photoshop skills by taking courses or watching videos about editing photographs on YouTube.
However, you can still seek photography post-production services by checking out the various options outlined in the section above.
Related Posts
How To Match A Subject Into Any Background
Create Real Shadow In Photoshop
How To Add Reflection In Photoshop
Create Light Effect In Photoshop
Create 3D Image – Photoshop Beginner’s Guide
How To Fix Distortion In Photoshop
The full list of our editing posts can be found inside the Editing group on the main page
Thanks for reading, I hope you enjoyed the article if you have any questions just post them below & I will be happy to answer you.
The featured Photo by Rene Asmussen from Pexels
If you enjoy the site, don’t forget to subscribe, we will only inform you when a new article is posted.


Excellent.
Photography post production is required for photographer and eCommerce owner. Its nice sharing for all of the sectors.
You’re absolutely right—post-production is such a crucial step, whether it’s perfecting a stunning photograph or making products stand out in eCommerce. It’s great to see how these tools cater to such diverse needs. Thanks for the feedback! Do you have a go-to post-production tool or technique you swear by?
Thanks, Ehab! Your guide on post-production, especially the techniques for deep etching, was incredibly helpful for enhancing photos naturally!
It was a great and affordable article. Thanks for the sharing with us.
Great and helpful piece of information. I believe that proofreading can be very helpful in organizing content and can make it error free too.
Thanks
Useful and informative article you have shared with us. Liked and appreciated it.
Thanks
Thank you so much ! for sharing this beautiful information about photography post-production. That was really helpful.
You are welcome
It’s really nice to read and very informative. So much thanks for the sharing. I was looking for that and this is very important for me. Thanks!
Thanks
Useful and informative article you have shared with us. Keep it up
This is a great article and informative. I have very glad to read your article. You are a really brilliant person. I have read your full article and I have got much important news that was very helpful to me. Excellent explanation and I appreciate it. Thanks a lot for sharing a nice article. For portrait photography, e-commerce business, Photoshop needs product photo editing making images pop up.
Hey Ehab Amin,
This blog is very informative. all the tips are really helpful. keep it up! I really learned a lot from your blog. I hope to post more topis like this.
Thanks for dropping by. Glad that you liked the artile.
Very much informative post. Thanks for sharing with us.
Glad you liked the post, thanks for the comment
Useful and informative article you have shared with us. Liked and appreciated it.
Thanks for your comment, glad you liked the article
Really informative and helpful tips! These tips have been of great benefit to my work. I would like to get something more modern from this site. Thanks For Sharing and Keep Up the Good Work.
This is incredible! I would love to play around with some of these options and see what I could do! I think I like the idea of curves to adjust the look of the entire picture, while image sharpening can definitely help to shape up a slightly blurred picture. I have a few questions, though. Are these tools for digital images? If so, can they be used on pictures taken with a cell phone? Does the image sharpening work on a picture that has become blurry due to blowing it up? I look forward to your reply.
Hi Cynthia
Thanks for your comment, Yes these tools are used for digital photos and pictures that are taken by cell phone. You can sharpen a blurry photo in case the data in the photo’s histogram are not clipped because that means that there are no data at all to recover.
I just started my first class on photography and I had no idea what I was walking into. There’s a lot more complexities that go into photography than I ever even thought. This is how I ended up on your site because I ended up researching a little bit on photography after seeing how much went into it from my class. Thank you so much for all this valuable information, your website overall is very valuable
Thank you Misael! glad that you find the post & the site useful.