

Welcome to the enchanting world of Northern Lights photography! If you’ve ever dreamed of capturing the mesmerizing dance of colors in the night sky, this guide is here to help you get started. The enchanting phenomenon known as the Northern Lights has captivated people for centuries. Northern Lights photography allows us to capture the beauty of these dancing lights in the sky and share them with the world.
What are the Northern Lights?
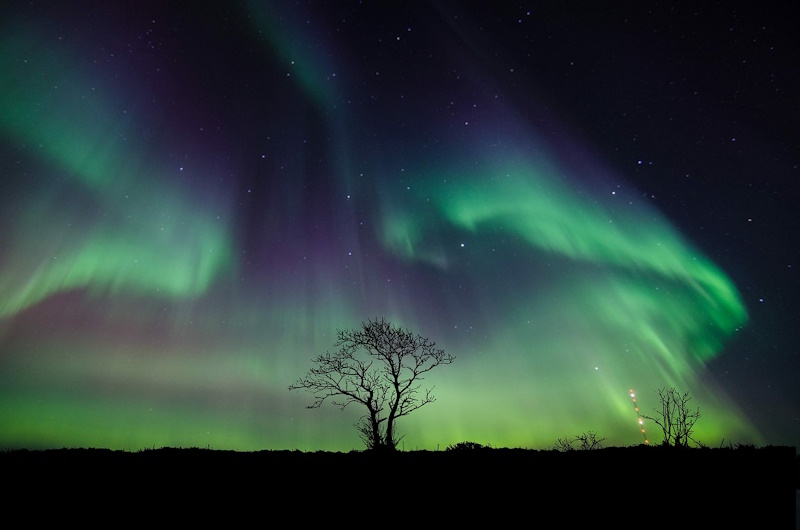
The Northern Lights, also known as the Aurora Borealis, are one of nature’s most captivating and mesmerizing phenomena. These ethereal light displays occur when charged particles from the sun collide with atoms in the Earth’s atmosphere. The result is a breathtaking dance of vibrant colors illuminating the night sky.
When do the Northern Lights happen? They can occur throughout the year, but they are more visible during the winter months when the nights are longer and darker. The best time to see them is typically between September and March.
The Northern Lights are commonly observed in countries close to the Arctic Circle, such as Iceland, Norway, Finland, Sweden, and Canada. These regions offer ideal viewing conditions due to their proximity to the Earth’s magnetic poles and minimal light pollution.
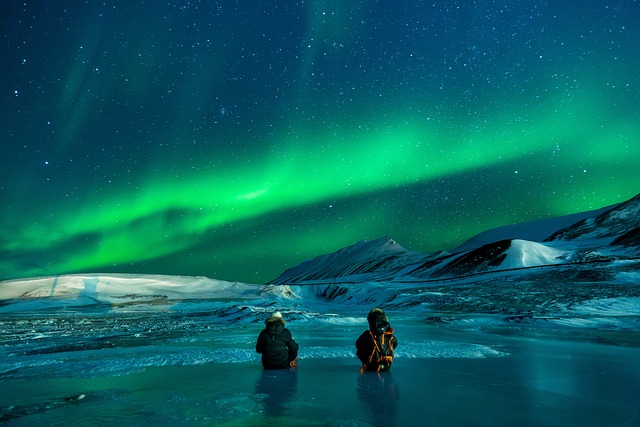
Image by Noel Bauza from Pixabay
Why photograph the Northern Lights?
Northern Lights photography allows you to capture the magical beauty of this celestial spectacle and preserve it for years to come. It offers a unique opportunity to showcase the wonders of nature and share them with others. Through your lens, you can freeze the fleeting moments of shimmering greens, purples, and pinks, creating images that evoke a sense of awe and wonder.
Photographing the Northern Lights also provides a personal connection with nature. It allows you to immerse yourself in the quiet darkness, surrounded by the vastness of the cosmos. Each experience is unique, as the lights dance and shift, creating patterns and shapes that are never the same. The challenge of capturing these ephemeral moments adds an element of excitement and reward to your photography journey.
Moreover, Northern Lights photography can be a deeply fulfilling creative outlet. It pushes you to explore different techniques and experiment with camera settings to capture the lights in their full glory. It challenges you to compose visually striking images, incorporating the lights as the centerpiece or using them to enhance the overall composition. The process of planning and executing a successful Northern Lights shoot can be immensely satisfying, giving you a sense of accomplishment as you capture breathtaking images.
Additionally, sharing your Northern Lights photographs allows you to inspire and educate others about this natural wonder. Your images can transport viewers to the remote corners of the world where the lights appear, fostering an appreciation for the beauty and fragility of our planet.
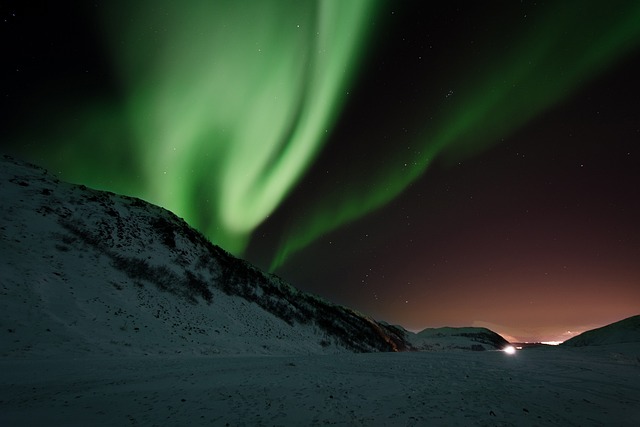
Image by JHGilbert from Pixabay
In the following sections of this guide, we will delve deeper into the techniques and tips for capturing stunning Northern Lights photographs. From understanding the gear and camera settings to composing compelling shots and post-processing your images, we will equip you with the knowledge and tools necessary to embark on your own Northern Lights photography adventure.
Preparing for a Northern Lights Photography Trip
-
Researching the best locations
Before embarking on your Northern Lights photography adventure, it’s crucial to research the best locations for optimal viewing and capturing opportunities. Look for places near the Arctic Circle, like Troms in Norway or Fairbanks in Alaska, known for their frequent Aurora displays. Consider factors such as accessibility, local infrastructure, and the availability of photography-friendly accommodations.
-
Planning the timing of your trip
Timing is everything when it comes to photographing the Northern Lights. Plan your trip during the months with longer nights, typically between September and March, as the darkness enhances visibility. Additionally, aim for dates with minimal moonlight to ensure a darker sky for clearer views of the auroras. Check the aurora forecast websites or apps to stay updated on solar activity levels and geomagnetic storms, which increase the chances of witnessing the lights.
-
Understanding the weather conditions
While the Northern Lights are a mesmerizing sight, the weather can significantly impact your photography experience. Familiarize yourself with the typical weather patterns of your chosen location and pack accordingly. Dress in layers to stay warm during extended periods outside. Keep in mind that clear skies offer the best conditions for capturing vivid Northern Lights photos, so check the local weather forecasts and be prepared to adjust your plans if needed.
By researching the best locations, planning your trip during the right season, and understanding the weather conditions, you’ll set yourself up for a successful Northern Lights photography experience.
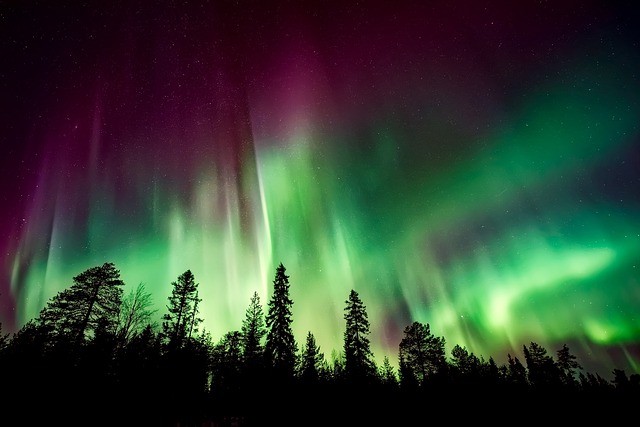
Image by David Mark from Pixabay
Essential Gear for Northern Lights Photography
-
Camera body and lenses
When it comes to capturing the Northern Lights, having the right camera gear is essential. Invest in a camera body that performs well in low-light conditions, preferably a DSLR or mirrorless camera with manual controls. Wide-angle lenses are ideal for capturing the expansive night sky and the dancing auroras. Look for lenses with low aperture values (f/2.8 or lower) to gather as much light as possible.
For additional resources check the below posts:
What Is The Best Wide Angle Lens For Nikon?
Best Wide Angle Lens For Canon- The Full Guide with Sample Photos
Best Wide Angle Lens For Astrophotography
-
Tripod and remote shutter release
Stability is crucial for capturing sharp Northern Lights photos. A sturdy tripod will keep your camera steady during long exposures. Look for one that is lightweight and easily adjustable. Additionally, a remote shutter release allows you to take photos without touching the camera, minimizing the risk of blurriness caused by camera shake.
-
Extra batteries and memory cards
Northern Lights photography can be a time-consuming endeavor, so be prepared with extra batteries and memory cards. Cold weather can drain battery life faster, so having spares ensures you don’t miss out on capturing those magical moments. Similarly, carry multiple memory cards with ample storage capacity to capture a large number of high-quality images.
-
Lens filters and lens hoods
Lens filters can enhance your Northern Lights photos by reducing glare and improving contrast. Consider using a polarizing filter to reduce reflections and make the colors pop. Additionally, a neutral density (ND) filter can help achieve longer exposures, which is useful for capturing the intricate movements of the auroras. Don’t forget to use lens hoods to minimize lens flares caused by unwanted light sources.
-
Warm clothing and accessories
Photographing the Northern Lights often involves spending prolonged periods outside in cold temperatures. Dressing appropriately is vital to stay comfortable and focused. Layer your clothing to trap heat and regulate your body temperature. Don’t forget essentials like a warm hat, gloves, and thermal socks. Hand warmers can be a lifesaver during chilly nights. It’s also a good idea to have a headlamp for navigating in the dark and a comfortable backpack to carry your gear.
You may check “Photography And Cold Weather- Protect Your Gear And Yourself” for more information.
By having the right gear, including a suitable camera body and lenses, a stable tripod, extra batteries and memory cards, lens filters and hoods, as well as warm clothing and accessories, you’ll be well-prepared for your Northern Lights photography adventure.
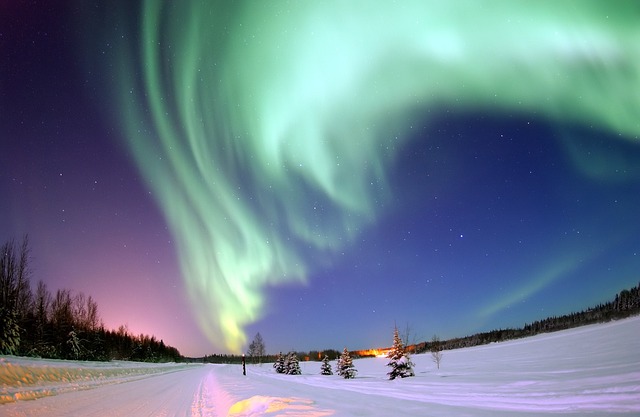
Image by WikiImages from Pixabay
Camera Settings for Capturing the Northern Lights
-
Manual mode vs. automatic modes
When photographing the Northern Lights, using manual mode gives you full control over your camera settings. Automatic modes may struggle in low-light conditions and result in inaccurate exposures. Take charge of your camera and adjust the settings yourself to achieve the best results.
-
How to focus
To avoid the common mistake of improper focusing in Northern Lights photography, follow these steps:
Set your camera to Live View mode and zoom in on a distant light source, such as the moon or a bright star. Manually adjust the focus ring on your lens until you achieve the sharpest point. While some cameras can autofocus in low-light conditions, manual focus is generally more reliable for capturing the Northern Lights.
Periodically review your captured Aurora images on the camera’s LCD screen. Zoom in on the stars to confirm the focus accuracy. This practice is particularly essential when transitioning between locations, as movements may inadvertently shift the focus ring.
While some photographers recommend focusing at the hyperfocal distance to achieve maximum sharpness, this method may not guarantee sharp stars. It’s better to use the manual focusing technique described above for precise results.
-
ISO settings for low-light conditions
In low-light situations like Northern Lights photography, using a higher ISO setting helps capture more light. To capture the mesmerizing beauty of the Northern Lights, adjusting your camera’s ISO is crucial. Ideally, for optimal results, raise your camera’s native ISO as high as possible, typically ranging between 3200 and 8000. However, determining the right ISO setting for the Northern Lights depends on several factors:
- Your camera: The ISO capabilities vary among camera models. High-end cameras equipped with Full-Frame sensors generally allow for higher ISO settings, typically ranging from ISO 5000 to 12800. On the other hand, if you’re using an entry-level camera with a crop sensor, exceeding the ISO limit can lead to digital noise and compromised image quality. It is recommended to maintain an ISO of 6400 or lower with this type of camera.
- Moonlight: The presence of a large and bright moon can illuminate the landscape. In such scenarios, it’s advisable to set a lower ISO, usually between 800 and 3200, depending on the moon’s brightness.
- External artificial lights: When photographing the Northern Lights in a setting where there are external lights, such as a street or house lights, it’s important to set a lower ISO. Failing to do so may result in blown-out highlights in your Aurora shots.
Considering these factors will help you determine the appropriate ISO setting for capturing the Northern Lights and ensure you achieve high-quality images.
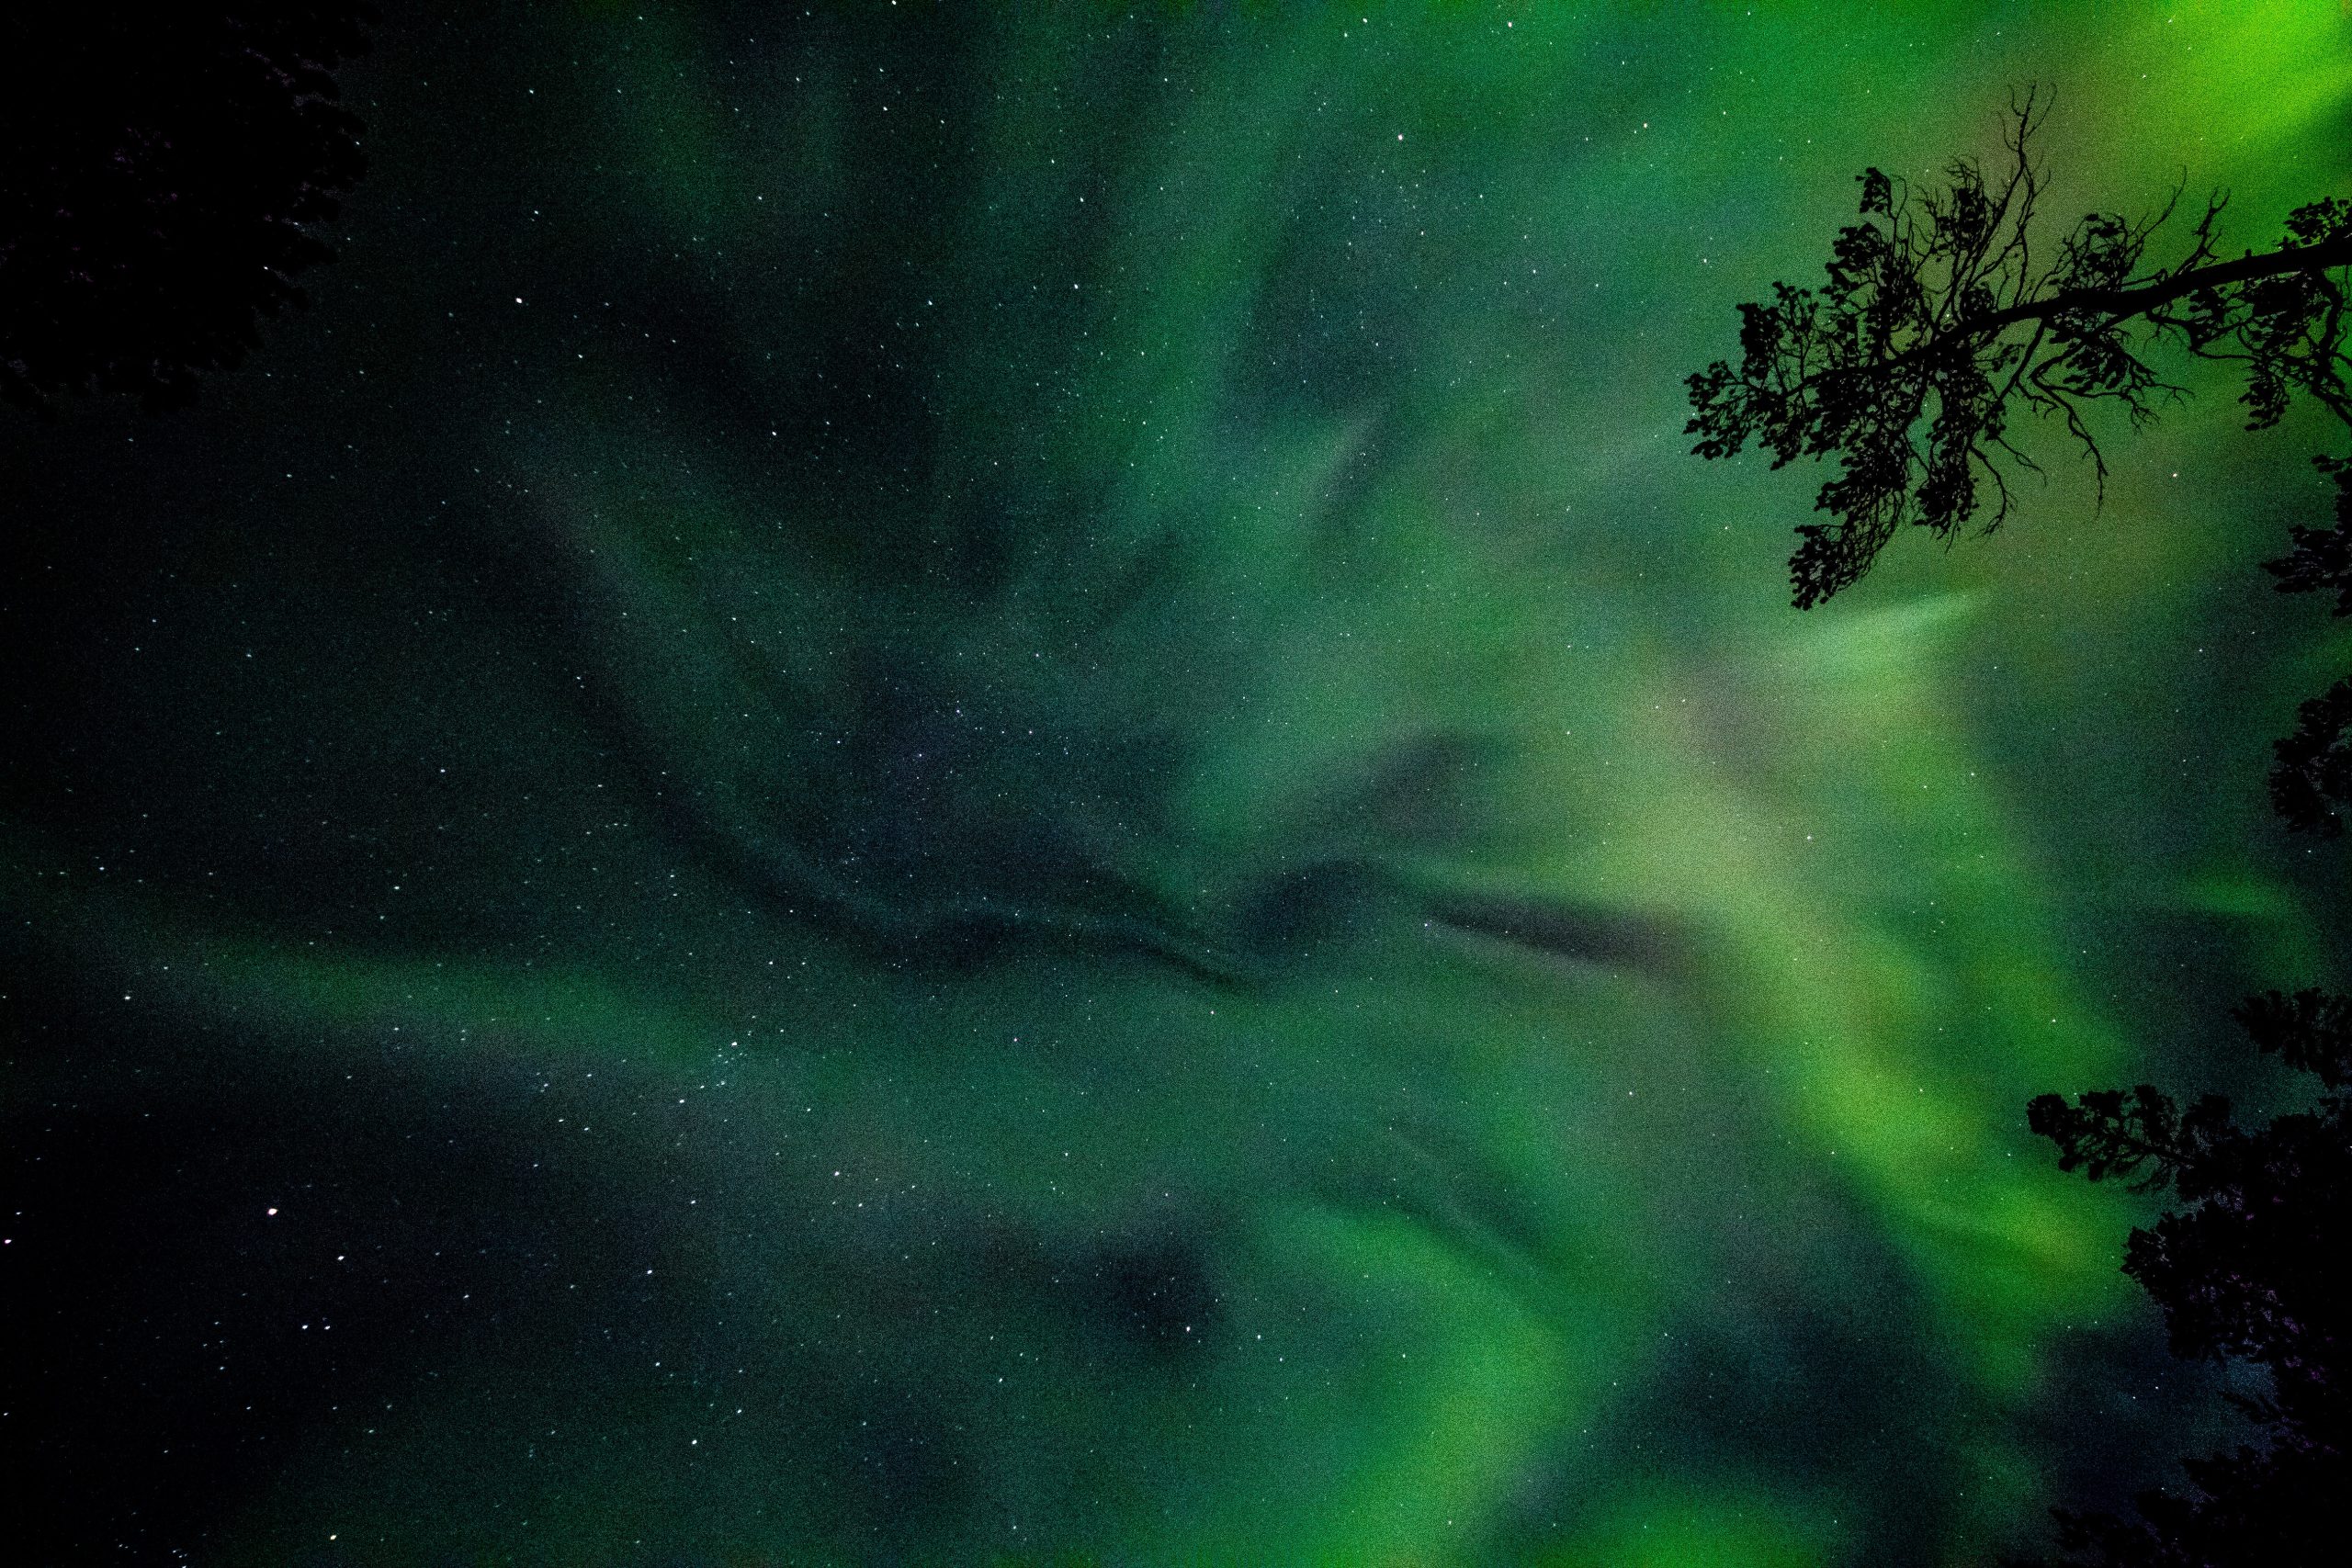
Photo by Margerretta
-
Aperture settings for depth of field
Choosing the right aperture is crucial for capturing the Northern Lights. A wide aperture, such as f/2.8 or lower, allows more light to enter your lens, resulting in brighter images. It also helps create a shallow depth of field, keeping the auroras in focus while blurring the foreground or background.
-
Shutter speed for capturing movement
The shutter speed is the final and most crucial exposure setting to consider in Northern Lights photography. However, it presents a unique challenge due to the unpredictable nature of the Aurora Borealis.
To capture the vibrant movements of the Northern Lights, you’ll need a longer shutter speed. Start with a few seconds and experiment from there. Be mindful of the Earth’s rotation, which can cause the stars to appear as trails with longer exposures.
Unlike capturing the Milky Way or other night-time shots where the stars dictate the maximum exposure time, the Northern Lights continuously evolve in shape and brightness. As a result, you must adjust the shutter speed based on each specific situation.
In general, the strength, dynamism, and brightness of the Northern Lights determine the required shutter speed. To capture the shape and movement of the Aurora in your Northern Lights images, relatively faster shutter speeds are necessary when the lights are stronger, more dynamic, and brighter.
To assist you in selecting the appropriate shutter speed for capturing the Northern Lights, refer to the following guidelines:
- Faint and static Auroras: When the Auroras are relatively weak and not easily discernible with the naked eye, opt for a shutter speed ranging between 8 and 12 seconds. This longer exposure time allows for capturing the faint details of the static lights.
- Vibrant Auroras: If the Northern Lights are clearly visible to the naked eye and exhibit some movement, aim for a shutter speed of 3 to 8 seconds. This range allows you to capture the vibrant colors and gentle movements of the Auroras while maintaining sharpness.
- Very strong Northern Lights: When the Auroras are exceptionally active and rapidly moving across the sky, a shorter shutter speed is necessary to freeze their motion and prevent blown-out highlights. In this case, select a very short shutter speed, typically ranging from 0.5 to 3 seconds.
By utilizing these recommended shutter speeds, you can adapt to the specific characteristics of the Northern Lights, ensuring your images convey the beauty and dynamism of this awe-inspiring phenomenon. Remember to experiment and adjust your settings based on the intensity and movement of the Auroras for the best results.
-
White balance adjustments
White balance affects the overall color temperature of your Northern Lights photos. Experiment with different white balance settings to achieve accurate color representation.
In Northern Lights photography, it’s essential to use a manual White Balance setting for consistent and natural colors in your images. A recommended starting point is around 3500 Kelvin, as this setting typically yields a more authentic color representation of the Northern Lights.
While you can adjust the White Balance during post-processing when shooting in RAW, maintaining color consistency during capture streamlines the editing process and ensures cohesive and stunning Aurora images. Embracing manual White Balance enhances the overall quality of your Northern Lights photographs and makes the editing workflow smoother and more efficient.
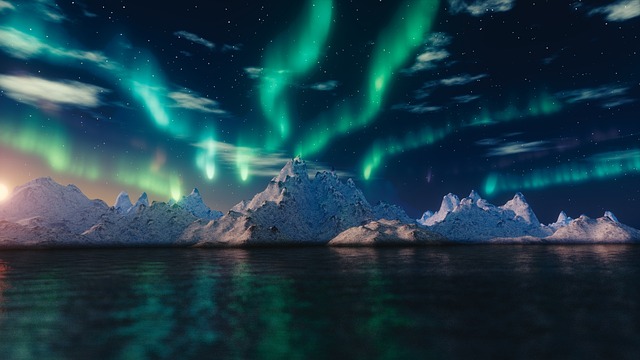
Image by GooKingSword from Pixabay
Composition and Framing Techniques
Choosing the right composition and framing techniques can greatly enhance your Northern Lights photography. Here are some tips to help you capture stunning images of this mesmerizing phenomenon:
- Choosing a focal point: Selecting a strong focal point adds depth and visual interest to your photos. Look for elements that can reflect the Aurora, such as water, snow, or ice. These reflective surfaces can create captivating compositions that showcase the ethereal glow of the Northern Lights.
When capturing the Northern Lights over a reflective surface, such as a lake or a snowy landscape, the reflection can create a sense of symmetry and balance in the composition. It adds a dynamic element that enhances the overall visual impact of the photograph. The reflection can also create a beautiful interplay of colors and light, making the image more captivating and immersive.
- Including human elements for scale: To convey the scale and grandeur of the Northern Lights, consider including human elements in your composition. People gazing up at the dancing lights add a sense of awe and wonder to your images. They provide a visual reference, emphasizing the immense size and beauty of the Auroras.
- Silhouettes: Incorporating silhouettes of trees, mountains, or people against the backdrop of the Northern Lights can create a dramatic and striking composition. The contrast between the dark foreground and the vibrant lights in the sky adds depth and interest to your photo.
- Vertical compositions for the Northern Lights crown: When the Aurora forms the iconic “Northern Lights crown,” try using a vertical composition. This allows you to capture the full extent of the crown as it arcs across the sky. Frame your shot to emphasize the magnificent shape and elegance of this phenomenon.
- Negative Space: Incorporating negative space around the Northern Lights can add a sense of serenity and emphasize the vastness of the sky. By allowing empty space in your composition, you give the Aurora room to breathe and become the focal point.
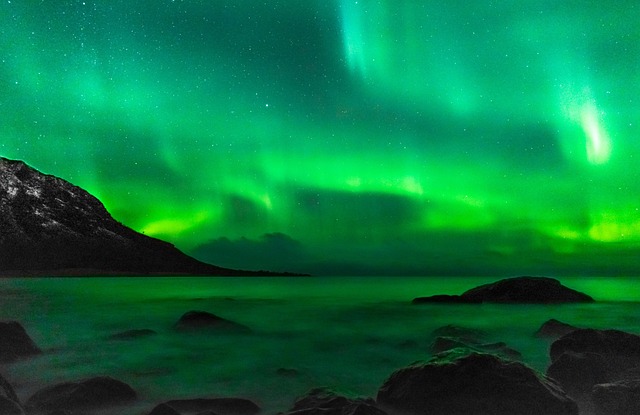
Image by Martin Solhaug Standal from Pixabay
Tips for Shooting the Northern Lights
Capturing the mesmerizing beauty of the Northern Lights requires patience, preparation, and a few key techniques. Here are some tips to help you make the most of your Northern Lights photography experience:
Monitor the aurora forecast:
Stay updated on the aurora forecast to plan your photography outing. Websites and apps dedicated to aurora forecasts provide valuable information on solar activity and geomagnetic storms, helping you determine the best time to witness and photograph the Northern Lights.
Find dark skies and reduce light pollution:
To ensure clear and vivid Northern Lights shots, seek locations with minimal light pollution. Get away from city lights and find remote areas or national parks where the night sky is at its darkest. This allows the colors of the auroras to shine brightly in your images.
Bracketing and exposure blending:
Experiment with bracketing by taking multiple shots at different exposure settings. This technique helps you capture a wider dynamic range and ensures proper exposure in challenging lighting conditions. Later, you can blend these exposures during post-processing for a well-balanced final image.
Pack essential gear:
Prepare your camera gear in advance. Along with the basics, consider carrying extra batteries, memory cards, and a lens cloth. Ensure your tripod is sturdy enough to withstand windy conditions, as stability is crucial for capturing sharp and clear Northern Lights photos.
Mind additional camera settings:
- Screen brightness: To get a more accurate preview and avoid underexposing your Aurora shots, turn down the LCD screen brightness. This allows you to see the scene as it truly appears, without the screen artificially brightening the image.
- Shoot in RAW: Capture your Northern Lights photos in RAW Shooting in RAW allows you to retain maximum image information, both in the highlights and shadows. This flexibility is essential for post-processing, where you can bring out the best in your images.
- Long exposure noise reduction: Disable the long exposure noise reduction feature in your camera settings. This setting can significantly slow down your camera’s processing time, potentially causing you to miss crucial moments while capturing the Northern Lights. Instead, address any noise issues in post-processing using dedicated software like Denoise AI.
- Learn from your camera’s histogram: Utilize your camera’s histogram to check the exposure levels in your images. A well-exposed Northern Lights photo will typically have a histogram with the peak pushed towards the right, avoiding excessive underexposure or overexposure.
Experiment with different compositions:
Don’t be afraid to try different compositions and perspectives. Incorporate elements like trees, mountains, or bodies of water to add depth and context to your shots. Use leading lines and foreground objects to guide the viewer’s eye toward the Northern Lights.
Embrace long exposures:
Longer exposures can capture the graceful movements of the auroras. Experiment with shutter speeds ranging from a few seconds to several minutes to achieve different effects. Keep in mind that longer exposures can create star trails if the stars are visible in your frame.
Panoramas for Dancing Auroras:
When the Northern Lights put on a dynamic display, spanning the entire sky, consider creating panoramic shots. Panoramas help capture the vastness and movement of the Auroras, allowing you to showcase the full spectacle in a single image. Experiment with stitching multiple photos together to create a seamless panorama.
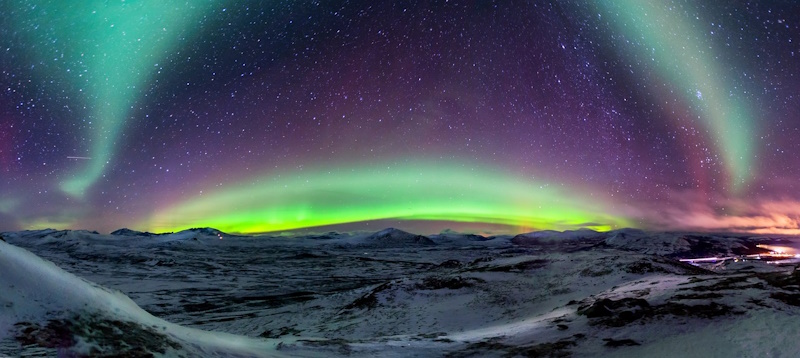
Image by Benjamin Zocholl from Pixabay
Using Time Lapse:
Time lapse photography is a fantastic technique to capture the mesmerizing dance of the Northern Lights. Set up your camera on a stable tripod, and take a series of photos at regular intervals throughout the night. Later, these images can be combined into a captivating time-lapse video that beautifully showcases the movement and brilliance of the Aurora Borealis.
Video by ucuzucuyorum com from Pixabay
Take test shots and adjust settings:
Before the Northern Lights appear, take test shots to fine-tune your camera settings. Check the focus, exposure, and composition to ensure everything is in place when the magical lights dance across the sky.
Patience is key:
The Northern Lights can be unpredictable, so be prepared to wait. Sometimes, the best displays occur unexpectedly, and patience pays off with breathtaking shots. Stay alert, be patient, and embrace the anticipation of capturing the perfect moment.
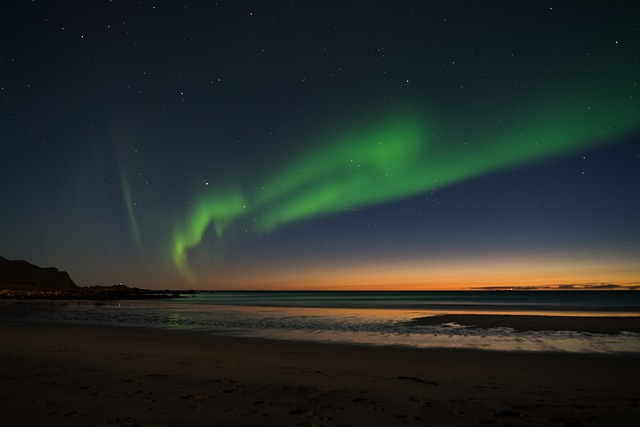
Image by Nico Becker from Pixabay
Post-Processing Northern Lights Photos
Capturing the stunning beauty of the Northern Lights is only the first step. To truly bring out the magic and vibrancy of the Aurora Borealis in your images, post-processing plays a crucial role. Here are some tips for enhancing your Northern Lights photos in post-processing:
- Importing and organizing your images: Start by importing your images into your preferred editing software. Create a well-organized folder structure to easily locate your Northern Lights photos. Renaming files with meaningful names or using metadata tags can help streamline the organization process.
- Adjusting exposure, contrast, and color balance: Begin by adjusting the exposure, ensuring the Northern Lights are properly exposed. Pay attention to the histogram and avoid clipping the highlights or shadows. Fine-tune the contrast to enhance the details and add depth to the image. Adjust the color balance to accurately represent the vibrant hues of the Aurora. Experiment with different settings to achieve the desired look while maintaining a natural appearance.
- Enhancing details and reducing noise: Northern Lights photos often benefit from enhancing details to bring out the intricate patterns and movements. Utilize sharpening tools to enhance fine details without overdoing it. Keep in mind that noise can be more noticeable in low-light shots, so use noise reduction tools to reduce any unwanted graininess. Strike a balance between noise reduction and maintaining image sharpness.
- Creating panoramic shots and time-lapse videos: If you have captured a series of Northern Lights photos, consider creating panoramic shots or time-lapse videos. Stitching together multiple images can result in breathtaking panoramas that showcase the full extent of the Aurora. For time-lapse videos, combine sequential images to create a mesmerizing visual representation of the Northern Lights’ dance across the sky. Utilize specialized software or plugins to simplify the process and create smooth transitions.
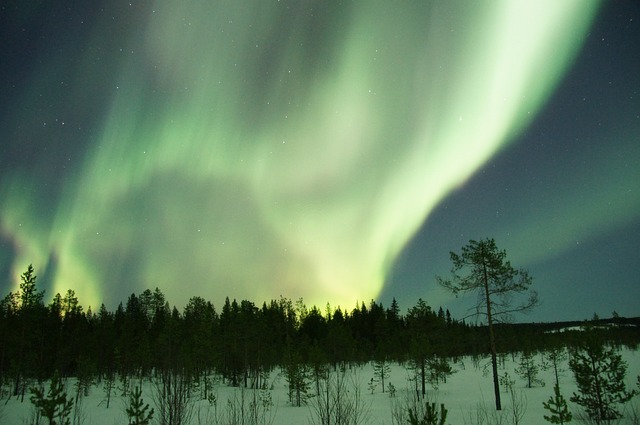
Image by Martin Str from Pixabay
Related posts
Tips For Taking Good Photos At Low Light Condition
Best Wide Angle Lens For Astrophotography
Capturing The Magic: Mastering Time-Lapse Sky Photography
How To Shoot Moon Photography- Everything You Need To Know
Photographer’s Guide To Landscape And Night Photography
Thanks for reading, I hope you enjoyed the article, in case you have any questions just drop them below & I will be happy to answer you.
The featured Image by RENE RAUSCHENBERGER from Pixabay
If you enjoy the site, don’t forget to subscribe, we will only inform you when a new article is posted.


Seeing the Northern Lights has been on my bucket list for many years. Reading this post has made me more determined to see it one day. This guide is invaluable for anyone that wants to get the most out of the beauty and wonder of the Northern Lights, and preserve the memories through the lens of a camera.
It is great to know that the winter months are the best to see the lights, and that a bright moon and light pollution will affect the Northern Lights. Thank you for this very helpful guide on getting the best Northern Lights photographs.
I’m glad to hear that you found the guide helpful and that it has inspired you to pursue your dream of seeing the Northern Lights! It truly is a breathtaking and awe-inspiring natural phenomenon that leaves a lasting impression on those fortunate enough to witness it.
Indeed, the winter months often offer the best opportunities to view the Northern Lights, and being aware of factors like the brightness of the moon and light pollution can significantly enhance your experience. Capturing these mesmerizing lights through the lens of a camera allows you to preserve the memories and share the beauty with others.
I hope that one day soon, you get to fulfill your dream of seeing the Northern Lights and capturing their enchanting beauty with your camera. Happy travels, and best of luck in your future adventures!
I must commend you, the author, for providing such a comprehensive and insightful shooting guide, making it easier for photographers to immortalize this breathtaking natural phenomenon.
The step-by-step breakdown of the equipment needed and the camera settings is incredibly helpful. It’s evident that you have a deep understanding of the technical aspects of night photography and is generous in sharing your expertise with us, readers. The emphasis on using a sturdy tripod and a remote shutter release to minimize camera shake is crucial when shooting in low light conditions.
The tips for finding the ideal location and time to photograph the Northern Lights are golden nuggets of advice. Planning ahead and checking for weather forecasts and light pollution levels can significantly increase the chances of capturing those stunning aurora displays. The inclusion of a “dark sky map” resource is also an excellent touch to help photographers identify the best spots with minimal light pollution.
I’m grateful for the exposure triangle explanation catered specifically to Northern Lights photography. Understanding the relationship between aperture, shutter speed, and ISO in this context is vital to capturing the vivid colors and delicate details of the auroras.
Thank you so much for your kind words and appreciation for the shooting guide! I’m thrilled to know that you found it comprehensive and insightful in helping photographers capture the beauty of the Northern Lights.
Photographing such a breathtaking natural phenomenon requires a deep understanding of the technical aspects of night photography, and I’m glad that the step-by-step breakdown of equipment and camera settings was helpful to you.
Once again, thank you for your kind words and for taking the time to share your feedback. I’m genuinely grateful that the guide was helpful to you, and I hope it inspires you to capture incredible images of the Northern Lights in the future. Happy shooting